A metal that has stood the test of time with its incredible strength and conductivity. But what if you need to stick two pieces of this shiny stuff together without resorting to soldering or welding? Don’t fret. We’re here to spill the beans on how to bond copper to copper using the power of glue.
In this blog post, we’ll dive deep into the techniques, tips, and secret tricks that will help you achieve a rock-solid connection between copper surfaces.
So, whether you’re a DIY aficionado or a crafty pro looking to create stunning copper masterpieces, get ready for an enchanting journey into the world of gluing copper to copper.
What Is Copper?
Contents
- 1 What Is Copper?
- 2 What Is the Best Adhesive for Gluing Copper?
- 3 Preparing the Copper Surfaces for Bonding
- 3.1 Step 1: Cleanliness – The Crucial First Step
- 3.2 Step 2: Mechanical Preparation – Embracing Rough Love
- 3.3 Step 3: Surface Activation – Banishing Oxide Layers
- 3.4 Step 4: Surface Conditioning – Going the Extra Mile
- 3.5 Step 5: Adhesive Selection – Finding the Perfect Match
- 3.6 Step 6: Application Technique – The Final Touch
- 4 Applying the Epoxy Adhesive
- 5 Curing Time of Epoxy Adhesives
- 6 Other Types of Adhesives for Bonding Copper
- 7 Benefits of Using Epoxy Adhesives to Glue Copper
- 8 Tips and Considerations When Gluing Copper to Copper
- 9 Conclusion
Copper, an extraordinary reddish-orange metal, has been an integral part of human civilization for thousands of years. Its fascinating history, exceptional properties, and diverse applications in modern industries make copper a vital element in our daily lives. Let’s dive into the captivating world of copper and explore why this versatile metal is so significant.
A Metal with a Rich History:
- Copper derives its name from the Latin word “cuprum,” meaning “from Cyprus,” where it was extensively mined in ancient times.
- Copper artifacts dating back to 9000 BCE have been discovered, highlighting its cultural and historical value.
Exceptional Properties:
- Copper’s softness, malleability, and ductility allow it to be easily shaped and formed into intricate objects.
- It boasts unmatched electrical and thermal conductivity, making it indispensable in electrical wiring, electronics, and power generation.
Resistance to Corrosion:
- When exposed to air and moisture, copper develops a remarkable patina, a protective layer that prevents further corrosion.
- This unique property makes copper ideal for outdoor applications such as roofing and gutters.
Antimicrobial Power:
- Copper possesses natural antimicrobial properties, effectively eliminating bacteria and viruses on its surface.
- In healthcare settings, copper is utilized for door handles and high-touch surfaces to help curb the spread of infections.
Abundance and Extraction:
- Copper is relatively abundant in nature and can be found in ores worldwide.
- Top copper-producing countries include Chile, Peru, China, the United States, and Australia.
Versatile Alloys:
- Copper alloys like bronze (copper + tin) and brass (copper + zinc) offer enhanced strength and hardness for specific applications.
- These alloys find use in industries ranging from construction to musical instruments.
What Is the Best Adhesive for Gluing Copper?
With its rich history and exceptional properties, copper has become a widely used material across numerous industries. However, when it comes to gluing copper to copper, finding the right adhesive can be a daunting task. In this article, we will delve into why epoxy adhesive emerges as the superior choice for achieving a strong and long-lasting bond between copper surfaces.
The Power of Epoxy:
Epoxy adhesives are renowned for their versatility in bonding different materials, including metals like copper. Their exceptional strength and durability make them the go-to choice for applications that demand a robust bond.
Filling the Gap:
Copper’s smooth surface poses a challenge for adhesives to adhere effectively. However, epoxy adhesives excel in gap-filling properties, ensuring a solid bond even on uneven surfaces. This capability is crucial for achieving a secure connection between copper components.
Resilience in Extreme Conditions:
Copper is often exposed to high temperatures and corrosive environments. Thankfully, epoxy adhesives are specifically designed to withstand these conditions, ensuring that the bond remains unaffected by external factors. This resilience guarantees a long-lasting connection that can endure demanding applications.
Selecting the Perfect Epoxy:
When choosing an epoxy adhesive for gluing copper, opt for one formulated specifically for metal bonding. These adhesives offer high shear strength and optimal adhesion to metals like copper. Additionally, consider the working time and curing time of the adhesive to ensure convenient application and sufficient bonding time.
Surface Preparation is Key:
To achieve a strong bond with epoxy adhesive, proper surface preparation is essential. Clean and roughen the copper surfaces before applying the adhesive to maximize its effectiveness. Following the manufacturer’s instructions regarding application techniques and curing time will ensure optimal results.
Preparing the Copper Surfaces for Bonding
Experience the art of bonding copper surfaces with the mighty epoxy adhesive. In this captivating article, we will unlock the secrets to achieving a bond as strong as steel. Prepare to elevate your projects to new levels of strength and durability.
Step 1: Cleanliness – The Crucial First Step
Before embarking on your bonding journey, ensure that your copper surfaces are squeaky clean. Rid them of any dirt, grease, or oxide layers that may hinder the bonding process. Gently cleanse the surfaces using a mild detergent or solvent and a soft cloth or brush. Handle with care to preserve the integrity of the copper.
Step 2: Mechanical Preparation – Embracing Rough Love
To enhance bonding strength, give your copper surfaces a little roughening. Employ techniques like sanding, grinding, or wire brushing to create a textured surface. This texture provides increased area for the adhesive to grip onto, resulting in a stronger bond. Remember, delicacy is key – avoid excessive roughening that could compromise the metal structure.
Step 3: Surface Activation – Banishing Oxide Layers
Pesky oxide layers can hinder bonding on copper surfaces. Fear not. Activate your surfaces by using acid-based solutions like diluted phosphoric or hydrochloric acid. These solutions remove oxides and create a clean, reactive surface ready for bonding. Handle with caution and follow safety precautions for a flawless result.
Step 4: Surface Conditioning – Going the Extra Mile
For an added boost in bond strength, consider using specialized surface conditioners or primers designed specifically for bonding copper. These products optimize adhesion and bond strength by prepping the copper surface before applying the adhesive. Follow the manufacturer’s recommendations for best results.
Step 5: Adhesive Selection – Finding the Perfect Match
Choosing the right adhesive is paramount to a successful bonding experience. Look for adhesives formulated for bonding copper, such as epoxy, cyanoacrylate, acrylic, or polyurethane adhesives. Consider factors like temperature resistance, flexibility, and curing time to ensure the adhesive meets your specific needs.
Step 6: Application Technique – The Final Touch
The application technique can make or break your bond. Apply the adhesive evenly and in the recommended amount to ensure optimal bonding. Follow the manufacturer’s instructions regarding curing time, pressure application, and any additional steps required for a robust bond. Patience is key – give your bond ample time to cure for maximum strength.
Applying the Epoxy Adhesive
When it comes to taking your copper crafting to the next level, epoxy adhesive is your secret weapon for creating a strong and long-lasting bond. Whether you’re working on a DIY project or repairing a broken copper item, mastering the art of applying epoxy adhesive is essential. In this comprehensive guide, I’ll walk you through the step-by-step process and share some tips and tricks along the way.
Step 1: Prepare the surfaces
Before diving into the gluing process, it’s crucial to ensure that the copper surfaces are clean and free from any grease, dirt, or oxidation. This can be achieved by using a solvent such as acetone or isopropyl alcohol to wipe down the surfaces thoroughly. By starting with clean surfaces, you’ll ensure optimal bonding between the copper pieces.
Step 2: Mix the epoxy adhesive
The next step is to mix the epoxy adhesive. It’s important to follow the manufacturer’s instructions for the correct ratio of resin to hardener, as this can vary depending on the brand. Typically, equal parts of each component are required. Use a disposable container and a stirring stick to thoroughly mix the two components until they’re well combined. Take your time with this step to ensure a proper blend, as a well-mixed adhesive will result in a stronger bond.
Step 3: Apply the epoxy adhesive
With your mixed adhesive at the ready, it’s time to apply it to both copper surfaces. A disposable brush or a small spatula works perfectly for this task. Ensure an even coating on both pieces, making sure to cover all areas that will be bonded. The key here is to apply just enough epoxy adhesive to create a strong bond without causing excess messiness.
Step 4: Press and hold
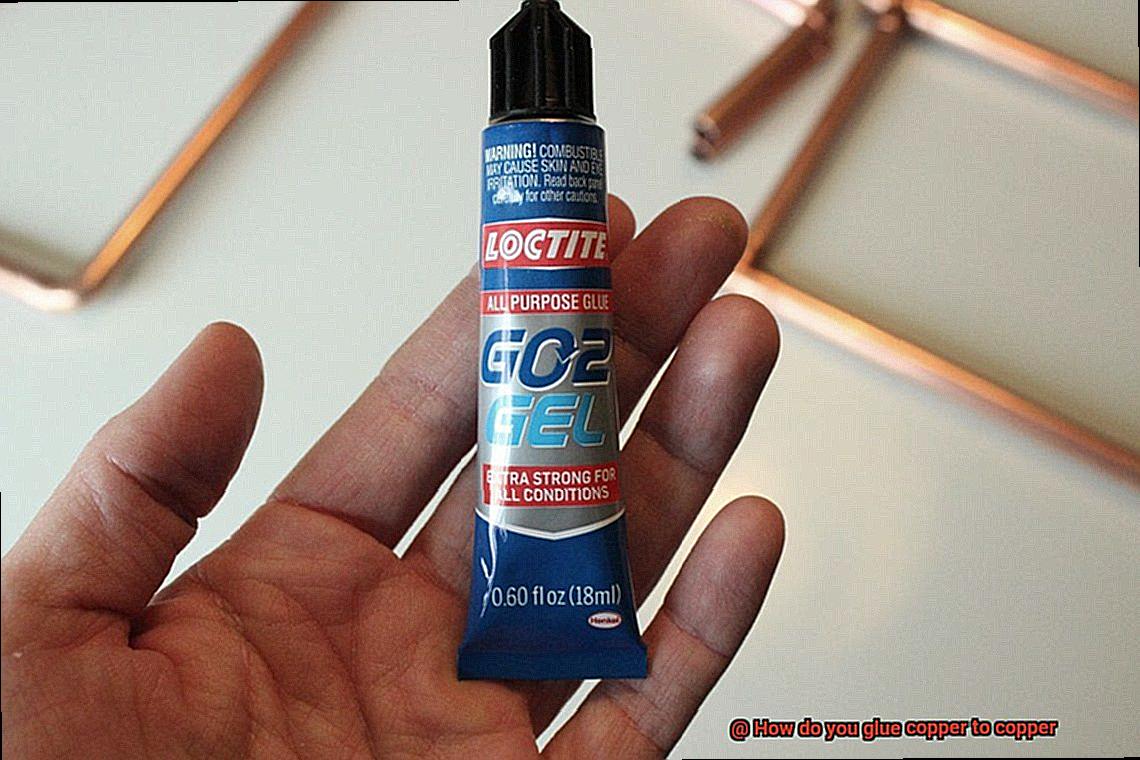
Now comes the crucial step – pressing the copper pieces together firmly. This will create a strong bond between them. Use clamps or weights to hold them in place while the epoxy cures. Be sure to follow the manufacturer’s instructions regarding curing time, as it can vary depending on the type of epoxy adhesive used. Patience is essential during this step, as a proper curing process will ensure optimal bonding strength.
Step 5: Allow curing time
During the curing process, it’s important to keep the glued copper pieces in a well-ventilated area with a stable temperature. This will aid in proper bonding and prevent any interference from external factors. The duration of the curing time can vary from a few hours to several days, depending on the specific epoxy adhesive being used. It’s crucial to be patient and allow sufficient time for the adhesive to fully cure before moving on to the next step.
Curing Time of Epoxy Adhesives
Curing time is a critical factor to consider when using epoxy adhesives to bond copper. Epoxy adhesives are renowned for their strength and durability, making them a popular choice for joining metals like copper. However, the curing time of epoxy adhesives can vary depending on several key factors.
The type of epoxy adhesive used is one of the primary factors that influence curing time. Epoxy adhesives come in two main forms: one-component and two-component. One-component adhesives cure when exposed to air or moisture, while two-component adhesives require the mixing of resin and hardener to initiate the curing process. Generally, one-component adhesives take longer to cure compared to their two-component counterparts.
In addition to the type of epoxy adhesive, ambient temperature and humidity can also have a significant impact on curing time. Higher temperatures can expedite the process, while lower temperatures may delay it. Similarly, higher humidity levels can accelerate curing, while drier conditions might prolong it. It is crucial to adhere to the manufacturer’s recommended temperature and humidity guidelines for optimal results.
The thickness of the adhesive layer is another factor that affects curing time. Thicker layers generally take longer to cure because they have less exposure to air or moisture. To ensure efficient and timely curing, it is essential to apply an even and thin layer of adhesive between the copper surfaces.
Lastly, following the manufacturer’s guidelines regarding curing time is crucial. Each epoxy adhesive product has its own set of instructions specifying the recommended curing time. It is important to adhere to these guidelines to ensure a strong and durable bond between the copper surfaces.
Other Types of Adhesives for Bonding Copper
Look no further. In addition to the popular epoxy and soldering methods, there are other fantastic adhesives that can create a strong and reliable bond between copper surfaces. Let’s dive into the world of glues and explore the top contenders for your copper bonding needs.
Epoxy Adhesives: The Unbeatable Choice
When it comes to strength and durability, epoxy adhesives reign supreme. These adhesives consist of two components – a resin and a hardener – that, when mixed together, create an incredibly strong and durable bond. In addition to their bonding strength, epoxy adhesives are also resistant to temperature changes and chemicals, making them suitable for various applications. Whether you’re working on plumbing projects or crafting intricate copper jewelry, epoxy adhesives are an excellent choice for bonding copper.
Super Glue (Cyanoacrylate Adhesives): The Speedy Solution
If you need a quick bonding solution, look no further than super glue, also known as cyanoacrylate adhesive. This adhesive is notorious for its lightning-fast drying time, forming an instant bond between copper surfaces. However, it’s important to note that cyanoacrylate adhesives may not be as strong as epoxy adhesives. To achieve optimal results, ensure that your copper surfaces are clean and smooth before applying this adhesive.
Polyurethane Adhesives: Flexibility Meets Moisture Resistance
When flexibility and moisture resistance are essential, polyurethane adhesives come to the rescue. These glues can handle some movement and exposure to water without compromising bond strength. It’s important to keep in mind that polyurethane adhesives may not be as sturdy as epoxy adhesives, so choose wisely based on your specific needs. Whether you’re repairing copper gutters or bonding copper pipes, polyurethane adhesives are a reliable choice.
Silicone Adhesives: Heat Resistance at Its Finest
If heat is a concern in your project, silicone adhesives have got you covered. These glues can withstand high temperatures, making them perfect for applications where copper may be exposed to heat. However, it’s crucial to note that silicone adhesives may not provide the same level of bonding strength as epoxy or cyanoacrylate adhesives. When working on projects like electronics or HVAC systems, silicone adhesives are the go-to option for bonding copper.
Benefits of Using Epoxy Adhesives to Glue Copper
Epoxy adhesives are an exceptional choice for bonding copper surfaces, offering a wide range of benefits that make them the go-to solution for any copper project. In this comprehensive guide, we will explore the numerous advantages of using epoxy adhesives to glue copper, ensuring a strong and durable connection that can withstand even the most challenging conditions.
First and foremost, let’s discuss the remarkable bonding strength of epoxy adhesives. Renowned for their exceptional adhesion properties, these adhesives create a bond between copper surfaces that is reliable and long-lasting. Whether you are working on plumbing fixtures or electrical components, epoxy adhesives will provide the strength necessary to ensure a durable connection.
One of the standout features of epoxy adhesives is their ability to fill gaps. Copper surfaces may not always be perfectly smooth or even, but epoxy has the unique capability to bridge those gaps and create a seamless bond. This ensures that your copper pieces are securely connected, with no weak points or areas susceptible to damage.
In addition to their gap-filling capabilities, epoxy adhesives also offer exceptional resistance to moisture, chemicals, and temperature fluctuations. This is particularly important when working with copper, as it is often exposed to water and other corrosive substances. With epoxy adhesives, you can be confident that your bond will remain intact, unaffected by environmental factors.
The versatility of epoxy adhesives is another advantage worth noting. They can be used to glue different types of copper, whether it’s pure copper or copper alloys. This makes epoxy adhesives suitable for a wide range of applications involving various compositions of copper materials.
Durability is key when it comes to bonding copper, and epoxy adhesives deliver in spades. Once fully cured, these adhesives form a rigid bond that can withstand mechanical stress and vibrations without weakening. Whether your project involves constant movement or pressure, epoxy adhesives will keep everything securely in place, ensuring the longevity of your copper construction.
Now let’s discuss the ease of use offered by epoxy adhesives. They typically come in two-part formulations that need to be mixed together before application. This allows for precise application and adjustment of the bonded copper parts. Furthermore, there is a working window during which the adhesive can be applied and positioned before it starts to cure, ensuring that you have ample time to achieve the desired bond.
Last but certainly not least, epoxy adhesives offer aesthetic benefits when gluing copper to copper. The clean and seamless bond they create leaves no visible gaps or residues, resulting in a visually appealing finish. This is particularly desirable for projects where the appearance of the bond is important, such as jewelry or decorative copper pieces.
Tips and Considerations When Gluing Copper to Copper
Gluing copper to copper may seem challenging, but with the right techniques and considerations, it can be accomplished successfully. In this guide, we will explore essential tips to help you achieve a strong bond when gluing copper pieces together.
Clean and Prepare the Surfaces:
To ensure a strong bond, start by cleaning the copper surfaces thoroughly. Use a mild detergent or degreaser to remove any dirt, grease, or oxidation. This step eliminates contaminants that could hinder adhesion. After cleaning, dry the surfaces completely before proceeding.
Roughen the Surfaces:
To enhance the bond strength, lightly roughen the copper surfaces using sandpaper or a wire brush. This creates more surface area for the adhesive to grip onto. Be careful not to apply excessive force that could damage the copper. The goal is to create a slightly textured surface.
Choose the Right Adhesive:
Selecting the appropriate adhesive is crucial for a successful bond between copper surfaces. Epoxy adhesives are widely used for gluing copper to copper due to their exceptional strength and durability. Look for an epoxy adhesive specifically designed for bonding metal surfaces.
Apply the Adhesive Correctly:
When applying the adhesive, less is more. Use a thin layer of adhesive and spread it evenly on both copper surfaces. Applying too much adhesive can result in excess squeeze-out and weaken the bond. Use a small brush or applicator to ensure an even coating.
Apply Pressure and Secure:
After applying the adhesive, firmly press the copper pieces together. Applying pressure ensures maximum contact between the surfaces and allows the adhesive to bond effectively. To maintain constant pressure during curing, use clamps or weights to secure the copper pieces together.
JyVbjDsric4″ >
Also Read: How to Glue Brass to Brass? – Glue Things
Conclusion
When it comes to bonding copper to copper, there are a few tried and true methods that can ensure a strong and lasting connection. One option is to use an epoxy adhesive specifically designed for metal bonding. These adhesives typically come in two parts that need to be mixed together before application. Once applied, the epoxy creates a powerful bond between the copper surfaces.
Another option is to use soldering, which involves melting a filler metal between the copper pieces to create a solid joint. This method requires heating the copper surfaces and applying the soldering material with a soldering iron or torch. It’s important to note that soldering requires some skill and practice to achieve optimal results.
If you’re looking for a quick and easy solution, you can also consider using conductive adhesive tapes or films. These adhesive products have conductive properties that allow them to bond copper surfaces effectively. Simply apply the tape or film onto the copper surfaces, ensuring proper alignment, and press firmly to create a secure bond.
Whichever method you choose, it’s crucial to clean and prepare the copper surfaces beforehand. Remove any dirt, grease, or oxidation using sandpaper or a wire brush. This will ensure better adhesion and improve the overall strength of the bond.
In conclusion, gluing copper to copper can be achieved through various methods such as epoxy adhesive, soldering, or conductive adhesive tapes/films. Each method has its advantages and considerations, so it’s important to choose the one that best suits your specific needs.

