Ready to tackle a DIY ceramic tile project but unsure how to make it stick to plywood?
Don’t fret. Gluing ceramic tile to plywood may seem like a challenge, but fear not – we’ve got you covered.
In this blog post, we’ll walk you through the process, giving you step-by-step instructions and insider tips. Whether you’re jazzing up your kitchen with a new backsplash or creating a one-of-a-kind tiled tabletop, this comprehensive guide will give you all the know-how and confidence you need.
So let’s dive right in and discover how to achieve a rock-solid bond between ceramic tile and plywood.
What Type of Adhesive Should be Used?
Contents
- 1 What Type of Adhesive Should be Used?
- 2 Preparing the Plywood Surface
- 3 Applying Primer on the Plywood Surface
- 4 Applying Adhesive to the Plywood
- 5 Placing Ceramic Tiles onto the Adhesive Bed
- 6 Allowing Tiles to Set and Cure
- 7 Grouting Joints Between Tiles
- 8 Applying a Sealer to Protect Grout and Tiles
- 9 Conclusion
Don’t underestimate the importance of selecting the right adhesive for the job. A strong and long-lasting bond is key, and in this comprehensive guide, we’ll explore the different types of adhesives suitable for gluing ceramic tile to plywood. Get ready for expert tips and recommendations that will ensure your project’s success.
Latex-Modified Thinset Mortar:
When it comes to tile installations, one adhesive stands out as a popular choice – latex-modified thinset mortar. This adhesive is designed specifically for tiles and offers exceptional bond strength. It comes in both powdered and pre-mixed forms, making it user-friendly. The added benefit of being water-resistant and durable makes latex-modified thinset mortar an ideal option for ceramic tile installations on plywood.
Two-Part Epoxy Adhesive:
If you’re seeking unparalleled strength and durability, consider using a two-part epoxy adhesive. These adhesives are known for their resistance to moisture, chemicals, and temperature changes. While they require precise mixing and have a limited working time, their bonding capabilities are unmatched.
Specialized Adhesives:
For those looking for a more tailored solution, certain manufacturers produce adhesives specifically formulated for bonding ceramic tile to wood substrates. These specialized adhesives offer excellent adhesion between the two materials and are worth considering. Remember to carefully follow the manufacturer’s instructions for optimal results.
Surface Preparation:
Before applying any adhesive, take the time to prepare the plywood surface properly. Ensure it is clean, dry, and free from any dust or debris. To improve adhesion, lightly sanding the surface can create a rougher texture that aids in bonding.
Manufacturer’s Instructions:
Always adhere to the manufacturer’s instructions when it comes to application techniques, curing times, and any other specific requirements. This will guarantee the best results with your chosen adhesive.
Test Before Full Installation:
To avoid any unwanted surprises, it’s wise to test the adhesive on a small, inconspicuous area before proceeding with the full installation. This allows you to assess the bond strength and compatibility of the adhesive with both the ceramic tile and plywood.
Preparing the Plywood Surface
Are you ready to embark on a new DIY project? How about transforming your plywood surface with beautiful ceramic tiles? Whether you want to revitalize your kitchen backsplash or give your bathroom floor a stunning makeover, gluing ceramic tiles to plywood can add both style and functionality to any space.
But before you dive into this exciting project, it’s essential to properly prepare the plywood surface for a strong and long-lasting bond. Don’t worry, I’ve got you covered with some easy step-by-step instructions.
First things first, let’s ensure that your plywood surface is clean and free from any pesky dust or debris. Grab a broom or vacuum cleaner and give it a thorough sweep, bidding farewell to any loose particles. Trust me, you don’t want any dirt standing in the way of your beautiful tiles.
Now, take a closer look at your plywood surface for any imperfections or unevenness. If you spot rough spots or raised edges, arm yourself with sandpaper or a sander and smooth them out. This will guarantee a nice, flat surface for your tiles to adhere to. Once the sanding is complete, wipe down the plywood with a damp cloth to eliminate any lingering dust or residue. Ensure the surface is completely dry before proceeding.
Here comes an important tip: seal that plywood. Plywood is a porous material that can absorb moisture, leading to potential warping or damage over time. To prevent this, apply a coat of primer or sealer suitable for wood and tile applications. Follow the manufacturer’s instructions for application and drying times. Usually, one or two coats are sufficient.
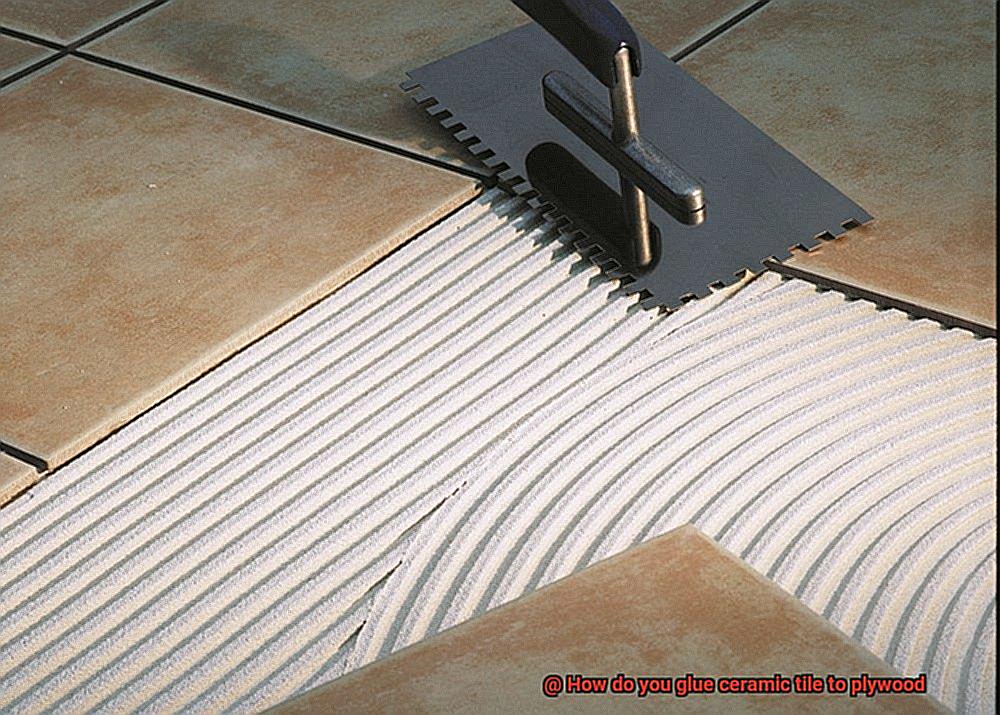
Once your primer or sealer has dried, it’s time to unleash your adhesive prowess and start gluing those ceramic tiles. Grab a high-quality adhesive specifically designed for tile installation and apply an even layer onto the prepared plywood surface using a notched trowel. The size of the notches on the trowel depends on the tile size, so consult the adhesive manufacturer’s instructions for recommended notch sizes. You want to apply enough adhesive to create a strong bond without any excess oozing up between the tiles.
And now, the fun part – pressing those tiles into place. Begin from one corner and carefully press each tile onto the adhesive, working your way outwards. To maintain even spacing between the tiles, utilize tile spacers. You don’t want your tiles crowded together or too far apart, so find that perfect balance.
Once all the tiles are in place, it’s time to exercise your patience and let the adhesive dry. Follow the manufacturer’s instructions for drying times, which typically range from 24 to 48 hours. Remember, patience is key here.
Applying Primer on the Plywood Surface
Applying primer on the plywood surface is an essential step in preparing for the installation of ceramic tiles. This process creates a strong and durable bond between the tile adhesive and the plywood, ensuring that your beautiful tiles will stay securely in place for years to come.
To begin, it is crucial to select a high-quality primer specifically designed for plywood surfaces. Don’t skimp on this step – invest in a primer that is suitable for both interior and exterior applications. This will provide added protection against moisture and other environmental factors that could potentially damage your tiles.
Before applying the primer, it is important to properly prepare the plywood surface. Take a broom or vacuum cleaner and thoroughly clean the surface, removing any dirt, dust, or debris that could interfere with the bonding process. Once the surface is clean, use a damp cloth to wipe away any remaining grime, leaving a fresh and pristine canvas.
Now it’s time to apply the primer. Stir the primer well to ensure a consistent mixture, and then choose either a paintbrush or roller to apply an even coat onto the plywood surface. Don’t hold back – make sure to cover the entire area where your tiles will be installed. This will provide a solid foundation for the adhesive to adhere to.
After applying the primer, exercise patience and allow it to dry completely according to the manufacturer’s instructions. This typically takes around 24 hours, but consult the product label for precise drying times. Rushing this step can lead to disastrous consequences later on, so take your time and let the primer work its magic.
Once the primer has dried, give the surface a thorough once-over. If you notice any areas where the coverage is thin or uneven, don’t panic. Simply apply a second coat of primer to ensure proper adhesion. Again, be patient and allow sufficient drying time before moving on.
Congratulations. You have successfully primed your plywood surface, creating an ideal base for your ceramic tile installation. Now, it’s time to unleash your creativity and transform that plain plywood into a stunning masterpiece. With the primer in place, your tiles will adhere firmly and securely, providing a beautiful and long-lasting finish.
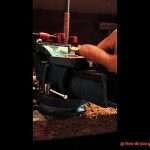
Applying Adhesive to the Plywood
Well, you’ve come to the right place. In this comprehensive guide, we’ll walk you through the steps of applying adhesive to plywood, with a focus on how to use glue effectively. So grab your notched trowel and let’s dive in.
First things first, choosing the right adhesive is crucial for a successful ceramic tile installation on plywood. Thinset mortar is the go-to choice due to its strong bond and ability to withstand moisture. However, mastic is a pre-mixed adhesive that’s easier to work with, although it may not be as durable in wet areas. So make sure to select the adhesive that suits your specific project.
Now that you have the right adhesive, it’s time to prepare the plywood surface. Start by giving it a thorough cleaning to remove any pesky dirt, dust, or debris that could interfere with your tile installation. After cleaning, lightly sand the surface to create a rough texture, ensuring a better bond with the adhesive.
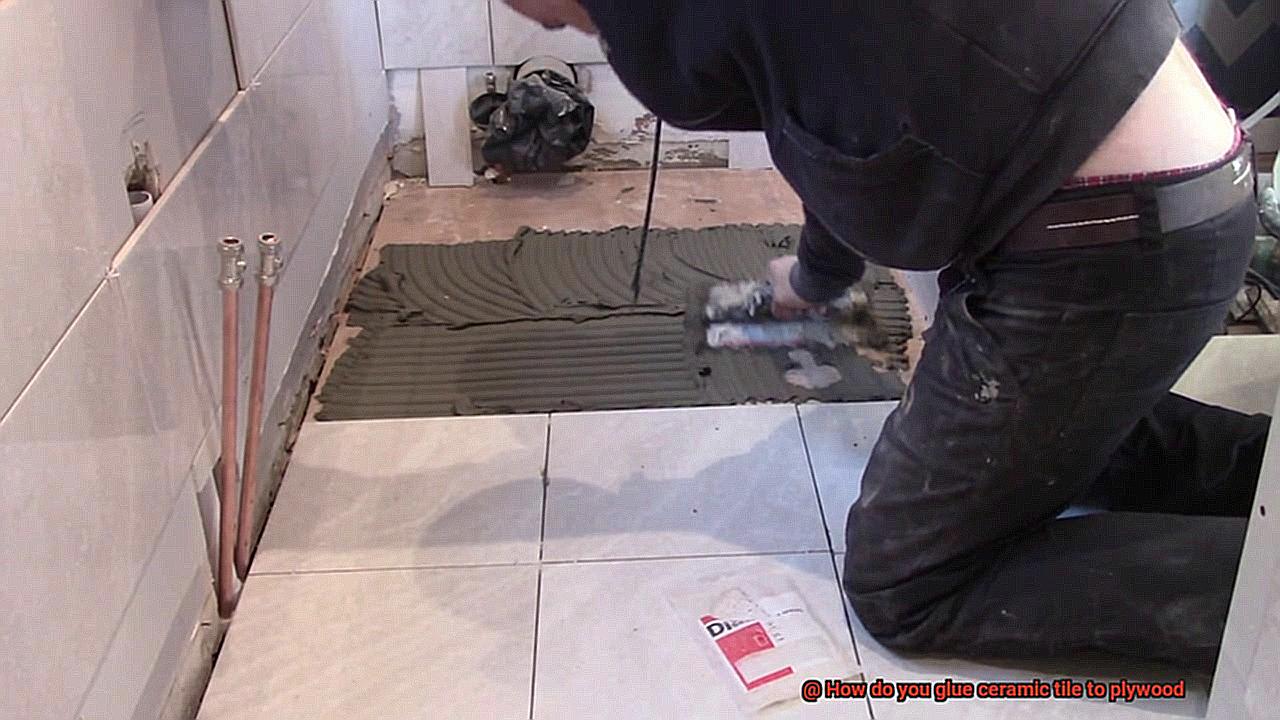
With your surface prepped and ready, it’s time to apply the adhesive. Grab your trusty notched trowel and get ready to spread some glue. The size of the trowel notch will depend on the size of your ceramic tiles. A 1/4 inch notch is typically suitable for most applications. Remember to spread the adhesive evenly across the plywood, covering the entire area where the tiles will be installed. Working in small sections at a time is key to prevent the adhesive from drying out before you can lay the tiles.
Once you’ve applied the adhesive, allow it a few minutes to become tacky. This tackiness is crucial for creating a strong bond between the tiles and plywood. So be patient and resist the urge to rush through this step.
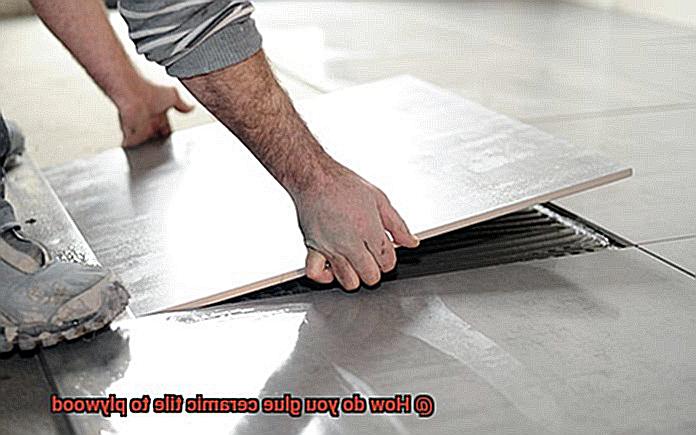
Now comes the exciting part – laying those tiles. When placing them on the adhesive, press them firmly into place using a slight twisting motion. This ensures good contact between the tile and adhesive, giving you a rock-solid bond. Repeat this process for each tile, making sure to leave consistent spacing between them for grout lines.
Once all the tiles are laid, it’s time to let them set and bond with the adhesive. Check the manufacturer’s instructions for the recommended drying time, but typically it takes around 24 hours. This waiting game can be tough, but trust me, it’s worth it for a sturdy and long-lasting tile installation.
After the adhesive has fully cured, you’re ready to move on to the final step – grouting. Grouting fills in the gaps between tiles, providing stability and further strengthening your tile installation.
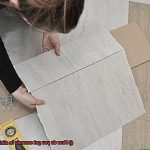
Placing Ceramic Tiles onto the Adhesive Bed
Whether you’re a DIY enthusiast or a professional tile installer, this step-by-step process will help you achieve a flawless and durable tile installation. So, let’s dive in.
Preparing the Adhesive Bed:
To ensure a smooth and even adhesive bed, take the following steps:
- Smooth Surface: Before starting the tiling process, it is crucial to prepare the plywood surface. Ensure it is free from imperfections by sanding down any bumps or ridges.
- Even Application: Use a trowel to spread and level the adhesive evenly across the plywood surface. Opt for a 1/4 inch notched trowel suitable for most ceramic tiles. This size creates grooves that allow for proper adhesive coverage.
- Work in Sections: To prevent the adhesive from drying out before placing the tiles, work with small sections at a time – about 15-20 minutes’ worth of tiling. This ensures optimal adhesion.
Placing the Tiles:

Now that your adhesive bed is ready, follow these steps for proper tile placement:
- tart Strong: Begin by aligning the first tile at a corner of the plywood surface. Press and twist it gently to ensure proper adhesion. This initial placement sets the foundation for your entire tile installation.
- Spacing Matters: Maintain consistent spacing between tiles by using spacers. These handy tools ensure professional-looking gaps and allow for grout application later on.
- Level Check: Periodically check the level of your tiles using a spirit level or straight edge. This step guarantees a flat and visually appealing tile installation.
- Clean as You Go: Remove any excess adhesive that oozes out between tiles immediately with a damp cloth or sponge. This not only keeps your workspace tidy but also prevents dried adhesive from interfering with grout application.

Ensuring Firm Adhesion:
To guarantee a strong bond between the tiles and adhesive bed, take these precautionary measures:
Tap to Set: After placing each section of tiles, use a rubber mallet or wooden block to tap them gently. This step eliminates air pockets and ensures the tiles are firmly set in the adhesive bed.
Curing Time:
Patience is key when it comes to allowing the adhesive to cure properly. Follow these guidelines:
Wait It Out: Let the adhesive cure for at least 24 hours before proceeding to grouting. This timeframe ensures that the tiles are securely bonded to the adhesive bed and ready for the next step in the tiling process.
Allowing Tiles to Set and Cure
Well, hold your excitement for just a bit. In this guide, we’ll reveal the importance of allowing ceramic tiles to set and cure when gluing them to plywood. Trust us, this step is crucial for achieving a flawless and long-lasting tile installation. So, let’s dive in and explore why patience truly is a virtue when it comes to tile adhesive.
The Bonding Magic:
When you apply adhesive and press those beautiful ceramic tiles onto the plywood, you’re initiating a magical bonding process. Allowing the tiles to set undisturbed ensures that the adhesive fully bonds with both the tile and the plywood. This creates a super-strong and durable bond that will stand the test of time.
Timing is Everything:
Different adhesives have different curing times, so it’s important to follow the manufacturer’s instructions. Generally, most adhesives require at least 24 hours of curing time before proceeding with any additional work. However, be mindful that factors like temperature and humidity can affect curing time, so adjust accordingly.
Protect from Moisture and Pressure:
During the curing process, moisture and temperature fluctuations can compromise the bond between the tiles and plywood. To prevent any unwanted mishaps, cover the tiled surface with a plastic sheet or similar protective material. This will shield it from moisture seepage.
No Dancing on Tiles Yet:
We know you’re excited about your new tiled surface, but hold off on dancing just yet. Walking on or applying pressure to the tiles during the curing period can disturb the adhesive and result in an uneven bond or even damage. So, give your tiles some rest until they’ve fully cured.
Grout and Seal with Confidence:
You’ve waited patiently, and now it’s time to reap the rewards. Once the adhesive has fully cured, you can proceed with grouting or sealing the tiles. Rushing this step can compromise the overall integrity of the installation, so take your time and enjoy the process.
Grouting Joints Between Tiles
Grouting is the final flourish that can elevate your ceramic tile installation from ordinary to extraordinary. It not only bestows a polished and refined appearance but also safeguards the integrity of your plywood surface. In this comprehensive guide, we will walk you through the meticulous process of grouting joints between tiles when gluing ceramic tile to plywood. So, let’s dive in and unlock the secrets to a flawless finish.
Step 1: Prepare for Grouting
Exercise patience and ensure that the adhesive used to affix the tiles to the plywood has fully cured. The waiting period typically spans 24 to 48 hours, depending on the adhesive type. Remember, good things come to those who wait.
Step 2: Choose the Right Grout
Selecting the appropriate grout is vital for a successful installation. For wider joints exceeding 1/8 inch, opt for sanded grout, which provides enhanced durability. Conversely, unsanded grout is perfect for narrower joints, allowing for a smooth and seamless appearance.
Step 3: Cleanse the Surface
Before embarking on the grouting process, meticulously clean the tile surface, banishing any remnants of excess adhesive or debris. A damp sponge or cloth will effectively tackle this task. Ensure that the tiles are thoroughly dry before proceeding to the next step.
Step 4: Apply the Grout
Prepare the grout according to the manufacturer’s instructions until it reaches a luxurious peanut butter-like consistency. Armed with a rubber grout float, at a 45-degree angle, expertly spread the grout over the tiles, ensuring it infiltrates every nook and cranny of those precious joints. To prevent premature drying, work in small sections and take pride in your precision.
Step 5: Wipe Away Excess Grout
Once you have masterfully applied the grout, embrace your inner perfectionist and utilize a damp sponge to meticulously wipe away any excess grout from the tile surface. Rinse the sponge frequently in clean water, eliminating any possibility of smearing excess grout across your carefully crafted tiles.
Step 6: Buff and Shine
Allow the grout to dry for approximately 15 to 30 minutes before employing a clean, dry cloth to buff the tiles, removing any hazy residue left behind by the grout. This transformative step will unveil the true brilliance and radiance of your tiles, leaving them immaculate and irresistible.
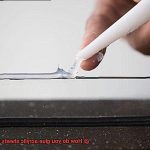
Step 7: Seal the Grout
After patiently waiting for 24 to 48 hours for the grout to fully cure, it’s time to protect your masterpiece from staining and discoloration. Apply a high-quality grout sealer in accordance with the manufacturer’s instructions, ensuring that the tiles are pristine and dry beforehand. Revel in the satisfaction of safeguarding your grout for years to come.
Applying a Sealer to Protect Grout and Tiles
In this comprehensive guide, we will delve into the significance of applying a sealer and provide you with step-by-step instructions.
Let’s begin by understanding why the application of a sealer is crucial. Acting as a protective barrier, a sealer prevents dirt, grime, and liquids from penetrating the surface of your grout and tiles. Bid farewell to unsightly stains and moisture damage that tarnish your pristine tiles.
Before proceeding with the application of a sealer, it is imperative to thoroughly clean your grout and tiles. Utilize a mild detergent or opt for specialized tile and grout cleaners to eliminate any dirt or residue. Ensure that the surface is completely dry before advancing to the next step.
Now, when it comes to selecting a sealer, take into account the different types available. Penetrating sealers are absorbed into the grout and tile, providing long-lasting protection from within. Conversely, topical sealers create a protective layer on the surface. Consider factors such as tile and grout type, traffic in the area, and desired level of protection to make an informed choice.
Precision is key when applying the sealer. Adhere to the manufacturer’s instructions regarding application techniques and drying times. Use a small brush or roller to achieve even coverage, guaranteeing no gaps or streaks.
After applying the sealer, allow ample drying time before using or walking on the surface. This duration can vary depending on the type of sealer used, typically ranging from several hours to multiple days. Display patience during this period and refrain from exposing the surface to water or other liquids.
Maintenance plays a pivotal role in preserving the protective properties of the sealer. Clean with a pH-neutral cleaner and avoid harsh chemicals or abrasive cleaning tools that pose a risk of damaging the sealer. Additionally, periodic reapplication may be necessary, especially in high-traffic areas.
While a sealer adds an extra layer of protection, it is not infallible. Promptly clean up spills and handle heavy objects with care to avoid scratching or chipping the surface.
MMykWBWdLVg” >
Also Read: What kind of glue do you use on vinyl flooring?
Conclusion
When it comes to gluing ceramic tile to plywood, there are a few key steps you should follow. First, make sure the plywood surface is clean and free of any dust or debris. This will ensure a strong bond between the tile and the plywood.
Next, choose a high-quality adhesive specifically designed for ceramic tiles. This will provide the necessary strength and durability to hold the tiles in place.
Apply the adhesive evenly onto the plywood using a notched trowel. The notches on the trowel will create ridges that help secure the tiles in place.
Carefully press each tile into the adhesive, making sure they are aligned properly. Use spacers to maintain consistent spacing between each tile.
Allow the adhesive to dry completely before grouting. This will ensure that the tiles are firmly attached to the plywood.
Once dry, apply grout between the tiles using a grout float. Wipe off any excess grout with a damp sponge, taking care not to disturb the tiles.
Finally, seal the grout to protect it from stains and moisture. This will help prolong the life of your tiled surface.