Acrylic and plastic, two versatile materials that have found their way into countless industries, from crafting to construction, electronics to automotive. But what happens when you need to bring these two together? It can feel like cracking a secret code, trying to find the perfect adhesive and technique.
In this comprehensive guide, we’ll unravel the mysteries of gluing acrylic to plastic. Whether you’re a DIY enthusiast or a seasoned pro in need of reliable bonding solutions, we’ve got your back.
Join us as we explore the different types of adhesives that work like magic for this task. We’ll also dive into preparation techniques that ensure an unbreakable bond between acrylic and plastic. And don’t worry—we won’t leave you hanging. We’ll provide step-by-step instructions so you can achieve seamless and long-lasting connections every time.
By the end of this guide, you’ll be armed with the knowledge to tackle any project involving these materials with confidence. So let’s dive in and discover the art of gluing acrylic to plastic together.
Types of Adhesive Suitable for Bonding Acrylic to Plastic
Contents
- 1 Types of Adhesive Suitable for Bonding Acrylic to Plastic
- 2 Preparing the Surfaces Before Applying Adhesive
- 3 Applying the Adhesive
- 4 Aligning and Securing the Pieces
- 5 Curing Time for Adhesives
- 6 Inspecting the Bond After Curing
- 7 Compatibility Considerations When Gluing Acrylic to Plastic
- 8 Alternative Options for Gluing Acrylic to Plastic
- 9 Conclusion
Well, you’re in luck. In this comprehensive guide, we will explore the different types of adhesives suitable for this purpose. Whether you’re a craft enthusiast or a DIY aficionado, understanding the right glue to use will ensure your masterpiece sticks together seamlessly.
Super Glue: The Quick Fix
When time is of the essence and you need a fast-drying adhesive, look no further than cyanoacrylate glue, also known as super glue. This versatile adhesive forms an instant and strong bond between acrylic and plastic surfaces. However, it is important to note that super glue can be brittle, so it’s not ideal for projects that require flexibility.
Epoxy Resin: Strength and Durability
For projects that demand exceptional strength and durability, epoxy resin is your go-to adhesive. This two-part adhesive consists of a resin and a hardener that, when mixed together, create an unbreakable bond. Whether you’re working on crafts or repairs, epoxy resin is your new best friend.
Acrylic Cement: The Master of Transparency
When invisibility is key, acrylic cement is your secret weapon. This specialized adhesive chemically welds acrylic pieces together, creating a seamless and crystal-clear bond. Ideal for constructing aquariums or display cases, this adhesive will make your creations shine.
Specialty Solvent-Based Adhesives: Strong and Reliable
For heavy-duty projects that require resistance to water and chemicals, look no further than solvent-based adhesives like methyl methacrylate (MMA). These adhesives provide exceptional strength while ensuring your creations stand up to the test of time. Just be aware that these adhesives can have strong fumes, so proper ventilation is essential.
Structural Acrylic Adhesives: The Industrial Powerhouse
When it comes to industrial projects that demand a high-strength bond, structural acrylic adhesives are your best bet. These adhesives offer resistance to impact and temperature, making them ideal for automotive or aerospace applications. With structural acrylic adhesives, your creations will withstand the toughest challenges.
Conclusion:
Now that you’ve become an expert in the world of adhesives for bonding acrylic to plastic, it’s time to unleash your creativity and start crafting.
Whether you choose super glue for quick fixes, epoxy resin for strength, or acrylic cement for transparency, the right adhesive will ensure your projects stick together flawlessly.
Remember to always follow the manufacturer’s instructions and test the adhesive on a small area before committing to the entire project.
Preparing the Surfaces Before Applying Adhesive
Preparing the Surfaces Before Applying Adhesive: Achieving a Strong Bond for Acrylic and Plastic Materials
Imagine having a stunning piece of acrylic that you want to bond to a plastic material. You’ve got your adhesive ready, but before you dive in, it’s crucial to prepare the surfaces properly. This step is essential for ensuring a strong bond that will stand the test of time. So, grab your cleaning supplies and let’s embark on this journey to adhesive success.
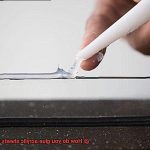
Step 1: Cleanliness is Key
To begin, thoroughly clean the surfaces. Any dirt, dust, or grease can hinder the adhesive from bonding effectively. Don’t hold back—grab a mild detergent or soap and scrub away. Rinse the surfaces with water and ensure they’re completely dry before moving on.
Step 2: Roughen Things Up
Next, let’s roughen the surfaces slightly to create a better bonding surface for the adhesive. Take some fine-grit sandpaper and gently sand the surfaces. Remember, we want to be cautious and avoid any damage. The goal is to create a slightly textured surface for the adhesive to grip onto.
Step 3: Dust Off
After sanding, remove any dust or debris from the surfaces using a clean cloth or compressed air. We want a clean and smooth surface before applying adhesive.
Step 4: Primer Power
In certain cases, using a primer or adhesion promoter on the surfaces may be necessary. These products work wonders in improving the bond between acrylic and plastic materials. Follow the manufacturer’s instructions for the specific primer or adhesion promoter you’re using.
Step 5: Choosing the Right Adhesive
Now that your surfaces are prepped and ready, it’s time to choose the perfect adhesive. Look for one that is specifically suitable for bonding acrylic and plastic materials. Options like acrylic-based adhesives or epoxy adhesives designed for these materials are available.
Step 6: Apply and Bond
Follow the manufacturer’s instructions to apply the adhesive. Ensure that you use the right amount, covering the entire bonding area evenly. Too much adhesive can lead to excess squeeze-out, while too little may result in a weak bond. Once applied, align and press the acrylic and plastic materials together firmly.
Step 7: Hold It Together
To ensure a secure bond, utilize clamps or other suitable methods to hold the pieces in place while the adhesive cures. Check the recommended curing time provided by the adhesive manufacturer and be patient—good things come to those who wait.
Step 8: Inspect and Reinforce
After the adhesive has cured, inspect the bond for any imperfections or weak spots. If necessary, apply additional adhesive to strengthen any areas that require reinforcement. It’s always better to be safe than sorry.
Applying the Adhesive
When it comes to the intricate art of gluing acrylic to plastic, the process may seem simple at first glance, but there are a few crucial steps that can make all the difference in achieving a strong and durable bond. So, gear up with your trusty safety goggles and let’s dive into the captivating world of adhesives.
The first step in this adhesive adventure is selecting the perfect glue for the job. You have a few options at your disposal, each with its own unique superpowers: epoxy, cyanoacrylate (also known as super glue), and acrylic cement. Just like assembling your team of superheroes, it’s essential to choose the adhesive that best suits your specific needs.
Once you’ve chosen your adhesive superhero, it’s time to prepare the surfaces. Remember, cleanliness is next to stickiness. Grab a mild detergent or some rubbing alcohol and give those surfaces a thorough cleaning. This meticulous step ensures that no dirt, dust, or grease interferes with the bonding process.
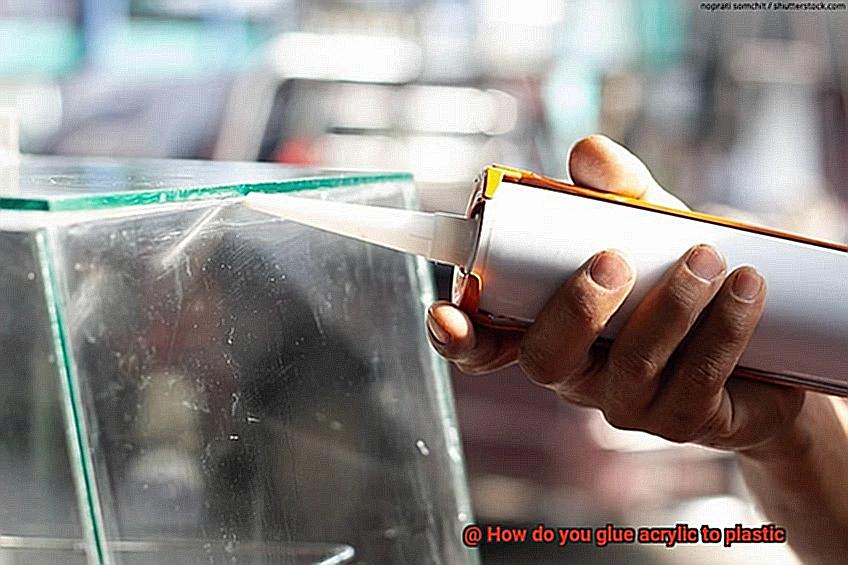
Now that everything is squeaky clean, it’s time to apply the adhesive. If you’re using epoxy or cyanoacrylate, delicately spread a thin layer of the glue onto one of the surfaces. Be cautious not to go overboard with the adhesive, as an excessive amount can cause unwanted seepage when you press the surfaces together.
However, if you’ve opted for acrylic cement, things take a delightful twist. This magical adhesive acts like a skilled illusionist – it melts the acrylic and merges it flawlessly with the plastic. To utilize acrylic cement, apply a small amount to both surfaces and press them together firmly. Hold your breath for a few minutes while the adhesive weaves its enchanting spell.
Now comes the waiting game. Depending on the type of adhesive used, curing times can vary from just a few minutes to several hours. It’s best to follow the instructions provided by the adhesive manufacturer to ensure a proper and secure bond.
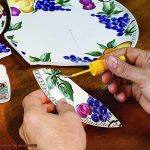
Once the adhesive has worked its magic and cured completely, it’s time to inspect your handiwork. Observe closely for any weak spots or excess glue. If you spot any imperfections, carefully remove them using a razor blade or some sandpaper, ensuring a flawless finish.
Now, here’s a little inside secret: the bond between acrylic and plastic may not be as robust as the bond between two pieces of the same material. So, if you desire additional reinforcement and extra strength, consider employing mechanical fasteners like screws or rivets. This superhero duo will provide an even mightier hold.
Lastly, safety is paramount. While embarking on your adhesive journey, always adhere to the manufacturer’s instructions and work in a well-ventilated area. Don’t forget to don your trusty safety goggles and gloves for protection against any unexpected mishaps.
Aligning and Securing the Pieces
Today, we embark on an exhilarating journey into the enchanting realm of gluing acrylic to plastic. If you desire a bond that is both unyielding and visually stunning, it is imperative to comprehend the significance of aligning and securing your pieces with utmost precision. So, don your adhesive superhero cape and let us delve into this captivating process.
Immaculate Surfaces:
Close your eyes and envision this scenario: you are about to embark on a remarkable bonding adventure, but wait. Before aligning those precious pieces, it is crucial to cleanse both the acrylic and plastic surfaces meticulously.
We must vanquish any lurking dirt, dust, or grease that could sabotage our adhesive odyssey. Employ a gentle detergent or isopropyl alcohol to achieve pristine cleanliness, ensuring the surfaces are flawlessly dry.
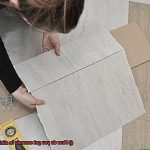
The Test Fit Triumph:
Prepare yourself for the exhilarating test fit. This pivotal step grants you the opportunity to evaluate if the pieces align harmoniously before committing them to the steadfast embrace of adhesive. Picture it as trying on your favorite superhero suit before embarking on a courageous rescue mission. Empower yourself by marking the positions where the pieces will unite with a pencil or masking tape, serving as your secret weapon for reference.
Unleashing Adhesive Supremacy:
Now is the moment to unleash the formidable might of adhesive. A myriad of options awaits your selection, ranging from solvent-based to acrylic-based adhesives. Surrender yourself to the wisdom bestowed by the manufacturer’s instructions and apply your chosen adhesive with unrivaled precision and grace. Remember, even a humble droplet possesses extraordinary power.
The Mighty Grip:
Secure those magnificent pieces together akin to a superhero sidekick. Clamps emerge as stalwart allies, bestowing unwavering pressure upon the joint, forging a bond capable of conquering any challenge. Should clamps be absent from your arsenal, fear not. Seek solace in the weight of mighty tomes or objects substantial enough to safeguard your masterpiece.
The Virtue of Patience:
Patience, dear adhesive adventurer, is the key to our triumph. Each adhesive brandishes its own distinctive curing time, demanding unwavering adherence to the manufacturer’s instructions. Haste in this endeavor jeopardizes the integrity of our bond. Remember, heroes understand that great rewards are bestowed upon the patient souls who await their due.
The Alignment Vigil:
As the adhesive weaves its enchantment, vigilance becomes paramount. Periodically inspect your pieces, ensuring their unwavering alignment during the initial stages of curing. Adjustments can be made if necessary, but once the bond reaches its full potency, repositioning becomes a challenge worthy of a supervillain’s machinations.
Curing Time for Adhesives
In this captivating journey, we will delve into the importance of allowing sufficient time for adhesives to cure and unlock the secrets behind achieving bonds that withstand the test of time. So, fasten your adhesive capes and let us embark on this extraordinary adventure.
The Power of Curing Time:
Curing time refers to the period it takes for an adhesive to fully bond and harden after application. It is a crucial step that determines the strength and durability of the bond. When it comes to gluing materials together, selecting the right adhesive is paramount. Opting for an adhesive specifically designed for the intended application ensures compatibility between materials and enhances overall bonding performance.
Choosing the Perfect Adhesive:
When gluing materials such as acrylic to plastic, it is important to choose an adhesive that suits the task at hand. Structural acrylic adhesives or two-part epoxies are excellent choices for achieving strong and durable bonds. Structural acrylic adhesives are known for their fast curing capabilities, while two-part epoxies offer outstanding strength and chemical resistance.
Tips for Ensuring Proper Curing Time:
To achieve a bond worth marveling at, consider these essential tips:
- Cleanliness is Next to Bond-iness: Thoroughly clean both surfaces using a mild solvent or alcohol to remove any dirt, grease, or contaminants that could impair adhesion.
- Fit Like a Superhero Suit: Ensure perfect alignment and fit between the surfaces before applying the adhesive. Proper alignment during curing is crucial for optimal bonding strength.
- Patience is a Virtue: Allow sufficient curing time as recommended by the adhesive manufacturer. Rushing the process can compromise the bond’s integrity and lead to potential failure.
Environmental Factors:
Environmental conditions can significantly impact curing time. Higher temperatures and humidity levels generally accelerate the curing process, while lower levels can prolong it. Ensure the curing environment meets the manufacturer’s specifications for optimal results.
The Bonding Triumph:
By allowing sufficient curing time, the adhesive reaches its maximum strength and hardness, creating a bond that can withstand stress and load-bearing activities. This ensures your materials remain securely bonded, even in the face of adversity.
Inspecting the Bond After Curing
Today, we embark on a thrilling journey into the world of glue, where we unravel the secrets behind achieving strong and durable bonds. Just like superheroes donning capes, adhesives need time to work their magic and become invincible. In this captivating exploration, we will delve into the importance of inspecting the bond after curing when gluing acrylic to plastic. We will unravel potential problems and reveal expert tips for ensuring a rock-solid connection that withstands the test of time.
The Process:
Once you have meticulously applied adhesive between your acrylic and plastic surfaces, patiently waiting for the magic to happen, it is time to unleash your inner inspector. Visual examination is our first weapon of choice – scrutinize the joint closely, searching for any signs of weakness or failure. A smooth and even bond with no visible gaps ensures a solid connection that can stand up to any challenge.
Potential Problems:
Failing to inspect the bond after curing can lead to disastrous consequences. Imagine your beautifully glued acrylic artwork suddenly falling apart due to an overlooked weak spot. Without inspection, you risk compromising the strength and durability of the bond, resulting in frequent repairs or even complete failure. By investing a little extra time in inspecting the bond, you can save yourself from future heartbreak and frustration.
Tips and Best Practices:
- Flex your visual examination skills: Train your eyes to detect any inconsistencies or irregularities in the joint. A seamless, smooth appearance is indicative of a strong bond.
- Channel your inner strength: Apply moderate pressure on different areas of the bond to evaluate its resistance. A robust bond will hold firm against this test, showing no signs of loosening or separation.
- Embrace long-term durability: Subject the joint to various environmental conditions it might encounter during its lifetime. Extreme temperatures, humidity, or exposure to chemicals can reveal any weaknesses and ensure a lasting bond that can withstand the elements.
- Step up your testing game: If needed, perform additional chemical resistance tests or mechanical stress tests. These simulations of real-world scenarios can identify potential weak points, allowing you to reinforce the bond if necessary.
Compatibility Considerations When Gluing Acrylic to Plastic
When it comes to gluing acrylic to plastic, there are several compatibility considerations that can make or break the strength and durability of the bond. Let’s delve into the key factors that play a crucial role in achieving a successful connection between these two materials.
First and foremost, the compatibility of the plastics being used is of utmost importance. Acrylic is a thermoplastic that can be melted and reformed multiple times without losing its characteristics. Therefore, it is vital to select a plastic that shares similar properties, such as being thermoplastic as well. Some plastics that are commonly compatible with acrylic include polycarbonate, PETG (polyethylene terephthalate glycol), and PVC (polyvinyl chloride). These plastics possess similar properties to acrylic and can form robust bonds when glued together.
Conversely, there are certain types of plastics that do not mesh well with acrylic. Polypropylene and polyethylene, for example, have low surface energy and do not bond effectively with other materials. To ensure a strong connection, it is crucial to avoid using incompatible plastics.
In addition to considering the compatibility of the plastics, the choice of adhesive or glue is equally critical. Different adhesives have varying properties and may work better with specific materials. It is highly recommended to use an adhesive specifically formulated for bonding acrylic to plastic, as these adhesives are designed to provide optimal bonding strength and durability.
To achieve a successful bond, proper surface preparation is essential. Any dirt, grease, or debris on the surfaces can hinder the bonding process and weaken the connection. Thoroughly cleaning the surfaces with a mild detergent or rubbing alcohol will remove contaminants and ensure a clean bonding surface.
Following the instructions provided by the adhesive manufacturer is also crucial. Each adhesive may have specific application methods and curing times that need to be followed for maximum effectiveness. Adhering to these instructions will greatly enhance the chances of achieving a strong bond between the acrylic and plastic.
Lastly, it is important to note that the strength of the bond can vary depending on factors such as surface area, joint design, and stress conditions. Testing the strength of the bond before relying on it for critical applications is highly recommended. Applying moderate pressure on different areas of the bond can help evaluate its resistance, and subjecting the joint to various environmental conditions can ensure long-term durability.
Alternative Options for Gluing Acrylic to Plastic
If you’re on a mission to find alternative options for bonding acrylic to plastic, look no further. Our extensive research has yielded valuable information to guide you on this adhesive adventure. So, grab your adhesive of choice and let’s dive into the world of acrylic-to-plastic bonding.
First up, we have the mighty two-part epoxy adhesive. This powerhouse is renowned for its unparalleled strength and durability. However, not all epoxies are created equal, so be sure to select one that is compatible with both acrylic and plastic. Once you’ve found the perfect match, prepare to be amazed at how effectively it fuses these materials together.
Next on our list is the ever-reliable cyanoacrylate adhesive, commonly known as super glue. With its quick-drying and secure bond, it’s a popular choice. But be cautious – not all plastics and acrylics play nice with this adhesive. To avoid any mishaps, perform a small test in an inconspicuous area before committing to the entire surface.
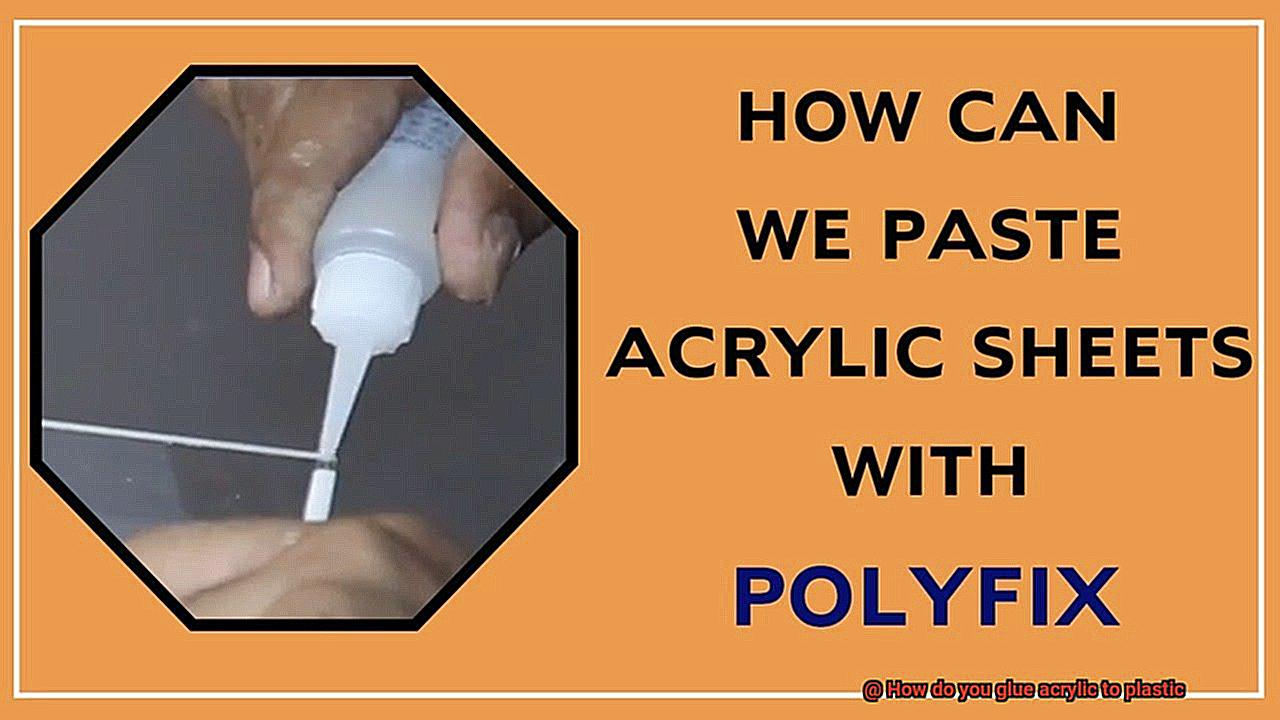
Now, let’s talk about the marvel that is acrylic cement. Tailor-made for bonding acrylic, this specialized adhesive works its magic by chemically melting the surfaces together. Follow the instructions meticulously, and you’ll be rewarded with an unbreakable bond that will make your project shine.
For those seeking convenience, some acrylic sheets come with an adhesive backing. Simply peel off the backing and apply it to your plastic surface – easy peasy. However, bear in mind that not all plastics and acrylics are suitable for this method, so choose wisely.
Sometimes, adhesive alone isn’t enough to handle the weight or thickness of your materials. Enter mechanical fasteners like screws or bolts. These stalwart companions provide extra strength and stability when bonding hefty pieces of acrylic to plastic.
Before embarking on your bonding journey, don’t forget about surface preparation – cleanliness is crucial. Ensure both surfaces are immaculately clean, dry, and free from any dirt or grease. Additionally, roughening or sanding the surfaces can enhance the bond by giving the adhesive more gripping power.
Testing is the key to success. Before fully committing, conduct a small test in an inconspicuous area to ensure your chosen adhesive is up to the task. You don’t want any surprises down the road.
Finally, heed the manufacturer’s instructions like your life depends on it. Allow ample time for the bond to cure or dry properly. Rushing this process could result in a feeble bond that won’t withstand the test of time.
Remember, achieving a successful bond when gluing acrylic to plastic relies on factors such as materials, surface preparation, adhesive selection, and application techniques. When in doubt, seek advice from experts who will guide you through the process and ensure a rock-solid connection.
3KzZDi-aXD4″ >
Also Read: How To Glue Acrylic Together? – Glue Things
Conclusion
When it comes to bonding acrylic to plastic, there are a few key methods you can rely on. One option is using an adhesive specifically designed for bonding these materials together. These adhesives typically come in the form of a liquid or a two-part epoxy. They work by creating a strong chemical bond between the acrylic and plastic surfaces.
Another method is using a solvent cement, which essentially melts the acrylic and plastic together, creating a strong bond. This type of glue is commonly used for joining acrylic sheets or pieces together.
If you’re looking for a quick and easy solution, you can also try using double-sided tape or adhesive strips. While not as strong as the other options mentioned, they can still provide sufficient adhesion for certain applications.
No matter which method you choose, it’s important to properly prepare the surfaces before applying the glue. This involves cleaning them thoroughly with soap and water to remove any dirt or grease that could interfere with the bonding process.
Additionally, roughening up the surfaces with sandpaper or a file can help improve the bond strength. Just be sure to handle the materials carefully to avoid any scratches or damage.
In conclusion, gluing acrylic to plastic requires selecting the right adhesive, preparing the surfaces properly, and taking your time to ensure a strong and durable bond.