Ever wondered how to seamlessly bond acrylic sheets to glass? Whether you’re a DIY enthusiast or simply need a reliable solution for repairs or projects, we’ve got your back. Don’t worry, gluing acrylic sheets to glass doesn’t have to be intimidating. With the right tools, materials, and techniques, you can create a flawless fusion that combines the clarity of glass with the durability of acrylic.
In this guide, we’ll take you through each step of the process, unlocking endless possibilities for crafting and home improvement. So let’s dive in and discover the secrets to achieving a strong and long-lasting bond.
How do you glue acrylic sheets to glass?
Contents
- 1 How do you glue acrylic sheets to glass?
- 2 Preparing the Surface
- 3 Choosing the Right Adhesive
- 4 Applying the Adhesive
- 5 Aligning the Acrylic Sheet and Glass
- 6 Securing the Bond with Clamps or Weights
- 7 Allowing Sufficient Time for Curing
- 8 Inspecting the Bonded Area for Gaps or Imperfections
- 9 Filling in Gaps with Additional Adhesive
- 10 Conclusion
Step 1: Prepare for Success
Before diving in, make sure both your acrylic sheets and glass are clean and free from dust or grease. Grab a lint-free cloth and wipe them down with mild glass cleaner or isopropyl alcohol.
Step 2: Choose Wisely
Selecting the right adhesive is key. Look for a high-quality, transparent adhesive that’s specifically designed for bonding glass and acrylic surfaces. You can find these gems at hardware stores or online.
Step 3: Apply with Care
Evenly spread the adhesive on the glass surface using a disposable brush or an adhesive spreader. Make sure it covers every inch where the acrylic sheet will be attached.
Step 4: Position and Press
Gently position your acrylic sheet onto the glued glass surface, starting from one edge and gradually aligning it with the others. Once aligned perfectly, apply even pressure across its surface to eliminate air bubbles and ensure a solid bond.
Step 5: Let It Cure
Allow the adhesive to cure according to the manufacturer’s instructions. This means leaving your glued masterpiece undisturbed for a specific period—ranging from hours to days—so don’t touch or move it during this time.
Step 6: The Final Touch
Once the adhesive is fully cured, inspect the bond for any imperfections or areas that need a little extra attention. Make any necessary adjustments to achieve the flawless finish you desire.
Now that you know how to glue acrylic sheets to glass, you can confidently embark on your next project. So go ahead and explore the endless possibilities of this perfect fusion.
Preparing the Surface
When it comes to gluing acrylic sheets to glass, achieving a strong and durable bond is essential. This requires more than just applying adhesive; proper surface preparation is key. In this article, we will explore the importance of surface preparation and provide expert tips to ensure a seamless bond between acrylic and glass.
The Power of Cleanliness:
Cleanliness is paramount before starting the gluing process. Any dirt, dust, or grease on the surfaces can compromise the adhesive’s effectiveness. Thoroughly clean both the acrylic sheet and the glass surface using a mild detergent or rubbing alcohol. This guarantees the removal of all contaminants, allowing the adhesive to work its magic.
Sanding for Enhanced Adhesion:
To further enhance adhesion, consider sanding both the acrylic sheet and the glass using fine-grit sandpaper. This gentle sanding creates a slightly roughened surface, providing better grip for the adhesive. Remember to remove any sanding residue before proceeding for a clean and smooth finish.
Degreasing for Flawless Results:
Even after cleaning, oily residue may still be present on the surfaces. Wipe both the acrylic sheet and the glass with a degreasing agent like acetone or isopropyl alcohol to eliminate this issue. This step ensures that no oils or fingerprints interfere with the bonding process.
The Primer Advantage:
For an extra boost in adhesion, apply a primer specifically designed to promote bonding between different materials. Follow the manufacturer’s instructions carefully during application to maximize its effectiveness.
Masking for Precision:
To achieve a professional finish, use masking tape along the edges of both the acrylic sheet and the glass surface before applying adhesive. This prevents excess adhesive from spreading beyond the desired bonding area, ensuring a neat and clean outcome.
Choosing the Right Adhesive
Achieving a strong and durable bond between acrylic sheets and glass requires selecting the right adhesive. With so many options available, it’s crucial to consider various factors to ensure success.
First, compatibility is key. Acrylic is a delicate material that can crack under certain chemicals or solvents. To avoid damage, choose an adhesive specifically formulated for bonding acrylic. Don’t risk your masterpiece falling apart.
Next, consider the smooth surface of glass. It requires an adhesive that can effectively adhere to it. Some adhesives simply won’t stick to glass, leading to weak bonds and poor adhesion. That’s not what you want, right?
Additionally, think about the intended use of your bonded materials. Will they be exposed to high temperatures, extreme weather conditions, or challenging environments? If so, choose an adhesive that can handle the heat. Look for products designed for outdoor use or with high-temperature resistance.
Strength matters too. Different adhesives have varying strength properties, so choose one that can handle the weight and stress on the bond. Don’t opt for a low-strength adhesive if you’re working on a heavy-duty project. It’s like using a toothpick to hold up a bowling ball – it just won’t work.
Finally, consider any specific requirements or constraints you may have. Do you need a transparent bond between the acrylic and glass? Choose a clear adhesive that won’t affect the aesthetic appearance. Need something that sets quickly? Look for fast-curing adhesives that will get the job done in no time.
Popular choices for bonding acrylic sheets to glass include cyanoacrylate (super glue), epoxy, and UV-curing adhesives. Each has its own advantages and disadvantages, so evaluate their properties and suitability for your application.
Applying the Adhesive
When it comes to bonding acrylic sheets and glass surfaces, selecting the right adhesive is crucial for a strong and durable bond. In this comprehensive guide, we will walk you through the step-by-step process of achieving a rock-solid bond between these two materials. So, let’s dive in and explore the art of applying the adhesive.
Step 1: Research and Choose the Right Adhesive
Start your journey by selecting an adhesive specifically designed for bonding acrylic and glass surfaces. Consider factors such as transparency, curing time, temperature resistance, and overall strength. Popular options like cyanoacrylate (super glue), epoxy, and UV-curing adhesives are worth exploring. These adhesives offer exceptional bonding properties that ensure long-lasting results.
Step 2: Prepare the Surfaces
Thoroughly clean both the acrylic sheet and glass surface using a mild detergent and water solution. Remove any dirt, dust, or grease that could hinder proper adhesion. Ensure that both surfaces are completely dry before moving on to the next step. This step is crucial for achieving maximum bonding strength.
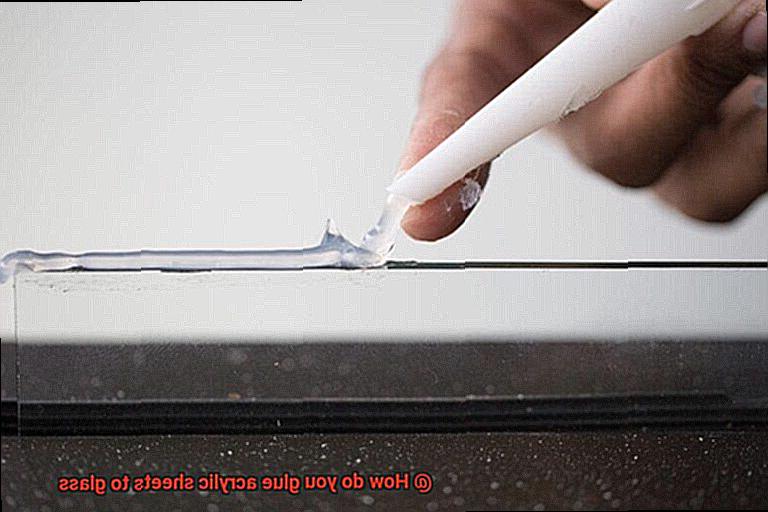
Step 3: Apply the Adhesive
Using a brush or applicator, evenly apply the adhesive to one of the surfaces. Refer to the manufacturer’s instructions for the recommended quantity. Remember, too much adhesive may cause seepage, while too little could result in weak bonding. Take care to apply the adhesive evenly, ensuring complete coverage for optimal bond strength.
Step 4: Align the Surfaces
Carefully align the acrylic sheet with the glass surface, ensuring a perfect fit. Pay attention to any visible gaps or misalignment that may compromise the bond. To hold the surfaces together securely, use masking tape or clamps while waiting for the adhesive to set. This step guarantees precise alignment and eliminates any chances of misbonding.
Step 5: Apply Pressure
Applying even pressure across the entire glued area is essential for a strong bond. Use weights or clamps to firmly press the surfaces together. This will minimize any potential gaps and ensure maximum contact between the two materials. The pressure applied during this step enhances the adhesive’s effectiveness, resulting in a robust bond.
Step 6: Allow Curing Time
Patience is key here. Different adhesives have varying curing times, so refer to the manufacturer’s instructions for guidance. Avoid moving or disturbing the glued surfaces during this period to allow for proper bonding. Adequate curing time ensures that the adhesive fully sets, providing a bond that withstands the test of time.
Aligning the Acrylic Sheet and Glass
Achieving a strong and durable bond when gluing acrylic sheet and glass together requires perfect alignment. In this blog post, we will guide you through the step-by-step process of aligning these materials before applying adhesive glue. By following these techniques, you’ll be able to create seamless connections that will withstand the test of time.
Step 1: Clean, Clean, Clean
Thoroughly clean both the acrylic sheet and glass surface using a mild detergent and warm water. Removing dirt, dust, and oil residue ensures a successful bond. Rinse well and let dry completely before proceeding.
Step 2: Measure and Mark
Measure and mark the desired position where you want to align the acrylic sheet on the glass. Accurate measurements are crucial for precise alignment. Use a measuring tape or ruler to mark dimensions on both surfaces as reference points.
Step 3: Apply Adhesive
Choose a high-quality adhesive designed for bonding acrylic to glass. Apply a thin layer of adhesive on one surface using a brush or applicator. Ensure complete coverage without excess glue that could seep out.
Step 4: Align with Care
Carefully position the acrylic sheet onto the marked area of the glass. Start by aligning one corner or edge with the corresponding corner or edge of the glass. Slowly lower the rest of the sheet, ensuring perfect alignment with the marked dimensions.
Step 5: Use Alignment Tools
Ensure precise alignment by using spacers or shims. These tools help maintain an even gap between the acrylic sheet and glass while supporting it in place. Place them at regular intervals along the edges for uniform alignment.
Step 6: Apply Even Pressure
Gently press down on the acrylic sheet to ensure proper contact between the adhesive and surfaces. Apply even pressure across the entire surface using a roller or soft cloth. This eliminates air bubbles and ensures a strong bond.
Step 7: Allow for Curing Time
Follow the adhesive manufacturer’s instructions for curing time. Avoid moving or disturbing the glued acrylic sheet during this period to prevent misalignment or weakening of the bond.
Securing the Bond with Clamps or Weights
Are you ready to learn the secrets of creating a strong and durable bond between acrylic sheets and glass? Look no further, as we unveil the ultimate guide to securing the bond with clamps or weights. Get ready to dive into the world of gluing and discover the tips and tricks that will take your projects to the next level.
First things first – cleanliness is key. Before embarking on your gluing journey, make sure to clean both the acrylic sheet and glass surface thoroughly. Dust, dirt, and grease can hinder the bonding process, so grab some mild detergent or alcohol solution and give those surfaces a good scrub. Remember to dry them completely before proceeding.
Now that your surfaces are squeaky clean, it’s time to choose the right adhesive. Selecting an adhesive designed specifically for bonding acrylic to glass is crucial. These adhesives offer high bond strength without compromising the visual appeal of your materials. Ensure you follow the manufacturer’s instructions for application.
Let’s dive into the two methods of securing the bond: clamps and weights. Clamps are a popular choice for many DIYers. C-clamps or bar clamps can be positioned around the edges of the acrylic sheet to apply even pressure. This ensures a secure and uniform connection. Leave the clamps in place for several hours or overnight, depending on the adhesive’s curing time.
If clamps aren’t your thing, weights can also do the trick. Place heavy objects like books or sandbags evenly on top of the acrylic sheet after applying the adhesive. Use a soft cloth or foam pad as a protective layer to prevent scratches. The weights should be distributed across the surface to ensure uniform pressure.
Now comes the hard part – patience. Allow sufficient curing time for the adhesive to work its magic. Follow the manufacturer’s instructions for specific curing times, as they may vary. Don’t rush the process – give your bond the time it needs to become unbreakable.
Once the curing process is complete, it’s time to inspect and perfect. Carefully remove the clamps or weights and inspect the bond between the acrylic sheet and glass for any imperfections. If necessary, apply additional adhesive and follow the instructions for curing.
Allowing Sufficient Time for Curing
Today, we’re going to delve into the fascinating world of curing and discover the secret to creating unbreakable bonds.
So, what exactly is curing? Curing is the mighty process by which the adhesive flexes its muscles and transforms from a liquid state to a solid state. It’s like watching Clark Kent transform into Superman – ordinary to extraordinary. This transformation creates a strong bond between acrylic sheets and glass that can stand the test of time.
Now, why is curing so crucial? Let me break it down for you. When you allow sufficient time for curing, you are ensuring that the bond between your acrylic sheets and glass is not flimsy like wet tissue paper, but robust like a steel fortress. No one wants their hard work to crumble after a week, right?
But how long should you wait for this magical curing process to work its wonders? Ah, the answer lies in the type of adhesive you choose. Each adhesive has its own unique personality and requires different amounts of time to fully cure. So, it’s essential to consult the manufacturer’s instructions and follow them diligently. In general, it’s wise to give it at least 24 hours before subjecting your glued masterpiece to any stress or pressure.
During this waiting period, it’s crucial to treat those glued surfaces like fragile treasures. Don’t poke or prod them like a curious cat. Any movement or stress during the curing process could weaken the bond, and we definitely don’t want that, do we?
Now, I understand that patience isn’t always our greatest virtue (I’m guilty too), but rushing the curing process can lead to a weak bond that may fail over time. So take a deep breath, relax, and give it the time it needs.
Remember, once the adhesive has fully cured, your glued acrylic sheets are ready to take on the world. But, my friend, remember to handle them with care. Avoid excessive stress or pressure on the bond to maintain its strength and integrity.
Inspecting the Bonded Area for Gaps or Imperfections
Hold on tight as we explore the critical step of inspecting the bonded area for gaps or imperfections. This is the secret sauce that separates the true glue gurus from the amateurs. So, let’s dive in and unlock the power of perfect bonding.
Visual Inspection:
Imagine this, my friends – you’ve successfully glued your acrylic sheets to glass, and now it’s time to play detective. Grab your magnifying glass or unleash your keen eyesight, and meticulously examine the edges of the acrylic sheets and glass. Look out for any elusive gaps or unevenness that might hint at a less-than-perfect bond. We’re aiming for seamless perfection here.
Tactile Examination:
Now it’s time to get hands-on with your creation. Run your fingers along the bonded area, searching for any rough spots, bumps, or inconsistencies. Is it smooth as silk? That’s fantastic. But if you detect any irregularities, it’s time to give those areas some extra tender loving care.
Shedding Light on Hidden Imperfections:
Let’s illuminate this matter – quite literally. In a dimly lit room, grab a flashlight or wield your phone’s torch and shine it along the edges of the bonded area. Watch out for any sneaky rays escaping through hidden gaps or spaces that may remain unseen under normal lighting conditions. It’s like a thrilling treasure hunt in the dark.
Apply Pressure:
Time to channel your inner Hulk – but with finesse. Apply gentle pressure to different parts of the joint and ensure it feels secure and firm. No weak spots allowed. A properly bonded acrylic sheet should withstand your super strength without breaking a sweat.
Fixing Gaps or Imperfections:
Uh-oh, did you spot any blemishes during your inspection? Fear not, my fellow craftsmen. If you find smaller gaps, arm yourself with an adhesive or sealant specially designed for acrylic and glass bonding. Fill those gaps like a seasoned pro. For larger gaps, consider reapplying adhesive or reinstalling the acrylic sheet and glass. Don’t fret; it’s just a minor hiccup on your creative journey.
Filling in Gaps with Additional Adhesive
Today, we embark on an exciting journey into the realm of filling in gaps when bonding acrylic sheets to glass. Imagine a project where seamless fusion is paramount, but pesky gaps threaten to spoil the perfection. Fear not, for we hold the key to achieving flawlessness in adhesion.
Step 1: The Cleanliness Crusade
In any bonding adventure, cleanliness reigns supreme. Don your detective gear and thoroughly cleanse the acrylic sheet and the glass surface. Every speck of dirt, every hint of grease, and every lingering particle must be banished to ensure a strong and unhindered bond.
Step 2: The Adhesive Alchemy
Not all adhesives are created equal, my friends. To conquer this task, we need an adhesive that possesses the magical properties required for bonding acrylic sheets to glass while effortlessly filling in those sneaky gaps. Direct your attention towards acrylic-based adhesives that boast durability and exceptional gap-filling capabilities.
Step 3: Unleash the Magic
Now comes the exhilarating part – filling in those gaps. Take a small dollop of your chosen adhesive and apply it onto a clean surface, such as a plastic spatula or putty knife. With surgical precision and artistic finesse, spread the adhesive into the gaps, ensuring it permeates every nook and cranny evenly. It’s like playing connect-the-dots, but with glue.
Step 4: The Lockdown
With gaps filled and adhesive applied, it’s time for the grand union of acrylic and glass. Press the acrylic sheet firmly against the glass surface, distributing even pressure across every inch. This step ensures a tight and secure bond that can withstand the test of time.
Step 5: Patience Prevails
Now, adhesive aficionados, exercise patience. Allow the adhesive to dry and cure according to the manufacturer’s instructions. This period of anticipation may span a few hours or even extend overnight. Remember, a bond of strength requires the passage of time, so resist the urge to test it prematurely.
hT6Ow_cBTps” >
Also Read: How To Glue Acrylic Together? – Glue Things
Conclusion
When it comes to bonding acrylic sheets to glass, there are a few key steps you need to follow.
First, make sure both surfaces are clean and free from any dirt or debris. Next, apply a high-quality adhesive specifically designed for bonding acrylic and glass.
Be sure to spread the adhesive evenly across the surface of the acrylic sheet. Then, carefully place the acrylic sheet onto the glass surface and apply pressure to ensure a strong bond.
Allow sufficient time for the adhesive to dry and cure before handling or moving the bonded pieces.