Ready to unleash your creativity and transform your metal objects into personalized masterpieces? Look no further than vinyl. Whether you’re jazzing up a metal sign, adding flair to kitchenware, or giving your car bumper some personality, vinyl is the secret ingredient.
But how do you ensure that it sticks flawlessly and stands the test of time? Don’t worry, we’ve got you covered.
In this article, we’ll walk you through simple steps and insider tips to make sure your vinyl adheres seamlessly to metal surfaces. So let’s dive in and get crafty.
How do you get vinyl to stick to metal?
Contents
- 1 How do you get vinyl to stick to metal?
- 2 Clean the Metal Surface
- 3 Roughening Up the Metal Surface
- 4 Applying an Adhesive Primer or Promoter
- 5 Applying the Vinyl
- 6 Activating the Adhesive with Heat
- 7 Letting the Vinyl Cure and Set Properly
- 8 Potential Challenges and Tips for Overcoming Them
- 8.1 Cleanliness is Key:
- 8.2 Smooth Surfaces for Strong Bonds:
- 8.3 Temperature Matters:
- 8.4 If the metal surface is too cold, warming it up slightly can improve adhesion. Use a heat gun or warmers to raise the temperature of the metal surface without overheating it. Conversely, if the metal surface is too hot, allow it to cool down before applying the vinyl. Working within the recommended temperature range will optimize the adhesive properties and ensure a successful bond.
- 8.5 Choose the Right Adhesive:
- 9 Conclusion
Cleanliness is Key:
Before diving into the fun part, give your metal surface a good scrub. Use mild detergent or rubbing alcohol with a clean cloth to remove any dirt, dust, grease, or rust that could interfere with the vinyl sticking.
Priming for Success:
Want a rock-solid bond between the vinyl and metal? Consider using a primer or base coat. Automotive primers work wonders for creating a smooth surface that makes vinyl stick like glue. Just follow the manufacturer’s instructions on drying time.
Choosing the Right Vinyl:
Not all vinyl is created equal. When working with metal, opt for adhesive vinyl designed for outdoor use and durability. Brands like Oracal, 3M, or Avery offer high-quality options that are worth the investment for long-lasting results.
Measurements and Placement:
Precision is key when it comes to applying vinyl on metal surfaces. Measure twice (or thrice.) before cutting once. Create a template or use a cutting machine to ensure an accurate fit. And don’t forget painter’s tape or removable adhesive vinyl as placement guides for perfect alignment.
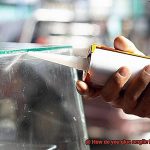
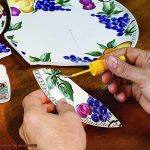
Applying the Vinyl:
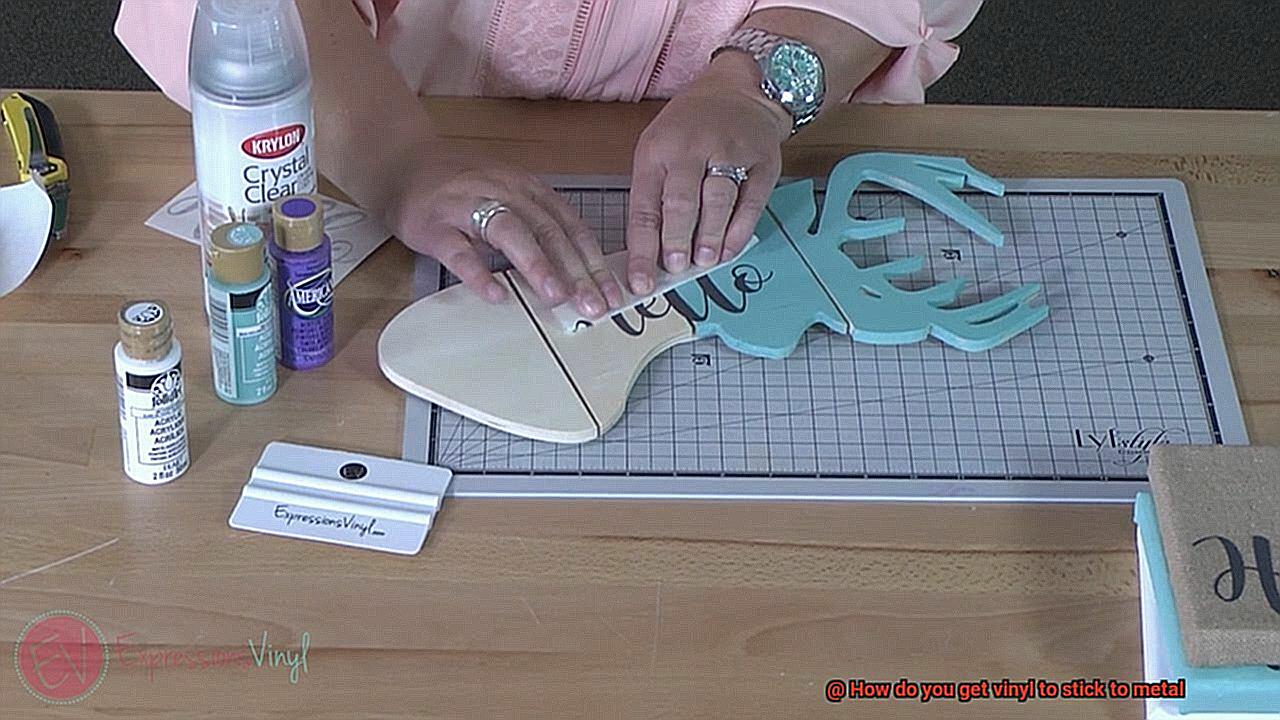
Now comes the fun part. Peel off a small portion of the backing paper while aligning the exposed adhesive with your marked placement. Smoothly lay down the vinyl, using a squeegee or credit card to remove air bubbles and ensure a tight bond.
Heat and Pressure:
To really amp up the sticking power, give your vinyl a little heat. Use a heat gun or hairdryer on low to gently warm the vinyl, making it more pliable and helping it adhere better to the metal surface. Apply some pressure with your trusty squeegee for good measure.
Clean the Metal Surface
Vinyl application on metal surfaces can be a fantastic way to infuse your project with style and personalization. However, achieving a strong and long-lasting bond between the vinyl and metal requires proper surface preparation. In this comprehensive guide, we will take you through the step-by-step process of cleaning a metal surface before applying vinyl, ensuring a flawless and enduring result.
Step 1: Gather the necessary supplies
Before diving into the cleaning process, it is essential to assemble all the vital supplies. These include mild detergent or soap, water, a soft cloth or sponge, and potentially a non-abrasive brush.
Step 2: Remove loose debris
Kickstart the cleaning process by swiftly wiping away any loose debris, such as dirt or dust, that may have settled on the metal surface. Employ a soft cloth or brush to gently eliminate these particles.
Step 3: Prepare a cleaning solution
Create a potent cleaning solution by combining a small amount of mild detergent or soap with warm water. Opt for a mild detergent to prevent any potential damage to the metal surface.
Step 4: Test a small area
Before committing the cleaning solution to the entire metal surface, take a moment to test it on a small, inconspicuous area. This precautionary step ensures that the solution does not cause any undesirable discoloration or harm to the metal.
Step 5: Clean the metal surface
Dip your chosen soft cloth or sponge into the cleansing solution and delicately scrub the metal surface. Ensure that you evenly cover every inch of the area. For those stubborn stains or grime, employ a non-abrasive brush to banish them effectively.
Step 6: Rinse thoroughly
Once you have completed the cleaning process, rinse the metal surface meticulously with clean water. This final step eliminates any residual soap and guarantees a pristine surface for the vinyl adhesive to adhere to.
Step 7: Dry completely
After rinsing, employ a dry cloth or allow the metal surface to air dry entirely before applying the vinyl. Moisture can disrupt the adhesive properties of the vinyl, making it crucial to ensure a bone-dry surface.
Roughening Up the Metal Surface
While it may appear to be a straightforward process, obtaining a durable and steadfast bond requires meticulous surface preparation. In this comprehensive guide, we will take you on a journey through the step-by-step process of roughening up the metal surface before applying vinyl, ensuring an impeccable and enduring outcome.
Sandpaper or Sanding Block:
- Select medium grit sandpaper (120-180) to create small abrasions on the metal.
- Employ a circular motion, exerting even pressure for an evenly textured result.
Wire Brush or Steel Wool:
- Ideal for eliminating existing coatings, rust, and generating a subtly roughened surface.
- Apply firm pressure and work in circular motions to optimize outcomes.
Chemicals:
- Acetone: Remove oils and contaminants that may hinder adhesion.
- Metal etching solution: Craft microscopic grooves on the surface, amplifying the bond.
Safety Precautions:
- Adhere strictly to safety guidelines when handling chemicals, including donning gloves and working in well-ventilated spaces.
- Familiarize yourself with the instructions provided by the manufacturer prior to employing any chemical products.
Thorough Cleaning:
- After roughening up the metal surface, meticulous cleaning is crucial before vinyl application.
- Utilize a clean cloth dampened with isopropyl alcohol or an appropriate cleaning agent to wipe down the entire area.
- Allow the surface to air dry completely before proceeding.
Applying an Adhesive Primer or Promoter
Today, we will explore the mystical world of achieving a bond between metal and vinyl that is as strong as the mighty Hercules. So, put on your gloves and safety goggles, and let’s dive into the magical realm of adhesive primers and promoters.
The Power of Primers and Promoters
- Introduction to adhesive primers and promoters
- Their role in enhancing adhesion between metal and vinyl
- Creating a chemical bond for increased longevity and durability
Prepping the Surface
- Thoroughly clean the metal surface before applying primer
- Remove dirt, dust, and grease that hinder adhesion
- Use a mild detergent or solvent for a squeaky-clean surface
Applying the Primer or Promoter
- Follow manufacturer’s instructions for application techniques
- Spray or brush onto metal surface in a thin, even layer
- Avoid excessive application to prevent pooling or uneven drying
Patience is Key – Drying Time
- Allow primer or promoter to dry completely before proceeding
- Refer to manufacturer’s guidelines for recommended drying times
- Ensure optimal conditions for efficient drying
The Final Step – Applying the Vinyl
- Carefully adhere vinyl to primed metal surface
- Smooth out air bubbles or wrinkles with a trusty squeegee
- Celebrate your successful bond.
Exceptions and Compatibility
- Not all vinyls require an adhesive primer or promoter
- Consider compatibility with different vinyl materials and metal surfaces
- Select the right primer based on specific needs
Safety First.
- Emphasize following manufacturer’s instructions and safety precautions
- Wear gloves and work in well-ventilated areas
- Become the chemical wizard you were born to be.
Applying the Vinyl
Step 1: Prepare for Success
Before embarking on the enchanting process of applying vinyl to metal surfaces, it is crucial to set the stage for success.
Begin by giving your metal surface a thorough cleaning, removing any dirt, dust, or grease that may hinder the magical bond we seek.
Use a mild detergent and water solution or a specialized cleaner for metal surfaces to ensure a pristine canvas for our vinyl masterpiece.
Once clean, dry the surface thoroughly, banishing any lingering moisture that might spoil our magical potion.
Step 2: Choose Your Potion
In this mystical realm, we have a plethora of adhesive options at our disposal. One popular choice is pressure-sensitive adhesive (PSA) vinyl, boasting an adhesive backing that bonds to the metal under pressure. Alternatively, you may opt for an adhesive spray or a specially formulated glue designed specifically for bonding vinyl to metal surfaces. These potions provide a potent concoction, ensuring a strong and enduring bond that will withstand the test of time.
Step 3: Unleash the Power of Pressure
With your potion selected and ready, it’s time to unleash its power. Apply the adhesive to either the vinyl or the metal surface, ensuring even coverage. Now, take hold of your trusty squeegee or a similar tool and apply firm pressure as you press the vinyl onto the metal. This step is crucial in banishing any air bubbles and securing a smooth and secure bond between our magical materials.
Step 4: Harness the Power of Heat
Ah, heat. A powerful ally in our quest for perfection. In some cases, applying heat can further enhance the bonding process between vinyl and metal surfaces. A heat gun or a heat press machine can be used to gently warm the adhesive, allowing it to penetrate into the very pores of the metal surface. Follow manufacturer instructions and temperature guidelines carefully to avoid any unintended damage to our magical materials.
Step 5: The Finishing Flourish
With the vinyl securely bonded to the metal, it’s time to add the finishing touches that will ensure its longevity. Seal all edges with precision, using a heat gun or additional adhesive to prevent any lifting or peeling. Remember, patience is key. Allow the adhesive to cure for the recommended period before subjecting your newly bonded creation to harsh conditions or excessive handling.
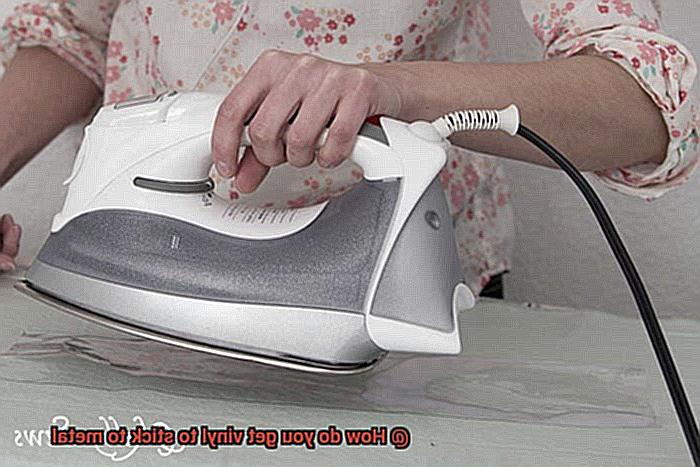
Activating the Adhesive with Heat
Prepare yourself for an enchanting journey as we delve into the art of activating the adhesive with heat and create a mesmerizing bond.
Activating the adhesive with heat is a vital step in ensuring a secure and long-lasting connection between vinyl and metal surfaces. By softening the adhesive and increasing its tackiness, heat allows for a strong and resilient bond to form. But before we unleash the power of our heat guns, let’s review some essential safety precautions.
First and foremost, always work in a well-ventilated area. The hot air emitted by the heat gun can be harmful if inhaled for an extended period. Safeguard your hands with protective gloves and shield your precious peepers with eye protection to prevent burns and potential debris-related accidents.
Now that we’ve established a safe environment, let’s dive into the application process. If you opt for a heat gun, start with a low temperature setting and adjust accordingly. Hold the heat gun approximately 6-8 inches away from the surface and elegantly sweep it across the vinyl and metal. Be wary not to focus on one spot for too long, as this could lead to damage or even vinyl melting – a tragic outcome for any aspiring magician.
For those who prefer a more traditional approach, fear not. A household iron can also work its magic. Set it to a low or medium heat setting and allow it to preheat. Place a thin cloth or protective sheet over the vinyl and metal surface to safeguard them from direct contact with the iron. With grace, press the iron onto the cloth, moving it in a gentle circular motion for approximately 10-15 seconds. This will evenly distribute the heat, awakening the adhesive’s full potential.
Remember, should you encounter any warping, melting of vinyl, or discoloration on the metal surface, halt immediately. Allow everything to cool down before proceeding. We wouldn’t want your magical masterpiece to suffer any harm.
Keep in mind that each adhesive and vinyl product may have its own specific recommendations, so always consult the manufacturer’s instructions for temperature settings and application methods.
Letting the Vinyl Cure and Set Properly
Today, we will delve into the fascinating world of allowing vinyl to cure and set properly on a metal surface. This process is essential for achieving maximum adhesion and durability, resulting in breathtaking creations that will endure the test of time. Join us as we explore the key factors that contribute to a successful bond between vinyl and metal.
The Curing Process:
Vinyl requires a specific period of time to cure and set properly on a metal surface. This crucial phase typically lasts between 24 to 48 hours, although it can vary depending on factors such as temperature and humidity. During this time, it is crucial to resist the temptation of touching or disturbing the vinyl, allowing it to securely bond with the metal beneath.
Creating the Ideal Environment:
To ensure proper curing, it is recommended to keep the metal surface untouched in a controlled environment. Seek out a well-ventilated area away from direct sunlight and extreme temperatures, as these can compromise the adhesive properties of your creation. Whenever possible, let the vinyl cure indoors, as outdoor conditions can be unpredictable and may adversely affect the bonding process.
Protection Against Moisture:
Moisture is the arch-nemesis of vinyl adhesion. It is imperative to avoid exposing the vinyl to any liquid during the curing period, as even a slight encounter can interfere with the bonding process. A dry environment is crucial for achieving optimal results.
Extreme Temperatures:
Like Goldilocks searching for her perfect porridge, vinyl requires temperatures that are not too hot or too cold. Extreme heat or cold can cause expansion or contraction, leading to compromised adhesion. Keep your vinyl-covered masterpiece in an environment with stable temperatures to ensure a strong bond.
Patience Is Key:
In our fast-paced world, patience may seem like a forgotten virtue. However, when it comes to letting vinyl cure and set on metal surfaces, patience is crucial for success. Rushing the curing process can result in poor adhesion and premature peeling. Take a deep breath, trust the process, and allow the vinyl to work its magic at its own pace.
The Reward:
Once the vinyl has fully cured, it will reward you with a strong bond that withstands daily wear and tear. Your masterpiece will proudly display its vibrant colors and intricate designs, captivating all who encounter it. The time invested in allowing the vinyl to cure and set properly will be well worth it when you witness the remarkable durability of the final product.
Potential Challenges and Tips for Overcoming Them
Vinyl stickers are a fun and creative way to personalize your belongings or add a unique touch to your project. However, getting vinyl to stick to metal surfaces can sometimes be challenging. In this blog post, we will explore potential obstacles and provide helpful tips to ensure a successful bond between vinyl and metal.
Cleanliness is Key:
One of the main challenges when sticking vinyl to metal is the presence of dirt, dust, or grease on the metal surface. These contaminants can prevent the adhesive from properly adhering, leading to a weak bond. To overcome this challenge, start by thoroughly cleaning the metal surface using a mild detergent or rubbing alcohol. Make sure to remove any debris and dry the surface completely before applying the vinyl.
A clean surface is essential for good adhesion. Use a lint-free cloth or sponge to wipe away any dirt or grease. Ensure that there are no particles left behind that could interfere with the adhesive. Taking the time to clean the metal surface properly will greatly improve the chances of a successful bond between the vinyl and the metal.
Smooth Surfaces for Strong Bonds:
Another challenge is dealing with uneven or textured metal surfaces. Vinyl adheres best to smooth and flat surfaces, so if your metal surface is rough or has ridges, achieving a strong bond can be more difficult. To overcome this challenge, consider using a primer specifically designed for bonding vinyl to metal.
A primer creates a smooth and even surface for better adhesion. Follow the manufacturer’s instructions and apply the primer evenly on the metal surface. Allow it to dry completely before applying the vinyl. The primer will provide a solid foundation for the vinyl adhesive, ensuring a strong and durable bond.
Temperature Matters:
Temperature can also impact the bonding process between vinyl and metal. Extreme temperatures, whether too hot or too cold, can affect the adhesive properties of both materials. To overcome this challenge, work within the recommended temperature range provided by the vinyl manufacturer.
If the metal surface is too cold, warming it up slightly can improve adhesion. Use a heat gun or warmers to raise the temperature of the metal surface without overheating it. Conversely, if the metal surface is too hot, allow it to cool down before applying the vinyl. Working within the recommended temperature range will optimize the adhesive properties and ensure a successful bond.
Choose the Right Adhesive:
The type of adhesive used plays a significant role in the success of vinyl sticking to metal. Different adhesives have varying properties and strengths. It is crucial to choose an adhesive specifically formulated for bonding vinyl to metal.
Read and follow the manufacturer’s instructions regarding application techniques and recommended drying times. Apply the adhesive evenly on the vinyl and press firmly onto the metal surface. Allow sufficient drying time for the adhesive to set and bond with the metal. Choosing the right adhesive will greatly improve the chances of a strong and long-lasting bond.
sALHtR7DQnM” >
Conclusion
To ensure that vinyl sticks to metal, there are a few key steps you should follow.
First, prepare the metal surface by cleaning it thoroughly with soap and water to remove any dirt or debris. Next, use a degreaser or rubbing alcohol to eliminate any grease or oils that may prevent the vinyl from adhering properly.
Once the surface is clean and dry, apply a primer specifically designed for metal surfaces. This will create a strong bond between the vinyl and the metal.
After allowing the primer to dry according to the manufacturer’s instructions, carefully place the vinyl onto the metal surface, smoothing out any bubbles or wrinkles as you go.
Use a squeegee or credit card to firmly press down on the vinyl and ensure good adhesion. Finally, allow sufficient time for the adhesive to fully cure before subjecting the vinyl to any stress or pressure.
By following these steps with precision and care, you can achieve a long-lasting bond between vinyl and metal that will withstand even the toughest conditions.