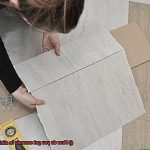
Looking to add a touch of elegance and charm to your wooden furniture or decor? Ever wondered how ceramic can magically meld with wood, creating awe-inspiring and one-of-a-kind pieces? Well, you’ve come to the right place. In this blog post, we’ll delve into the captivating process of getting ceramic to stick to wood. We’ll explore the steps involved, the essential tools and materials needed, and even share some nifty tips and tricks for achieving a flawless bond between these two materials.
It all begins with prepping the wood’s surface. Sand it down until it’s as smooth as a baby’s bottom, removing any finishes or rough spots that might get in the way of that perfect union. Once your wood is silky-smooth, give it a good cleaning and make sure it’s bone-dry before moving on. You want optimal adhesive compatibility here.
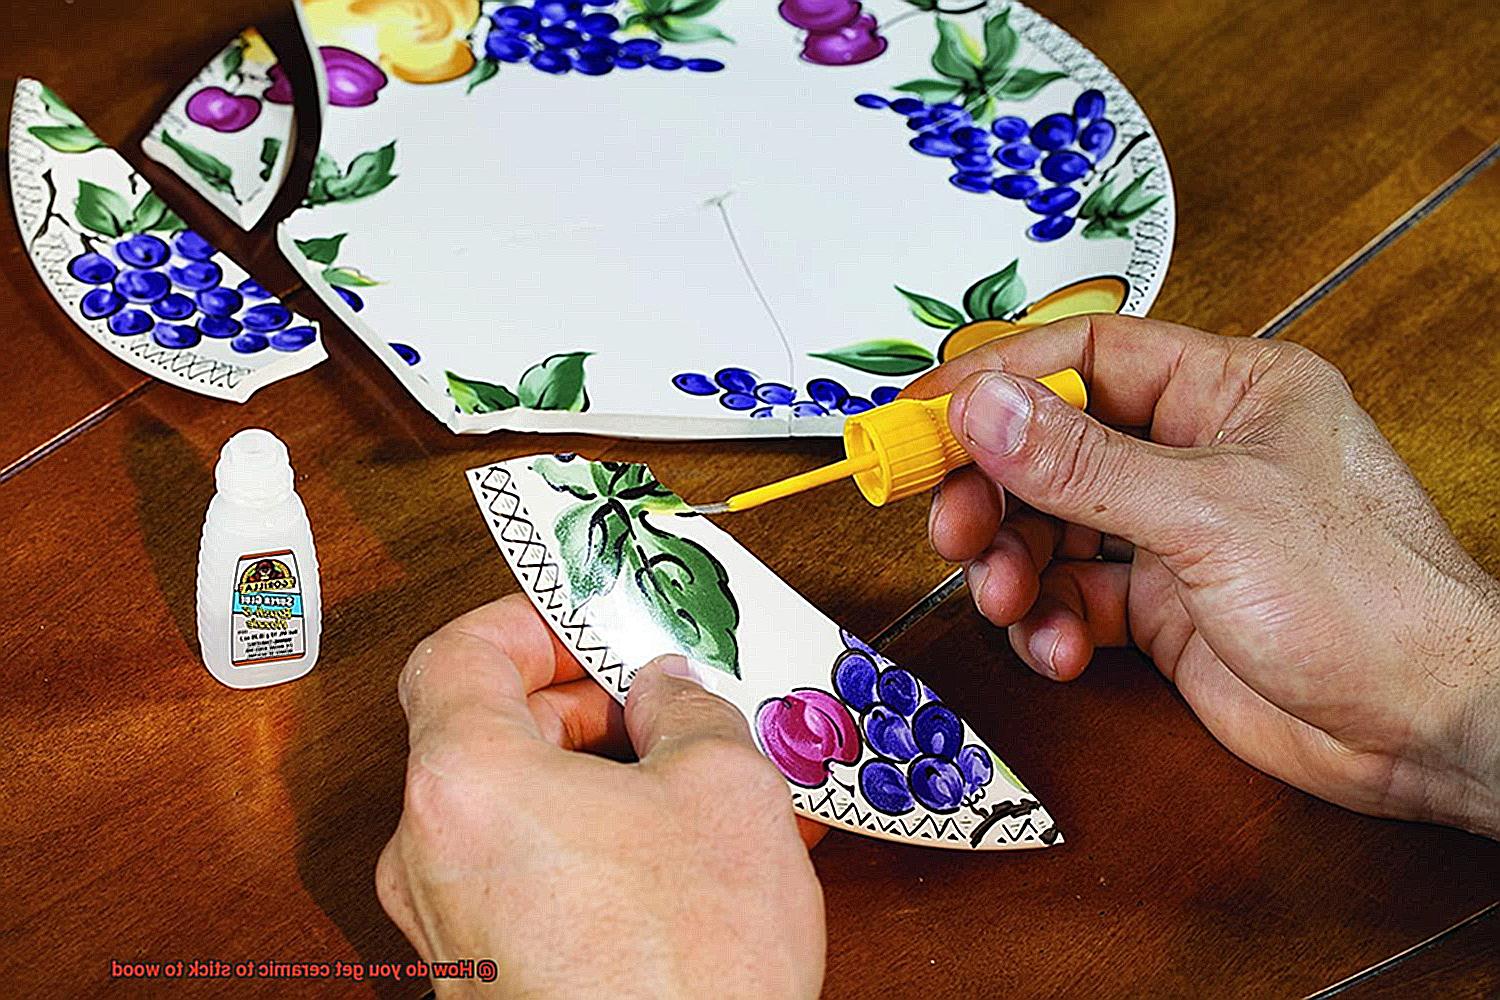
Now comes the crucial part: choosing the right adhesive. Don’t settle for any old glue; you need an adhesive specifically formulated for bonding ceramic and wood. Look for one with Herculean strength, resistance to moisture (because let’s face it, accidents happen), and tailored for your specific display conditions.
With your adhesive in hand (or brush or trowel), apply it evenly onto both the ceramic and wood surfaces. Be generous but not excessive; too much glue can lead to uneven spreading or worse – damage that beautiful ceramic surface you’re working so hard to attach. Once applied, gently press the ceramic onto the wood, making sure they hug each other tight. Give them enough drying time as recommended by the adhesive manufacturer so they can form an unbreakable bond.
Pro tip: Clamps are worth their weight in gold during this drying period. They help maintain even pressure on your masterpiece, ensuring a strong connection that will stand the test of time. And don’t forget to wipe away any excess adhesive that might sneak out during the bonding process. A quick swipe with a damp cloth will give your creation that polished and professional finish.
Now, let’s talk about some important factors that can make or break your ceramic-wood love affair. Temperature, humidity, and the type of wood you’re using can all play a role in the success of your bond.
So, before diving headfirst into your project, try experimenting on some scrap pieces or seek advice from the pros if you’re working with delicate or exotic woods.
Preparing the Surfaces
Contents
In the world of crafting and construction, the ability to bond ceramic to wood is a valuable skill. To achieve a resilient and enduring connection, meticulous surface preparation is crucial. In this comprehensive guide, we will walk you through the step-by-step process of preparing both wood and ceramic surfaces, equipping you with the knowledge to confidently glue these materials together and create stunning, long-lasting creations.
Step 1: Cleanliness is Paramount
The foundation of any successful adhesion lies in cleanliness. Begin by meticulously cleaning both the wood and ceramic surfaces, ensuring they are free from any dust, dirt, or debris that could hinder adhesion.
Employ the assistance of sandpaper or a paint scraper to eliminate any loose paint or varnish from the wood surface. Then, diligently wipe it down with a damp cloth, leaving no trace of lingering dust or residue. For ceramics, employ the power of warm water and a gentle detergent to thoroughly cleanse the tiles or pieces, banishing all traces of grease, dirt, or residue. Rinse them meticulously and grant both surfaces ample time to achieve complete dryness.
Step 2: Embrace the Roughness
To enhance the adhesive’s grip on the wood surface, it is essential to create a slightly rough texture. Embrace the power of fine-grit sandpaper and gently sand the surface. The goal is not to strip away copious amounts of material but rather to achieve an ideal grip for the adhesive.
Step 3: Primer or Bonding Agent – Your Ally
To further fortify the bond between wood and ceramic surfaces, enlist the aid of a primer or bonding agent specially designed for this purpose. These indispensable products can be procured at reputable hardware stores or home improvement centers. Exercise precision when applying the primer, adhering closely to the manufacturer’s instructions for even coverage on both surfaces. Grant the primer the recommended drying time as specified by the manufacturer.
Step 4: Adhesive Application – A Delicate Dance
With surfaces meticulously prepared and primed, it is time to delicately apply the adhesive. Select an adhesive specifically formulated for bonding ceramic and wood surfaces. Employ a brush or applicator tool to judiciously spread a thin layer of adhesive on both the ceramic and wood surfaces, ensuring comprehensive coverage. Leave no surface untouched, for this is the key to achieving maximum adhesion.
Step 5: Press and Secure – The Final Frontier
Once the adhesive has been applied, firmly press the ceramic piece onto the wood surface, ensuring precise alignment. To fortify the bond, contemplate clamping or applying pressure to both ceramic and wood during the adhesive’s curing process. This extra step eradicates any potential gaps or air bubbles that could undermine the bond’s strength.
Applying the Adhesive
In the world of crafting and construction, achieving a strong bond between ceramic and wood surfaces requires careful preparation and the right adhesive. In this comprehensive guide, we will explore the step-by-step process of applying adhesive to ceramic and wood, ensuring a lasting and durable bond.
Step 1: Choose the Right Adhesive
Before diving into the application process, it’s crucial to select the appropriate adhesive for your project. There are several options available, including epoxy, construction adhesive, and silicone adhesive. Consider the specific needs of your project and choose an adhesive that suits it best.
Step 2: Prepare the Surfaces
To ensure a successful bond, both the ceramic and wood surfaces must be clean and free from any dirt, dust, or grease. Use a mild detergent and warm water to thoroughly clean the surfaces. Once cleaned, ensure they are completely dry before proceeding.
Step 3: Roughen Up the Surfaces
Enhance adhesion by lightly roughening up both surfaces. Use fine-grit sandpaper to gently sand the wood, creating a slightly textured surface. For the ceramic surface, use a diamond blade or sanding block to score it lightly. Be cautious not to apply too much pressure or cause damage.
Step 4: Apply Adhesive
Following the instructions provided with your chosen adhesive, apply a thin layer to both the wood and ceramic surfaces using a putty knife or small brush. Ensure that the adhesive is spread evenly and covers the entire area where the two materials will be joined.
Step 5: Press Materials Together
Carefully press the ceramic onto the wood surface, applying even pressure to ensure proper contact between the two materials. To aid in this process, you can use clamps or weights to hold them in place while the adhesive sets. Refer to the recommended drying time provided by the adhesive manufacturer.
Step 6: Check for Gaps and Uneven Areas
After the adhesive has dried completely, inspect the bonded area for any gaps or unevenness between the ceramic and wood. If necessary, fill in any gaps with additional adhesive or a suitable filler material. Use sandpaper to smooth down any excess adhesive or filler, creating a seamless finish.
Step 7: Protect the Bonded Area
To maintain the longevity and durability of the adhesive bond, apply a sealant or coating over the bonded area. Choose a sealant that is suitable for both ceramic and wood surfaces and follow the manufacturer’s instructions for application.
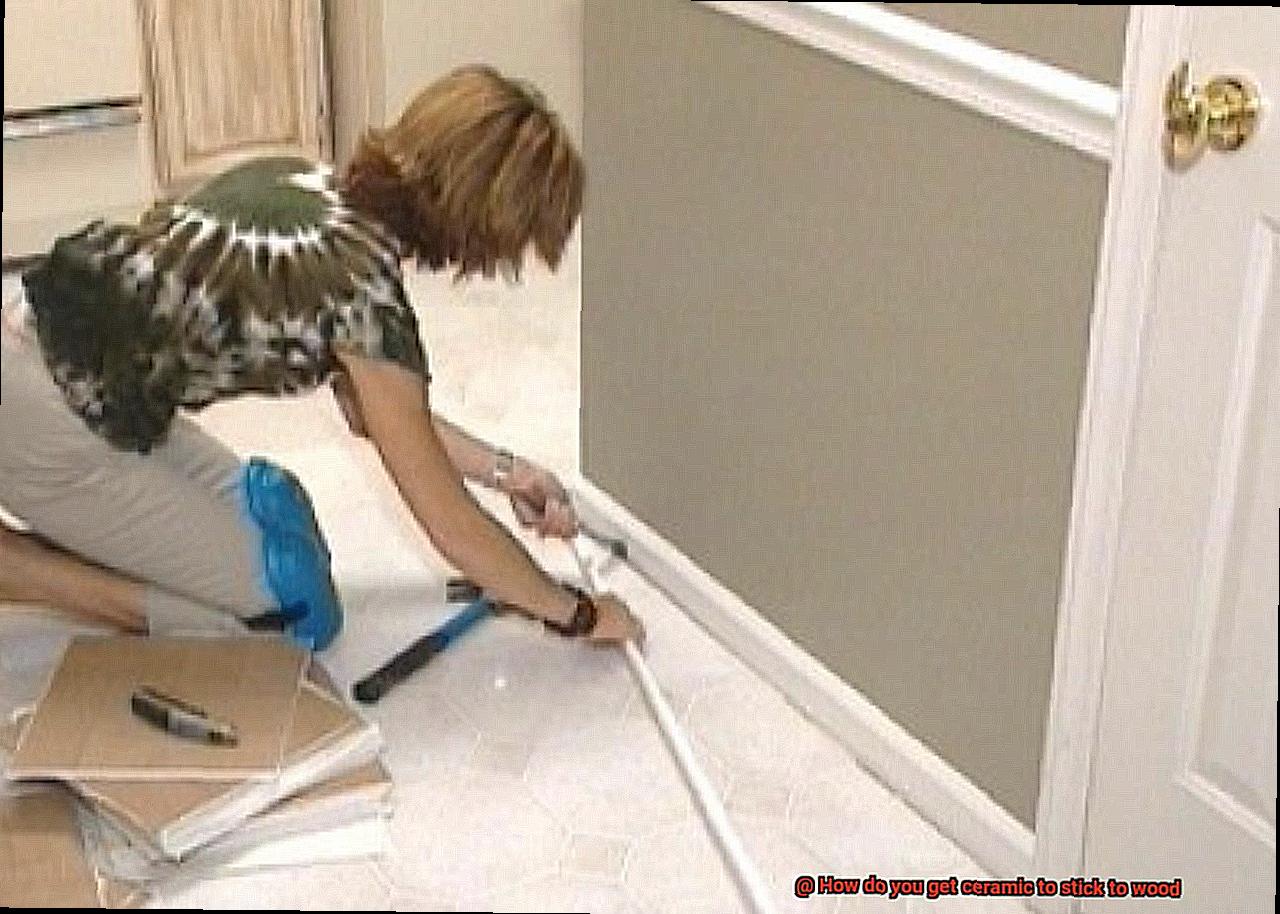
Curing and Clamping
When it comes to the delicate art of gluing ceramic to wood, curing and clamping are the unsung heroes that can make or break your project. They may not be the most glamorous steps, but they are crucial in ensuring a strong and reliable bond between these two materials.
Let’s dive into the world of curing first. Curing is the process of allowing the adhesive to dry and harden completely, like a cocoon transforming into a beautiful butterfly. Patience is the key here. Different adhesives have different curing times, so it’s important to follow the manufacturer’s instructions for the specific adhesive you are using. Rushing this process can result in a weak bond that will crumble under pressure. So take a deep breath, resist the urge to rush, and give your adhesive the time it needs to reach its maximum bond strength.
Now let’s turn our attention to clamping, the superhero that gives your bond a big bear hug. Clamping provides even pressure across the entire surface area, ensuring that every nook and cranny of the ceramic and wood are hugged tightly together. This prevents any sneaky gaps or air bubbles from forming, which could weaken the bond and lead to failure. The type of clamp you use will depend on the size and shape of your objects. For smaller projects, spring clamps or bar clamps may be sufficient, while larger projects may require more heavy-duty clamps or even specialized clamping systems.
But wait, there’s more. When clamping ceramic to wood, it’s essential to protect their delicate surfaces. Use soft materials like foam or rubber as protective pads or blocks between the clamps and the materials. This ensures that no harm will come to your precious creations during the clamping process. And remember, tighten those clamps firmly enough to provide adequate pressure, but not so tight that they cause damage or distort either material.
Once your adhesive has fully cured and the clamp is removed, it’s time for the grand reveal. Inspect the bond closely for any signs of weakness or separation. If you spot any issues, don’t panic. Simply apply additional adhesive or re-clamp if necessary. Your masterpiece can still be salvaged.
Roughening the Ceramic Surface
This article delves into the art of roughening ceramic surfaces to achieve a seamless bond with wood. Discover various techniques that will ensure a durable and long-lasting connection. So, grab your sandpaper and let’s embark on a journey of surface roughening.
Method 1: Sandpaper – The Trusty Companion
When it comes to roughening ceramic surfaces, sandpaper is the gentle giant in your arsenal. Begin by meticulously cleaning the ceramic to eliminate any dirt or debris. Then, delicately sand the surface using fine-grit sandpaper. Remember, our goal isn’t to strip layers of ceramic away; rather, we aim to create minute scratches and grooves that will provide a sturdy base for adhesive attachment.
Method 2: Diamond-Tipped Engraving Tool – Precision at Your Fingertips
For those seeking a more intricate approach, the diamond-tipped engraving tool offers unparalleled precision. This tool grants you the power to etch intricate grooves onto the ceramic surface, ensuring comprehensive coverage in areas that will come into contact with the wood. With this level of control, adhesion becomes a work of art.
Method 3: Chemical Etching Solutions – Dissolving Boundaries
Should you prefer a chemical route, specialized solutions designed for roughening ceramic surfaces can be your ally. These solutions incorporate unique ingredients capable of gently dissolving a thin layer of ceramic, resulting in a rougher texture. It is vital to adhere strictly to the manufacturer’s instructions and take necessary safety precautions when utilizing these solutions.
Preparation and Cleanup – The Unsung Heroes
Before applying any adhesive, thorough cleaning of the ceramic surface is crucial to eradicate residue from the roughening process. This ensures optimal bonding between the roughened ceramic and the wood. After the adhesive has worked its magic, don’t forget to safeguard your precious creation by utilizing soft materials as protective pads or blocks between the clamps and your materials.
Using Mechanical Fasteners
Today, we embark on a journey into the world of mechanical fasteners and their pivotal role in securely attaching ceramic tiles to wood surfaces. Get ready to uncover the secrets to a bond that goes beyond average, as we delve into the fascinating process of achieving seamless adhesion.
Step 1: Choose the Right Fastener:
The first step in this art is selecting the perfect mechanical fastener for your project. Among these marvels of engineering, screws reign supreme. This trusted option boasts unparalleled strength and reliability. Opt for screws specifically designed for tile installation, featuring a flat or countersunk head that guarantees a flush finish, ensuring your masterpiece looks flawless.
Step 2: Pre-drilling Holes:
In this delicate dance of wood and tile, preventing wood splitting is paramount. Take a moment to pre-drill holes in the wood surface, a crucial step that not only safeguards the integrity of the wood but also facilitates easier insertion of screws. Remember, the hole size should be slightly smaller than the screw diameter for a snug fit that sets the stage for success.
Step 3: Screw It In:
Now it’s time to bring your creation to life. Secure the ceramic tile to the wood surface by inserting screws through the tile and into the pre-drilled holes. To guarantee unwavering stability, go above and beyond by using multiple screws for each tile. This meticulous approach ensures an attachment that can withstand movement and weight, giving your project longevity and strength.
Step 4: Consider Nails as an Alternative:
For lighter applications or temporary installations, nails can offer a viable alternative to screws. These versatile allies can join wood and ceramic with finesse. Choose nails long enough to penetrate both materials, ensuring a sturdy bond. To prevent any mishaps, opt for nails with a flat head or a small washer, minimizing the risk of tile breakage and adding an extra layer of security.
Step 5: Specialized Fasteners for Specific Applications:
In the vast realm of construction, some projects demand fasteners beyond the ordinary. Staples and clips may hold the key to success for these unique situations. However, be aware that these fasteners often require specialized tools or equipment for installation. When deciding which path to take, consider the weight, movement, and durability requirements of your project, ensuring the perfect match between form and function.
Considerations for Different Applications
In this blog post, we’ll dive into the considerations you need to keep in mind when selecting the perfect adhesive for attaching ceramic to wood.
First and foremost, let’s talk about the environment. Will your creation be displayed outdoors or in a high-humidity area? If so, it’s crucial to choose an adhesive that can withstand these conditions. Look for a waterproof or moisture-resistant adhesive that will keep your bond strong and reliable over time, even in the face of Mother Nature’s demands.
Next up, consider the weight of your ceramic object. If it’s on the larger or heavier side, you’ll need an adhesive with some serious strength. Enter epoxy adhesives. These powerhouses provide a robust and dependable bond that can handle the weight of your masterpiece without breaking a sweat.
Now, let’s turn our attention to the type of wood being used. Different woods have varying levels of porosity and surface textures, which can impact how well an adhesive bonds. To optimize adhesion, give your wood surface a light sanding before applying the adhesive. This will create a smoother and more receptive surface that’s just begging for a strong bond.
Moving on to shape and design. If your ceramic object boasts irregular shapes or curves, a specialized adhesive like mastic or tile adhesive may be necessary. These adhesives are designed to conform to uneven surfaces and provide a bond that can withstand any twist or turn.
Consider whether you want the adhesive line to be visible or hidden. If you’re aiming for a seamless look, opt for clear adhesives that dry transparently. This is especially important if aesthetics are at the forefront of your project.
Last but certainly not least, follow the manufacturer’s instructions with precision when applying any adhesive. Each product has its own set of guidelines regarding curing time, application techniques, and safety precautions. By adhering to these instructions, you’ll ensure a bond that not only stands the test of time but also captivates with its beauty.
Advantages of Adhesive Bonding
Adhesive bonding is a game-changer when it comes to joining ceramic and wood surfaces together. This versatile and effective technique offers numerous advantages over other bonding methods, making it the go-to solution for DIY enthusiasts, furniture makers, and artists looking to create unique designs.
One of the standout advantages of adhesive bonding is its ability to evenly distribute stress across the bonded area. This prevents localized stress concentrations that can lead to failure or damage. The adhesive acts as a cushion, absorbing and distributing the load, resulting in a stronger bond. Additionally, adhesive bonding offers excellent gap-filling capabilities, filling irregularities and gaps between ceramic and wood surfaces for a seamless finish and increased joint strength.
But that’s not all. Adhesive bonding excels in joining dissimilar materials, such as ceramic and wood. It allows for the creation of innovative designs, opening up endless possibilities in various industries. And because adhesives can be applied to both flat and curved surfaces, they are incredibly versatile for bonding ceramics and woods of different shapes, sizes, and thicknesses.
Durability is another key advantage of adhesive bonding. High-quality adhesives are formulated to resist corrosion and deterioration caused by environmental factors like moisture, temperature changes, and UV exposure. This ensures a long-lasting bond that remains strong over time. Plus, adhesive bonding offers excellent flexibility, allowing the joint to withstand vibrations, shocks, and movements without compromising its integrity.
If cost-effectiveness is important to you, adhesive bonding is your go-to solution. It eliminates the need for expensive tools or equipment and reduces labor costs. Adhesives can also be applied efficiently in a controlled and automated manner, streamlining production processes.
Last but not least, adhesive bonding enhances the aesthetic appeal of the ceramic-wood bond. With no visible fasteners or joints, your finished project will have a clean and seamless look. This makes adhesive bonding an ideal choice for applications where aesthetics are crucial, such as high-end furniture or artistic installations.
Disadvantages of Adhesive Bonding
In the exhilarating world of DIY projects and home renovations, adhesive bonding often takes center stage as the hero that effortlessly joins materials like ceramic and wood, creating stunning designs. But even superheroes have their weaknesses. In this blog post, we’ll explore the disadvantages of adhesive bonding when attaching ceramic to wood. So fasten your seatbelt and prepare for a reality check.
Weak bond strength:
The Achilles’ heel of adhesive bonding lies in its reliance on the glue’s strength to hold ceramic and wood together. Unfortunately, not all adhesives are created equal; some may fail to provide a strong enough bond. As time passes, this can lead to tiles detaching from the wood surface, shattering dreams of a flawless finish.
Limited durability:
Adhesives may initially secure a bond, but can they withstand the test of time? Long-term exposure to moisture, heat, or other environmental factors may cause degradation and weakening of the adhesive. This relentless assault ultimately results in a failure in the bond between ceramic and wood.
Maintenance and repair challenges:
When the bond between ceramic and wood is compromised or fails, repairing or replacing affected tiles becomes a daunting task. The battle against adhesive residue becomes an epic struggle that consumes time and risks damaging the underlying materials.
Compatibility issues:
The compatibility war can be fierce when it comes to adhesive bonding. Certain adhesives struggle to adhere well to glossy or glazed ceramic surfaces, leaving you with weak links in your project. Similarly, some types of wood with natural oils, textures, or porous nature pose challenges that need strategic planning to overcome.
Surface preparation and application techniques:
To achieve a victorious bond through adhesive bonding, meticulous surface preparation and application techniques are vital. Cleaning, sanding, and priming both ceramic and wood surfaces are crucial steps in the battle for a strong bond. The strategic application of adhesive and allowing sufficient curing time become maneuvers worthy of a seasoned warrior.
0gMeRi9GVr8″ >
Conclusion
When it comes to getting ceramic to stick to wood, there are a few key steps you can take. First and foremost, you need to ensure that the wood surface is clean and free of any dirt or debris. This can be done by using a mild detergent and water solution, along with a soft cloth or sponge.
Once the wood surface is clean, it’s important to roughen it up slightly to create a better bonding surface for the ceramic. You can do this by lightly sanding the wood with fine-grit sandpaper. Be sure to wipe away any dust or particles afterwards.
Next, you’ll want to apply a primer specifically designed for bonding ceramic to wood. This will help create a strong foundation for the adhesive. Follow the instructions on the primer carefully, making sure to apply it evenly and allow it to dry completely.
Now comes the crucial step of applying the adhesive. There are various types of adhesives that work well for bonding ceramic to wood, such as epoxy or construction adhesive. Choose one that is suitable for your specific project and follow the manufacturer’s instructions for application.
Once you have applied the adhesive, carefully place the ceramic piece onto the wood surface, pressing firmly but gently. It’s important to ensure that there is full contact between the ceramic and wood.
Allow sufficient time for the adhesive to cure and bond properly before moving or handling the piece. This may take several hours or even days depending on the type of adhesive used, so be patient.
In conclusion, getting ceramic to stick to wood requires proper preparation of both surfaces, using a suitable primer and adhesive, and allowing ample time for curing. By following these steps diligently, you can achieve a strong bond between ceramic and wood that will withstand time and use.