Do you have a collection of gorgeous shells from your beach trips, but don’t know what to do with them? Are you looking for a creative way to incorporate these treasures into your home decor or DIY projects? Look no further.
Gluing shells to wood is an excellent way to infuse coastal charm into your crafting endeavors. The possibilities are endless – from a seashell-covered jewelry box to a beach-themed picture frame, the options are limitless.
However, before you start gluing away, it’s crucial to understand the key factors that will impact the success of your project. Factors like the type of glue you use, surface preparation, and proper placement of shells can make all the difference in achieving optimal adhesion.
In this article, we’ll guide you through all the essential steps necessary for creating stunning and durable shell-wood projects. Get ready to learn the art of shell gluing and add some seaside flair to your home today.
Choosing the Right Glue
Contents
Gluing shells to wood is a creative and fun way to achieve this look, but it’s important to choose the right glue for the job. The perfect bond requires careful consideration of the materials you’re working with and the conditions they will be exposed to.
One popular adhesive for gluing shells to wood is marine-grade epoxy. This type of glue can withstand exposure to water and moisture, making it ideal for items that will be used outdoors or in damp environments. Marine epoxies provide a strong and durable bond, which is essential when dealing with delicate shells.
If you’re working on smaller or more intricate pieces, cyanoacrylate (CA) glue, commonly known as super glue, may be your best choice. CA glue dries quickly and forms a robust bond, making it perfect for precise application. However, it may not be strong enough for larger or heavier shells.
For those seeking a more natural or eco-friendly option, there are several types of wood glues available. These adhesives are typically water-based and free of harsh chemicals, making them an excellent choice for those who want to avoid toxic substances. Keep in mind, though, that wood glue may not be as strong as marine epoxy or CA glue, so it may not be suitable for larger or heavier shells.
Regardless of which type of glue you choose, ensure that you clean both the shells and the wood surface thoroughly before gluing. This ensures the best possible bond and prevents any dirt or debris from interfering with the adhesive.
Selecting the right glue for gluing shells to wood is essential for creating a strong and long-lasting bond. Consider the specific materials you’re working with and the conditions they’ll be exposed to when choosing your adhesive.
Cleaning the Shells and Wood
Whether you’re creating a stunning shell art piece or repairing a broken shell decoration, the cleaning process for shells and wood remains the same.
Begin by using a damp cloth to wipe down the shells, removing any dirt, debris, or residue that may be present. For those stubborn stains or particles that are stuck on the shells, use a soft-bristled brush or toothbrush to gently scrub them away. However, it’s essential to avoid using harsh chemicals or abrasive materials that could damage the delicate shells.
Next up, clean the wooden surface where you’ll be gluing the shells. Use sandpaper or a scraper to remove any rough spots or bumps on the surface. This step will create a smooth and even surface for the glue to adhere to. Once you’ve sanded the surface, wipe it down with a clean cloth to remove any dust or debris that may remain.
It’s worth noting that if you’re using reclaimed or salvaged wood, it may have coatings or finishes that can affect the bonding process. In such cases, you may need to sand or strip the surface before proceeding with cleaning.
After both surfaces are cleaned and prepped, ensure they are entirely dry before applying any glue. Any moisture on either surface can weaken the bond and cause the shells to come loose over time.
Applying the Glue
We hope you’re ready to take the next step in creating beautiful shell decorations on wooden surfaces. In this section, we’ll be discussing the crucial step of applying the glue.
To ensure a strong and waterproof bond, we recommend using epoxy glue for this project. Once you have the right type of glue, it’s important to prepare both the shells and wooden surfaces by cleaning them thoroughly and ensuring they are completely dry.
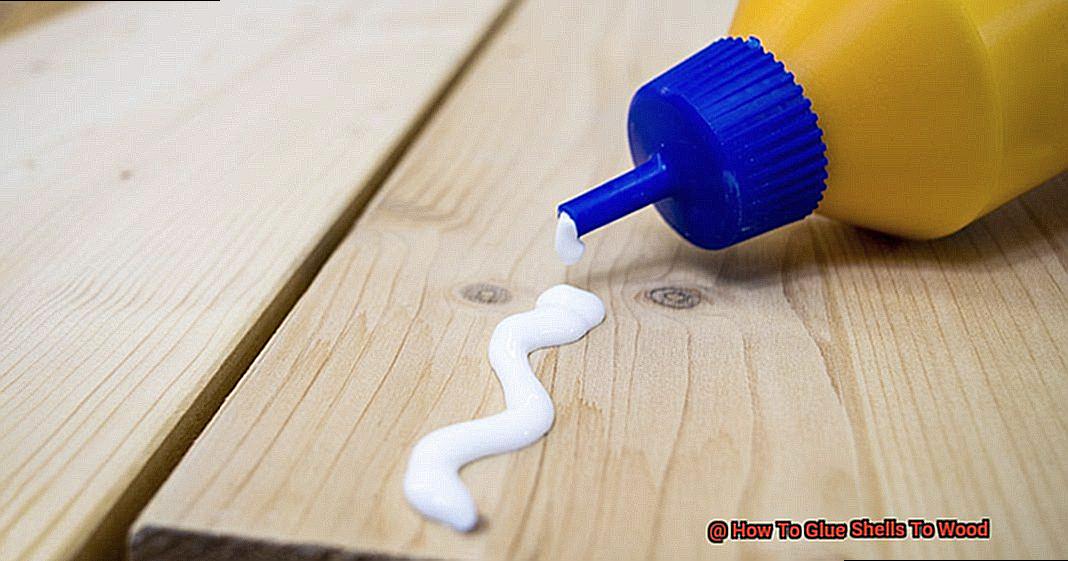
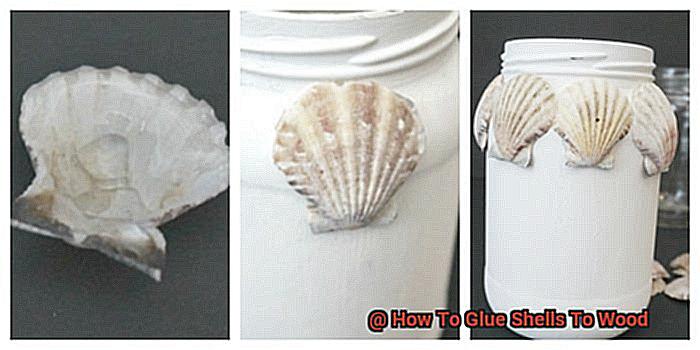
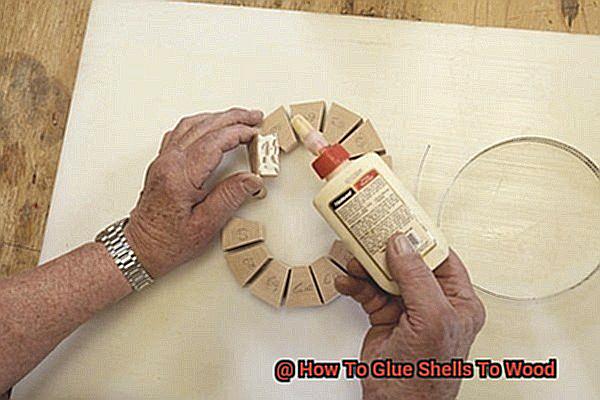
Now, onto the exciting part of applying the glue. Start by adding a small amount of epoxy glue onto the wood surface where you want to attach the shell. You can use a toothpick or small brush to spread the glue evenly and thinly. Remember not to overdo it with the glue, as excess can create an unsightly finish.
Next, it’s time to carefully press the shell onto the glued area of the wood surface. Make sure that it is centered and aligned correctly. By applying gentle pressure with your fingers, you will secure it in place.
The next step is crucial: patience. Allow the glued area to dry completely before moving or handling it. Depending on the type of epoxy glue used and humidity levels in your environment, this could take up to 24 hours. But trust us, it will be worth it once you see your beautiful creation.
Applying glue for shells to wood is an easy process as long as you use the right adhesive and follow proper techniques. With these steps, you’ll be able to create stunning shell decorations on wooden surfaces that will last for years to come.
Pressing the Shells into Place
Before starting, ensure that you have applied the glue evenly and thoroughly to both the shell and the wood surface. Once you have done that, gently place the shell onto your desired location on the wood. Then, using a flat tool like a credit card or putty knife, press down firmly on the shell. This will prevent any air bubbles or gaps from forming between the shell and the wood.
It’s important to apply even pressure across the entire surface of the shell while pressing down. This ensures that your shell creation stays in place and doesn’t break or crack. But be careful not to press too hard, as this can damage your beautiful shells.
After pressing the shells into place, it’s crucial to give them plenty of time to dry completely before handling or moving them. Depending on the glue used and environmental conditions, this could take several hours or even overnight.
Pressing shells into place is a vital step in gluing them onto wooden surfaces. By applying even pressure and allowing sufficient drying time, you can create a durable bond between these two materials.
Drying Time for Adhesion
We hope you’re enjoying the journey of gluing shells onto wooden surfaces, but there’s an essential element that we must address: timing. Timing is crucial in any dance, and the same goes for gluing shells to wood. In this section, we’ll delve into the importance of allowing enough time for the glue to dry completely to create a robust bond between the shell and wood.
The drying time for adhesion is the amount of time required for the glue to fully dry and create a durable bond. This is essential to ensure that your art or decor will withstand the test of time. The drying time for adhesion can vary depending on several factors such as the type of glue you’re using, the size and weight of your shell, and the humidity and temperature of your working environment. Generally, most types of glue require at least 24 hours to fully dry and create a strong bond.
It’s vital to note that hurrying the drying time can result in a weaker bond, causing your shell to come loose over time. Therefore, it’s best to exercise patience and allow sufficient time for the glue to entirely dry before handling or moving your project.
To ensure optimal results, carefully follow the instructions provided with your chosen adhesive. Furthermore, consider using clamps or other tools to secure your shell in place during the drying process. This will help ensure an even and firm bond.
Tips for a Professional Look
Gluing shells to wood can be a fun and unique way to create a beautiful piece of art or decor. However, achieving a professional-looking result requires some attention to detail and the right techniques. Here are five tips to help you create a stunning project that looks like it was made by a pro.
Choose the Right Glue:
When it comes to gluing shells to wood, not all adhesives are created equal. A clear and strong adhesive like epoxy or cyanoacrylate (super glue) is the best choice for this project. These types of glue will provide a waterproof and durable bond that won’t break down over time. Plus, they won’t yellow or discolor over time, ensuring your project looks great for years to come.
Prepare the Surfaces
Before applying any glue, make sure both surfaces are clean and free of any dirt or debris that may interfere with the bond. Sanding the wood surface lightly can also help create a better bonding surface for the glue. By preparing the surfaces beforehand, you’ll ensure that the bond is strong and long-lasting.
Arrange the Shells
Take your time to arrange the shells on the wood surface in a pleasing design before applying glue. This will help you visualize the final product and make any necessary adjustments before gluing. Designing your layout beforehand will also help prevent mistakes and ensure a professional-looking result.
Apply Glue Sparingly
When it comes to glue, less is definitely more. Apply a thin layer of adhesive to both surfaces and press them firmly together. Be careful not to apply too much glue, as excess can seep out and ruin the appearance of your project. Using a small brush or toothpick can be useful for applying the glue precisely and avoiding any unwanted mess.
Allow Time to Dry
Patience is key when it comes to achieving a professional-looking result. Allow adequate drying time for the adhesive to set completely before handling or moving the object. Rushing this step can result in a weak bond and a less professional look.
Follow the manufacturer’s instructions for drying time, which can take anywhere from a few hours to overnight depending on the type of glue used.
Troubleshooting Common Issues
One of the most frequent problems is shells not adhering well to the wood surface. This may cause them to fall off or become loose over time.
To avoid this, ensure that the surface of the wood is free of dirt, dust, or debris by thoroughly cleaning it. Sanding the surface will create a rougher texture for the glue to cling to, preventing the shells from detaching. It’s also crucial to choose a high-quality glue designed specifically for bonding shells to wood surfaces.
Another issue that can occur is discoloration or damage to shells during the gluing process. This happens when you use glue containing harsh chemicals or apply it too thickly or unevenly.
To avoid this problem, use a clear and non-toxic glue and apply a thin and even layer. This will prevent the shells from becoming distorted or weighed down during the bonding process.
Lastly, you may notice that your shells lose their vibrancy or color over time due to exposure to sunlight or moisture.
To keep your artwork looking its best, store your shells in a cool and dry place and avoid exposing them to direct sunlight or moisture for extended periods of time.
If you notice any fading or discoloration, consider reapplying a protective coating to restore their original appearance.
Creating beautiful shell and wood artwork doesn’t have to be stressful. By following our troubleshooting tips, you can easily avoid common issues and enjoy your artwork for years to come. Remember to thoroughly clean and sand the wood surface, choose a high-quality glue, apply it evenly and thinly, and store your artwork in a cool and dry place.
wcjSYV4PgoE” >
Conclusion
In summary, gluing shells to wood is a delightful way to add a touch of coastal flair to your home decor or crafting projects. However, there are several crucial factors to consider for success, such as selecting the right glue, preparing surfaces adequately, and placing the shells correctly.
When choosing an adhesive for attaching shells to wood, it’s essential to think about the materials you’ll be working with and the conditions they’ll be exposed to. Marine-grade epoxy is ideal for outdoor or damp environments, while cyanoacrylate (CA) glue may work better for smaller or more intricate pieces. Although wood glue is eco-friendly, it may not be as robust as other adhesives.
To ensure optimal adhesion, clean both the shell and wooden surface thoroughly before gluing. Apply glue sparingly and press the shells evenly into place with a flat tool like a credit card or putty knife.
For professional-looking results that will impress your guests, follow these tips: select an appropriate adhesive, prepare surfaces meticulously beforehand, arrange shells in an aesthetically pleasing design before applying glue, use minimal amounts of glue and allow sufficient drying time.
If you encounter common problems such as poor adhesion or discoloration during the gluing process, try troubleshooting by cleaning surfaces thoroughly beforehand using clear and non-toxic glue applied thinly and evenly. Additionally, store your artwork in a cool and dry place.