Are you tired of scouring the market for a countertop that complements your interiors? Granite is a popular choice for its elegance and durability, but have you considered adding a touch of tradition by mounting it on a wooden base? The combination of granite and wood can bring an unmatched character to your kitchen. But, how do you glue granite to wood?
Fear not, the process is simpler than it sounds, but it requires precision and patience. You don’t want to end up with a countertop that falls apart midway through use. In this blog post, we’ll guide you step-by-step through the process of successfully gluing granite to wood.
First things first, let’s take a look at the materials you’ll need for the task. Then we’ll dive into the preparation process for both the granite and wood surfaces. We’ll outline suitable adhesive types and provide tips on their accurate application on the wooden base.
Additionally, we’ll give you pointers on how to level the granite with the wood surface and steer clear of common mistakes during the process. By the time you reach the end of this post, you’ll have created a stunning granite and wood countertop that will leave your guests envious. So let’s get started without any further delay.
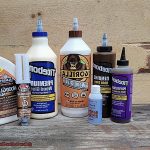
What Adhesive to Use for Gluing Granite to Wood
Contents
- 1 What Adhesive to Use for Gluing Granite to Wood
- 2 Preparing the Surfaces for Gluing
- 3 Applying the Adhesive Evenly and Thinly
- 4 Pressing the Granite onto the Wood Surface
- 5 Clamping or Weighing Down the Bonded Pieces
- 6 Removing Excess Adhesive Before It Dries
- 7 Sanding Down Any Residue After Curing
- 8 Conclusion
If so, you’ll need to know which adhesive to use to ensure a durable and long-lasting bond between the two surfaces.
One of the most reliable adhesives for this application is epoxy. This adhesive consists of two parts, a resin and a hardener, that chemically react to form a tough and resilient bond. Epoxy is known for its high strength, versatility, and ability to bond different materials together, making it an excellent choice for gluing granite to wood. Just make sure to choose an epoxy that is specifically designed for use with these two materials.
Another excellent adhesive option is polyurethane glue, which expands as it dries, filling in any gaps or voids in the bond. This type of glue also has a high level of flexibility, which can be advantageous when bonding materials with varying rates of expansion and contraction.
If you prefer a more natural adhesive option, consider using cyanoacrylate (CA) glue, also known as super glue. CA glue dries quickly and forms a strong bond between surfaces, but may not be ideal for larger projects as it can become brittle over time.
Regardless of which adhesive you choose, always follow the manufacturer’s instructions carefully and allow sufficient time for the adhesive to dry before applying any weight or stress on the bond. Proper surface preparation is also critical for achieving an effective bond. Clean both surfaces thoroughly with a degreaser or alcohol-based cleaning solution to ensure they are free from dirt or debris that could interfere with the bond.
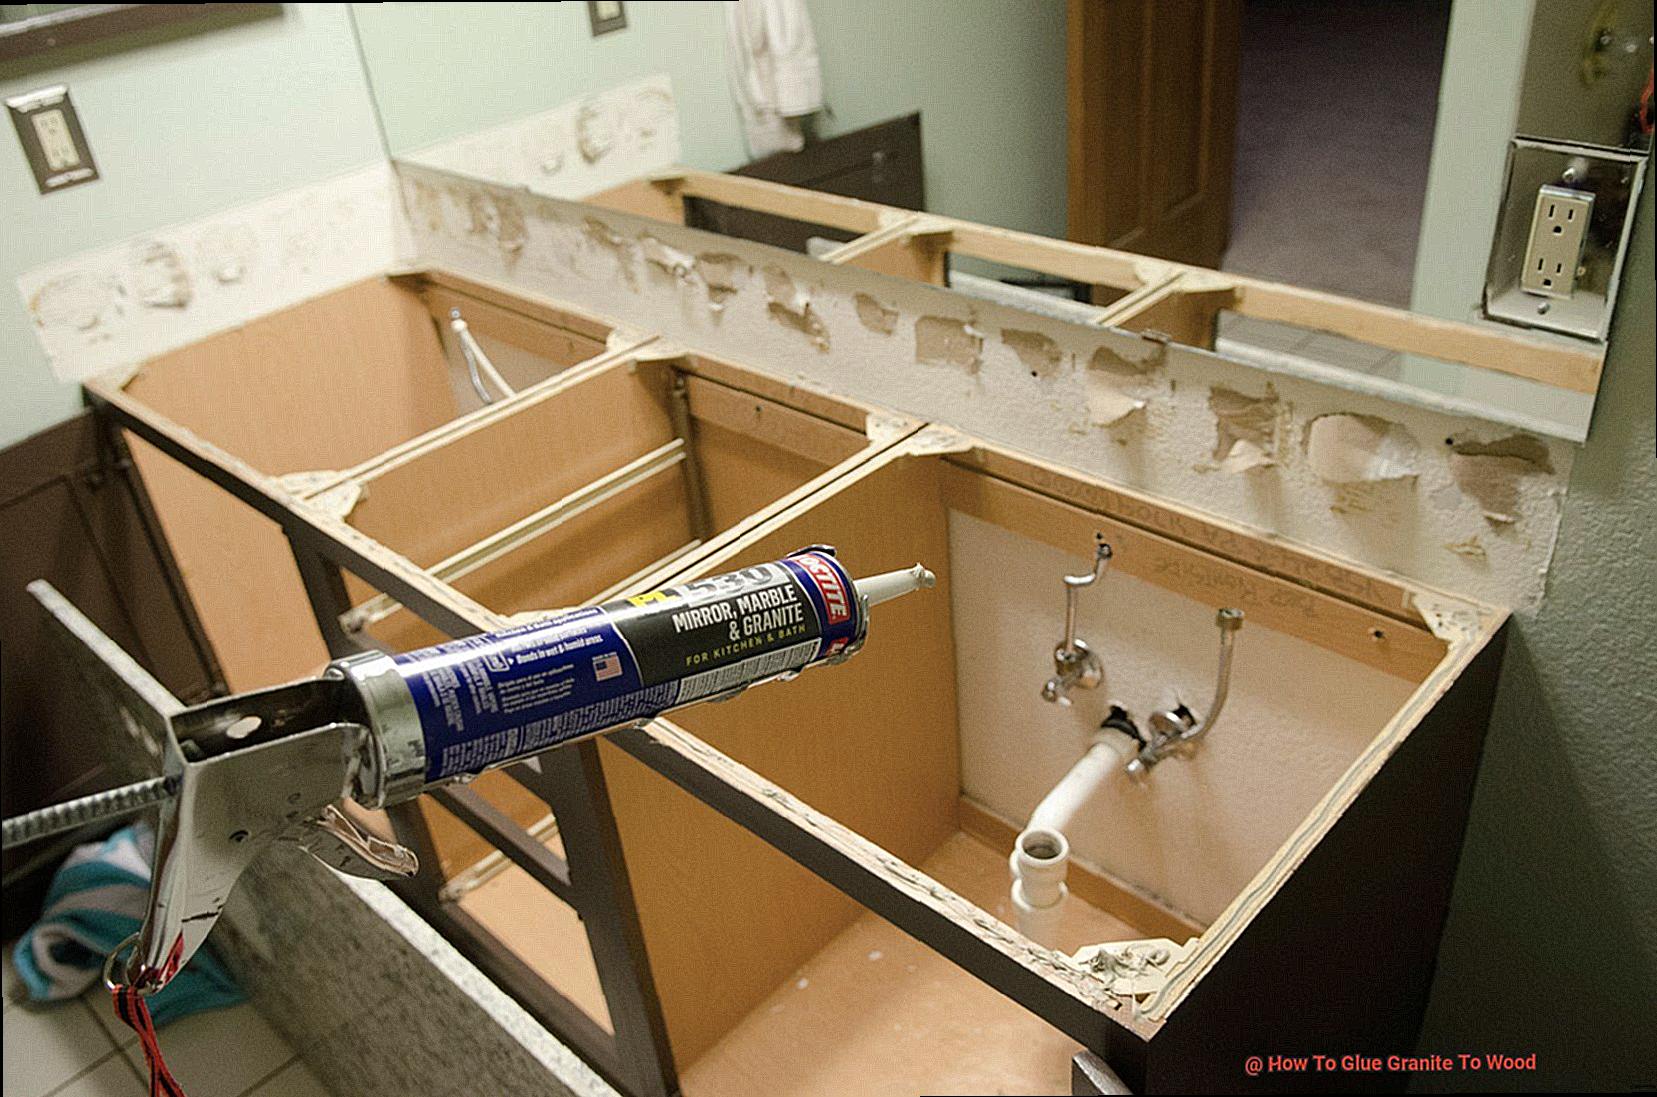
Once your surfaces are clean and dry, apply your chosen adhesive evenly and thinly across both surfaces. Use a notched trowel to spread epoxy evenly on the wood surface and brush or roller on the granite surface. Work quickly and efficiently as epoxy sets fast.
Then gently press the granite onto the wood surface, ensuring proper alignment. Use clamps or heavy objects to keep the two surfaces securely in place until the adhesive dries completely. Remember to remove any excess adhesive immediately with a scraper or putty knife before it dries. Once the adhesive has fully cured, sand down any remaining residue with fine-grit sandpaper.
Preparing the Surfaces for Gluing
To ensure a strong and long-lasting bond, it’s vital to prepare the surfaces properly. Follow these simple steps to get started:
Step 1: Clean the surfaces thoroughly
Before anything else, clean both the granite and wood surfaces thoroughly. Any dirt, dust, or debris can negatively impact the glue’s effectiveness.
Step 2: Roughen up the surfaces
To create a better bonding surface, use a fine-grit sandpaper to roughen up both the granite and wood surfaces. Remember to sand in one direction only to avoid creating scratches that may weaken the bond.
Step 3: Clean the surfaces again
After roughening up the surfaces, clean them again to remove any dust or debris left behind by the sandpaper. You can use a degreaser or denatured alcohol to remove any oils or other contaminants that may be present.
Step 4: Test-fit the granite on the wood surface
It’s important to do a test-fit before gluing to ensure that the granite fits properly on the wood surface. This will help identify any areas that may need additional support. If necessary, use shims or other materials to create a level surface for the granite.
Applying the Adhesive Evenly and Thinly
Before you begin, it’s important to know that applying the adhesive evenly and thinly is crucial for a successful bond. But don’t worry, we’ve got you covered with expert tips to ensure your project is a success.
First things first, make sure that both the granite and wood surfaces are clean and dry before applying any adhesive. Even the smallest particles of dirt or debris can compromise the bond between the two materials. Once the surfaces are clean, choose an epoxy or polyurethane adhesive for their strength and durability.
To apply the adhesive evenly and thinly, use a notched trowel or brush to spread a thin layer of adhesive onto one side. This will ensure that the adhesive is distributed evenly across the surface and create a stronger bond overall. Remember to work quickly, some adhesives have a limited working time.
When placing the granite onto the wood surface, take care to position it properly so that it is aligned correctly. Once in place, press down firmly to ensure good contact between the two materials. If excess adhesive squeezes out from the edges, wipe it away with a damp cloth before it dries.
By taking these steps, your project will be off to a great start. And remember, always follow the manufacturer’s instructions for best results. With proper preparation and application techniques, you can create a strong and durable bond between granite and wood that will last for years to come.
Pressing the Granite onto the Wood Surface
When it comes to gluing granite to wood, pressing the two materials together is a critical step for achieving a secure and long-lasting bond. But don’t just slap on some glue and hope for the best. Follow these expert tips and manufacturer’s instructions for a flawless result.
First, make sure you have everything you need. A rubber mallet is perfect for gently tapping the granite into place, so it sits flush with the wood surface. And clamps can help hold everything in position while the glue dries. Just be sure to use clamps that won’t damage the granite or leave any marks on its surface.
When you’re ready to press the granite onto the wood surface, apply even pressure across its entire surface. This will help ensure that it adheres properly and creates a strong bond.
If you notice any gaps between the granite and wood, fill them with additional glue before pressing them together.
Clamping or Weighing Down the Bonded Pieces
But before you start admiring your beautiful creation, there’s one more crucial step to take: clamping or weighing down your bonded pieces.
This step is like giving your new creation a big hug to make sure everything sticks together perfectly. It ensures that the granite and wood are held tightly together while the adhesive dries, creating a strong and durable bond that will last for years to come.
Clamping is the most effective method of ensuring a strong bond between the two materials. To do this, use clamps that cover the entire surface area of your project. Be sure to place a piece of cardboard or scrap wood between the clamp and the granite to prevent damage.
Tighten the clamps until you see a small amount of adhesive squeeze out from the seam. This will indicate that the bond is secure and that excess adhesive has been removed.
But what if you don’t have clamps? Don’t worry. You can still achieve a successful bond by weighing down the bonded pieces with heavy objects like books or bricks. Just be sure to place a layer of cardboard or cloth between the objects and the granite to prevent damage. Stack the objects on top of each other until they cover the entire surface area of the bonded pieces.
The curing time for your adhesive will depend on its specific type. Be sure to read the manufacturer’s instructions carefully to determine how long you need to wait before removing the clamps or weights. As a general rule, allow for at least 24 hours for the adhesive to fully cure before using or moving your granite and wood project.
So, clamping or weighing down your bonded pieces is an essential step in ensuring a strong bond between granite and wood. By following these simple steps, you’ll be able to admire your beautiful creation for years to come without worrying about it falling apart.
Removing Excess Adhesive Before It Dries
It’s essential to take one final step to ensure that your project looks clean and professional – removing excess adhesive before it dries.
Don’t fret, removing excess adhesive is a simple process that requires patience and attention to detail. First, wait for the adhesive to dry slightly until it becomes tacky. Once it has reached the right texture, use a putty knife or scraper to gently scrape away any excess.
Be careful not to wait too long to remove the excess adhesive since it will become harder to remove once it has fully dried. If you find that the adhesive is becoming too difficult to remove, don’t worry. You can use a solvent such as acetone or rubbing alcohol to loosen it up.
Remember, apply the solvent carefully and sparingly to avoid damaging the wood or granite. Use a clean cloth or sponge to apply the solvent, and gently wipe away any excess adhesive. Make sure to wear gloves when handling solvents since they can be harmful if they come into contact with your skin.
Once you have removed all of the excess adhesive, clean the area thoroughly with soap and water. This will help ensure that there is no residue left behind that could affect the appearance of your finished project.
In conclusion, removing excess adhesive before it dries is an essential step in gluing granite to wood. With these tips in mind, you’ll be able to achieve a professional-looking result that will impress everyone.
Sanding Down Any Residue After Curing
However, after the adhesive has cured, there may be some residue left on the surface from the excess glue. No need to worry, I’m here to guide you through the process of sanding down any residue after curing.
Before you begin, it’s important to note that waiting for the glue to fully cure is crucial to avoid damaging the bond. Once it’s cured, grab a 120-grit sandpaper and start sanding gently in circular motions. Remember to wear protective goggles and a mask to protect yourself from any harmful dust.
As you sand down the area, switch to a finer grit sandpaper, such as 220-grit, and continue until the surface is smooth and even. Be careful not to over-sand as it can damage the granite. Take breaks as needed and proceed with caution.
After sanding, make sure to clean the surface with a damp cloth to remove any remaining dust or debris. It’s worth noting that excessive sanding can damage the granite, so it’s important to take your time and be gentle.
Now that you’ve successfully removed any residue, you’re ready for any additional finishing touches such as sealing or polishing. With proper care and maintenance, your newly glued granite and wood piece will last for years to come.
PclgvfhqOsg” >
Conclusion
To sum it up, bonding granite to wood may seem like a daunting task, but with the right tools and techniques, you can achieve a stunning countertop that will elevate your kitchen’s appeal. Choosing the correct adhesive such as epoxy or polyurethane glue and preparing the surfaces by cleaning and roughening them are crucial steps in ensuring a successful bond.
When applying the adhesive, make sure to do it evenly and thinly for a strong hold. Using clamps or weights to press the two materials together is essential in achieving a secure bond. Don’t forget to remove any excess adhesive before it dries and sand down any residue after curing for a professional finish.
With proper care and maintenance, your newly glued granite and wood piece will last for years to come. So why settle for an ordinary countertop when you can add elegance by mounting granite on wood? Follow these expert tips and create a beautiful masterpiece that will leave your guests envious of your skills.
In conclusion, don’t be intimidated by gluing granite to wood. With our step-by-step guide, you’ll be able to accomplish this task with ease.