Are you a puzzle enthusiast or someone who cherishes their memories? Framing your completed puzzle is an excellent way to showcase your hard work and add a decorative touch to your home. However, gluing it together can be a daunting task for many people.
Worry not. In this blog post, we’ll guide you step-by-step on how to glue together a puzzle for framing. We’ll cover everything from prepping the surface of the puzzle to selecting the right adhesive. Plus, we’ll share some tips and tricks to ensure that your puzzle stays intact while being glued and offer alternative methods for consideration.
Puzzles are more than just a fun activity; they also help relieve stress and enhance cognitive abilities. So, why not preserve your masterpiece by framing it? Whether you’re new to framing puzzles or looking to improve your technique, we’ve got all the information you need right here.
Get ready for an exciting journey of preserving your memories with our comprehensive guide on how to glue together a puzzle for framing.
What You Need To Glue Together A Puzzle
Contents
Gluing your puzzle together for framing is the perfect solution. But, what materials are necessary to get the job done right?
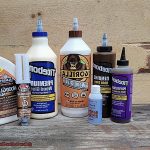
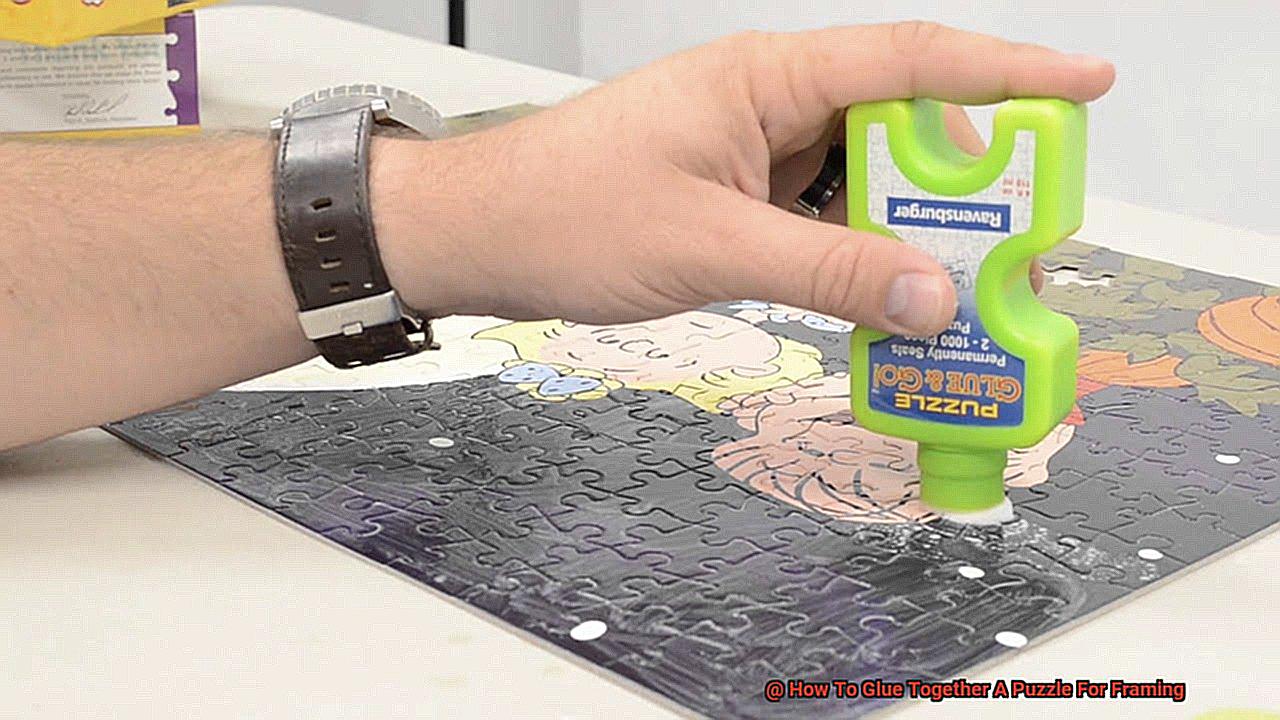
First and foremost, puzzle glue or adhesive is crucial. Puzzle glue is designed to protect the colors and textures of your puzzle while holding it together without damage. You can find puzzle glue in most craft stores, online retailers, or even in some toy stores. With puzzle glue, you can ensure that all of your hard work doesn’t go to waste.
Next, you’ll need a flat surface to work on. A table or desk will do the trick but make sure it’s large enough to accommodate your puzzle’s size. You can also use a piece of cardboard or foam board as a base for your puzzle, adding extra support.
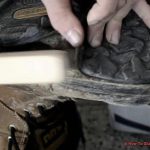
To apply the glue, you’ll need a brush or sponge. Using a brush will ensure that you spread the glue evenly and cover all parts of the puzzle. However, if you don’t have a brush, don’t worry. A sponge or even your fingers will do the job. Just make sure to cover all pieces, including the edges.
Lastly, wax paper or plastic wrap is essential to cover your puzzle while it dries. The wax paper or plastic wrap prevents any sticking while preserving the puzzle’s shape during drying. Be patient and allow plenty of time for drying to avoid warping or buckling before framing.
How To Apply The Glue
Completing a puzzle can be a rewarding experience that brings a sense of accomplishment and satisfaction. But what if you want to showcase your hard work and keep it as a beautiful work of art in your home?
In that case, applying puzzle glue is the next step. Here are five sub-sections detailing how to apply the glue correctly to ensure that your puzzle stays together and looks great in its frame.
Spread The Glue Evenly
The first step is to spread a thin layer of glue evenly over the back of your completed puzzle. To do this, you can use a foam brush or a flat brush, ensuring that the glue is distributed evenly across the entire surface. Avoid using too much glue as it could cause the puzzle to warp or become discoloured.
Give It Time To Dry
After applying the glue, allow it enough time to dry completely before moving on to the next step. The drying time can vary depending on the type of glue used and the size of your puzzle. It’s recommended to let it dry for several hours or even overnight.
Apply Glue To Both Sides
To ensure that your puzzle stays together securely, you need to apply glue to both sides. Start with the back of the puzzle, then flip it over and apply a thin layer of glue to the front side as well. This helps to seal the puzzle pieces together and prevent any from falling out.
Less Is More
Remember, less is often more when it comes to applying glue. Applying too much glue can cause warping or discoloration of your puzzle pieces. Start with a small amount and gradually add more if needed until the entire surface is covered.
Handle Gently
Once the glue has dried completely on both sides, you can transfer your puzzle onto a backing board or into a frame. However, it’s important to handle it gently and avoid applying any pressure that could cause pieces to shift or come loose. Be sure to take your time and handle it with care.
By following these tips, you can ensure that your puzzle stays together securely and looks beautiful in its frame for years to come. It’s a satisfying feeling to preserve your hard work and turn it into a stunning piece of art that you can proudly display.
Drying Time For The Glue
Now, it’s time to turn it into a stunning piece of art that you can proudly display. But, before you start framing, it’s essential to ensure that the puzzle pieces stick together seamlessly without any gaps or bumps. This is where the drying time for glue comes into play.
Waiting for the glue to dry completely is crucial when gluing a puzzle together for framing. The drying time depends on various factors, such as the type and amount of glue used, humidity, and temperature. Typically, regular white glue or puzzle glue takes around 24 hours to dry completely. However, some brands may take longer or shorter time depending on their formulation. It’s always best to read the manufacturer’s instructions carefully before applying the glue to ensure you understand the drying time.
If you’re using a faster-drying glue like a hot glue gun, be careful not to overheat the glue. Overheating can cause it to dry too quickly and create bumps or gaps in the puzzle. A good rule of thumb is to apply the glue in small sections and work quickly to avoid any mistakes during application.
Humidity and temperature can also affect drying time. High humidity levels can slow down the drying process, while hot temperatures can speed it up. Therefore, it’s best to apply puzzle glue in a well-ventilated area with moderate temperature and humidity levels.
Lastly, it’s crucial to let the glued puzzle dry flat on a stable surface. Placing weight on top of the puzzle can help ensure an even distribution of glue and prevent any warping or bending. Once the glue has dried completely, you can carefully lift the puzzle off the surface and frame it as desired.
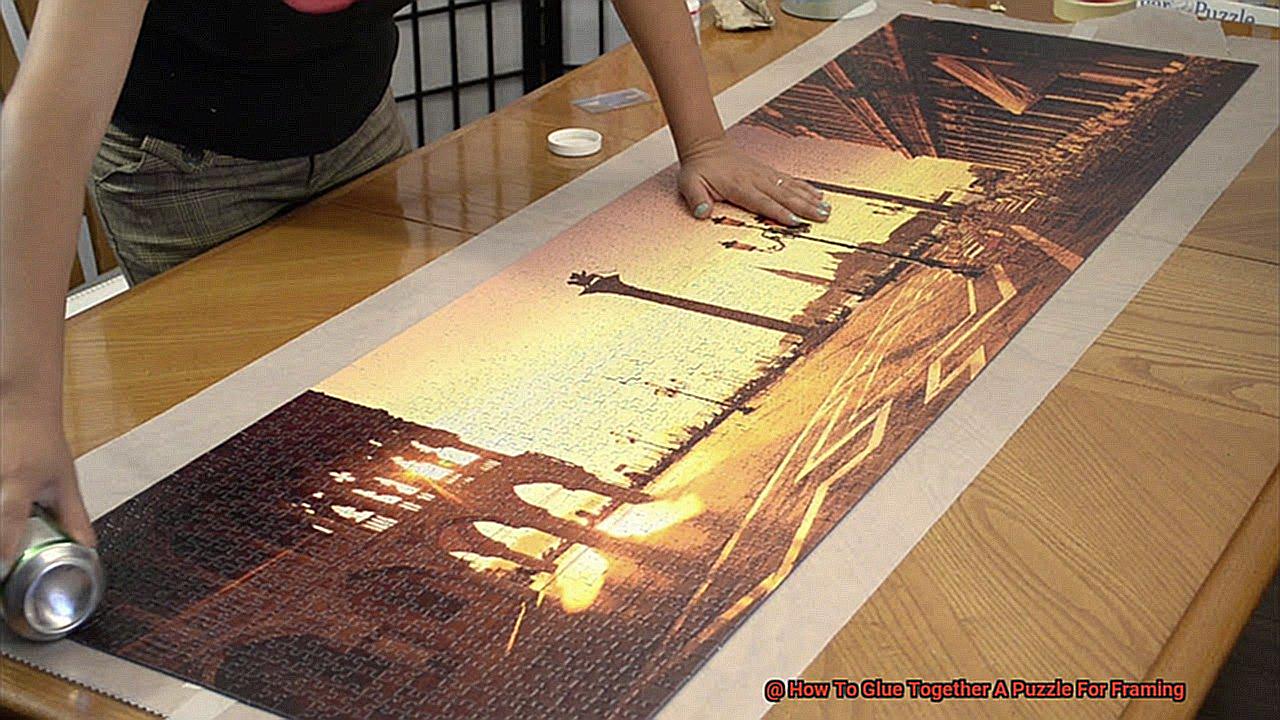
Flipping The Puzzle Over
Now that you’re ready to transform it into a stunning piece of art, flipping it over becomes an essential step to ensure its professional finish. Let’s explore how this crucial step can be executed with precision and care.
To successfully flip your puzzle over, you will need a large piece of cardboard or foam board that can cover its entire surface area. Once you have it, place it on top of the puzzle, making sure it covers all the edges. Then, hold the edges of both the puzzle and the cardboard or foam board together and carefully flip them over.
Now comes the exciting part. To secure your puzzle together, you will need to apply adhesive to the backside of the puzzle. Make sure you remove the backing from the adhesive sheet or glue before applying it evenly to every piece. Once done, use a rolling pin or a flat tool to smooth out any bumps or bubbles that may have formed to ensure that the adhesive sticks correctly.
Patience is key when gluing a puzzle together, so wait for the adhesive to dry completely before removing the cardboard or foam board. This step ensures that your puzzle remains flat and smooth on both sides, making it ready for framing.
Flipping your puzzle over is not just an easy task but an essential one that gives your finished product a professional look. With precision and attention to detail, you can turn your completed puzzle into a stunning work of art that you can proudly display for years to come.
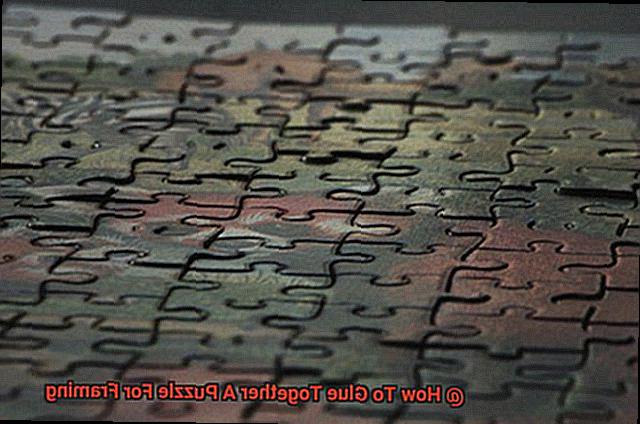
Checking For Gaps Or Bubbles
When it comes to gluing together a puzzle for framing, attention to detail is crucial. One essential step to ensure a professional-looking end result is checking for gaps or bubbles in the puzzle surface.
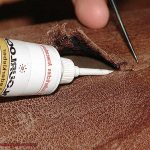
To begin, carefully inspect each puzzle piece, paying close attention to the edges. If you spot any gaps, use a toothpick or small brush to apply glue to the area and press the pieces together until they fit snugly.
Next, keep an eye out for pesky bubbles that can arise due to excess glue between the pieces. Fear not. You can quickly rectify this issue with a needle or toothpick to puncture the bubble and release the extra glue. Then, gently press down with a finger or flat tool until the area is smooth again.
Patience is key during this process. Take your time and don’t rush through it. Ensuring a smooth and even surface for your puzzle may take longer than you expect, but trust us – the end result will be worth it. Once you’ve finished checking for gaps and bubbles, let the puzzle dry completely before moving on to framing.
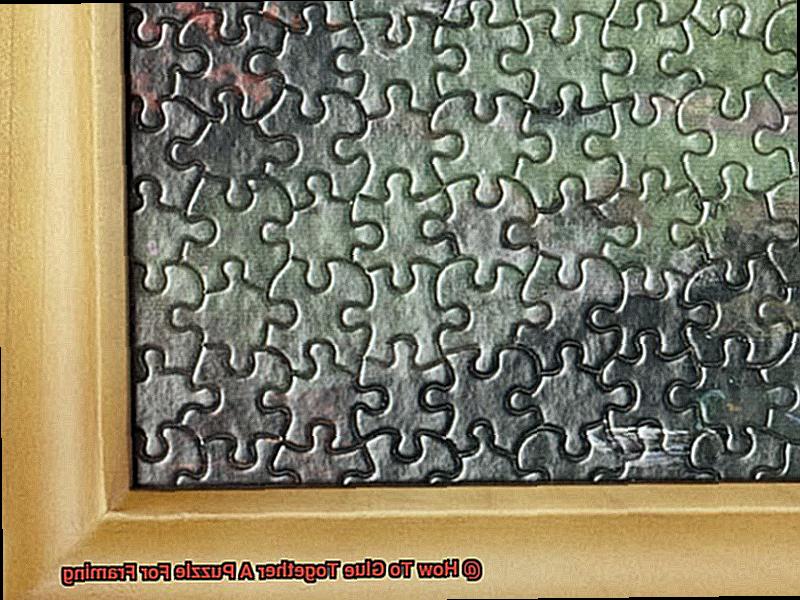
Choosing A Frame For Your Puzzle
Now that you have put in all the hard work, it’s time to select a frame that will showcase your masterpiece.
Choosing the perfect frame is all about finding one that enhances and complements the puzzle’s overall beauty, and also protects it for years to come. Here are some things to consider when selecting a frame for your puzzle:
Firstly, make sure that the frame is the right size for your completed puzzle. Measuring the dimensions of your puzzle and finding a matching frame will keep everything in place and prevent any movement or shifting of the puzzle pieces.
Next, think about the style of the frame that you want. Do you prefer a simple and sleek look or something more ornate? The frame should complement your puzzle and enhance its appearance. A simple frame can draw attention to the puzzle itself, while a more ornate frame can add elegance and sophistication.
When it comes to color, choose one that either complements or creates a nice contrast with your puzzle. Consider where you plan on hanging the framed puzzle – whether it will be in a brightly lit area or a dimly lit space – this can affect how the colors of the frame and puzzle look together.
Lastly, consider the type of glass or acrylic you want to use for the frame. If you plan on hanging your framed puzzle in an area with lots of natural light, using UV-protective glass or acrylic can help prevent fading over time.
Choosing a frame for your puzzle is an exciting way to display all your hard work and dedication. Remember to measure your puzzle, consider the style and color of the frame, and think about the type of glass or acrylic that will work best for your situation.
Securing The Puzzle In Place With Backing Board/Clips
Before you start framing, it’s crucial to ensure that your hard work stays intact. One popular method for securing the puzzle in place is by using a backing board and clips. Not only will this technique keep your puzzle flat, but it will also ensure that it stays put during the framing process.
To get started, you’ll need a piece of foam board or cardboard that’s slightly larger than your puzzle. Carefully center the puzzle on top of the backing board, making sure it’s straight. Then, apply a layer of puzzle glue or Mod Podge evenly over the front of the puzzle using a foam brush or roller.
Next, carefully flip the puzzle and backing board so that the back of the puzzle faces up. Apply glue to the back of the puzzle in the same manner as before. Once the entire backside is covered with glue, place another piece of cardboard or foam board on top. Use clips or clamps around the edges to hold the two pieces together while the glue dries.
It’s essential to remember not to clip around the middle of the puzzle. Doing so may leave unflattering imprints on the surface. Also, ensure that you let the glue dry completely before removing the clips and handling it again.
Hanging Up Your Puzzle On The Wall
After countless hours of dedication and hard work, you’ve completed your masterpiece. Now it’s time to take the final step and hang it up on the wall for all to see. But how do you hang up a puzzle without damaging it or causing it to fall apart? Fear not, as an expert on this topic, I’m here to guide you through the process.
Before we dive into the different methods, there are some important things to keep in mind. First and foremost, make sure your puzzle is completely dry and set before attempting to hang it up. This will prevent any pieces from shifting or falling off the wall. Additionally, choose a suitable location for your puzzle that is clean and free from any dust or debris that could affect adhesion.
Now onto the exciting part – the methods for hanging up your completed puzzle. The most popular option is using puzzle glue sheets. These adhesive sheets attach to the back of the puzzle and allow you to stick it to the wall without damaging it. Puzzle conserver, a liquid glue that sets hard and provides a more permanent solution, is another great option.
But what if you want to frame your puzzle instead? No problem. You can frame your puzzle like any other piece of art. Choose a frame that fits your puzzle size, complements its colors and design, and voila – a beautiful piece of home decor.
Hanging up your completed puzzle on the wall is a crucial final step in displaying your hard work as a stunning piece of art. By following these tips and choosing a suitable hanging method, you can ensure that your puzzle stays in place and looks great for years to come.
RlBvp6hy9TU” >
Conclusion
Gluing together a puzzle for framing may seem like an intimidating task, but fear not. With the right materials and techniques, it can be a satisfying and enjoyable experience. Our step-by-step guide will help you achieve a professional-looking end result that you’ll be proud to display on your walls.
When choosing an adhesive, make sure it’s suitable for puzzles and spread it evenly to avoid any lumps or bumps. Patience is key here – allow ample time for the glue to dry completely before handling the puzzle. Checking for gaps or bubbles and flipping the puzzle over are also essential steps in ensuring a flawless finish.
Selecting the perfect frame is crucial in enhancing your puzzle’s beauty while protecting it from damage. Consider factors such as color, material, and style to find one that complements your puzzle’s overall aesthetic.
Once your masterpiece is complete, don’t forget about hanging it up. Choosing a suitable hanging method will ensure that your puzzle stays securely in place and looks great for years to come. Displaying your hard work as a stunning piece of art is not only rewarding but also therapeutic – preserving memories through puzzles has never been more fun.
In conclusion, gluing together a puzzle for framing may require some effort, but with our comprehensive guide at hand, you’ll be able to turn your completed puzzle into an eye-catching work of art that you can proudly display. So why wait?