Are you looking for a durable and versatile material to use in your next project? Consider plexiglass. This lightweight alternative to glass can be shaped and cut into various sizes and shapes, making it a popular choice for many applications. However, if you need to glue two pieces of plexiglass together, it’s important to choose the right adhesive.
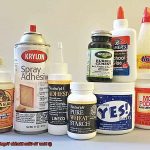
Choosing the wrong adhesive can lead to damage or even melting of the plexiglass, which is why it’s crucial to select an appropriate adhesive such as cyanoacrylate glue, epoxy or silicone adhesive. But don’t worry – with the proper knowledge and techniques, gluing plexiglass together can be a breeze.
To ensure a successful bond between your two pieces of plexiglass, it’s important to start by cleaning and drying the surfaces thoroughly. Once you’ve selected your adhesive and prepared your surfaces, clamping the two pieces together while the adhesive sets is typically recommended.
Whether you’re working on a DIY project or a professional installation, this guide will provide you with all the information you need to successfully glue plexiglass together. With our tips and tricks, you’ll be able to achieve a strong bond quickly and easily. So let’s get started.
Benefits of Glueing Plexiglass Together
Contents
Plexiglass is a material that has been steadily gaining popularity across industries for its durability and versatility. But did you know that by gluing plexiglass together, you can enhance its functionality and make it even more useful? In this article, we’ll explore the benefits of gluing plexiglass together.
One of the most significant advantages of gluing plexiglass together is the strength and durability it offers. When plexiglass is glued together, it creates a bond that can withstand pressure and impact. The adhesive creates a seamless joint that holds the pieces firmly in place, making the item more durable overall. With this process, you can rest assured that your plexiglass item will last longer and withstand wear and tear.
Another benefit of gluing plexiglass together is its aesthetic appeal. The joints are invisible, providing a sleek and professional appearance to the item. The seamless look enhances the beauty of the item and gives it a polished finish that is sure to impress. Whether you’re creating displays, signs, or aquariums, gluing plexiglass together elevates the overall look and enhances the visual appeal.
Gluing plexiglass together also allows for customization of shapes and sizes that may not be possible with just one piece of plexiglass. It provides flexibility in design and allows for creative ideas to come to life. This feature makes it an ideal material for creating unique and intricate designs. With this process, you can create items with intricate details or custom shapes that make them stand out.
The water-resistant property of plexiglass combined with glue makes it an excellent choice for creating aquariums or water tanks. The added water resistance ensures that the item remains functional and safe to use while maintaining its durability. Gluing plexiglass together provides an additional layer of protection against water damage, making it a reliable option for aquatic applications.
Lastly, gluing plexiglass together is a cost-effective method of creating items compared to using a single large piece of plexiglass. It reduces wastage and saves money on materials without sacrificing the quality of the final product. This feature makes it an excellent option for businesses or individuals who want to create items while staying within their budget.
In conclusion, gluing plexiglass together offers many benefits that make it an ideal material for various applications. It provides strength and durability while enhancing the aesthetics of the item.
Choosing the Right Adhesive for the Job
When it comes to working with Plexiglass, choosing the right adhesive is a crucial step that cannot be overlooked. You want to make sure that you select an adhesive that works well with this material, as the wrong one can result in a weak bond, discoloration, or even damage to the material.
Fortunately, there are several types of adhesives available on the market that work great with Plexiglass. One of the best options is solvent-based adhesives. These adhesives work by chemically melting the surface of Plexiglass, creating a strong molecular bond. The best part? They’re incredibly easy to use and provide a strong bond that can withstand stress and strain.
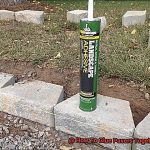
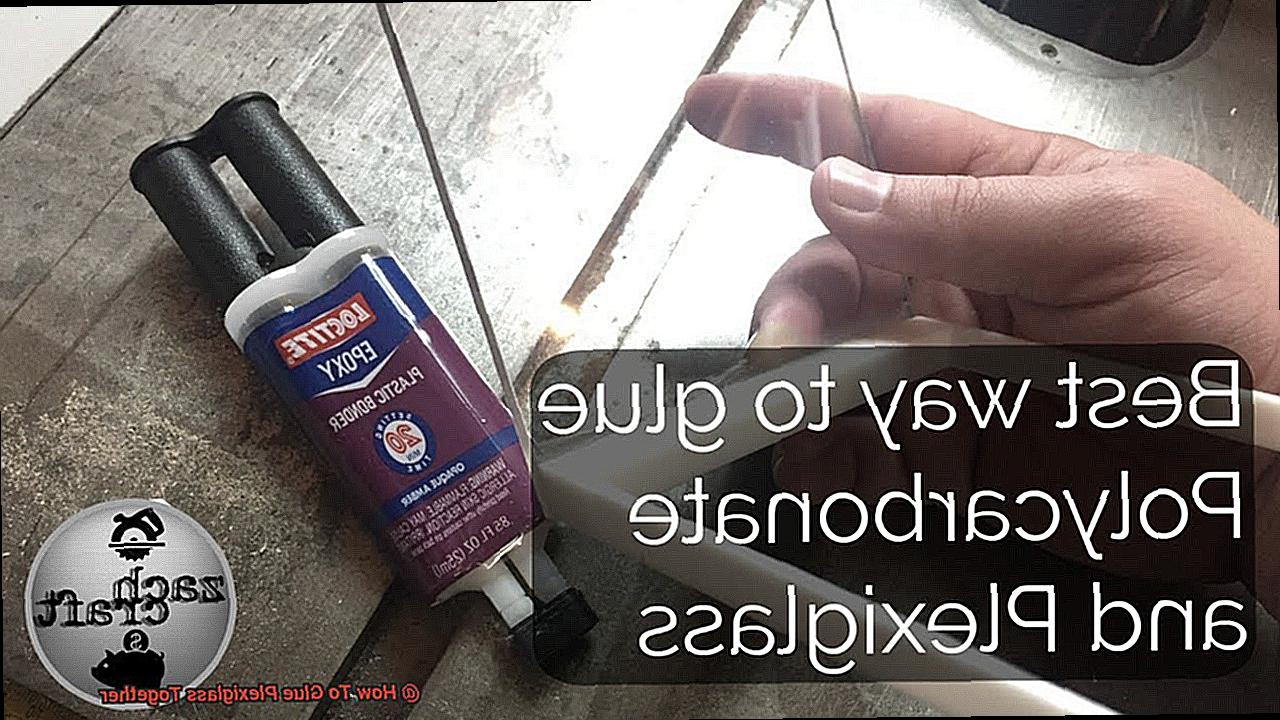
Another excellent adhesive for bonding Plexiglass is epoxy. This two-part adhesive consists of a resin and a hardener that, when mixed together, create a strong and durable bond. Epoxy is particularly effective for bonding large pieces of Plexiglass together, such as aquariums or display cases, as it can withstand extreme temperatures and pressure.
Finally, we have cyanoacrylate (CA) glue, also known as superglue. While CA glue can be used to bond Plexiglass, it’s not recommended for large pieces or areas where there will be stress or strain. Over time, this type of adhesive can become brittle and may not hold up well under pressure.
It’s important to note that not all adhesives are suitable for all types of Plexiglass. Some adhesives may even cause discoloration or damage to certain types of Plexiglass, such as UV-resistant or anti-glare Plexiglass. That’s why it’s vital to read the manufacturer’s instructions carefully before selecting an adhesive.
To summarize, choosing the right adhesive for your Plexiglass project is essential for creating a strong and durable bond. Solvent-based adhesives, epoxy, and CA glue are all suitable options depending on the size and application of the project. Just remember to consider the type of Plexiglass you’re using and read the manufacturer’s instructions carefully before selecting an adhesive.
Cyanoacrylate (Super Glue)
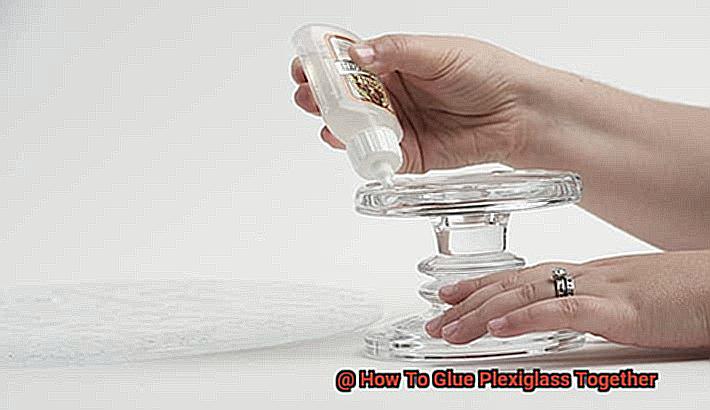
Today, let’s talk about cyanoacrylate, also known as super glue. This adhesive is a popular choice for bonding plexiglass due to its fast drying time. But before we dive into the advantages and disadvantages of cyanoacrylate adhesive, let’s make sure we’re applying it correctly.
First things first, make sure the surfaces being bonded are clean and free of any debris or oils. Rubbing alcohol or a similar solvent can do the trick. Then, apply a small amount of glue onto one of the surfaces being bonded. Remember, less is more. Excess adhesive can cause the joint to become brittle and crack over time. Once the glue has been applied, press the two surfaces firmly together and hold them in place for several minutes to allow the adhesive to dry.
Now that we know how to properly apply cyanoacrylate adhesive, let’s talk about its advantages and disadvantages for bonding plexiglass. One advantage is its fast drying time, which is perfect for those who need a quick fix or don’t have a lot of time to spare. However, it’s important to note that not all types of plexiglass may be suitable for this type of adhesive. We recommend testing a small area before bonding larger pieces together.
Another advantage of cyanoacrylate adhesive is that it creates a strong and durable bond between two surfaces. But remember, use it sparingly. Excess adhesive can cause the joint to become brittle and crack over time.
On the other hand, cyanoacrylate adhesive may not be suitable for applications where the bond will be exposed to high levels of stress or vibration. In these cases, a more robust adhesive such as epoxy may be a better option.
Cyanoacrylate adhesive can be an effective option for bonding plexiglass if used properly. Its fast drying time and strong bond make it a great choice for those who need a quick fix. But as with any adhesive, read the manufacturer’s instructions carefully and consider the type of plexiglass you’re using to avoid any discoloration or damage.
Epoxy
Epoxy is a two-part adhesive made up of resin and hardener that creates an unbreakable union.
Just like any good relationship, it starts with cleanliness. Clean the surfaces you want to bond with mild soap and water, then dry them with a clean cloth. Now it’s time to mix the epoxy. Think of it as chemistry class – follow the instructions carefully and mix the resin and hardener in the right proportions.
Once your epoxy is mixed, it’s time to apply it to one of the surfaces using a brush or applicator. Then, press the two surfaces together firmly. You can use clamps or weights to hold everything in place while the epoxy cures.
But be patient – like any great love story, curing takes time. The curing time can vary depending on the type of adhesive you’re using, so make sure to read and follow the instructions on the package. Once everything is set, your bonded plexiglass will be strong enough to withstand anything.
Solvent-Based Adhesives
These adhesives work by dissolving the surface of the plexiglass, allowing it to fuse together with another piece of plexiglass. It’s like a chemical love story, where two pieces of plexiglass are brought together in a strong and unbreakable bond.
Methyl methacrylate (MMA) adhesive is the most commonly used solvent-based adhesive for bonding plexiglass. This two-part adhesive requires careful mixing and application, but can create a strong bond in just a few minutes. Think of it like a romantic relationship – it takes effort and commitment, but the end result is worth it. With MMA adhesive, you can trust that your plexiglass project will stay together for years to come.
It’s important to note that MMA adhesive can be toxic and should be used in a well-ventilated area with proper safety equipment. Safety always comes first, just like in any good relationship. Proper handling and preparation are key to ensuring a safe and successful bond.
Another solvent-based adhesive option for bonding plexiglass is cyanoacrylate (CA) adhesive, also known as super glue. This adhesive creates a strong bond through a chemical reaction when it comes into contact with moisture. However, it may not be suitable for larger or structural projects as it can become brittle over time. So, if you’re looking to create a smaller bond, CA adhesive may be the perfect match for your project.
To ensure a successful bond with solvent-based adhesives, prepare the surfaces being bonded by thoroughly cleaning and drying them. It’s also recommended to clamp or hold the pieces together while the adhesive cures to ensure maximum strength.
And remember, not all types of plexiglass may be suitable for solvent-based adhesives, so check with the manufacturer or test on a small area before applying to larger projects.
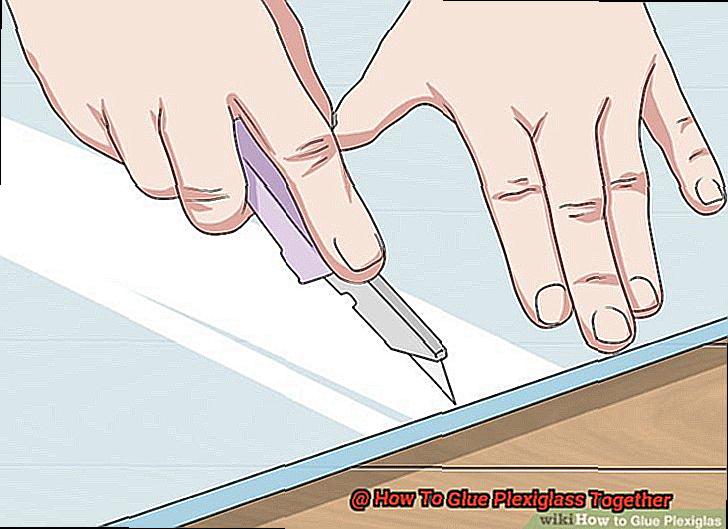
Preparing the Surface of the Plexiglass
Before you dive in, let’s talk about the crucial step of preparing the surface. Just like getting ready for a first date, you want to ensure that your plexiglass is clean, smooth, and ready to bond with its partner. In this article, we’ll take you through the process of properly preparing the surface of plexiglass before gluing.
First, cleanliness is paramount. The surface needs to be free of any dirt, grease, or oil that may prevent the glue from adhering correctly. To achieve this, you should use a cleaning solution specifically designed for plexiglass. Avoid using household cleaners that can damage the material. Take a soft cloth or sponge and gently wipe down the surface with the cleaning solution. Remember to use a gentle touch and avoid abrasive materials that can scratch the surface.
Once your plexiglass is clean, rinse it thoroughly with water and dry it with a clean, dry cloth. Now that it’s sparkling clean, it’s time to create some texture. This step is like getting a fresh haircut before a date – it’s all about creating a good impression. Use fine-grit sandpaper and sand in a circular motion until the surface is slightly roughened. Be careful not to oversand as this can damage the material.
After creating some texture on your plexiglass, it’s time to get rid of any remaining oils or residue before applying the glue. Think of this step like putting on deodorant before going out on a date – it’s an essential part of preparation. Use a solvent such as acetone to further clean the surface. Apply the solvent with a clean cloth and allow it to dry completely before proceeding with the gluing process.
By properly preparing the surface of your plexiglass, you can ensure that your glue will adhere correctly and create a strong bond between the pieces. Just like a successful first date, proper preparation is key to building a lasting relationship.
fa2h-xSespI” >
Conclusion
In conclusion, gluing plexiglass together can do wonders for your DIY projects or professional installations. It can increase durability and aesthetic appeal, but only if you choose the right adhesive for the job. You don’t want to end up damaging or discoloring your material.
There are several suitable options available depending on the size and application of your project. Solvent-based adhesives, epoxy, and cyanoacrylate glue are all popular choices. But before you start gluing, make sure to properly prepare the surface of your plexiglass.
Cleaning and drying the surfaces thoroughly is a must. Creating texture with fine-grit sandpaper and removing any remaining oils or residue with a solvent is also essential for ensuring a successful bond between the two pieces.
By following these tips and techniques, you’ll be able to easily glue plexiglass together and create unique and durable items like displays, signs, aquariums, or other intricate designs. Take your time in choosing the right adhesive for your project and properly preparing your surfaces.