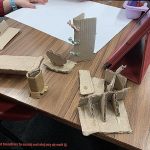
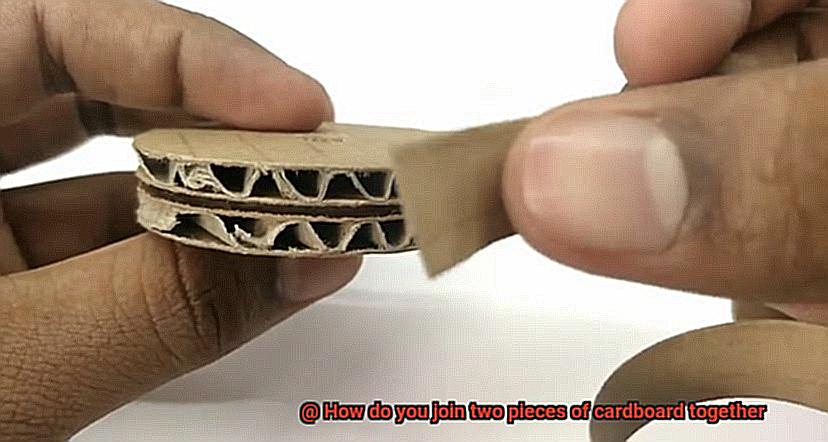
Picture this: you’re knee-deep in a DIY extravaganza, pouring your heart and soul into a magnificent creation, when suddenly, you hit a roadblock – how in the world do you seamlessly join two pieces of cardboard together? Take a deep breath, my fellow craft connoisseurs.
Whether you’re a rookie or an old hand at the art of crafting, unlocking the mysteries of cardboard bonding can elevate your projects to new heights.
In this blog post, we’ll embark on an exhilarating journey into the captivating realm of cardboard craftsmanship. Brace yourself for an array of techniques that will effortlessly unite those two stubborn pieces of cardboard. From tried-and-true adhesives to cutting-edge alternatives, get ready to uncover the secrets behind bonding cardboard in ways that are as enthralling as they are practical.
So grab your glue guns and buckle up – it’s time to dive headfirst into the mesmerizing world of joining cardboard together. Let’s get this creative party started.
What Materials Are Needed to Join Cardboard?
Contents
- 1 What Materials Are Needed to Join Cardboard?
- 2 Adhesive Options for Joining Cardboard
- 3 White Glue: An Overview
- 4 Hot Glue: An Overview
- 5 Craft Glue: An Overview
- 6 Double-Sided Tape or Adhesive Strips: An Overview
- 7 Staples or Brads: An Overview
- 8 Considerations When Joining Cardboard Together
- 9 Conclusion
Cardboard, the jack-of-all-trades material, is indispensable for a wide range of projects. However, mastering the art of joining cardboard pieces together requires the right materials. In this comprehensive guide, we will delve into the essential materials needed to achieve strong and durable joins in your cardboard creations.
Glue:
- White glue: Harness the power of PVA glue, also known as white glue, for its impressive bonding strength and transparent drying properties.
- Craft glue: When heavier cardboard applications demand a stronger bond, craft glue rises to the occasion.
- Hot glue: For quick fixes or temporary joins, hot glue provides instant adhesion and effortless application with a trusty hot glue gun.
Tape:
- Masking tape: Lightweight and easily torn by hand, masking tape is perfect for temporary joins or lighter projects that require flexibility.
- Duct tape: Renowned for its unrivaled strength and durability, duct tape guarantees long-lasting bonds that can withstand rough handling with ease.
- Packing tape: Engineered specifically for shipping purposes, packing tape ensures a secure seal and excels in heavy-duty applications.
Adhesive Sprays:
Double-sided Tape:
Staples:
Rivets:
Adhesive Options for Joining Cardboard
When it comes to joining two pieces of cardboard together, there are several adhesive options available. The choice of adhesive largely depends on the specific requirements of the project, such as the desired strength, durability, and flexibility of the bond. Let’s explore some common adhesive options for joining cardboard:
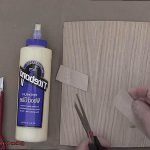
- PVA Glue: Polyvinyl acetate (PVA) glue, also known as white glue or school glue, is a popular adhesive option for joining cardboard. Not only is it readily available and easy to use, but it also provides a strong bond. PVA glue is water-based, meaning it is non-toxic and dries clear. This makes it ideal for bonding different types of cardboard. However, keep in mind that PVA glue may not be the best choice for projects that require high moisture resistance or long-term durability.
- Hot Glue: Hot glue, also known as hot melt adhesive, is another commonly used adhesive for joining cardboard. Applied using a hot glue gun, this adhesive melts the glue stick and allows for quick bonding. The result is a strong bond with good adhesion on cardboard surfaces. Hot glue is suitable for a wide range of applications and can be used for both temporary and permanent bonding. However, be cautious when using hot glue for projects that require flexibility or resistance to high temperatures.
- Double-Sided Tape: For a convenient option that eliminates the need for wet adhesives and drying time, consider double-sided tape for joining cardboard. With a thin layer of adhesive on both sides of a tape strip, all you have to do is peel off the backing and stick the two pieces of cardboard together. Double-sided tape provides a quick and easy bond. However, its strength may vary depending on the brand and type of tape used. To ensure a secure and durable bond, choose a tape specifically designed for bonding cardboard.
- Epoxy: If you’re looking for a strong and durable option, epoxy adhesive is the way to go. Composed of two components, a resin and a hardener, epoxy requires careful handling and proper mixing before application. Nevertheless, it provides excellent adhesion on various surfaces, including cardboard. The resulting bond is resistant to moisture, heat, and chemicals. To achieve a successful bond with epoxy, it’s crucial to follow the manufacturer’s instructions and allow sufficient curing time for it to set.
- Spray Adhesive: For joining large or irregularly shaped pieces of cardboard, consider spray adhesive. Applied using an aerosol can, this adhesive allows for even distribution over the surface of the cardboard. Spray adhesive creates a strong bond and provides good coverage. However, due to its volatile nature, it may require proper ventilation and precautionary measures. Ensure you use spray adhesive in a well-ventilated area and follow safety guidelines.
White Glue: An Overview
When it comes to joining two pieces of cardboard together, white glue, also known as school glue or PVA glue (polyvinyl acetate), is a popular choice. This versatile adhesive offers numerous advantages, but it’s important to keep in mind its limitations.
White glue is like a superhero for your crafting and DIY projects, ready to save the day with its incredible versatility. It can be used on a wide range of materials, including paper, cardboard, fabric, wood, and even some plastics. Whether you’re creating a masterpiece out of cardboard or repairing a torn book page, white glue is the go-to option.
Not only is white glue versatile, but it’s also easy to use. Its water-based formula means that cleaning up is a breeze. No need to worry about sticky messes or toxic fumes. Just grab some water and wipe away any excess glue. It’s safe for children and adults alike, so you can let your creativity flow without any worries.
The liquid consistency of white glue allows for smooth and effortless application. No need to struggle with clumpy or uneven coverage. Just squeeze or brush on the glue, and watch as it spreads evenly across the surface of your cardboard masterpiece. It’s like magic in a bottle.
But the magic doesn’t stop there. White glue has another trick up its sleeve – it dries clear. That means no unsightly glue marks ruining the aesthetics of your project. Whether you’re creating a stunning piece of cardboard art or putting together a delicate paper model, white glue ensures that your work looks clean and professional.
However, it’s important to consider the limitations of white glue when using it for cardboard projects. While it forms a strong bond when dry, the bond may not be as strong as some other types of adhesives like epoxy or hot glue. If you require an extra-strong bond or need to join heavy-duty cardboard pieces together, you may want to consider using a different type of adhesive.
Additionally, the drying time of white glue can vary depending on the brand and type used. It typically takes around 30 minutes to an hour for the adhesive to dry completely. Thicker layers or humid environments may prolong the drying time. Patience is key when working with white glue. To ensure a strong bond, it is advisable to allow the glued cardboard to dry overnight before subjecting it to any stress or pressure.
Hot Glue: An Overview
When it comes to joining two pieces of cardboard together, hot glue emerges as the adhesive superhero that can save the day. This versatile thermoplastic adhesive is melted at high temperatures and then skillfully applied to the surfaces that need to be bonded. Once it cools and solidifies, it creates a bond of Herculean strength that can withstand a variety of applications.
One of the biggest advantages of using hot glue for cardboard projects is its lightning-fast drying time. Unlike other adhesives that require hours or even days to fully cure, hot glue sets within minutes. This makes it an ideal choice for those urgent projects that demand immediate bonding and quick results. Whether you’re working on a school project, a DIY craft, or even a professional application, hot glue can get the job done efficiently.
In addition to its rapid drying time, hot glue showcases remarkable versatility. It is compatible with a wide range of materials, including cardboard, wood, fabric, and plastic. This flexibility makes it a favorite among crafters, DIY enthusiasts, and professionals alike. Regardless of the materials you’re working with, you can trust hot glue to provide a steadfast bond.
To join two pieces of cardboard together using hot glue, there are a few simple steps to follow. First and foremost, ensure that the surfaces you want to bond are pristine and free from any dust or debris. This meticulous attention to cleanliness will help the glue adhere effortlessly and create an unyielding bond. Next, heat up your trusty hot glue gun until it reaches the desired temperature. Most hot glue guns feature an indicator light that illuminates when the glue is primed for use.
Once your glue gun is heated to perfection, apply a precise amount of hot glue onto one of the cardboard surfaces. Take heed not to apply an excessive amount as surplus glue may seep out and tarnish the aesthetics of your masterpiece. Press the second piece of cardboard firmly onto the glued surface, ensuring impeccable alignment. Hold the pieces together for a few seconds to allow the glue to cool and solidify. It’s important to note that hot glue bonds with lightning speed, so you may need to work swiftly and diligently to guarantee proper alignment before the glue sets.
While hot glue is a formidable adhesive option, it’s paramount to exercise caution when using it. The adhesive can reach scorching temperatures that can cause painful burns if mishandled. It is imperative to use protective gloves or tools to avoid direct contact with the hot glue. Additionally, be mindful of any potential hazards such as cords or other flammable materials while working with hot glue.
Craft Glue: An Overview
Craft glue is like a secret weapon in the crafting world, ready to unleash its adhesive superpowers. It’s versatile, easy to use, and can join two pieces of cardboard together like a boss. Whether you’re working on a school project, creating a homemade gift, or simply unleashing your creative side, craft glue is your go-to adhesive.
Craft glue provides a strong bond between different surfaces, including cardboard. Trust that your glued pieces will stay together, even under some serious crafting pressure. But that’s not all. Craft glue dries clear, leaving no visible marks or residue on your beautiful cardboard creations. It creates smooth, seamless bonding that lets your creativity shine through.
Using craft glue effectively starts with prepping your surfaces. Clean your cardboard pieces to remove any dust or debris. A quick wipe with a clean cloth or gentle wash with mild detergent should do the trick. Once your surfaces are squeaky clean and dry, it’s time to get gluing.
Apply a thin layer of craft glue evenly onto one of the cardboard pieces. Remember, less is more; a little goes a long way. Press the second piece of cardboard firmly onto the glued surface, aligning everything perfectly for a seamless fit.
Patience is key as you enter the waiting game. Craft glue usually dries quickly, but giving it some time to set and bond properly ensures your glued pieces stay put when moving or manipulating them. Drying time can vary by brand and type of craft glue, so refer to the manufacturer’s instructions for guidance.
But craft glue isn’t just for joining two pieces of cardboard together. It can also be used to attach decorations like beads or sequins onto cardboard surfaces, adding pizzazz to your projects. Lightweight embellishments like ribbons or fabric? Craft glue has got you covered.
Remember, when using craft glue effectively, start small and add more as needed. Trust me, you don’t want a messy application ruining your masterpiece.
Double-Sided Tape or Adhesive Strips: An Overview
When it comes to joining two pieces of cardboard together, you may find yourself faced with the dilemma of choosing between double-sided tape and adhesive strips. Not to worry, I’ve got you covered. Let’s dive into the world of these adhesive options and explore their pros and cons.
One of the greatest advantages of using double-sided tape or adhesive strips is their sheer convenience. Unlike traditional glue, which requires tedious drying time, these adhesives instantly create a strong bond. No more waiting around for your project to dry before moving forward. With double-sided tape or adhesive strips, you can seamlessly transition from one step to the next with confidence.
Another perk of these adhesives is the wide range of options available. They come in various widths and strengths, ensuring that there’s a perfect tape or strip for every project. Whether you’re working on a delicate craft project or packaging something up for shipping, the flexibility of these adhesives allows you to choose the one that best suits your needs.
In addition to their convenience and versatility, double-sided tape and adhesive strips offer a neat and clean finish. Most of them are transparent or colorless, which means no unsightly glue marks ruining the appearance of your project. The result is a professional-looking final product that’s sure to impress.
However, it’s important to note that double-sided tape and adhesive strips may not be suitable for heavyweight or load-bearing applications. While they offer a strong bond, their strength can vary depending on the specific product. If you’re working with heavier materials or need a more heavy-duty bond, it’s recommended to opt for traditional glue or specialized adhesives designed specifically for such tasks.
Using double-sided tape or adhesive strips to join cardboard is relatively straightforward. Start by ensuring that both surfaces are clean and free from dust or grease. Apply the tape or strip onto one surface, peel off the protective backing, and firmly press the other piece of cardboard onto it. To ensure proper adhesion, evenly distribute pressure across the entire surface.
Staples or Brads: An Overview
When it comes to joining two pieces of cardboard together, staples and brads are two popular contenders. But which one should you choose? Let’s delve into the nitty-gritty details of these fasteners and explore how to select the perfect size for your project.
Staples, those tiny metal powerhouses, are driven into the cardboard using a trusty stapler. With two prongs that pierce the material, they then gracefully bend inward, securing the pieces together. Staples work wonders for attaching thin sheets of cardboard or when you need a temporary fix, as they can be easily removed if necessary.
Now, let’s talk about brads. These pint-sized nails boast a flat, wide head that grips the cardboard firmly in place. Inserted using either a hammer or a brad gun, brads hold their own when it comes to thicker or weightier cardboard pieces. Their strength knows no bounds.
Of course, selecting the right size of staples or brads is crucial. You wouldn’t want flimsy joints or damage to your precious material, would you? Take into account the thickness of the cardboard and choose accordingly. And don’t forget to evenly space them along the edges for optimal holding power.
Feeling overwhelmed? Fear not. Staples and brads can be found in various sizes and quantities at office supply stores or hardware havens. In fact, there are even specialized staplers and brad guns designed specifically for cardboard, ensuring top-notch performance and ease of use.
Considerations When Joining Cardboard Together
Joining cardboard together may seem like a simple task, but there are several important considerations to keep in mind. Whether you’re using glue, tape, staples, or brads, the way you join cardboard can determine the strength and durability of your construction. Let’s dive into the world of cardboard bonding and explore the factors you should consider.
- Type of Cardboard: Different types of cardboard, such as corrugated cardboard, chipboard, and paperboard, have unique characteristics that may require different joining methods. Consider the type of cardboard you’re working with before deciding on the joining technique.
- Selecting the Right Glue: Not all glues are created equal when it comes to bonding cardboard. Look for glues specifically designed for cardboard, such as white glue, craft glue, or hot glue. These have good adhesion properties and are easy to work with.
- Surface Preparation: Before applying any adhesive, make sure to clean the surfaces that will be joined. Dust and debris can hinder adhesion and weaken the bond. A clean surface ensures better bonding and a stronger hold.
- Applying the Glue: Less is often more when it comes to applying glue on cardboard. A thin layer of glue evenly spread on both surfaces will ensure a clean bond without excess mess. Avoid using too much glue, as it can take longer to dry and result in a sloppy finish.
- Applying Pressure: Firmly press the two pieces of cardboard together after applying the glue. Applying pressure helps distribute the adhesive evenly and creates a stronger bond. Use clamps or heavy objects to hold the pieces together while the glue dries.
- Drying Time: The drying time for glue varies depending on the type you’re using. Follow the manufacturer’s instructions for the recommended drying time and avoid disturbing or moving the joined pieces until the glue has fully cured.
- Alternative Joining Methods: While glue is popular, other methods like tape, staples, or brads can also be used. Tape provides a quick and easy solution, but may not offer as strong of a bond as glue. Staples or brads are versatile options, with staples being nimble and brads being sturdier for heavier cardboard.
- Additional Support: For larger pieces of cardboard or projects subjected to heavy weight or stress, consider reinforcing the joints with additional strips of cardboard. This will help strengthen the bond and ensure durability.
1SZnl4dZbV4″ >
Conclusion
Joining two pieces of cardboard together may seem like a simple task, but it requires careful consideration and the right techniques to ensure a strong bond. There are several methods you can use, depending on your specific needs and the materials at hand.
One common way to join cardboard is by using adhesive. You can opt for glue sticks or liquid glue, both of which work well for bonding cardboard surfaces. Apply the adhesive evenly on one piece of cardboard, then press the second piece firmly against it. Make sure to align the edges properly for a neat finish.
Another effective method is using tape. Duct tape or masking tape can provide a secure hold between two pieces of cardboard. Simply apply the tape along the seam where the two pieces meet, ensuring it adheres tightly to both surfaces.
For a more durable joint, consider using staples or brads. These small metal fasteners can be inserted through the thickness of the cardboard, securing it firmly together. Use a stapler or brad gun to insert them evenly along the seam, making sure they are driven in completely.
If you require added strength and stability, reinforcing your joint with additional support is recommended. You can achieve this by creating corner braces from extra pieces of cardboard or using wooden dowels inserted into pre-drilled holes in both pieces.
In conclusion, joining two pieces of cardboard together requires careful consideration and appropriate techniques. Adhesive, tape, staples, brads, and additional reinforcement methods are all viable options depending on your specific needs.