Ever pondered the enchanting union of wood and rubber? Found yourself stumped when faced with the challenge of seamlessly joining these two materials? Fret not, for we’re about to embark on an eye-opening journey into the world of wood-to-rubber bonding.
Imagine this scenario: you’ve got a stunning handcrafted wooden chair, but its legs need robust rubber feet to ensure stability and safeguard your floors. Or perhaps you’re a craft aficionado yearning to create a hybrid masterpiece that combines the versatility of wood with the pliability of rubber. Whatever your motivation, understanding the key factors behind this fusion is crucial.
In this blog post, we’ll delve deep into the captivating realm of wood-to-rubber bonding, exploring methods and techniques favored by professionals and DIY enthusiasts alike. From adhesive wonders and mechanical marvels to advanced processes like vulcanization, no stone will be left unturned.
Join us as we unravel the secrets behind successful wood-to-rubber adhesion, uncovering both their merits and limitations. Discover how to achieve bonds that withstand the test of time while keeping aesthetics and functionality in mind.
We’ll shed light on essential elements such as surface preparation, material compatibility, and proper application techniques. Armed with this knowledge, you’ll be empowered to make informed choices tailored to your unique project needs. Whether you’re a seasoned carpenter or simply fascinated by the science behind melding dissimilar materials, this article promises to captivate your interest.
So let’s dive headfirst into the enthralling world of wood-to-rubber bonding—where flawless connections are forged. Stay tuned for our upcoming posts where we’ll explore fascinating techniques and expert tips that can elevate your wood-rubber creations to new heights.
Adhesive Glue Bonding
Contents
- 1 Adhesive Glue Bonding
- 2 Preparing the Surfaces for Adhesive Bonding
- 3 Applying the Adhesive
- 4 Securing the Bond with Pressure or Clamps
- 5 Allow Sufficient Drying and Curing Time
- 6 Mechanical Fasteners for Joining Wood to Rubber
- 7 Choosing Appropriate Fasteners for Wood and Rubber
- 8 Combining Adhesive Bonding and Mechanical Fastening Methods
- 9 Conclusion
Adhesive glue bonding is a remarkable technique that brings together the worlds of wood and rubber, creating a bond that is strong, durable, and reliable. In this captivating journey, we will explore the intricacies of adhesive glue bonding for joining wood to rubber. From surface preparation to adhesive selection, application techniques, and curing time, we will unravel the secrets behind this fascinating process.
Step 1: Preparing the Surfaces – A Solid Foundation
Before embarking on the adhesive glue bonding journey, it is imperative to lay a strong foundation by preparing the wood and rubber surfaces. Ensuring cleanliness, dryness, and freedom from contaminants like dust or grease sets the stage for a successful bond. To enhance the grip and strengthen the connection, a gentle sanding or roughening of the surfaces can work wonders.
Step 2: Selecting the Perfect Adhesive – The Glue that Holds it All Together
The choice of adhesive can make or break the wood-to-rubber bond. With various options available, such as epoxy, polyurethane, and cyanoacrylate glues, it is essential to consider specific factors. Application requirements, desired bond strength, and environmental conditions play pivotal roles in selecting the ideal adhesive type.
- Epoxy adhesives boast unparalleled strength and resilience against temperature and moisture. Their ability to withstand heavy loads makes them perfect for applications requiring durability.
- Polyurethane adhesives offer flexibility along with resistance to impact and chemicals. Perfect for scenarios involving movement or external stress.
- Cyanoacrylate glues, known as super glues, deliver instant high-strength bonding. However, they may not be suitable for larger surface areas or applications necessitating flexibility.
Step 3: Applying the Adhesive – Mastering the Art
With adhesive in hand, it’s time to unleash your creativity by following the manufacturer’s instructions for application. A thin, even layer of adhesive should be carefully spread on both the wood and rubber surfaces using a brush or spreader. The key is to achieve complete coverage without excessive buildup.
Preparing the Surfaces for Adhesive Bonding
Today, we embark on an exciting journey into the realm of surface preparation for adhesive bonding. Get ready to unlock the secrets that will elevate your wood-to-rubber connection from ordinary to extraordinary. So, gear up and let’s dive into this captivating exploration.
The Power of Purity:
Imagine a pristine piece of wood and a reliable rubber companion ready to unite. But hold on. Before they can form an unbreakable bond, we must ensure their surfaces are as pure as the driven snow. Dust, dirt, grease, and oils have no place in adhesive bonding. To banish these contaminants, arm yourself with a gentle detergent or solvent that plays nice with both materials. Then, with a soft brush or cloth, lovingly cleanse those surfaces until they gleam with purity.
Embracing the Rough Side:
Smooth surfaces can be quite the challenge for adhesives – they simply can’t get a grip. That’s where roughening comes to the rescue. Take hold of some fine-grit sandpaper and delicately caress both the wood and rubber surfaces. This act creates microscopic grooves that serve as tiny anchors for the adhesive to grasp onto. Remember, evenness and thoroughness are the keys to unlocking maximum bonding potential.
Priming for Success:
We’ve cleansed and roughened our surfaces, but there’s still more to be done. Enter the mighty primer or adhesion promoter – our secret weapon for an unbeatable bond. Carefully select a primer compatible with both wood and rubber, and follow the manufacturer’s instructions diligently. These magical substances work their alchemy by enhancing the bond between adhesive and materials. Don’t underestimate this vital step – it’s the key to unlocking perfection.
Dryness: The Ultimate Ally:
Moisture is the sworn enemy of adhesive bonding, dear friends. It wreaks havoc on the process and weakens the joint. So, before you apply that adhesive, ensure your surfaces are as dry as a desert breeze. Employ a clean cloth or even an air blower to banish any lingering moisture. Your bond will be eternally grateful for this act of kindness.
Applying the Adhesive
Prepare yourself for a journey filled with secrets that will elevate your woodworking projects to new heights. Grab your adhesive of choice and let’s embark on this adventure together.
Choosing the Perfect Adhesive:
The first step in our adhesive odyssey is selecting the ideal adhesive for the task at hand. With options like epoxy, polyurethane, and contact cement at your disposal, it’s crucial to consider factors such as the materials being joined, desired bond strength, and environmental conditions. Each adhesive possesses its own unique strengths and limitations, so choose wisely.
Preparing the Surfaces:
Before we plunge into the sticky realm, let’s discuss the art of surface preparation. Cleanliness is paramount, my friends. Ensure that both wood and rubber surfaces are devoid of any dirt, dust, or greasy residues that could hinder adhesion. If necessary, embrace the power of sanding or roughening to create surfaces that eagerly await the adhesive’s touch. And don’t forget to conduct a secret compatibility test in a hidden corner.
Applying the Adhesive:
Now, dear adhesive enthusiasts, it’s time for the grand moment. Follow the manufacturer’s instructions with utmost care to unlock adhesive nirvana. Apply the adhesive evenly and in just the right amount, ensuring both surfaces are drenched in its magical embrace. Remember, an even coating paves the way for an unbreakable bond.
Joining the Surfaces:
In this pivotal stage of our adhesive masterpiece, wood and rubber become one. Handle this union with precision and accuracy because once that adhesive sets, there’s no turning back. To lend a helping hand during this critical moment, consider enlisting clamps or other trusty tools to hold the surfaces together while they undergo their transformation into a unified whole.
Curing Time:
Patience, my friends, is the key to unlocking the full potential of adhesive bonding. Allow the adhesive ample time to cure and solidify its grip. The duration of this process varies depending on the adhesive type, ranging from a few hours to a few days. During this period, resist the temptation to test the bond’s strength or subject it to any undue stress. Give it the space it needs to blossom into an unbreakable connection.
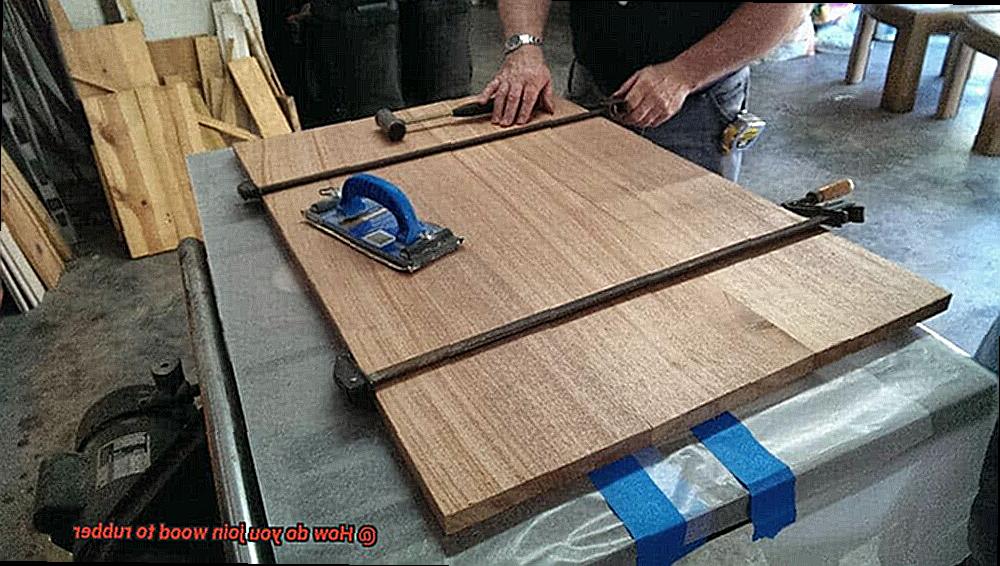
Securing the Bond with Pressure or Clamps
In this installment, we will explore the art of using pressure or clamps to secure a bond that withstands the test of time. Get ready to elevate your woodworking projects to masterpieces with these innovative techniques.
The Mighty Force of Pressure:
When it comes to joining wood and rubber, applying pressure is a tried and true method that guarantees success. By exerting even and consistent force on the surfaces, you encourage the adhesive to penetrate every microscopic gap, creating a bond that is as strong as steel. Here’s how to do it effectively:
- Immaculate Surfaces: Before applying pressure, ensure both the wood and rubber are rid of any dirt or grease. Cleanliness is the foundation for achieving a bond that can withstand the ages.
- Embrace Gravity’s Strength: To apply pressure, unleash the power of heavy objects or weights that uniformly distribute force across the surfaces. Let your imagination soar as you stack books, deploy sandbags, or seek out other creative solutions that provide optimal pressure without compromising the integrity of the materials.
The Enchanting Spell of Clamps:
In the quest for a secure bond between wood and rubber, clamps emerge as invaluable tools. They offer controlled pressure, ensuring an unyielding connection without causing harm to either material. Here’s what you need to know:
- Choose Your Champion Clamp: With a plethora of options like C-clamps, bar clamps, or pipe clamps at your disposal, you have the freedom to select the perfect match for your project’s specific requirements. Pick a clamp that delivers sufficient pressure while keeping alignment in check.
- Paving the Way with Preparation: Just like pressure bonding, preparing clean surfaces is paramount before employing clamps. Strip away any existing finishes or coatings to unlock the full potential of adhesion.
The Alchemy of Adhesives:
To forge a bond that defies time and adversity between wood and rubber, selecting the right adhesive is essential. Take into account factors such as application, bond strength, and flexibility requirements. Here are some adhesive options that have earned their place in the spotlight:
Allow Sufficient Drying and Curing Time
Today, we’re delving into the critical topic of allowing sufficient drying and curing time when joining wood to rubber. While it may not be the most glamorous aspect of your project, it is an absolutely crucial step in ensuring the longevity and durability of your masterpiece.
Let’s begin with the fundamentals. Drying and curing are distinct processes that play a pivotal role in establishing a robust bond between wood and rubber. Drying involves eliminating moisture from the adhesive, while curing encompasses a chemical reaction that solidifies the adhesive and creates an unyielding connection.
Now, it’s important to note that drying and curing times will vary based on the type of adhesive you’re utilizing. To achieve optimal results, it is imperative to adhere to the manufacturer’s instructions. Typically, most adhesives necessitate a minimum of 24 hours of drying time before any stress or load can be applied to the joined surfaces.
During this drying phase, it is essential to shield the adhesive from excessive moisture or extreme temperatures. These elements can obstruct the bonding process, potentially compromising the strength of your joint. Therefore, ensuring a stable and controlled environment is paramount for your project to dry effectively.
Moving on to curing time, this period can span anywhere from a few hours to several days, contingent upon the adhesive type and specific application. During this stage, it is crucial to refrain from disturbing or stressing the joined wood and rubber surfaces. Any premature movement or stress can weaken the bond, jeopardizing its overall strength.
Now, let’s explore potential additional steps that may be required during the drying and curing process. Some adhesives may necessitate applying pressure or utilizing clamps to ensure a secure bond. These supplementary measures contribute significantly to attaining a wood-rubber unity that rivals even the strongest of materials.
Lastly, I cannot stress enough the importance of patience when allowing sufficient drying and curing time. I understand the temptation to rush things, particularly when you’re excited about completing your project. However, taking shortcuts during this crucial phase can result in subpar adhesion and a weak joint between wood and rubber.
Mechanical Fasteners for Joining Wood to Rubber
In the realm of joining wood to rubber, adhesive bonding may take center stage, but don’t overlook the mighty mechanical fasteners. These ingenious connectors can forge a bond that withstands the test of time, ensuring your wood and rubber creations stay firmly united. In this comprehensive guide, we’ll delve into the captivating world of mechanical fasteners, exploring their diverse types and applications to help you create enduring connections.
Screws: The Versatile Titans
Enter the realm of screws, the veritable titans of mechanical fasteners. With their threaded shafts, they effortlessly penetrate wood and rubber, forging an unyielding bond. But hold on – choosing the right screws is paramount. Consider their length and diameter in relation to the material thickness to ensure optimal performance. And for an extra dose of efficiency, opt for screws with sharp points that glide through rubber surfaces like a whisper in the wind.
Nails: The Underdogs with a Punch
While nails may play second fiddle to screws, they still pack a punch when joining wood to rubber. Crafted from metal, these underdogs feature a sharp point that can be hammered into wood, creating a sturdy connection. However, it’s worth noting that nails might not offer the same level of holding power as screws. Reserve them for lighter applications or situations where disassembly is on the horizon.
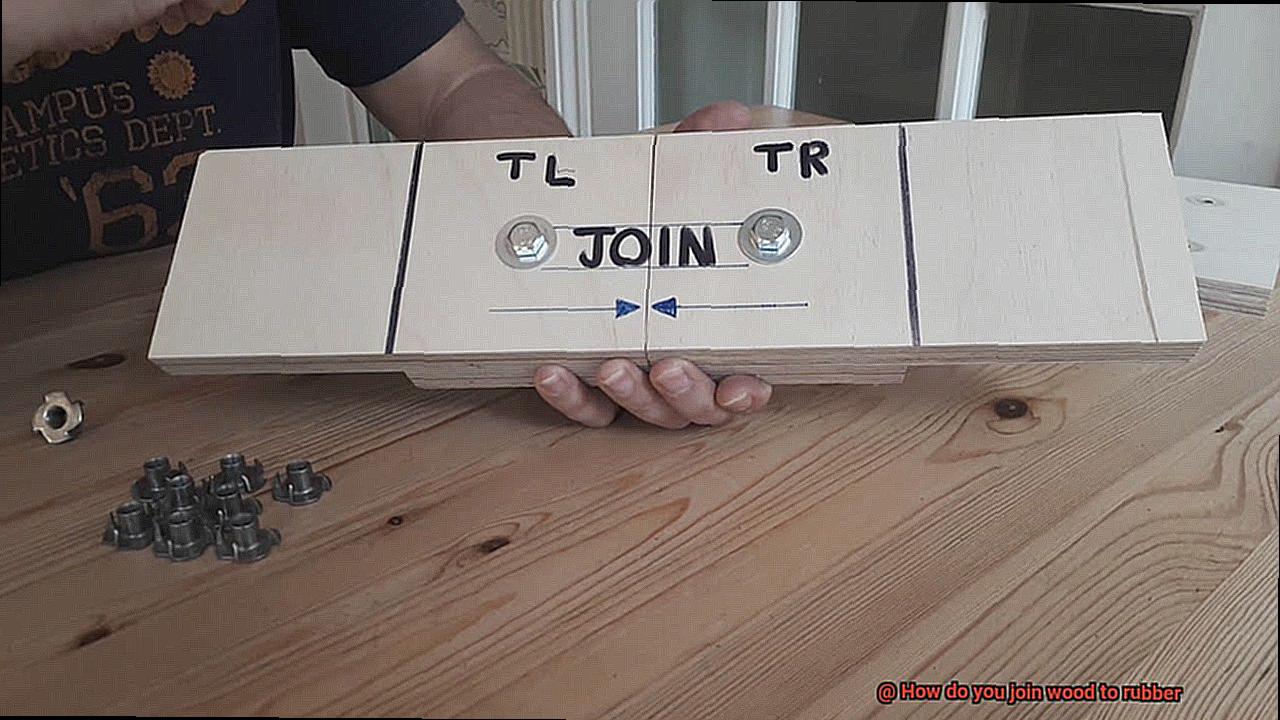
Bolts and Nuts: The Dynamic Duo
For projects requiring unwavering strength or easy disassembly, embrace the dynamic duo of bolts and nuts. Bolts, with their threaded shafts, elegantly traverse pre-drilled holes in both wood and rubber. Once in position, nuts tighten onto these threaded shafts, sealing the deal with unyielding force. This method allows for seamless adjustments and disassembly when versatility is essential – making it ideal for furniture construction or ever-changing applications.
Choosing Appropriate Fasteners for Wood and Rubber
In the mesmerizing realm of connecting wood to rubber, the spotlight often falls on adhesive bonding. However, let us not overlook the unsung heroes that forge an unbreakable union between these two materials – mechanical fasteners. From screws that bite with relentless force to bolts and nuts that exude unwavering strength, a world of fasteners awaits to bring your wood and rubber creations to life. Join us as we delve into the different types of fasteners and the crucial factors to consider when selecting the perfect match for your specific application.
Screws – The Mighty Titans:
When it comes to joining wood to rubber, screws emerge as steadfast champions. But beware, not all screws are created equal. For wood, opt for screws with coarse threads and sharp points. These mighty titans sink their teeth into the wood, ensuring a secure hold. For rubber, embrace the magic of self-drilling screws with sharp points and wide thread pitches. With their ability to create pilot holes effortlessly, they guarantee a firm grip on the rubber material.
Bolts and Nuts – The Dynamic Duo:
When sturdiness reigns supreme, bolts and nuts take center stage. This dynamic duo thrives in heavy-duty applications that demand unwavering strength. Selecting the right bolts involves pondering over crucial factors such as length, diameter, and head type. The length should penetrate through the wood and provide ample thread engagement in the rubber. The diameter must align with the load requirements of your project, ensuring a secure hold. As for head type, let personal preference or specific requirements guide your choice.
Adhesives – The Versatile Option:
While mechanical fasteners dazzle on center stage, adhesives play a vital supporting role in joining wood to rubber. With a plethora of options available – epoxy, polyurethane, and cyanoacrylate (super glue) – adhesives offer remarkable versatility. When selecting adhesives, tread carefully and choose ones compatible with both wood and rubber surfaces. Seek bonds with excellent strength and flexibility, seamlessly accommodating movements and vibrations. Remember, a pristine canvas is paramount, so prepare and cleanse surfaces diligently for optimal adhesion.
Combining Adhesive Bonding and Mechanical Fastening Methods
When it comes to joining wood and rubber, the combination of adhesive bonding and mechanical fastening methods may seem unconventional. However, this powerhouse duo can create an unbreakable union between these two materials. In this article, we will explore the advantages of combining these techniques and how they work together to provide a strong and durable connection between wood and rubber.
The Power of Adhesive Bonding:
Adhesive bonding, with the use of adhesives like glue or epoxy, is a versatile method that relies on chemical properties to create a strong bond between wood and rubber surfaces. By applying the adhesive to both materials and firmly pressing them together, the bond cures over time, resulting in a lasting connection.
Advantages:
- Increased strength: Adhesive bonding allows for a larger surface area of contact between wood and rubber, evenly distributing the load and enhancing the overall strength of the joint.
- Resistance to forces: This method provides excellent resistance to shear and peel forces, making it ideal for applications with movement or stress.
- Sealant properties: Adhesive bonding can effectively seal gaps between materials, protecting the joint from water or other contaminants.
- Flexibility: It offers flexibility, allowing for some movement between wood and rubber without compromising the bond’s integrity.
The Strength of Mechanical Fastening Methods:
Mechanical fastening methods like screws, nails, or bolts also offer unique advantages when joining wood to rubber. These physical devices penetrate both materials, creating a secure connection.
Advantages:
- Immediate strength: Mechanical fasteners provide immediate strength and stability to the joint while the adhesive cures over time.
- Adjustability: They offer adjustability for easy disassembly or repositioning if needed.
- Heavy-duty applications: Mechanical fasteners can handle heavy loads and provide high tensile strength, making them suitable for heavy-duty applications.
- Temperature resistance: They are more resistant to temperature fluctuations, making them ideal for extreme heat or cold environments.
The Winning Combination:
By combining adhesive bonding and mechanical fastening methods, you can have the best of both worlds. One common approach is to use screws or nails along with an adhesive. These fasteners provide initial strength, while the adhesive cures to create a long-lasting bond. This combination ensures a secure connection between wood and rubber.
WyM9JtRZuvc” >
Conclusion
When it comes to joining wood to rubber, there are a few methods that can be employed.
One option is to use adhesive bonding, where a strong adhesive is applied to both surfaces and then pressed together until the bond is secure. Another method is mechanical fastening, which involves using screws or nails to hold the wood and rubber together.
Additionally, thermal bonding can be used by heating the rubber and pressing it against the wood until they fuse together. Each of these techniques has its own advantages and considerations, so it’s important to choose the method that best suits your specific needs and circumstances.
By carefully selecting the right approach and following proper procedures, you can achieve a durable and reliable bond between wood and rubber.