TEver experienced that heart-wrenching moment when your beloved ceramic treasure meets a tragic fate and shatters into a million pieces? It’s enough to bring tears to your eyes, isn’t it? But fear not. There exists a captivating world where practicality meets artistry, allowing you to resurrect your broken ceramics and restore them to their former glory. Welcome to the enchanting realm of gluing ceramics back together.
In this captivating guide, we’ll unveil the secrets of ceramic restoration, uncovering the expert techniques used to mend these delicate works of art with finesse. Whether it’s your grandmother’s cherished vase, a treasured tea set, or an endearing figurine, don’t despair. Armed with a little know-how and the right tools, you can breathe new life into your shattered ceramics and bask in their beauty once more.
The key to bonding ceramics lies in choosing the perfect adhesive, mastering meticulous preparation, and employing strategic techniques for a robust and seamless restoration. We’ll explore various adhesives specifically designed for ceramic repair – from epoxy resins to super glues and beyond – so you can select the ideal option for your unique restoration needs. Let’s weigh up the pros and cons together.
But wait, there’s more. We’ll also delve into the crucial importance of thorough preparation before diving into the gluing process itself. Get ready for tips on cleaning those broken edges like a pro, aligning every piece with precision, and ensuring that adhesive bond holds strong for years to come. Rest assured that by following these steps closely, your once-shattered ceramics will be indistinguishable from their original splendor.
So are you prepared to unlock the secrets of mending ceramics like a true artisan? Join us on this wondrous journey into the realm of ceramic restoration. Gather those fragments, don your creative hats, and get ready to infuse life back into your precious treasures, one drop of adhesive at a time.
Choosing the Right Adhesive
Contents
When it comes to repairing broken ceramics, choosing the right adhesive is crucial for a successful and long-lasting repair. In this comprehensive guide, we will explore the factors to consider when selecting an adhesive and provide valuable tips to ensure your ceramic repair stands the test of time.
Consider the Ceramic Material:
Different types of ceramics require different adhesives due to variations in their properties. Whether you are working with delicate porcelain, sturdy stoneware, or rustic earthenware, it is essential to choose an adhesive that is compatible with the specific ceramic material to achieve maximum bonding strength.
Opt for Epoxy Adhesives for Unparalleled Durability:
If you’re looking for a strong and long-lasting bond, epoxy adhesives are your go-to choice. Renowned for their exceptional bonding capabilities and durability, epoxy adhesives are perfect for extensive repairs and larger broken pieces.
Instantly Bond with Super Glue:
For minor cracks or small repairs, super glue, also known as cyanoacrylate glue, provides an instant bond upon contact with ceramic surfaces. While it may not offer the same strength as epoxy in more extensive repairs, super glue is ideal for quick fixes.
Heat-resistant Adhesives for High-temperature Ceramics:
When dealing with heat-resistant ceramics like cookware or fireplace tiles, it is crucial to select an adhesive that can withstand extreme temperatures. Look for heat-resistant adhesives specifically formulated for ceramic repairs to ensure your bond remains intact even under intense heat.
Read Labels and Instructions:
Before selecting an adhesive, carefully read the product labels and instructions. Look for adhesives explicitly labeled as suitable for ceramics and providing information on bonding strength and temperature resistance. This will help you choose the most appropriate adhesive for your specific repair needs.
Prepare the Surfaces Effectively:
To enhance the adhesive’s grip, it is essential to properly prepare the ceramic surfaces before applying the adhesive. Thoroughly clean the surfaces using a mild detergent and water solution to remove any dirt, dust, or grease. Additionally, lightly roughen the surfaces with sandpaper or a file to create a slightly rough texture that promotes better adhesion.
Preparing the Ceramic Surfaces
From ancient pottery to delicate porcelain figurines, broken ceramics can be brought back to life with the right techniques. In this comprehensive guide, we will explore the essential steps involved in preparing ceramic surfaces for gluing, ensuring seamless repairs that withstand the test of time. Let’s dive into the art of ceramic restoration.
Step 1: Cleanliness is Key
To create a strong bond, start by washing away any traces of dirt, dust, or grease. Immerse your ceramic surfaces in warm water and gently scrub them with a mild detergent or soap. Rinse them thoroughly and allow them to air dry completely. A pristine surface guarantees a secure adhesive connection.
Step 2: Sanding for Success
A touch of finesse is required to achieve a perfect repair. Lightly sand the clean and dry ceramic surfaces using fine-grit sandpaper. This gentle abrasion creates a textured foundation, enhancing the glue’s grip on the ceramic. Remember, a delicate touch is essential to avoid any unsightly scratches or damage.
Step 3: Bid Farewell to Old Glue Residue
Before proceeding with the repair, it’s crucial to bid farewell to any remnants of past adhesive attempts. Employ a scraper or razor blade to gently remove any lingering glue residues. Exercise caution during this process to prevent further harm to the delicate ceramic surface. A fresh start ensures seamless alignment and bonding.
Step 4: Aligning the Broken Pieces
Like a puzzle waiting to be solved, aligning broken ceramic pieces requires careful precision. Take your time to match patterns and alignment marks flawlessly. To hold everything in place during gluing, utilize tape or clamps strategically. This meticulous step guarantees a precise fit and minimizes the risk of misalignment.
Step 5: Choosing the Right Adhesive
Selecting the perfect adhesive is paramount for a successful ceramic restoration. Consider the characteristics of your project and choose from a range of options, such as epoxy resin, super glue, or cyanoacrylate adhesive. Ensure the chosen adhesive is specifically designed for ceramics. Follow the manufacturer’s instructions closely, paying attention to application techniques and curing times.
Applying the Adhesive
In this section, we will explore the key steps and techniques involved in bringing these delicate pieces back to life. So, put on your gloves and prepare to embark on a journey of restoration.
Selecting the Perfect Adhesive:
The first step on our adhesive application journey is selecting the perfect adhesive for the task at hand. Epoxy, super glue, and ceramic glue are all viable options, each with its own unique properties and strengths. Take a moment to consider your specific needs before making a choice.
Cleaning Ceramic Surfaces with Precision:
Before diving into the adhesive application process, it is imperative to ensure that your ceramic surfaces are impeccably clean. Any trace of dirt, dust, or grease can hinder the adhesive’s ability to form a strong bond. Employ a gentle detergent or rubbing alcohol to cleanse the surfaces thoroughly. Remember, they must be completely dry before proceeding.
The Delicate Art of Applying Adhesive:
Now that your ceramics are pristine, it is time to delicately apply the adhesive. Begin by applying a thin layer to one of the broken pieces, exercising caution not to use excessive amounts that may seep out when pressure is applied. If you opt for epoxy or ceramic glue, carefully follow the manufacturer’s instructions for mixing the components.
Merging Broken Pieces with Precision:
With adhesive in place, embark on the critical task of aligning and pressing the broken pieces together. Ensure a snug fit, leaving no room for unsightly gaps. Hold them firmly in place for a few minutes, allowing the adhesive to work its magic and create an unbreakable bond.
Enhancing Durability through Extra Support:
Depending on the type of adhesive chosen, additional support may be necessary during the curing process. Consult the manufacturer’s instructions for recommended curing time and any clamping or supporting techniques required. This step is essential to ensure the utmost strength and durability of your repair job.
Achieving Seamless Restoration:
Once the adhesive has fully cured, carefully examine the bond for any visible gaps or weak spots. Should you detect any imperfections, apply a small amount of adhesive to fill them in, reinforcing the overall strength of the repaired ceramic piece. Remember, our goal is a flawless restoration.
Aligning and Pressing the Pieces Together
In this chapter, we will unveil the secrets of aligning and pressing the pieces together to achieve a flawless repair. Get ready for a journey filled with precision, creativity, and a touch of magic.
To begin, let’s talk about the importance of perfect alignment. When reuniting those broken edges, it’s crucial to ensure they fit together seamlessly. This meticulous process guarantees a robust bond and eliminates any unsightly gaps or weak spots in your revitalized ceramic masterpiece. Take your time, dear restorer, and let those pieces interlock like a puzzle made in heaven.
But hold on tight. Before you even think about reaching for that adhesive, it’s imperative to give those broken edges a thorough cleanse. Grab some mild detergent or soap and water, and wash away any traces of dirt, dust, or grease that could sabotage the bonding process. We want those edges gleaming with cleanliness, preparing them for their grand reunion.
Once they’re squeaky clean, it’s time to bid farewell to moisture. Drying those ceramic pieces completely is paramount in ensuring the adhesive’s effectiveness and fortifying the bond. Allow them to air dry gracefully or use a gentle touch with a clean cloth to pat them dry, removing any lingering signs of moisture.
Now it’s showtime for the adhesive. With a plethora of options at your disposal such as epoxy glue, super glue, and cyanoacrylate adhesive, choose one specifically crafted for ceramics. Remember to follow the manufacturer’s instructions meticulously – safety and precision go hand in hand.
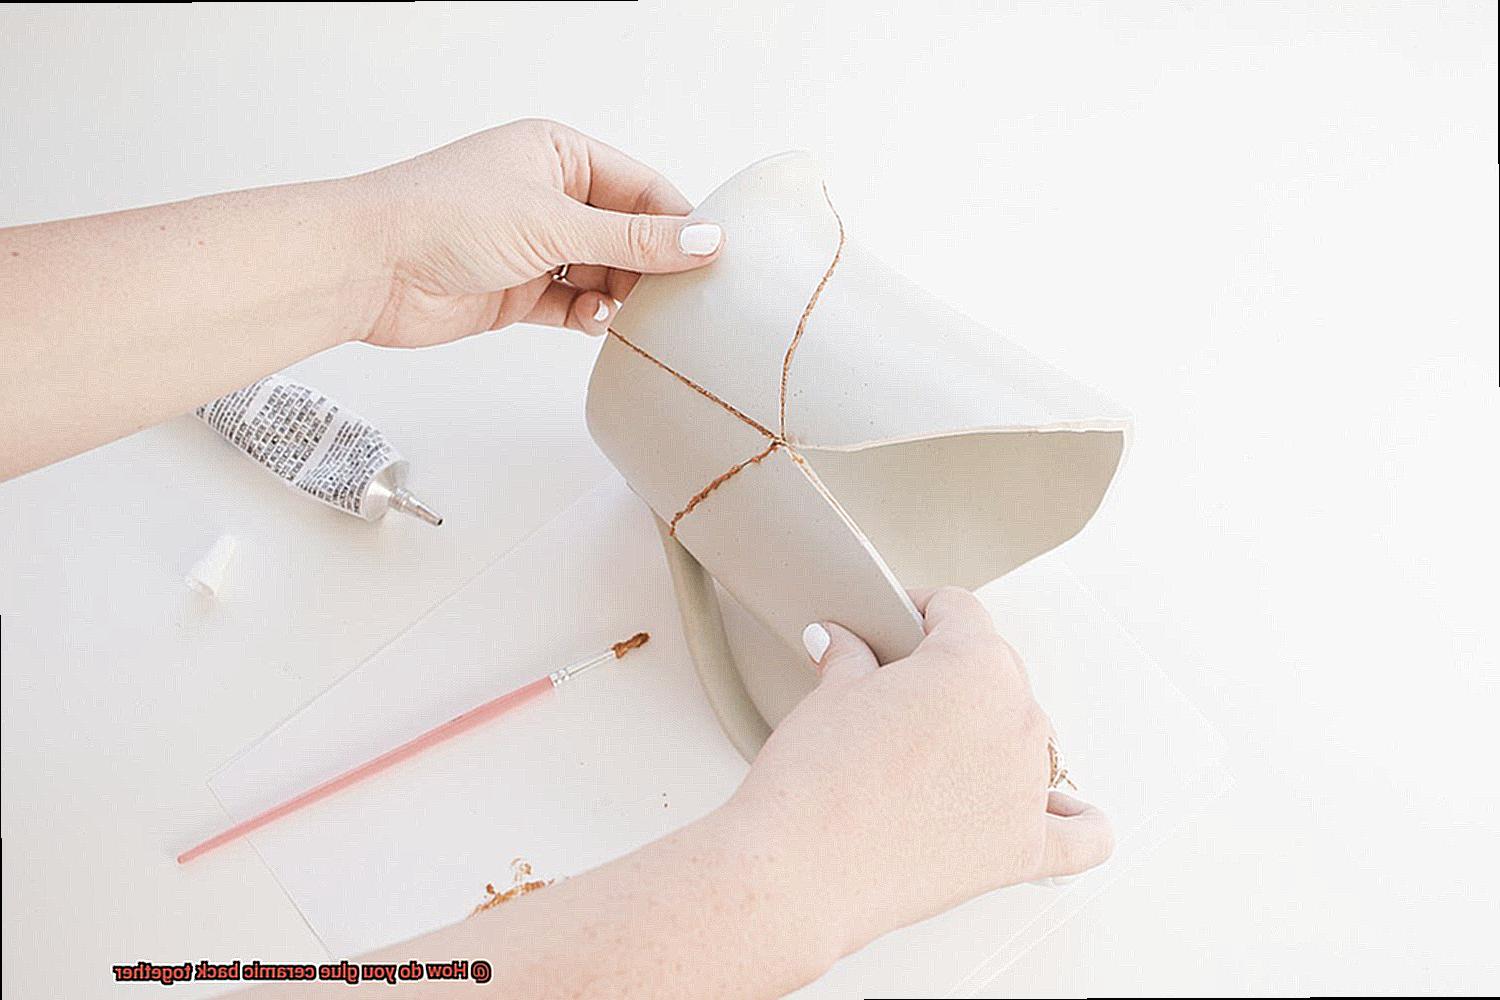
When applying the adhesive, let your inner artist emerge. Utilize a tiny brush or toothpick to execute controlled strokes. Your goal is to create a thin layer along the broken edge, ensuring comprehensive coverage that leaves no surface untouched. Imagine this as a tender embrace between the ceramic pieces and their newfound adhesive companion.
Now comes the delicate dance of alignment. Take a deep breath, focus, and strive for perfection as you bring those pieces back together. Give them the attention they deserve, ensuring that no seam is out of place. Once you’ve achieved this harmonious reunion, it’s time to apply gentle pressure and press those pieces together tenderly. Remember, consistent pressure is the secret ingredient that cements their connection.
Curing Time and Additional Steps
Today, we embark on a journey that will transform your ceramic repairs from ordinary to extraordinary. Join us as we delve into the captivating realm of curing time and discover the additional steps that can elevate your ceramic masterpieces to new heights.
Curing Time: The Key to Lasting Perfection
In the delicate process of reuniting shattered ceramic pieces, curing time holds the key to a bond that is unyielding. Once the adhesive is applied, patience becomes our ally as we allow it to work its magic. Remember, different adhesives require different durations for optimal results, so be sure to adhere to the manufacturer’s instructions.
Factors Influencing Curing Time:
Within the realm of curing time, environmental factors come into play, shaping the destiny of our repairs. Temperature, like a conductor orchestrating a symphony, can either hasten or slow down the curing process. High temperatures infuse urgency into the air, while lower temperatures compel us to embrace patience. Humidity adds another layer to this dance, with high levels prolonging the wait and low levels urging us forward. Let nature guide your expectations as you embark on your repair journey.
Additional Steps for Unparalleled Excellence:
Once the symphony of curing time has reached its crescendo, it is time to take additional steps towards perfection. Let us explore these steps that will elevate your repair to unparalleled excellence:
Removing Excess Adhesive:
As we delicately piece together our ceramic puzzle, excess adhesive may find its way into our masterpiece. Fear not. Armed with precision and finesse, we must gently scrape away this intruder using a sharp tool or razor blade. Our mission is clear – preserve the repaired surface while bidding farewell to any remnants of excess adhesive.
Cleansing the Repaired Surface:
To bestow our repaired ceramic surface with a newfound radiance, we must embark on a cleansing ritual. A mild detergent or soap and water solution become our allies as they purify the surface, eliminating any residue or contaminants that may have emerged during the repair process. As the surface basks in cleanliness, ensure it is given ample time to dry before handling or utilizing the restored ceramic item.
Securing the Bond with Clamps or Tape
In our journey to unlock the secrets of ceramic repair mastery, we have already explored the importance of curing time and the delicate steps involved in achieving a radiant finish. Now, it’s time to dive into the art of securing the bond with clamps or tape. Just like a symphony conductor orchestrates a masterpiece, we will show you how to use these tools effectively to ensure a strong and long-lasting repair. So, let’s get started.
Clamps – Applying Pressure with Precision:
Clamps, those trusty pillars of support, hold your ceramic pieces together while the glue works its magic. Let’s master their usage:
- Align broken edges meticulously before applying any glue.
- Apply a thin layer of glue to both surfaces and press them together with care.
- Introduce the clamps to the scene. Position them strategically for even pressure distribution.
- Remember, moderation is key – avoid overtightening the clamps to prevent additional damage.
Tape – A Delicate Alternative:
Not all repairs can withstand clamps’ might, especially when dealing with delicate or small ceramic pieces. Enter tape, your gentle savior. Here’s how to secure the bond using this method:
- Align broken edges as precisely as you would with clamps.
- Apply a thin layer of glue to each surface and delicately press them together.
- Wrap adhesive tape tightly around the repaired area, providing steadfast support until the glue sets.
- Choose a tape that strikes the perfect balance between strength and easy removal once the glue has dried.
Patience is Key – Allow Time for Curing:
After securing the bond with clamps or tape, exercise patience and allow ample time for the glue to fully cure. Rushing this process may result in a feeble bond prone to breaking. Adhere to the manufacturer’s drying time instructions, typically ranging from a few hours to overnight.
Tidy Up – Remove Excess Glue:
While applying pressure with clamps or tape, excess glue often squeezes out from the edges. To achieve a flawless repair, follow these steps:
- Gently wipe away any excess glue with a damp cloth or sponge before it dries completely.
- This meticulous cleanup ensures a clean and polished final result, worthy of admiration.
Handling the Repaired Ceramic with Care
Now that you’ve restored its beauty and functionality, it’s crucial to handle it with care to ensure its longevity. In this section, we will explore the importance of handling a repaired ceramic item delicately, providing practical tips to safeguard your masterpiece.
Mindful Holding Techniques:
To avoid accidental breakage, always hold the repaired ceramic item from the base or sturdiest part. By doing so, you protect the repaired area and maintain the integrity of your restoration.

Two Hands are Better than One:
For larger ceramic objects, use both hands to distribute weight evenly and reduce the risk of dropping or mishandling. This simple technique significantly minimizes damage and preserves your repaired ceramic.
Avoid Unnecessary Stress:
Protect your repaired ceramic by avoiding unnecessary stress on the restored area. Refrain from stacking heavy objects on top of it or using it for its original purpose if it was functional. Treating your repaired ceramic with extra care extends its lifespan.
Display in a Safe Area:
Choose a safe area to display your repaired ceramic piece, away from high-traffic zones and potential hazards caused by children or pets. By proactively selecting a suitable location, you can enjoy your restored ceramic’s beauty without worrying about accidents.
Temperature Considerations:
Prevent cracks and damage by avoiding extreme temperature changes. Keep your repaired ceramic away from direct sunlight or freezing conditions, as sudden expansions or contractions can occur, leading to further harm.
Gentle Cleaning Methods:
Maintain the beauty of your repaired ceramic through gentle cleaning techniques. Use a soft cloth or mild soap and water to wipe the surface. Harsh chemicals or abrasive materials can weaken or damage the repair, so avoid them at all costs.
Regular Inspection:
Regularly inspect your repaired ceramic for any signs of deterioration or loosening of the adhesive. If any issues are detected, consult a professional restorer or take necessary steps to reinforce the repair. By staying vigilant, you can address potential problems before they worsen.
Secure Transportation:
When transporting your repaired ceramic item, ensure it is securely packaged with suitable padding materials. This prevents jostling or impact during transit, safeguarding your restoration.
Finishing and Touch-ups
Now, let’s delve into the final steps that will breathe life into your masterpiece once again. In this section on “Finishing and Touch-ups,” we will explore the secrets of color matching, the precision required in paint or glaze application, and the art of addressing imperfections. Together, let’s infuse your glued ceramic piece with the finishing touches it deserves.
Color Matching: The Key to a Harmonious Restoration
To ensure a seamless repair, color matching is paramount. Ceramics boast an array of shades and hues, demanding that we find a paint or glaze that closely mimics the original color. You can either procure a matching paint from a craft store or experiment with blending different shades to attain a customized hue.
Preparing for Paint or Glaze Application
Before embarking on paint or glaze application, it is imperative to cleanse the glued area of any residue. Gently caress the surface with a damp cloth or employ a mild detergent if necessary. Once cleanliness is achieved, allow the area to dry completely before proceeding.
Paint Application: A Brushstroke of Precision
Precision becomes our ally in painting. Opt for a small brush or even a cotton swab for meticulous application. Begin by delicately layering thin coats of paint onto the glued area, ensuring comprehensive coverage. Allow each coat to dry before considering additional layers, gradually building up color for an impeccable finish.
Glaze Application: The Enchantment of Firing
For those who prefer glaze over paint, adhere to the manufacturer’s instructions regarding application and drying time. Remember that glaze necessitates thin layering and kiln firing to achieve its mesmerizing allure. Should you lack access to a kiln, seeking professional assistance may be prudent at this stage.
Addressing Remaining Imperfections
With color matched and paint or glaze dried, it is time to address any lingering imperfections. Embrace the art of refinement by gently sanding the repaired area with sandpaper or a nail buffer.
Feel the transformation as rough edges and uneven surfaces are smoothed, culminating in a flawless finish. This process also eradicates any excess glue that may have seeped out during the bonding process.
H8LG3lFqQCs” >
Conclusion
Gluing ceramic back together can be a delicate process, but with the right techniques and materials, you can restore your broken piece to its former glory. It’s important to start by gathering all the necessary supplies: a high-quality ceramic adhesive, sandpaper, and gloves for protection.
Before beginning the gluing process, make sure to clean both surfaces of the broken ceramic thoroughly. Use a mild detergent and warm water to remove any dirt or debris that could hinder the adhesive’s effectiveness. Once cleaned, dry the surfaces completely before proceeding.
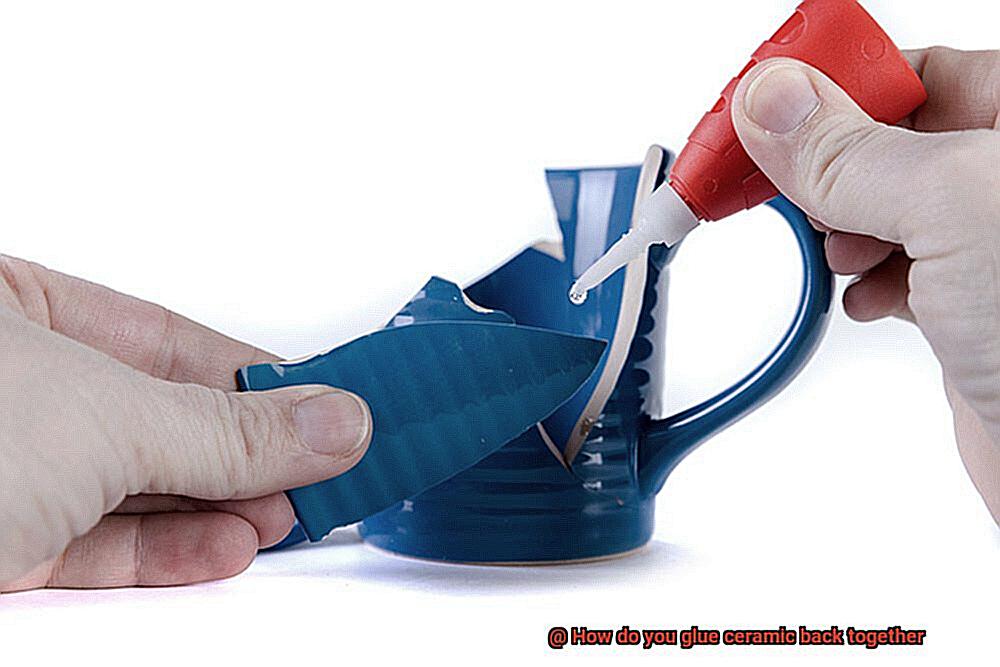
Now it’s time to apply the adhesive. Squeeze a small amount onto one of the broken edges and use a toothpick or small brush to spread it evenly along the surface. Be careful not to use too much glue as it may ooze out when pressure is applied.
Next, carefully align the broken pieces and press them firmly together. Hold them in place for a few minutes to allow the adhesive to bond properly. If needed, use rubber bands or clamps to secure larger or more complex ceramic pieces.
After allowing sufficient drying time (refer to the adhesive manufacturer’s instructions), it’s time for some finishing touches. Gently sand down any excess glue that may have seeped out during the bonding process. Take care not to scratch or damage the surrounding areas of the ceramic.
Once you’re satisfied with the alignment and appearance of your repaired ceramic piece, give it some additional time to fully cure before handling or using it again. This will ensure maximum strength and durability.
In conclusion, gluing ceramic back together requires patience, attention to detail, and quality materials.