Sick of those chilly, unyielding floors that offer no respite for your tired feet? Enter carpet padding, the unsung hero that brings warmth and luxury to your underfoot experience. But here’s the catch – making sure it stays securely glued to concrete is key for long-lasting results. Whether you’re a DIY enthusiast or just curious about the process, this guide will arm you with the knowledge and confidence to tackle this task like a pro.
Materials You’ll Need:
- Your choice of carpet padding
- Adhesive specially designed for carpet padding and concrete (think solvent-based adhesive)
- Measuring tape
- Chalk or marking pencil
- Utility knife
- Trowel/spreaders
- Optional knee pads (recommended for comfort)
- Optional duct tape (for securing seams)
Step-by-Step Process:
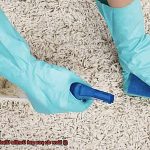
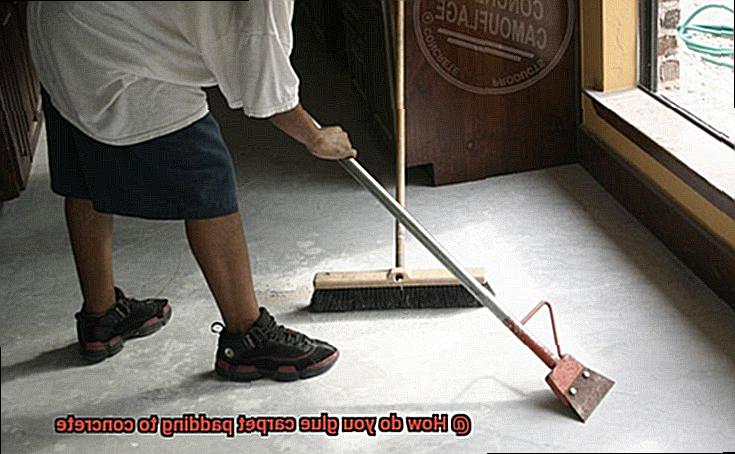
- Prepping the Surface: Get ready to say goodbye to dirt, debris, and dust. Clear your concrete floor of any unwanted particles and make sure it’s dry as a bone before moving forward. This will ensure a strong bond between the adhesive and the floor, keeping bumps at bay.
- Measure and Cut: Roll out your carpet padding parallel to the longest wall in the room and let it acclimate for 24 hours – temperature matters. Use a chalk or marking pencil to measure and mark where you need to cut, leaving an extra inch on each side for trimming later. Then, with precision and care, use a sharp utility knife to slice through the padding.
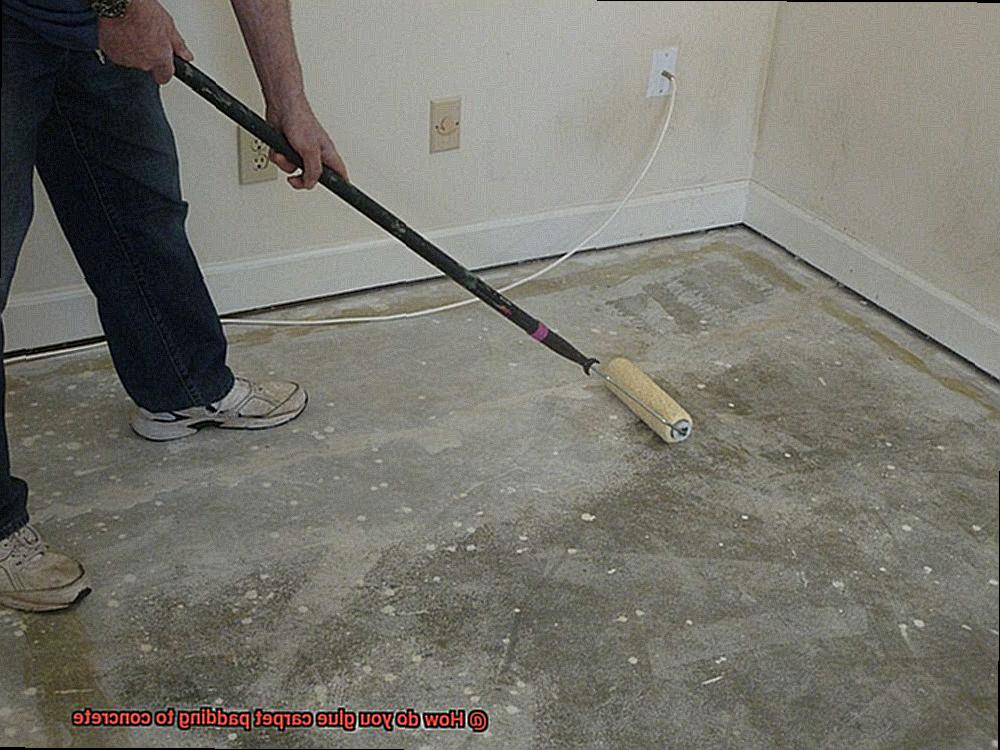
- Time for Adhesive Magic: Start in the corner farthest from the entrance – we’re building up suspense here. Grab your trowel or spreaders and evenly coat the concrete with adhesive according to the manufacturer’s instructions (yes, read those.). Make sure you cover the area well, leaving no stone unturned.
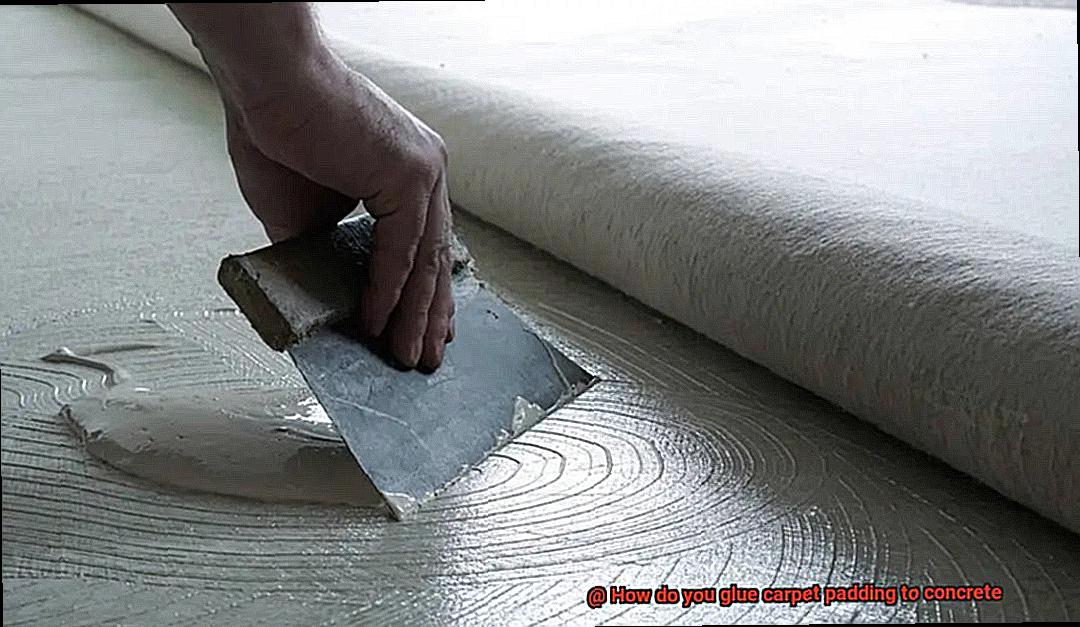
- Padding Placement: The moment has arrived. Place your carpet padding onto the adhesive with utmost care, aligning it perfectly with the edges of the room. Press gently but firmly, using your hands or a clean broom to smooth out any pesky air bubbles or wrinkles that dare to appear.
- Trim and Tweak: Time to get those scissors or utility knife back in action. Trim away any excess padding, ensuring a clean fit against edges and around obstacles like doorways or vents. Cons
What Materials Are Needed to Glue Carpet Padding to Concrete?
Contents
- 1 What Materials Are Needed to Glue Carpet Padding to Concrete?
- 2 Preparing the Concrete Surface for Glue Application
- 3 Measuring and Cutting the Carpet Padding
- 4 Applying the Adhesive Glue
- 5 Laying the Carpet Padding on the Glue
- 6 Sealing Seams in Carpet Padding (if necessary)
- 7 Drying Time and Instructions for Installation of Carpet Over Padding
- 8 Tips for Ensuring a Successful Installation
- 9 Conclusion
Achieving a strong and durable bond between carpet padding and concrete requires using the right materials and following proper installation techniques. In this article, we will explore the materials needed to glue carpet padding to concrete, empowering you to undertake this project with confidence.
Adhesive Glue:
Choosing the appropriate adhesive glue is paramount for a successful installation. Opt for a high-quality adhesive specifically designed for bonding carpet padding to concrete surfaces. Reliable options include carpet adhesive, multipurpose construction adhesive, and pressure-sensitive adhesive.
These adhesives create a strong bond that ensures the carpet padding remains securely in place.
Trowel or Notched Spreader:
To apply the adhesive evenly on the concrete surface, you will need a trowel or notched spreader. A trowel with a square-notched or V-notched edge is ideal for consistent adhesive distribution.
This guarantees an even layer of glue, eliminating lumps and unevenness that may compromise the adhesion of the carpet padding.
Moisture Barrier or Vapor Retarder:
Before gluing the carpet padding, it is crucial to ensure the concrete surface is dry and free from moisture. Moisture can seep through the concrete, affecting the adhesion of the padding.
To prevent this, use a moisture barrier or vapor retarder. This barrier can be plastic sheeting or specialized moisture-resistant underlayment, creating a protective layer between the concrete and the padding.
Utility Knife or Carpet Cutter:
A utility knife or carpet cutter is necessary for accurately trimming the carpet padding to fit the desired area. Cut the padding slightly smaller than the room’s dimensions to accommodate expansion and contraction due to temperature and humidity changes. Clean, precise cuts are essential for a seamless installation.
Measuring Tape, Straightedge, and Pencil:
Basic tools like a measuring tape, straightedge, and pencil are essential for marking and measuring purposes. They ensure accurate placement and alignment of the carpet padding on the concrete surface, resulting in a professional-looking finish.
Preparing the Concrete Surface for Glue Application
The key to a strong and long-lasting bond lies in the preparation of the concrete surface. Don’t fret, because we’re here to provide you with a step-by-step guide that will equip you with the knowledge and tools you need to succeed.
Step 1: Cleanse the Surface
Before diving into glue application, it is paramount to ensure that your concrete surface is free of any debris. Sweep or vacuum the area meticulously, ridding it of loose dirt, dust, or particles that might hinder the adhesive’s effectiveness.
Step 2: Inspect for Imperfections
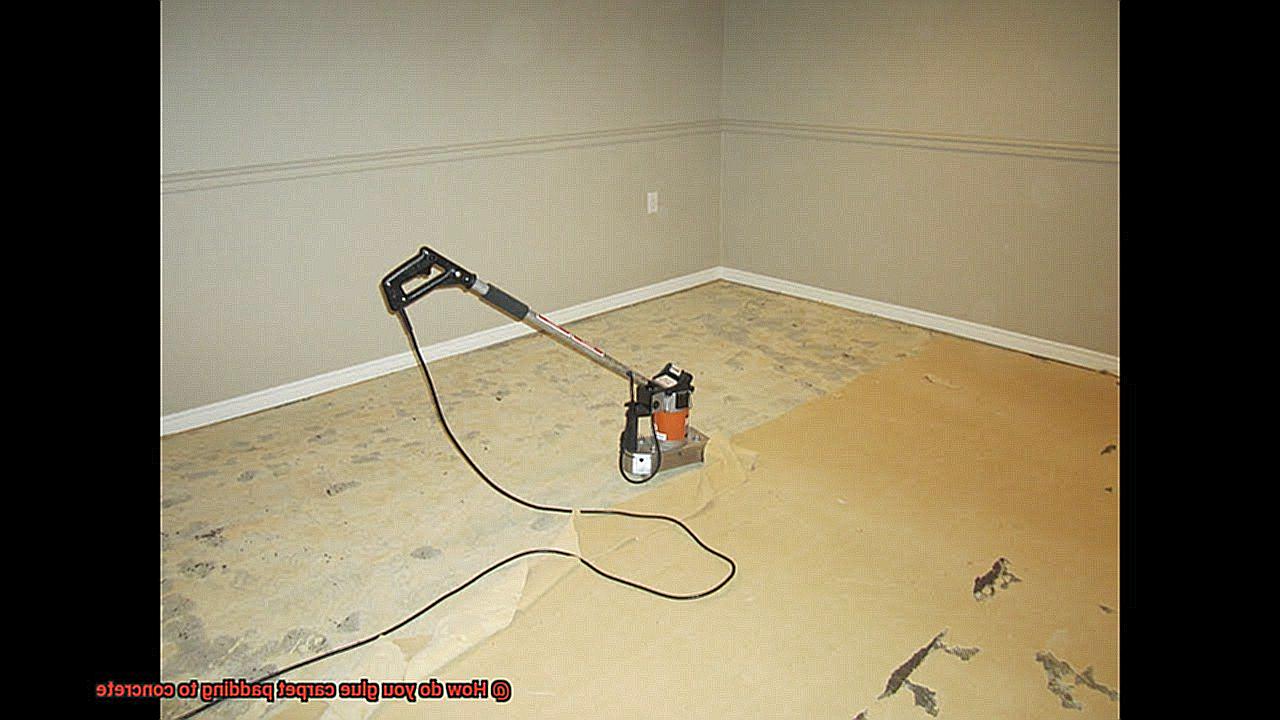
Take a close look at your concrete surface to identify cracks or uneven spots. These imperfections can jeopardize the adhesion of the glue and result in an uneven carpet installation. Prioritize repairing or leveling any cracks or uneven areas before proceeding.
Step 3: Gauge Moisture Content
Moisture is the ultimate nemesis of a strong bond. Employ a moisture meter to assess the moisture content of the concrete. Ideally, it should register below 4%. If the moisture content exceeds this threshold, consider implementing a moisture barrier or allowing the concrete to dry completely before moving forward.
Step 4: Enhance Adhesive Bond (If Necessary)
Smooth or sealed concrete surfaces may require etching or roughening to optimize adhesion. Acid-based etching solutions can be employed to create a rougher texture on the surface. Ensure your safety by following manufacturer instructions when using these solutions.
Step 5: Consider Temperature and Humidity
Extreme temperatures and high humidity levels can significantly impact both drying time and adhesive effectiveness. Set up shop in a well-ventilated area with moderate temperature and humidity levels for optimal results.
Step 6: Select the Perfect Adhesive
Choose an adhesive specifically designed for bonding carpet padding to concrete surfaces. Consider factors such as the type of concrete and the material of the carpet padding. Adhere to the manufacturer’s instructions regarding application and drying time for the adhesive.
Step 7: Apply the Glue
Employ a trowel or notched spreader to apply the adhesive evenly across the concrete surface. Ensure consistent distribution to avoid lumps or bumps that could compromise the bond.
Step 8: Trim and Align
Trim the carpet padding slightly smaller than needed using a utility knife or carpet cutter. This accounts for any expansion or contraction due to temperature and humidity changes. Utilize measuring tape, a straightedge, and a pencil to mark and measure, guaranteeing proper placement and alignment.
Measuring and Cutting the Carpet Padding
Measuring and cutting carpet padding is a crucial step in carpet installation. To get started, make sure the concrete surface is clean and free from debris. Accurately measure the length and width of the room using a measuring tape, adding extra inches for a proper fit. Transfer these measurements onto the padding using a marker or chalk.
Use a straight edge to draw parallel lines across the padding, guiding your cuts. Cut along these lines with a sharp utility knife, applying firm pressure but being careful not to damage the concrete. Replace the blade if it becomes dull.
If you have larger areas, overlap two pieces of padding by a few inches and secure them with adhesive tape to prevent shifting. Roll up the cut padding for easy transportation and storage, keeping it away from moisture or extreme temperatures until installation.
Applying the Adhesive Glue
Today, we embark on a journey to master the delicate art of applying adhesive glue to concrete, ensuring a secure bond for your carpet padding. Just like an artist creating a masterpiece, we’ll guide you through the steps with precision and finesse. So, let’s roll up our sleeves and dive into this creative process.
Step 1: Preparing the Canvas – Cleaning the Concrete Surface
Before we can create our carpeting masterpiece, we must prepare the canvas. Start by sweeping or vacuuming the concrete surface to remove any dust, dirt, or debris. Then, grab a damp mop or cloth to wipe down the surface, ensuring it is spotless. Remember to remove any existing adhesive residue as well. By starting with a clean surface, you provide the perfect foundation for the adhesive glue to work its magic.
Step 2: Choosing the Right Glue – Latex-based or Solvent-based
For our adhesive glue, we have two options – latex-based or solvent-based. These glues are specially formulated for porous surfaces like concrete and provide a strong and durable bond.
The latex-based glue offers easy cleanup with water while solvent-based glue provides excellent adhesion in high traffic areas. Choose the glue that best suits your needs and follow the manufacturer’s instructions for application.
Step 3: Applying the Glue – Spreading it Evenly
Working in small sections at a time, spread the adhesive glue evenly on the concrete using a trowel or notched spreader.
Be cautious not to apply too much glue as excess can seep through the carpet padding, causing unsightly stains and affecting its overall performance. Remember, less is more.
A thin and even layer of adhesive ensures a secure bond without compromising the aesthetics of your carpet.
Step 4: Letting it Set – Tackiness is Key
Allow the adhesive glue to set for a few minutes before placing the carpet padding onto the concrete. This brief waiting period allows the glue to become tacky, increasing its bonding strength. Patience is key here. While you wait, take a moment to appreciate the progress you’ve made in creating your carpeting masterpiece.
Step 5: Placing and Pressing – Ensuring Full Contact
Now comes the moment of truth – positioning the carpet padding onto the tacky adhesive and pressing it firmly into place. Use a carpet roller or walk over the padding with even pressure to ensure full contact with the glue.
Properly align the edges and corners of the padding, paying attention to details to create a seamless and professional finish. With each press and step, you’re one step closer to transforming your concrete canvas into a cozy haven.
Laying the Carpet Padding on the Glue
Whether you’re renovating your home or embarking on a new construction project, properly installing carpet padding is vital for creating a cozy and comfortable space. In this article, we will take you through the step-by-step process of transforming your concrete floor into a work of art by gluing carpet padding onto it.
The Importance of Carpet Padding:
Carpet padding serves multiple purposes beyond providing underfoot comfort. It acts as an insulator, keeping your space warm during colder months, and reduces noise transmission, ensuring a quieter environment. By choosing the right carpet padding and applying it correctly, you can enhance the overall comfort and functionality of your floors.
Types of Carpet Padding:
There are various types of carpet padding available, each with its own unique qualities. Foam padding offers excellent cushioning for maximum comfort, while rubber padding provides superior durability and resistance to moisture.
Felt padding is known for its exceptional sound-absorbing properties, making it ideal for rooms where noise reduction is a priority. Consider your specific needs and preferences when selecting the right type of padding for your project.
Preparing the Concrete Floor:
Before gluing the carpet padding, it is crucial to prepare the concrete floor properly. Start by thoroughly cleaning the surface to remove any dirt, debris, or remnants of previous adhesives. Repair any cracks or uneven areas using appropriate materials to ensure a smooth and level surface. This preparation will facilitate a secure bond between the glue and the flooring.
Applying Adhesive:
Select a high-quality carpet adhesive specifically designed for concrete surfaces. Carefully follow the manufacturer’s instructions for proper application and drying time. Use a trowel or roller to apply the adhesive evenly across the entire floor, ensuring complete coverage. This step is crucial for creating a strong foundation for the carpet padding.
Laying the Carpet Padding:
With the adhesive applied, it’s time to lay the carpet padding. Gently press the padding onto the glued surface, ensuring full contact with the adhesive. Smooth out any wrinkles or air bubbles that may appear, as they can affect the final appearance and performance of your carpet. Take your time to achieve a flat and even surface, paying attention to detail for the best results.
Additional Considerations:
To avoid a spongy or uneven carpet, be cautious not to over-glue. Allow sufficient drying time before proceeding with carpet installation to ensure a secure bond between the padding and the concrete floor. This will provide a stable foundation for your carpet and prevent any potential issues down the line.
Sealing Seams in Carpet Padding (if necessary)
Sealing seams in carpet padding is a crucial step in achieving a professional and durable installation. Whether you choose to use seam sealer or double-sided tape, properly sealing the seams ensures that your padding stays securely in place, preventing any movement or shifting. This not only enhances the overall appearance of your carpet but also prolongs its lifespan by minimizing wear and tear.
One popular method for sealing seams is using a seam sealer. This special adhesive, available in liquid or tape form, is designed specifically for this purpose. While it creates a strong bond between the padding pieces, preventing separation or movement, it can be messy to work with and requires complete drying before continuing with the carpet installation.
Before applying the seam sealer, it’s important to clean the seams thoroughly to remove any debris or dirt. Vacuum or brush the seams carefully to ensure they’re free from particles that could interfere with the adhesive’s effectiveness. Once the seams are clean, apply a thin layer of seam sealer evenly along the entire length of the seam, covering both sides of the padding.
Another method for sealing seams is using double-sided tape. This tape, with adhesive on both sides, provides an additional layer of security to prevent movement or shifting of the padding. However, it’s crucial to choose high-quality tape specifically designed for carpet installation.
When using double-sided tape, apply it evenly along the entire length of the seam, ensuring a firm bond on both sides of the padding. Press down firmly to secure it in place. Just like with seam sealer, wait for the tape to dry properly before proceeding with the carpet installation.
Drying Time and Instructions for Installation of Carpet Over Padding
Transforming a space into a cozy haven with carpet over padding on a concrete surface is an exciting project. However, before you can enjoy the luxury of your new carpet, it’s essential to consider the vital step of allowing sufficient drying time. In this comprehensive guide, we will explore the importance of drying time when installing carpet over padding on concrete and provide detailed instructions to ensure a successful installation.
Why is Drying Time Important?
- Strong Bond: The adhesive used to glue the padding to the concrete needs proper drying time to create a strong bond. This bond prevents any shifting or movement of the carpet once installed, ensuring its longevity and stability.
- Manufacturer’s Instructions: Each adhesive product comes with specific drying time recommendations from the manufacturer. Following these instructions is crucial as it allows the adhesive to reach its full strength, guaranteeing a durable installation.
- Environmental Factors: Drying time can vary depending on factors such as humidity, temperature, and ventilation. Allowing ample drying time ensures that the adhesive cures properly under the prevailing environmental conditions, providing optimal performance.
Proper Preparation:
- Clean and Dry Surface: Before starting the installation process, thoroughly clean and dry the concrete surface. Remove any dust, dirt, or debris that may interfere with the adhesive’s ability to bond with the padding. Repair any imperfections or cracks in the concrete to create a smooth base for the padding.
- Even Adhesive Application: Use a trowel or notched spreader to apply a layer of adhesive onto the concrete. Spread the adhesive evenly across the surface to create a uniform bond with the padding, ensuring a secure and stable foundation.
Installation Process:
- Careful Placement: Once the adhesive is applied, carefully place the carpet padding onto the concrete surface, ensuring it aligns correctly. Work in small sections at a time to prevent the adhesive from drying out before the padding is installed.
- Apply Pressure: After placing the padding, use a rolling pin or a weighted roller to apply even pressure on the entire surface. This step is crucial for proper adhesion between the padding and the concrete, ensuring a tight bond.
Allowing Sufficient Drying Time:
- Follow Manufacturer’s Instructions: Different adhesives have varying drying times. It is crucial to follow the manufacturer’s instructions regarding drying time to achieve the best results. Typically, the drying process can take anywhere from 24 to 48 hours.
- Minimize Traffic and Weight: During the drying period, keep foot traffic to a minimum and avoid placing heavy objects on top of the padding. This precaution allows the adhesive to dry undisturbed and ensures a strong bond between the padding and the concrete.
Tips for Ensuring a Successful Installation
Gluing carpet padding to concrete is the way to go. To ensure a successful installation, follow these expert tips and glue your carpet padding like a pro.
Start with a Clean Canvas:
Before gluing, clean the concrete surface thoroughly. Sweep away dust and debris with a trusty broom or vacuum cleaner. Then, wipe the surface with a damp cloth to remove any remaining dirt. A clean canvas ensures better adhesion between the adhesive and the concrete.
Choose the Perfect Adhesive:
Select an adhesive specially designed for bonding carpet padding to concrete surfaces. Look for strength, durability, and moisture resistance. Consult experts at your local home improvement store or carpet supplier if you’re unsure which adhesive to choose.
Apply Evenly for a Smooth Finish:
Spread the adhesive evenly across the concrete surface using a trowel or notched spreader. Avoid applying too much adhesive as it can create unevenness or lumps under your carpet padding. Remember, even distribution is key to a smooth and comfortable final result.
Patience Pays Off – Allow Proper Drying Time:
Be patient and allow sufficient drying time after applying the adhesive before installing the carpet padding. Check the manufacturer’s instructions for recommended drying time. Waiting patiently ensures that the adhesive fully cures and bonds with the concrete surface, providing a strong foundation for your carpet padding.
Press Down Firmly for a Secure Bond:
Once the adhesive has dried, firmly press down the carpet padding onto the glued surface. Apply even pressure across the entire area to ensure proper adhesion. Use a carpet roller or simply walk on the padding to help it adhere firmly to the concrete. This step guarantees that your carpet padding stays in place for years to come.
PEwNM2Js0qc” >
Also Read: How to Glue Rubber to Concrete?
Conclusion
Gluing carpet padding to concrete can be a straightforward process if you follow the right steps.
First, make sure the concrete surface is clean and free of any debris or dust. Use a broom or vacuum to remove any loose particles.
Next, choose an adhesive specifically designed for bonding carpet padding to concrete surfaces. Apply the adhesive evenly on the concrete using a trowel or notched spreader.
Make sure to cover the entire surface area where the padding will be placed. Once the adhesive is applied, carefully lay down the carpet padding onto the concrete, pressing firmly to ensure proper adhesion.
Finally, allow ample time for the adhesive to dry and cure before installing your carpet on top of the padding.