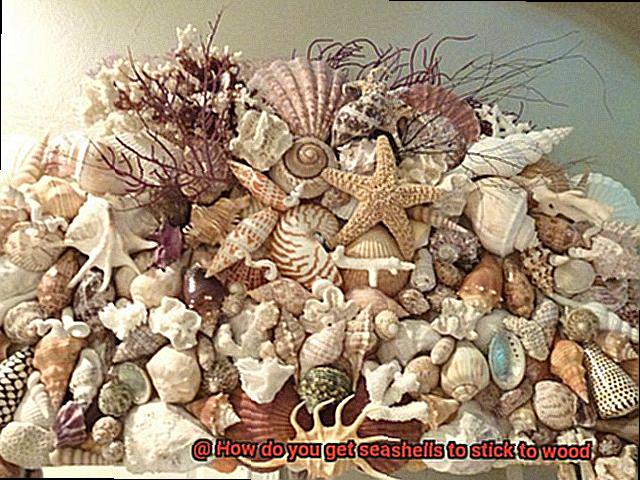
Picture this: a serene coastal retreat, adorned with the captivating beauty of seashells. Their intricate designs and vibrant hues breathe life into any space, instantly transporting you to sandy shores and crashing waves. But here’s the million-dollar question: how do you make these mesmerizing treasures stick to wood effortlessly, ensuring they stay put for years to come?
In this blog post, we’re about to embark on a journey that unveils a simple yet effective technique for securing seashells to wood. Whether you’re revamping an old piece of furniture or creating a stunning wall art display, we’ve got you covered.
So, grab your glue guns and join us as we dive deep into the art of attaching seashells to wood, uncovering expert tips and tricks along the way.
Let’s dive in.
Types of Adhesives for Bonding Wood and Seashells
Contents
The secret to their flawless attachment lies in choosing the right adhesive. In this blog post, we will immerse ourselves in the world of adhesives and explore the various options available for bonding wood and seashells. Get ready to unleash your creativity and create stunning seashell art that will withstand the test of time.
Epoxy Resin: The Superhero of Adhesives
Imagine a superhero with exceptional strength and versatility – that’s epoxy resin for you. This adhesive consists of two components, a resin and a hardener, which when mixed together create an unbreakable bond. Epoxy resin is perfect for attaching seashells to wooden surfaces, as it can withstand both indoor and outdoor conditions. So whether you’re creating a decorative art piece or furniture, epoxy resin will ensure a long-lasting bond that won’t let you down.
Super Glue (Cyanoacrylate): The Quick Fix
Sometimes, you need a quick fix for your seashell and wood bonding needs. Enter super glue, also known as cyanoacrylate adhesive. This adhesive is famous for its lightning-fast drying properties and unyielding bond. It works wonders on smooth surfaces, making it ideal for attaching seashells directly to materials like glass or ceramic. However, keep in mind that super glue may not be as effective on porous surfaces like wood. It’s best suited for smaller-scale projects where precision and speed are key.
Wood Glue: A Reliable Companion
When it comes to bonding wood surfaces together, wood glue is your go-to companion. Available in different formulations such as PVA or aliphatic resin glues, wood glue provides a strong bond while allowing some flexibility. It’s commonly used in woodworking projects and can be a reliable option for attaching seashells to wooden frames or panels. Wood glue is like the trusty sidekick that ensures your seashells stay firmly attached to wood.
Silicone Adhesive: The Versatile Wonder
If you’re looking for a versatile adhesive that can bond a variety of materials, including wood and seashells, look no further than silicone adhesive. This adhesive forms a flexible and waterproof bond, making it perfect for projects exposed to moisture or varying temperatures. Whether you’re attaching seashells to driftwood or creating decorative pieces for aquariums, silicone adhesive has got you covered.
Hot Glue: The Crafty Companion
When it comes to crafts and DIY projects, hot glue is the crafty companion you need. Applied using a hot glue gun, this adhesive heats up and solidifies upon cooling, providing a quick and easy bonding solution.
Preparing the Surfaces
To ensure your seashells stay securely attached to the wood surface, it’s crucial to properly prepare the surfaces. In this guide, we’ll walk you through the essential steps that will set the foundation for a long-lasting bond. So, grab your cleaning supplies, put on your creative hat, and let’s get started.
Step 1: Clean the Wood Surface
Before diving into any adhesive application, it’s vital to cleanse the wood surface thoroughly. Dust, dirt, and grease can hinder the adhesive’s effectiveness, so use a mild detergent or soap mixed with warm water to remove these impurities. By creating a clean and smooth surface, you ensure optimal adhesion.
Step 2: Sanding the Wood
Now that your wood surface is squeaky clean, it’s time to give it a gentle sanding. This step helps create a rough texture that improves the bond between the adhesive and the wood. Grab a fine-grit sandpaper and lightly sand the area where you’ll be attaching your beloved seashells. Be careful not to go overboard and damage the wood – a light touch will do wonders.
Step 3: Remove any Existing Finish
If your wood surface has any varnish or paint, it’s important to remove it before attaching seashells. Adhesives require direct contact with bare wood for optimal bonding. Use a paint stripper or sandpaper to strip away the existing finish, ensuring you reach the bare wood beneath.
Step 4: Smooth Out Imperfections
Inspect your wood surface for imperfections like knots, cracks, or uneven areas. Fill them using a suitable wood filler or putty and allow it to dry completely. Once dry, gently sand these filled areas until they are smooth and even with the surrounding wood. This step ensures a seamless canvas for your seashells.
Step 5: Protecting the Wood
Seashells can be sensitive to certain chemicals found in adhesives or sealants. To protect both the shells and the wood surface, it’s wise to apply a thin layer of clear sealant or primer on the wood before attaching the seashells. This added barrier minimizes the risk of any potential damage to your precious sea treasures.
Applying Adhesive Glue
The allure of the beach is hard to resist, and what better way to bring that coastal charm into your home than with seashell art on wood. But how do you ensure those delicate treasures stick securely without tumbling off?
In this guide, we’ll explore the step-by-step process of applying adhesive glue to help seashells adhere to wood. So grab your favorite seashells and let’s embark on this creative journey.
Step 1: Choose the Perfect Glue:
Not all glues are created equal, especially when it comes to bonding porous materials like wood and seashells. To ensure a strong bond, opt for a high-quality craft glue specifically designed for these materials. Consider the type of wood and seashells you’re working with to select the most suitable adhesive.
Step 2: Prepare the Surfaces:
Cleanliness is paramount. Before applying the glue, thoroughly clean both the wood and seashells. Gently scrub them with a mild soap and water solution, being careful not to damage the fragile seashells. Eliminate any dirt or debris that could hinder adhesion.
Step 3: Apply with Precision:
Using a small brush or applicator, skillfully apply a thin, even layer of glue to both the wood and seashells. Ensure complete coverage on the surfaces that will come into contact. Work swiftly yet carefully, as some glues dry rapidly. Follow the manufacturer’s instructions for optimal results.
Step 4: Press and Let It Set:
Press the seashells firmly onto the wood surface, exerting even pressure with your hands or a flat object like a credit card. This guarantees a secure bond. Allow ample time for the glued seashells to dry completely before handling or moving them. Drying times may vary depending on the type of glue used.
Step 5: Test for Resilience:
Once dry, gently tap the seashells to test their adhesion. If they feel loose, consider reapplying glue or using a stronger adhesive for added security. Keep in mind that humidity and temperature can influence drying time and adhesive strength, so factor in these variables during your project.
Adding a Clear Sealant or Varnish
Get ready to dive into the world of seashell art on wood, because I have a secret to share with you – the key to creating stunning and enduring seashell masterpieces lies in adding a clear sealant or varnish. This technique not only keeps your seashells securely in place, but also preserves their natural beauty for years to come. So let’s get started on this exciting journey.
First things first, before applying any sealant or varnish, ensure that your wood surface is squeaky clean. Grab a soft cloth or sponge and a gentle detergent mixed with warm water, and give that wood a good scrub. We want to eliminate any dirt, dust, or debris that could interfere with the adhesion process. After cleaning it thoroughly, allow it to dry completely before moving forward.
Now it’s time to apply that magical clear sealant or varnish. Choose a product specifically designed for use on wood surfaces – trust me, it’s worth the investment. Opt for a clear, water-based option to avoid altering the natural color of both the wood and seashells.
When applying the sealant or varnish, take it slow and steady. Work in small sections at a time to ensure even coverage. Use long, smooth strokes and be careful not to over-brush – we don’t want any air bubbles or streaks ruining our masterpiece. And don’t forget those intricate details and crevices on the wood surface – make sure the sealant reaches every nook and cranny where seashells will be placed.
Once you’ve coated the wood surface with the sealant or varnish, let it dry according to the manufacturer’s instructions. This may take several hours or even overnight, so be patient – good things come to those who wait. Once it’s dry, lightly sand the surface with fine-grit sandpaper. This step helps create a slightly rough texture, allowing better adhesion of the seashells.
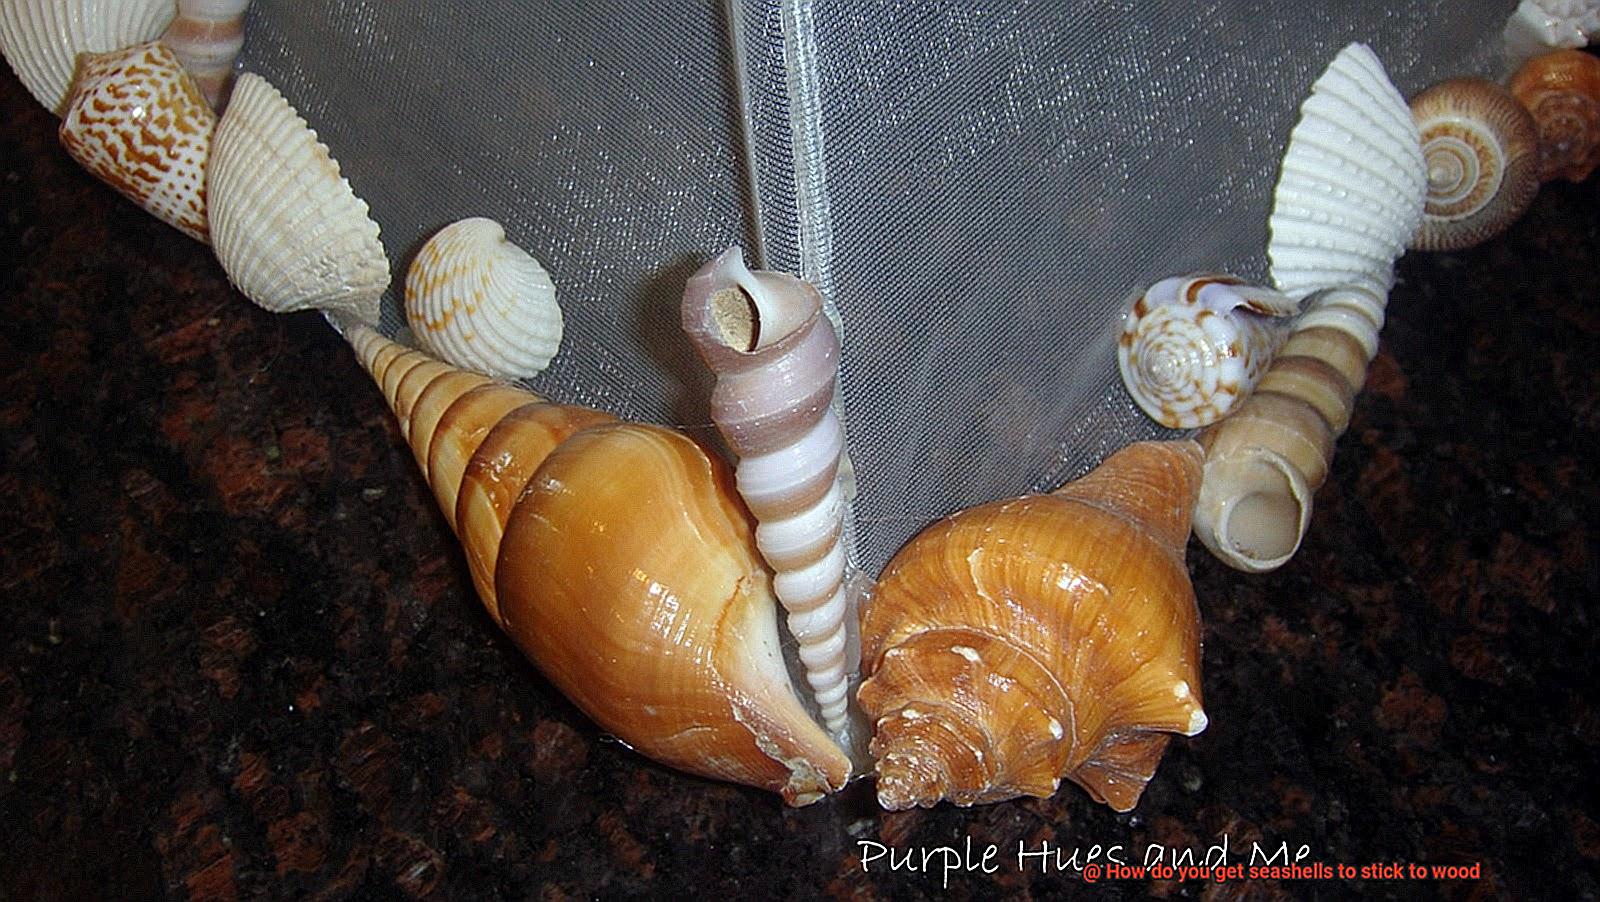
Now comes the fun part – arranging and attaching the seashells. Before gluing them down, play around with different arrangements to find the design that speaks to you. Once you’ve decided, grab a clear adhesive or glue and apply a small amount to the back of each shell. Press them firmly onto the prepared wood surface and hold them in place for a few seconds to ensure they stick.
Almost there. Now it’s time for one final coat of sealant or varnish. Apply it generously over the entire surface, including the seashells. This extra layer will seal and protect your precious shells, keeping them safe from potential damage. Allow the final coat to dry completely before proudly displaying your seashell and wood creation.
Using Hot Glue or a Hot Glue Gun
In the realm of arts and crafts, hot glue and hot glue guns have become indispensable tools for creative minds. Whether you’re a DIY enthusiast or a professional artist, the versatility and convenience of hot glue make it an ideal adhesive for various projects. In this article, we will explore the advantages and disadvantages of using hot glue or a hot glue gun, specifically focusing on sticking seashells to wood. So, let’s dive in and discover the wonders of hot glue.
Advantages of Hot Glue and Hot Glue Guns:
Quick Drying Time:
One of the greatest advantages of using hot glue is its rapid drying time. Unlike other adhesives that require hours to cure, hot glue solidifies within seconds, allowing you to continue working on your project without delay. When sticking seashells to wood, this quick-drying property ensures that your decorative masterpiece is ready to be displayed or handled in no time.
Ease of Use:
Hot glue guns are readily available in craft stores and online, making them easily accessible to beginners and professionals alike. These guns feature a simple design with a trigger mechanism that allows precise application of the adhesive. Additionally, inserting a glue stick is a breeze, ensuring a hassle-free experience throughout your project.
Strong Adhesion:
When used correctly, hot glue provides a strong bond between materials. This makes it suitable for various crafts and DIY projects where durability is crucial. Sticking seashells to wood becomes effortless with hot glue as it ensures a secure attachment that withstands normal handling and display.
Disadvantages of Hot Glue and Hot Glue Guns:
Temperature Sensitivity:
Hot glue is sensitive to temperature fluctuations. Extreme heat can cause the adhesive to melt, compromising the bond between materials. Therefore, if you intend to display your seashell-decorated wood piece outdoors, it is advisable to explore alternative adhesives such as epoxy resin or marine-grade adhesive that offer better resistance to temperature changes.
Limited Longevity:
While hot glue provides a reliable bond, its longevity may be limited in certain conditions. Over time, especially in humid environments, the adhesive properties of hot glue can weaken, leading to potential detachment of the seashells from the wood surface. If you desire a long-lasting and robust attachment, consider using stronger adhesives specifically formulated for projects involving seashells and wood.
Factors Affecting Adhesion Success
Today, we will explore the intricate factors that determine the success of adhesion when bonding seashells to wood. By delving into these key elements, you will gain the knowledge and confidence to create stunning seashell crafts that withstand the test of time.
Factor 1: Surface Preparation:
The foundation of any successful adhesion lies in proper surface preparation. To ensure a strong bond, it is crucial to remove dirt, dust, and grease from the wood surface. Additionally, creating a rougher surface through sanding enhances the adhesive’s grip. Grab your sandpaper and prepare that wood surface for a flawless connection.
Factor 2: Type of Adhesive:
Choosing the right adhesive is paramount in achieving a robust bond. With various options available, such as epoxy, super glue, or hot glue, each adhesive possesses unique strengths and properties. Take time to research and select an adhesive that aligns with your specific needs for bonding seashells to wood.
Factor 3: Compatibility:
Ensuring compatibility between the adhesive and the materials being bonded is critical. Certain adhesives may not work well with specific seashell types or particular wood species. To avoid disappointment, consult manufacturer recommendations or conduct small-scale tests before committing to your project.
Factor 4: Temperature and Humidity:
Environmental conditions significantly impact adhesion success. Extreme temperatures or high humidity levels can affect curing time and overall bond strength. Therefore, it is best to work in a controlled environment with moderate temperature and humidity levels for optimal results.
Factor 5: Pressure and Drying Time:
Applying adequate pressure during the bonding process ensures maximum contact between seashells and the wood surface. Utilize clamps or weights to achieve this desired pressure. Moreover, allowing sufficient drying time as per the manufacturer’s instructions enables the adhesive to fully cure and reach its maximum strength.
Factor 6: Surface Finish:
The type of finish on the wood surface can influence adhesion success. Finishes like varnish or wax can create barriers that hinder the bonding process. To overcome this, remove any existing finishes or select an adhesive capable of penetrating through the surface finish for enhanced adhesion.
Sanding the Backside of the Shells
Today, we embark on a journey into the world of sanding the backside of seashells before attaching them to wood. This essential step is the key to ensuring secure adhesion and achieving a flawless finish for your art projects.
The Importance of Sanding:
Imagine you’ve collected an array of beautiful seashells during your beachcombing adventures, eager to transform them into works of art. Before you dive into gluing them onto your wooden canvas, there’s a crucial step you don’t want to skip—sanding the backside of the shells. But why is sanding so important? Let’s delve into the reasons:
Increased Surface Area:
Choosing shells with a flat or concave backside allows for a larger surface area for gluing. This expanded contact area between the shell and the wood enhances stability and durability, ensuring your artwork stands the test of time.
Better Adhesion:
Sanding removes any shiny or smooth surfaces on the shell’s backside, creating a rough texture that greatly improves adhesive properties. This roughness allows the glue to form a strong bond with the shell, resulting in a secure attachment that won’t easily come loose.
Aesthetic Appeal:
Beyond enhancing adhesion, sanding adds an intriguing visual element to your artwork. The rough texture created by sanding provides a natural, organic look that seamlessly blends with the wood, elevating the overall beauty of your project.
The Sanding Process:
Now that you understand why sanding is crucial, let’s discuss how to do it right. Follow these steps for optimal results:
Gather your materials:
Prepare a fine-grit sandpaper or a sanding block, ensuring it is suitable for delicate shells. Having a soft brush or cloth on hand for cleaning is also essential.
Apply gentle pressure:
With the sandpaper or sanding block, gently rub it in circular motions across the backside of each shell. The goal is to create a slightly rough texture by removing any smooth or shiny surfaces. Take care not to exert too much force to prevent cracks or breakages, preserving the delicate beauty of these treasures.
Cleanse and prepare:
Once you’ve finished sanding, take a moment to clean off any dust or debris from both the shells and the wood surface. Using a soft brush or cloth, remove any loose particles to ensure optimal adhesion and achieve a flawless finish.
Using Shell Sealants
Shell sealants are specially designed adhesives that provide a strong and durable bond between seashells and wood. They ensure that your precious shells stay securely in place, allowing you to showcase them with confidence. Let’s dive into the different types of shell sealants and how to use them effectively.
One popular choice is epoxy resin. This two-part adhesive consists of a resin and a hardener. When mixed together, they create a powerful bond that can withstand the test of time. Before applying epoxy resin, make sure to properly prepare the wood surface by cleaning it thoroughly and lightly sanding it for better adhesion.
Then, use a small brush or toothpick to apply the resin directly onto the back of each seashell. Press the shells firmly onto the wood surface, ensuring proper positioning, before the resin starts to set. Wipe away any excess glue, and allow the resin to cure for about 24 hours.
Another option is silicone caulk, a flexible and waterproof adhesive that is easy to work with. Apply a thin bead of silicone caulk onto the back of each seashell, press them firmly onto the wood surface, and hold them in place for a few seconds.
Use outdoor-grade silicone caulk if you plan to display your seashells outside. Follow the manufacturer’s instructions regarding drying time, as the caulk needs to fully cure to form a strong bond.
Remember, whether you choose epoxy resin or silicone caulk, it’s crucial to follow the manufacturer’s instructions and allow sufficient curing time for optimal results. Avoid touching or moving the shells during this period to ensure a secure bond.
In addition to epoxy resin and silicone caulk, there are other shell sealants available in the market. Some popular options include:
- Hot glue: Hot glue guns can provide a quick and easy way to attach seashells to wood surfaces. However, keep in mind that hot glue may not be as durable as epoxy resin or silicone caulk, especially in high-temperature environments.
- Liquid nails: Liquid nails are construction adhesives that offer strong bonding capabilities. They can be used for attaching seashells to wood, but make sure to choose a variant that is suitable for your specific project.
- Cyanoacrylate glue: Also known as superglue, cyanoacrylate glue is a fast-drying adhesive that forms an instant bond between seashells and wood. It is ideal for small shells or delicate pieces that require precision placement.
When using any shell sealant, consider the following tips for optimal results:
bs7vvVgC8WA” >
Conclusion
To make seashells adhere to wood, there are a few methods you can try.
One option is using a strong adhesive like epoxy or marine-grade glue. These types of adhesives provide a secure bond that can withstand the elements and prevent the shells from falling off.
Another technique is to drill small holes into the wood and thread thin wire through them, creating a framework for the shells to be attached to. This method allows for flexibility and easy removal if desired.
Additionally, you can use hot glue or silicone sealant to affix the seashells directly onto the wood surface. Just be sure to apply enough pressure and hold them in place until the adhesive sets.
Whichever method you choose, it’s important to clean both the shells and the wood beforehand to ensure optimal adhesion.