Struggling with that stubborn extension glue on your hair extensions?
We’ve all been there, my friend. Whether you’re a seasoned extension wearer or a newbie, removing that sticky mess can feel like an uphill battle.
But don’t fret. We’re here to lend a helping hand.
In this blog post, we’ll walk you through the process of safely and effectively getting rid of that pesky glue from your extensions. Say goodbye to painful tugs and frustrating pulls – we’ve got your back.
So sit tight, relax, and get ready to discover the ultimate secret to restoring your extensions to their former glory.
Gather the Necessary Tools for Removing Extension Glue
Contents
- 1 Gather the Necessary Tools for Removing Extension Glue
- 2 Applying the Glue Remover to the Extensions
- 3 Allowing the Glue Remover to Penetrate
- 4 Gently Comb Through the Extensions After Application
- 5 Repeating the Process as Needed
- 6 Cleansing and Conditioning After Removal
- 7 Air Drying Extensions for Maximum Care
- 8 Benefits of Professional Assistance with Extension Glue Removal
- 9 Conclusion
When it comes to removing extension glue from your hair extensions, having the right tools at your disposal is crucial. In this comprehensive guide, we will walk you through the necessary tools and steps to safely and effectively remove extension glue. By gathering these tools beforehand, you can ensure a smooth and successful process that leaves your extensions in great condition for future use.
Tools You’ll Need:
- Acetone: Opt for pure acetone, a powerful solvent that breaks down and dissolves glue effectively.
- Cotton balls or pads: These will be used to apply the acetone to the extensions. Make sure you have enough to cover each extension thoroughly.
- Aluminum foil: Wrapping the extensions in aluminum foil after applying acetone creates a barrier, preventing evaporation and allowing the acetone to work its magic.
- Comb or brush: Use a fine-toothed comb or brush to gently detangle the extensions before and after removing the glue, minimizing any potential hair damage.
- Towel or cloth: Keep a towel or cloth nearby to wipe away excess acetone or glue residue during the removal process, ensuring a clean workspace.
- Hair clips or ties: Secure the extensions with hair clips or ties, keeping them out of the way while you work on removing the glue.
- Plastic gloves: Protect your hands from potential irritation by wearing plastic gloves throughout the removal process.
Step-by-Step Guide:
- Prepare your workstation: Set up a well-ventilated area with all your tools within reach.
- Apply acetone to cotton balls/pads: Soak cotton balls or pads with acetone, ensuring they are wet but not dripping.
- Place acetone-soaked cotton on glued area: Carefully place the acetone-soaked cotton on the glued area of each extension, ensuring complete coverage.
- Wrap extensions in aluminum foil: Wrap each extension in aluminum foil, securing it to create a barrier that prevents acetone evaporation.
- Allow acetone to work: Leave the acetone-soaked cotton and wrapped extensions in place for the recommended waiting time, as mentioned in the manufacturer’s instructions.
- Gently comb through extensions: After the waiting period, remove the aluminum foil and use a fine-toothed comb or brush to gently detangle the extensions, starting from the ends and working your way up towards the root. Be cautious not to pull or tug too hard.
- Repeat if necessary: If there is still glue residue remaining, repeat steps 2-6 until all the glue is removed.
- Cleanse and condition: Thoroughly wash the extensions with a mild shampoo and warm water to remove any residual glue or acetone. Follow up with a conditioner to keep the hair soft and manageable.

Applying the Glue Remover to the Extensions
Hair extensions can transform your hairstyle, but when it’s time to remove them, it’s important to do so without causing damage. This step-by-step guide will walk you through the process of applying glue remover to extensions, ensuring a safe and successful removal.
Step 1: Gather Your Supplies
Before you begin, gather all the necessary tools. You’ll need a suitable glue remover designed specifically for hair extensions, a comb or wide-toothed brush, cotton balls or pads, aluminum foil, gloves, and lukewarm water for rinsing.
Step 2: Prep the Extensions
Start by thoroughly cleaning your extensions and allowing them to dry completely. This removes any styling products or oils, ensuring that the glue remover can penetrate effectively and expedite the removal process.
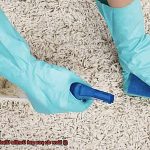
Step 3: Apply the Glue Remover Sparingly
Using a small amount of glue remover, focus on applying it directly onto the glued sections of the extensions. Be cautious not to overapply, as excessive use can lead to unnecessary damage or breakage. Less is more in this case.
Step 4: Let It Sit
Now it’s time to let the glue remover work its magic. Follow the recommended waiting time specified by the manufacturer. Each product has its own timeframe for optimal results, so be sure to read and follow the instructions carefully. During this waiting period, the glue remover breaks down the adhesive bonds between the extensions and natural hair.
Step 5: Gently Separate the Extensions
Once the waiting time is up, gently separate the extensions from your natural hair using your fingers or a wide-toothed comb. Avoid pulling or tugging forcefully to prevent tension and potential damage to both your extensions and natural hair.
Step 6: Repeat if Necessary
Stubborn or old adhesive may require multiple applications of glue remover to dissolve completely. If you encounter resistance during removal, repeat the process by applying a small amount of glue remover and allowing it to sit again before attempting to separate the extensions. Patience is key here.
Step 7: Rinse and Condition
After successfully detaching the extensions, it’s crucial to rinse both the extensions and natural hair thoroughly with lukewarm water. This step removes any residue from the glue remover. Follow up with a deep conditioning treatment to restore moisture and nourish the hair, ensuring your extensions remain soft and manageable.
Allowing the Glue Remover to Penetrate
Removing extension glue can be a daunting task, but with the right approach, you can achieve seamless and damage-free results.
In this section, we will delve into the importance of allowing the glue remover to penetrate the extensions for effective removal.
Patience and proper application are crucial in ensuring that the glue breaks down and dissolves, allowing you to effortlessly remove your extensions.
The Power of Patience:
Rushing through the removal process can lead to incomplete results and potential damage to the extensions. Different types of extension glue require varying amounts of time for penetration. By exercising patience, you allow the remover to thoroughly break down the adhesive, making removal easier.
Proper Application for Maximum Penetration:
To ensure maximum penetration of the glue remover, generously apply it directly onto the glued area of the extensions. Make sure every glued section is covered with the remover. Gently massage it into the glue using your fingertips or a soft brush, distributing it evenly for optimal results.
Allowing Time for Breakdown:
Give the glue remover ample time to work its magic, usually around 10-30 minutes. During this waiting period, cover the extensions with plastic wrap or a cap to create a warm, sealed environment. This promotes better penetration and accelerates the breakdown of the glue.
Avoid Excessive Manipulation:
While waiting for the glue remover to penetrate, resist the urge to comb or brush through your extensions. Excessive manipulation can create tension and worsen the adhesive bond. Instead, let the remover do its job undisturbed.
Testing for Sufficient Dissolution:
After sufficient time has passed, gently test if the glue has dissolved by trying to separate a small section of extension hair from your natural hair. If it detaches easily without any resistance or pulling, then the remover has effectively penetrated and broken down the glue.
Repeat if Necessary:
If stubborn sections still have remnants of glue, repeat the process with additional time and application of the remover. Persistence is key until all extensions are free from any glue residue.
Gently Comb Through the Extensions After Application
Now, let’s talk about an essential step to ensure they blend seamlessly with your natural hair – gently combing through them. In this guide, we’ll cover the crucial steps and valuable tips for combing through your extensions with care and finesse.
Step 1: Choose the Right Tool
To prevent tangling and breakage, opt for a wide-toothed comb or a specialized extension brush. These tools are designed to glide through your hair effortlessly, without causing damage.
Step 2: Start from the Ends
Begin combing from the ends of your hair, working your way up towards the roots. This approach prevents unnecessary tugging or pulling, which can lead to damage. Be patient and take your time – rushing through this process is a big no-no.
Step 3: Daily Maintenance
Make it a habit to comb through your extensions at least once a day. Regular detangling prevents knots and keeps them looking their best. Remember, healthy and tangle-free extensions mean happy hair.
Step 4: Be Mindful of Different Extension Types
While combing from the roots works for most glue-based extensions, some types like tape-in or fusion extensions require a different approach. Instead, gently detangle the ends and mid-lengths of the hair to avoid loosening the bonds.
Step 5: Nourishment and Care
Regularly combing through your extensions helps distribute natural oils from your scalp to them, keeping them nourished and shiny. It’s a win-win for both your natural hair and the extensions.
Step 6: Stubborn Knots or Tangles
Encountered stubborn knots or tangles? Don’t panic. Apply a leave-in conditioner or detangling spray to ease the process and prevent breakage. Gently work through the knots using your fingers or a wide-toothed comb, avoiding excessive force or pulling.
Repeating the Process as Needed
Removing extension glue requires patience and precision. In this blog post, we will explore why repeating the process as needed is essential for successful removal. Let’s dive in.
Eliminating Residual Traces of Glue:
Repeating the removal process ensures the elimination of hidden remnants of glue. Even if you think you’ve removed all adhesive, there may still be traces that can cause tangling or discomfort when wearing the extensions. Thoroughly inspect both the extensions and your natural hair after each removal attempt to ensure a meticulous cleaning.
Conquering Stubborn Glue:
Sometimes, certain glues just won’t budge, no matter how hard you try. This can happen with strong adhesives or excessive application. In such cases, repeating the removal steps multiple times may be necessary until all extensions are completely detached. However, exercise caution and use gentle force to avoid damaging your natural hair.
Setting the Foundation for Future Applications:
Before reapplying extensions, it is crucial to remove all previous glue residue. By repeating the removal process diligently, you guarantee a clean and healthy foundation for new extensions. This not only aids blending but also prevents potential damage to your natural hair.
Patience is Key:
Remember, rushing through the removal process can cause more harm than good. Take your time and be patient. Use gentle combing techniques, suitable tools, and start from the ends to prevent unnecessary breakage or damage.
Cleansing and Conditioning After Removal
Now, it’s time to give your locks the tender love and care they deserve. Cleansing and conditioning are the dynamic duo that will revive and rejuvenate your strands after removal, especially when it comes to dealing with stubborn glue. Let’s dive into why this process is so crucial and how you can make it a pampering experience for your hair.
First things first, let’s tackle that clingy ex of yours – the extension glue. We all know how tenacious it can be, clinging onto our strands like glue (pun intended). But fear not. A gentle clarifying shampoo is your secret weapon in this battle.
Look for a specialized formula designed to remove residue left behind by glue or opt for a sulfate-free option that won’t strip your hair of its natural oils. Massage that shampoo into your scalp and hair, paying extra attention to the areas where the extensions were attached.
Rinse thoroughly with warm water, and bid farewell to that clingy residue.
Now that the glue is history, it’s time to drench your natural hair in a nourishing conditioner to restore its moisture and softness. Choose a conditioner that suits your hair type and is hydrating enough to bring life back to those strands. As you apply the conditioner from mid-length to ends, avoid the roots to prevent them from becoming weighed down. Allow the conditioner to work its magic for a few minutes, indulging your senses in its luscious aroma, then rinse thoroughly.
Ah, but we’re not done yet. It’s time for a luxurious spa day for your tresses – a weekly deep conditioning treatment. This little gem provides an extra dose of nourishment and helps repair any damage caused by the extensions or glue. Look for a deep conditioning mask or treatment specifically formulated for damaged or chemically treated hair. As you apply it to damp hair, focus on the lengths and ends, where your hair needs the most love. Embrace the recommended time mentioned on the product packaging and let the treatment work its wonders. Rinse thoroughly, and marvel at the newfound vitality in your strands.
Now that you’ve cleansed and conditioned your hair post-removal, it’s time to towel dry it with care. No vigorous rubbing here. Instead, gently blot your hair to prevent breakage and preserve its strength. Give your hair a well-deserved break from heat styling tools to allow it to recover fully. Once your hair is dry, you can either proceed with your regular styling routine or let it bask in its natural beauty for a while, giving it some time without further manipulation. This will allow your natural hair to regain its strength and avoid additional stress.
Air Drying Extensions for Maximum Care
Today, we’re going to discuss the importance of air drying extensions for maximum care.
We all know that washing our hair extensions is essential for maintaining cleanliness and freshness. But did you know that how you dry them can make a big difference in their overall quality and lifespan? That’s right – air drying is the way to go.
Why is air drying so crucial? Let’s break it down:
- Prevents damage: Using heat tools like blow dryers on your extensions can be a recipe for disaster. Excessive heat can make them brittle and prone to breakage. By air drying, you’re giving your extensions a chance to dry naturally without the risk of damage.
- How to air dry: After washing, gently squeeze out any excess water from your extensions. No twisting or wringing, please. Use a soft towel or microfiber cloth to blot them and remove as much moisture as possible. Then, lay them flat on a clean towel or hang them up in a well-ventilated area away from direct sunlight or heat sources.
- Be patient: Rome wasn’t built in a day, and neither are perfectly dried extensions. It’s essential to let them air dry completely before styling or storing them. The drying time can vary depending on factors like length, thickness, and humidity levels. So sit back, relax, and let nature do its thing.
- Hands off: While your extensions are drying, resist the temptation to touch or manipulate them. This can disrupt their natural shape and texture and lead to breakage or damage. Also, hold off on brushing or combing until they’re fully dry.
- Speed up the process (if needed): If you’re in a hurry, use a fan on a low setting to gently blow air over your extensions. But remember, not too close. We don’t want any tangles.
- Style with care: Once your extensions are completely dry, you’re good to go. Style them as desired, but don’t forget to use heat protectant products when using heat tools. This extra step will further protect your extensions from heat damage.
By air drying your extensions properly, you’re ensuring that they stay in optimal condition for the long haul. Air drying allows your extensions to maintain their natural shape and texture while minimizing the risk of damage caused by excessive heat or manipulation.
Benefits of Professional Assistance with Extension Glue Removal
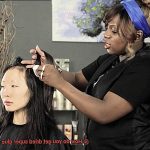
Seeking professional assistance for extension glue removal offers a multitude of benefits that can make a world of difference in your hair extension experience. From expertise and time-saving to damage prevention and enhanced results, the advantages are undeniable.
First and foremost, professional expertise is a game-changer. These professionals have been trained in the art of safely removing extension glue without causing any harm to your natural hair or extensions. They know all the right techniques and products to use, ensuring a smooth and effective removal process. So say goodbye to the stress and potential damage that can come with DIY glue removal.
Another major advantage of seeking professional assistance is the time-saving factor. Let’s face it, removing extension glue can be a time-consuming task, especially if you’re not familiar with the process. Professionals can efficiently remove the glue in a much shorter time frame, saving you valuable time and effort. This is particularly beneficial for those who lead busy lives or have multiple extensions to remove.
Speaking of damage prevention, trying to remove extension glue on your own can be risky business. Without proper knowledge and experience, you run the risk of damaging your natural hair or extensions. But with professional assistance, you can rest assured that the removal process will be done correctly and safely, minimizing any potential harm. These experts know how to handle different types of extensions and apply appropriate techniques to prevent breakage or damage.
One major perk of seeking professional help is access to specialized products. Professionals have access to high-quality products specifically designed for extension glue removal. These professional-grade products are formulated to effectively dissolve the glue without causing any harm to your hair or scalp. By using these specialized products, you increase your chances of successful and damage-free removal.
Let’s not forget about the enhanced results that come with professional assistance. These experts have the skills and tools to ensure that all traces of glue are completely removed, leaving your natural hair and extensions in optimal condition. This not only enhances the overall appearance of your extensions but also increases their longevity.
And finally, professional assistance comes with expert advice and aftercare. These professionals can provide you with valuable insights on how to properly care for your extensions after the glue removal process. They can recommend suitable products and techniques to maintain the health and longevity of your extensions, ensuring they continue to look and feel their best.
JTI-fhMFXbY” >
Also Read: How To Remove Glue In Hair Extensions?
Conclusion
Removing extension glue from extensions can be a tricky task, but fear not, for there are effective methods to tackle this sticky situation.
One way is to gently heat the glue with a hairdryer on low heat, allowing it to soften and become more pliable. Then, using a fine-toothed comb or your fingers, carefully work through the extensions, separating them from the glue.
Another method involves applying a small amount of oil or adhesive remover directly onto the glue and letting it sit for a few minutes. This will help break down the adhesive, making it easier to remove.
Remember to be patient and gentle throughout the process to avoid damaging your precious extensions.