Get ready to dive into the fascinating world of gluing aquarium plants to rocks.
We all know that creating a captivating underwater oasis for our aquatic buddies is what makes owning an aquarium so thrilling. And what better way to amp up the beauty than by attaching plants to rocks?
In this blog post, we’ll guide you through each step of bonding aquarium plants to rocks, ensuring a secure and visually stunning display for your tank.
How do you glue aquarium plants to rocks
Contents
- 1 How do you glue aquarium plants to rocks
- 2 Choosing the Right Glue
- 3 Cleaning the Surfaces
- 4 Planning the Arrangement
- 5 Applying the Glue
- 6 Allowing Time for Drying and Curing
- 7 Placing the Rocks in the Aquarium
- 8 Maintaining the Plants Regularly
- 9 Conclusion
Step 1: Gather Your Gear
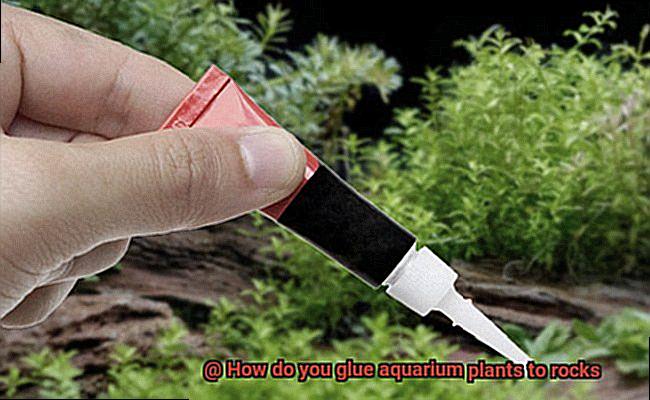
First things first, you’ll need some aquarium-safe glue. Look for a non-toxic adhesive specifically designed for underwater use – you don’t want any harm coming to your aquatic ecosystem. You can find this special glue at local pet stores or aquatic supply retailers. Don’t forget to grab some natural rocks and the plants you’re itching to attach too.
Step 2: Prep Those Rocks
Before diving into the gluing process, make sure your rocks are squeaky clean and debris-free. Give them a good rinse with freshwater, getting rid of any residues that might mess with the glue’s magic. Oh, and be sure to let those rocks dry completely – moisture can be quite the party pooper when it comes to adhesive bonding.
Step 3: Plant Prep Party
Time to spruce up those chosen aquarium plants. Trim away any damaged or decaying leaves, leaving only the healthiest and heartiest parts for attachment. Remember, we want these babies thriving on our rocks. It’s also helpful to lightly roughen up the area where the glue will go by gently scratching it with a smooth file – this will give us some extra bonding power.
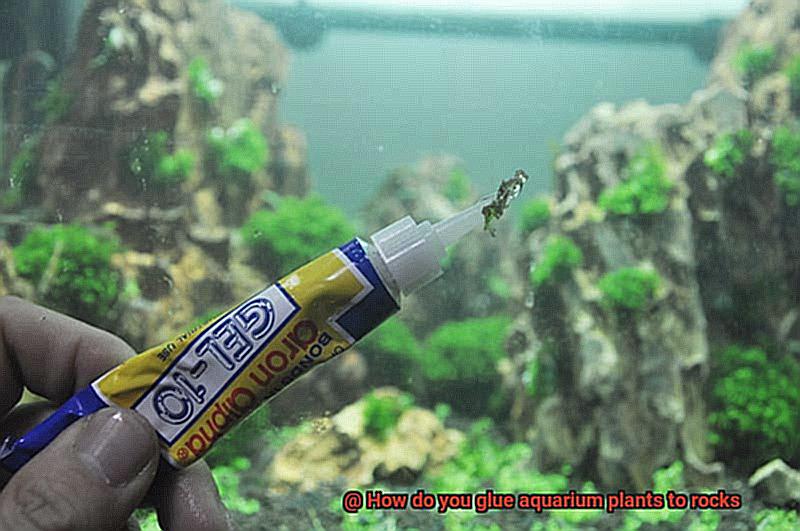
Step 4: Glue Galore
Now comes the fun part – applying that glue. Grab a small precision applicator or even a trusty toothpick and lay down a thin layer of glue on the rock’s surface. But be careful not to go overboard – we don’t want our tank looking like a glue factory exploded. A little dab will do ya.
Step 5: Plant Placement Party
It’s time to get those plants secured in style. Carefully position them on the glue-coated section of the rock, pressing gently to create a sturdy bond. Hold your breath for just a moment while the glue starts to set. And remember, watch out for those precious root systems – we don’t want any accidental plant casualties.
Choosing the Right Glue
Transforming your aquarium into a captivating underwater landscape requires careful consideration and attention to detail. One crucial aspect that often goes overlooked is selecting the right glue for attaching aquarium plants to rocks.
In this comprehensive guide, we will explore why choosing the correct adhesive is of utmost importance and provide you with expert tips on selecting and applying the glue to ensure a secure attachment that enhances the beauty and balance of your aquatic haven.
The Importance of Selecting the Right Glue:
Aquarium plants are exquisitely delicate, necessitating a strong adhesive capable of withstanding water conditions without harming them. Choosing the wrong glue can result in damage or detachment of the plants, disrupting the aesthetics and ecological equilibrium of your aquarium.
Recommended Glues for Attaching Aquarium Plants to Rocks:
Cyanoacrylate-Based Glue (Super Glue):
This adhesive is highly recommended due to its rapid bonding capabilities and aquatic life safety. Opt for a super glue without additives or fillers, as these may contain harmful chemicals that could compromise the health of your plants and fish.
Gel-Type Super Glue:
Choose a gel-type super glue over its liquid counterpart. The gel consistency allows for better control during application, preventing the glue from running and spreading to unwanted areas, ensuring precise and neat bonding.
Epoxy Glue:
Epoxy glues are renowned for their durability and strength when submerged in water. While they take longer to cure compared to super glue, they offer excellent long-term adhesion, guaranteeing the security of your attached plants.
Application Tips:
Thoroughly Clean Surfaces:
Before applying any glue, meticulously clean both the plants and rocks to eliminate dirt, debris, or algae that may hinder proper bonding.
Test Compatibility:
To avoid any adverse reactions, test the adhesive on a small area of the plant or rock before applying it extensively. This step ensures compatibility and safeguards your aquarium inhabitants.
Allow Sufficient Drying Time:
To prevent detachment or damage to the plants, always allow ample time for the glue to dry or cure before introducing the plants and rocks into the aquarium. Patience is key to achieving a secure and long-lasting attachment.
Cleaning the Surfaces
Get ready to discover the secret ingredient to flawlessly attaching your beloved plants to stunning rocks. It all starts with one essential step: cleaning those surfaces until they sparkle.
Imagine carefully selecting the most vibrant and lush aquarium plants, envisioning them gracefully swaying in your underwater paradise. But before you dive into the gluing process, let’s talk about why cleaning those surfaces is absolutely crucial.
- Bye-bye debris: Picture trying to glue your precious plants onto dirty rocks—no way. First things first, remove any dirt, algae, or other debris from both the plants and rocks. Give them a gentle rinse under running water or use a soft brush for a thorough cleansing.
- Algae, be gone: The notorious algae loves to grow on our beautiful rocks, but it’s not a fan of glue. Gently scrub away those green invaders using an algae scraper or brush (be careful not to scratch the rocks in the process).
- Dry is the way: Patience is key. After cleaning, allow the surfaces to dry completely before reaching for that adhesive. Moisture can interfere with bonding, so make sure everything is bone-dry before proceeding.
- Gentle cleaning agents: Remember, we’re creating a safe haven for our aquatic friends. Opt for gentle cleaning agents that won’t harm them. Stay away from harsh chemicals or detergents that might have fishy consequences.
- Sterilize for peace of mind: Want that extra cleanliness factor? Consider sterilizing the surfaces of your rocks and plants to eliminate any lurking bacteria or pathogens. Your aquarium ecosystem will thank you.
Now that you understand the importance of clean surfaces, it’s time to become a master of glue. Follow these steps to create a beautiful and secure attachment for your plants, allowing them to thrive in their new underwater home.
Planning the Arrangement
Planning and executing a captivating and functional arrangement of aquarium plants glued to rocks requires careful consideration. In this comprehensive guide, we will walk you through the essential steps to take before embarking on this exciting project. By following these steps, you will be able to create an underwater landscape that is not only visually stunning but also provides a thriving environment for your aquatic friends.
Step 1: Envision the Layout
Before diving into the gluing process, take a moment to visualize how you want your aquarium plants and rocks to be arranged. Consider the size and shape of your aquarium, as well as any specific themes or designs you wish to incorporate. Sketching a rough layout can help bring your vision to life and allow for adjustments along the way.
Step 2: Select Compatible Plants and Rocks
Choose plants and rocks that harmonize with each other and your aquarium’s ecosystem. Take into account factors such as light requirements, water parameters, and growth habits of the plants. Ensure that the rocks are aquarium-safe by avoiding sharp edges or substances that could harm your aquatic environment.
Step 3: Cleanse and Prepare the Rocks
Thoroughly cleanse the rocks to eliminate dirt, debris, and potential contaminants. Gently scrub them under running water using a brush or sponge. For added disinfection, soak the rocks in a mild bleach solution if necessary. Rinse them thoroughly afterward to eliminate any residue.
Step 4: Artfully Arrange the Rocks
Once cleaned and dried, arrange the rocks in your desired layout within the aquarium. Create height variations, position them strategically for optimal plant growth and visibility, and aim for natural-looking formations. Feel free to experiment with different arrangements until you find one that suits your artistic preferences.
Step 5: Plan Plant Placement
After finalizing the rock arrangement, it’s time to plan where each plant will thrive. Consider their growth habits, light requirements, and compatibility with neighboring plants. For a layered effect, position taller plants towards the back, while shorter ones towards the front will add depth to your underwater landscape. Remember to leave ample space between plants to accommodate growth and prevent overcrowding.
Step 6: Test the Arrangement
Before permanently gluing the plants to the rocks, test the arrangement by placing them in their designated spots without adhesive. This allows you to assess the overall appearance and make any necessary adjustments before finalizing the placement.
Applying the Glue
In this blog post, we will delve into the secrets of applying glue effectively when attaching aquarium plants to rocks. By mastering this simple yet crucial step, you will unlock the potential to create an underwater masterpiece that will leave both you and your aquatic companions in awe.
Choosing the Perfect Glue:
Let us begin with the foundation – selecting the ideal glue. Opt for an aquarium-safe adhesive, such as a specially formulated cyanoacrylate-based glue. These remarkable glues are designed to withstand the challenges of underwater conditions without posing any harm to your beloved aquatic ecosystem. By choosing wisely, not only will your plants stay firmly attached, but your aquatic buddies will also thrive in a safe and healthy environment.
Preparing for Success:
Before embarking on the gluing adventure, take a moment to prepare meticulously. Cleanliness is paramount. Thoroughly rinse both the plant and rock under a gentle stream of water, ensuring that no trace of dirt, debris, or pesky algae remains. Remember, a pristine surface guarantees a robust bond that will stand the test of time.
The Power of Dryness:
Now, let us focus on the importance of dryness. Just like seeking out a sunny spot on a sandy beach, it is essential for both the plant and rock to be completely dry before applying the glue. Gently dab away any lingering moisture using a clean cloth or paper towel. Trust us; this seemingly small step will prevent any weakening of the adhesive bond, ensuring a stronghold for your aquatic greenery.
Mastering the Glue Application:
With everything primed and ready, it is time for the main event – applying the glue. Begin by placing a modest amount of glue on either the plant or rock’s surface. Starting with the rock is recommended, as it provides a stable foundation for attaching the plant. Employ a toothpick or small brush to spread the glue evenly, like an artist delicately painting strokes on a canvas.
The Artistry of Placement:
Ah, the artistry of placement – where creativity takes center stage. Take your time to find the perfect spot for your plant on the glued area of the rock. Pay meticulous attention to alignment and ensure that the plant is securely pressed down. Remember, a well-placed plant adds depth and beauty to your underwater masterpiece, just like a carefully arranged bouquet of flowers.
Patience and Perfection:
As tempting as it may be to showcase your creation right away, exercise patience during the curing process. Follow the manufacturer’s instructions regarding drying time, as different glues may require varying durations for complete curing. This crucial step guarantees a robust bond that can withstand the currents of water and keep your precious plants firmly in place.
Allowing Time for Drying and Curing
Creating a stunning underwater landscape with glued aquarium plants on rocks is a masterpiece in itself. But before you dive into this creative endeavor, it’s important to understand the significance of allowing adequate time for drying and curing. In this blog post, we will explore why patience is key when it comes to ensuring a strong bond between your plants and rocks.
Choosing the Right Glue:
First things first, selecting the right aquarium-safe glue is crucial. Ensure that the glue you choose is specifically designed for use in water environments. This will guarantee that it won’t release any harmful substances into your aquarium, keeping your aquatic friends safe and sound.
Preparing for Success:
Before you embark on your gluing adventure, proper preparation is key. Clean the rocks thoroughly to remove any dirt or debris that may hinder the adhesion process. Dry them completely to create an ideal surface for bonding.
Drying and Curing: The Waiting Game:
Now comes the part that requires a little bit of patience – drying and curing. While it may be tempting to rush this step, remember that good things come to those who wait. Follow the manufacturer’s instructions carefully, as different glues may have varying drying times. In general, allowing at least 24 to 48 hours for drying and curing is recommended.
Proper Ventilation:
During the drying process, ensure that your glued plants and rocks are kept in a well-ventilated area. This will promote proper air circulation and expedite the drying process. Avoid trapping excess moisture, as it could weaken the bond or lead to mold growth.
The Power of Patience:
It’s essential not to cut corners by submerging your glued plants and rocks too soon. Even if the surface appears dry, the internal curing process may still be taking place. Premature submersion can result in a weakened bond and floating plants – a situation nobody wants to deal with.
Handle with Care:
Once your glued plants and rocks have dried and cured, it’s time to introduce them to their new underwater abode. Handle them delicately to avoid any unnecessary stress on the bond. Gently lower them into the water, positioning them as desired while ensuring that the plants are securely anchored to the rocks.
Regular Monitoring:
After placing your masterpiece in the aquarium, keep a watchful eye on it. Regularly check for any signs of loosening or detachment, especially in the initial days. If you notice any issues, remove the affected plants and rocks, allow them to dry completely, and reapply the glue following the proper drying and curing process.
Placing the Rocks in the Aquarium
Crafting a mesmerizing aquarium that mimics nature’s wonders requires careful attention to detail. One crucial aspect is placing rocks in the aquarium, which not only adds aesthetic appeal but also provides hiding spots and structure for fish. In this article, we will explore the step-by-step process of placing rocks in your aquarium, ensuring safety for your aquatic friends while creating a captivating underwater landscape.
Choosing the Right Rocks:
Begin by selecting rocks that are safe for your fish and plants. Opt for aquarium-safe rocks like lava rock, slate, or quartz, as they won’t alter water chemistry or harm your aquatic life. Avoid using rocks with sharp edges or those that may release harmful substances into the water.
Cleaning the Rocks:
Before adding rocks to your aquarium, give them a thorough cleaning. Rinse them with warm water to remove any dirt, debris, or potential contaminants. Remember to avoid using soap or cleaning agents, as they can be detrimental to your aquatic life.
Arranging the Rocks:
Now comes the exciting part – arranging the rocks. Consider both aesthetics and functionality while placing them. Create caves, tunnels, and hiding spots for your fish to explore and seek refuge in. Use a combination of different-sized rocks to create a visually appealing arrangement that mimics the natural environment.
Securing the Rocks:
To ensure stability and prevent any accidents, secure the rocks firmly in place using an aquarium-safe adhesive. Aquarium silicone sealant or epoxy resin are excellent choices for this purpose. Apply a small amount of glue to the bottom of each rock and press it firmly onto the glass bottom of the aquarium. Allow sufficient time for the glue to cure before proceeding.
Monitoring and Maintenance:
After placing the rocks in your aquarium, it is crucial to monitor its stability and make any necessary adjustments. Regularly check the rocks to ensure they remain securely in place. Additionally, maintain proper water conditions, lighting, and nutrient levels to support the health and growth of your aquatic plants.
Maintaining the Plants Regularly
Just like any other garden, your aquarium plants require regular maintenance to thrive. In this captivating blog post, we will explore the significance of maintaining your aquatic plants through pruning, fertilizing, cleaning, monitoring water conditions, and inspecting for pests or diseases. So grab your gardening gloves and let’s dive in.
Pruning:
- The art of trimming: Pruning is a delicate dance that involves removing dead or dying leaves and controlling overgrowth. This promotes new growth and maintains a neat and visually appealing appearance.
- Tools of precision: Equip yourself with sharp and clean scissors or pruning shears to make precise cuts without harming the plants.
- Snip away.: Carefully trim away any decaying leaves or overgrown parts to keep your plants healthy and visually stunning.
Fertilizing:
- Nutrients for optimal growth: While some nutrients are naturally present in the tank water, supplementing with liquid or substrate fertilizers ensures your plants receive the essential nourishment they need.
- Macro and micro essentials: Look for fertilizers specifically formulated for aquatic plants, providing vital nutrients like nitrogen, phosphorus, and potassium.
- Feed your green buddies: Follow the product instructions to supply your underwater companions with the nutrients they crave for thriving growth.
Cleaning:
- Wipe away the grime: Regularly clean the leaves of your plants to prevent debris, algae, and unwanted substances from accumulating.
- Gentle touch: Use a soft cloth or gentle brush to tenderly wipe off dirt or algae without causing harm to the delicate leaves.
- A clean slate: Clean plants not only look beautiful but also ensure optimal photosynthesis and nutrient absorption.
Monitoring water conditions:
- Striking the perfect balance: Maintain appropriate water temperature, pH levels, and water hardness to meet your aquarium plants’ specific needs.
- Knowledge is power: Different plant species have different requirements, so understanding their preferences will help you create an ideal environment for them to flourish.
- Test, test, test: Regularly monitor water parameters using test kits to ensure a healthy and stable aquatic ecosystem.
Inspecting for pests or diseases:
- Uninvited guests: Stay vigilant and watch out for common pests like snails, aphids, and algae-eating fish that can harm your precious plants.
- Early detection is crucial: Regularly inspect your plants for signs of infestation or disease, such as yellowing leaves or discoloration.
- Take action: If you spot any issues, promptly address them with appropriate treatments to prevent further damage.
dMrqgq_JtdY” >
Also Read: How to Glue Java Fern to Rock?
Conclusion
In conclusion, gluing aquarium plants to rocks is a simple and effective way to enhance the aesthetic appeal of your aquarium.
By following these steps, you can ensure that your plants stay securely attached to the rocks for a long time. Remember to clean the rocks thoroughly before gluing, choose a suitable adhesive, and allow sufficient drying time.
With a little patience and care, you can create a beautiful underwater landscape that will impress both you and your fish.