Ever been head over heels for a pair of shoes, only to find their soles starting to peel away? Don’t panic. Shoe sole separations are a common headache, but fear not, my friend. With a little know-how and some elbow grease, you can easily mend those beloved kicks. In this blog post, we’ll walk you through a simple step-by-step process to resurrect your favorite footwear.
Whether you’re a sneaker fanatic, a runner with worn-out treads, or simply someone who refuses to part ways with their trusty companions, our guide has got your back. So tighten those laces and prepare to embark on the journey of sole salvation.
Disclaimer: While these steps work wonders for most shoe types, keep in mind that severely damaged soles might require professional intervention.
What You Need to Fix a Shoe Sole Separation
Contents
- 1 What You Need to Fix a Shoe Sole Separation
- 2 Step-by-Step Guide to Repairing a Shoe Sole Separation
- 3 Clean the Area Around the Separation
- 4 Apply Adhesive to Both Surfaces
- 5 Press Firmly and Secure with Clamps or Heavy Books
- 6 Remove Clamps or Books and Trim Excess Glue or Uneven Edges
- 7 Maintenance Tips for a Long-Lasting Repair
- 8 When to Seek Professional Help from a Cobbler or Shoe Repair Specialist
- 9 Conclusion
We have the ultimate guide to help you restore your shoes to their former glory. With the right tools and materials, a little patience, and some adhesive magic, your shoes will be as good as new. Let’s dive into the steps you need to take to fix a shoe sole separation.
Step 1: Gather the necessary tools and materials:
- High-quality shoe adhesive: Look for a flexible and waterproof adhesive designed specifically for repairing shoe soles.
- Clamps or heavy objects: These will provide the necessary pressure while the glue dries.
- Mild detergent or shoe cleaner: Clean the sole and upper thoroughly before applying the adhesive.
- Sandpaper: Roughen up the surfaces for optimal bonding.
Step 2: Prepare the surfaces for bonding:
- Clean the sole and upper with mild detergent or shoe cleaner to remove any dirt or debris that may hinder adhesion.
- Use sandpaper to gently roughen the surfaces that will be bonded. This creates a better grip for the adhesive, ensuring a strong and long-lasting repair.
Step 3: Apply the adhesive:
- Apply a thin, even layer of adhesive to both the sole and upper. Avoid applying an excessive amount of glue, as it can seep out during clamping.
- Follow the instructions provided by the adhesive manufacturer regarding drying time and additional coats, if necessary.
Step 4: Clamp and let it dry:
- Align the sole and upper perfectly and apply firm pressure to ensure maximum contact between the surfaces.
- Utilize clamps or place heavy objects on top to hold them together while the glue cures. Adhere to the recommended drying time provided by the adhesive manufacturer.
Step 5: Clean up and inspect:
- Once the glue has fully cured, remove any excess adhesive using a small brush or cotton swab dipped in acetone or adhesive remover.
- Thoroughly inspect the repair job and make any necessary touch-ups or adjustments to ensure a seamless finish.
Step-by-Step Guide to Repairing a Shoe Sole Separation
Step-by-Step Guide to Repairing a Shoe Sole Separation
Have you ever been heartbroken by the sight of your favorite pair of shoes suffering from sole separation? Don’t worry. With a little bit of know-how, some adhesive magic, and a sprinkle of patience, you can repair that shoe sole separation and bring your beloved footwear back to life. Follow this comprehensive guide to get started.
Step 1: Cleanse and Prepare
- Use a mild soap or shoe cleaner to thoroughly clean both the sole and upper parts of your shoe.
- Remove any dirt or debris that might hinder the adhesive from working effectively.
- Dry the area with a clean cloth.
Step 2: Roughen Up for Bonding
- Lightly sand both the sole and the upper with fine-grit sandpaper to create a rough surface.
- This helps the adhesive stick better for a stronger bond.
- Wipe down both surfaces with acetone or rubbing alcohol to remove any remaining dust or residue.
Step 3: Apply the Adhesive
- Choose a shoe repair adhesive or contact cement recommended for shoe repairs.
- Apply a thin, even layer of adhesive to both the sole and upper surfaces using a small brush or applicator.
- Follow the instructions provided by the adhesive manufacturer regarding drying time and additional coats if necessary.
Step 4: Press Firmly and Clamp
- Carefully align the sole with the upper and press them together firmly.
- Work quickly as some adhesives have a limited working time before they start to set.
- Apply pressure to the repaired area for several minutes to ensure a strong bond.
- Use clamps, heavy objects, or your hands to exert pressure.
Step 5: Remove Excess Glue and Cure
- Once the adhesive has fully dried, use a small knife or razor blade to remove any excess glue that may have seeped out from the edges.
- Be careful not to damage the shoe in the process.
- Allow the repaired shoe to sit undisturbed for at least 24 hours to fully cure.
- This ensures a strong and durable bond before wearing the shoes again.
Clean the Area Around the Separation
Today, we embark on a journey into the intricate realm of fixing a shoe sole separation. But before we delve into the enchanting world of adhesive magic, we must first ensure that the area surrounding the separation gleams with pristine cleanliness. For, my friends, a spotless surface is the cornerstone of a formidable bond. So, let us roll up our sleeves and clean that area with the expertise of a seasoned professional.
To commence our endeavor, let us rid the scene of any laces or obstructions that may hinder our progress. By doing so, we shall attain unhindered access to the separation, rendering our task delightfully effortless.
Now, seize a soft brush or cloth and gently eradicate any loose dirt or debris from the vicinity. We must not allow those bothersome particles to meddle with our adhesive union. However, caution must be exercised to prevent scratching or damaging the shoe’s resplendent surface – for we desire it to appear as magnificently unblemished as ever.
Behold. Should your eagle eyes detect any remnants of old adhesive clinging tenaciously to the area, it is time to unleash our secret weapon – a solvent or adhesive remover. Dab a modest amount of this potent elixir onto a pristine cloth and proceed to delicately caress it over the affected terrain. Remember, dear comrades, to adhere faithfully to the manufacturer’s instructions for optimal results.
Now that all detritus has been vanquished, it is time for an exquisite display of suds and bubbles. Fashion a gentle solution of mild soap and warm water, immersing your cloth within its frothy embrace. Tenderly scrub the area surrounding the separation, eliminating any lingering remnants of dirt or residue. Ahh, cleanliness truly evokes an indescribable sense of satisfaction.
With bated breath, rinse the region with pure water, eradicating any trace of soapy residue. Finally, with the grace of a master, pat it dry with a pristine towel. Remember, my friends, moisture is not our ally in the realm of bonding – we must ensure that the area is bone dry before progressing further.
Yet fear not, for those stubborn stains or blemishes that may mar the beauty of your beloved shoes. A mighty savior awaits you in the form of specialized shoe cleaners and stain removers, patiently yearning to come to your rescue. Heed the wisdom of their creators by following their instructions diligently – for they possess profound knowledge in their craft.
With the area gleaming like a thousand sunsets, you are now prepared to embark upon the next phase – the application of adhesive. But hold your horses, for that is a tale for another chapter. Stay tuned, dear compatriots, for more wondrous adhesive magic awaits you.
Apply Adhesive to Both Surfaces
Today, we embark on a thrilling adhesive adventure as we uncover the secret to fixing a shoe sole separation. The key lies in skillfully applying adhesive to both surfaces, ensuring a bond that is not only secure but also long-lasting. So, let’s dive into this fascinating process and restore the magic to your beloved pair of shoes.
Step 1: Prepare the Surfaces
Before delving into the adhesive application, it is crucial to cleanse and prepare both surfaces. Arm yourself with mild soap and warm water, gently scrubbing away any dirt or debris that may have accumulated on the shoe sole and upper part. Thoroughly dry them, leaving no trace of moisture behind. This sets the stage for a flawless repair.
Step 2: Choose the Right Adhesive
The key to a successful repair lies in selecting an adhesive specifically designed for shoe repairs. Seek out a product renowned for its exceptional bonding properties and unwavering durability. The right adhesive will ensure that your repaired shoes stand tall against the tests of time.
Step 3: Apply the Adhesive
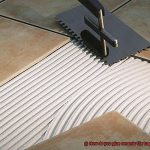
Now, armed with the perfect adhesive, it’s time to apply a thin layer onto both surfaces. Embrace your inner artist as you wield a brush or spatula, deftly spreading the glue to cover every inch in need of bonding. Remember, less is more – avoid an avalanche of adhesive that could disrupt the delicate balance.
Step 4: Allow Tackiness
Like a secret ingredient adding depth to a recipe, time plays its part in this adhesive symphony. Allow the freshly applied glue a few precious minutes to become delightfully tacky. This tackiness sets the stage for a bond that defies gravity and stands firm against the trials ahead.
Step 5: Press Firmly – Bonding Time.
With precision and purpose, align the shoe sole with the upper part and press them together with unwavering determination. Apply even pressure, letting your hands become the architects of this bond. For added security, employ clamps or the weight of heavy objects to keep them in perfect alignment, their union unbreakable.
Step 6: Give It Time to Cure
Now, patience becomes your greatest virtue. Respect the adhesive’s drying time, as each product carries its own unique rhythm. Allow it the opportunity to cure fully before venturing forth on your next adventure. In this moment of anticipation, trust that time will elevate this bond to unmatched heights.
Step 7: Remove Excess Glue
As with any masterpiece, a final touch ensures perfection. Check for any excess glue that may have seeped out during the bonding process. Employ a delicate brush or a cotton swab dipped in acetone or an adhesive remover, carefully erasing any remnants without harming the shoe’s delicate fabric.
Press Firmly and Secure with Clamps or Heavy Books
Today, we’re diving deep into the art of shoe repair, specifically focusing on the importance of pressing firmly and securing with clamps or heavy books when fixing a shoe sole. Trust me, this step is crucial to ensure a durable and long-lasting bond that will bring your shoes back to life.
Pressing Firmly: The Glue’s Best Friend
When it comes to repairing a shoe sole, pressing firmly is the glue’s best friend. After applying the adhesive to the separated area of the sole, it’s time to exert some pressure. This seemingly simple step is what guarantees a solid connection between your sole and shoe. By pressing firmly, you ensure that the glue spreads evenly, making full contact with both surfaces.
Say Goodbye to Air Bubbles
We all know how air bubbles can cause trouble. When gluing a shoe sole, air bubbles can weaken your bond if left unattended. That’s why pressing firmly is essential. By applying even pressure, you ensure that any trapped air is forced out, leaving you with a stronger bond that can withstand the test of time.
Clamps or Heavy Books: Your Trusty Sidekicks
To secure the glued area while it sets, clamps or heavy books come to the rescue. These trusty sidekicks keep your sole in place, preventing any movement that could compromise the bond. They provide the necessary pressure required for a secure fix.
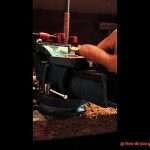
Clamps: The Perfect Squeeze
Clamps are like the perfect squeeze for your shoe repair project. When using clamps, make sure to select those that are appropriately sized for your shoe. Apply them evenly across the glued area, ensuring that they exert just enough pressure to create a secure bond without damaging the shoe or sole. Avoid overtightening them, as this can lead to excess glue squeezing out and creating a messy situation.
Heavy Books: Weighty Wonders
If clamps aren’t readily available, fear not. Heavy books can work wonders. Place them on top of the sole, making sure they cover the entire glued section. You can even stack multiple books if needed to achieve sufficient pressure. Allow them to work their magic for the recommended drying time specified by the adhesive manufacturer.
Adhesive-Specific Guidelines
It’s important to note that different adhesives may have specific instructions regarding pressing and securing methods. Always refer to the product’s guidelines for optimal results. Following these recommendations ensures you’re getting the most out of your chosen adhesive.
Remove Clamps or Books and Trim Excess Glue or Uneven Edges
Today, we’re going to delve into a crucial step in repairing shoe sole separations – the art of removing clamps or books and trimming excess glue or uneven edges. Trust me, this step will take your repair game to the next level, leaving your shoes looking stunningly flawless.
Let’s start with the clamps or books. These trusty companions help apply the necessary pressure to ensure a rock-solid bond between the sole and the shoe. But remember, removing them requires finesse. Gradually loosen the clamps or carefully remove the books one by one. Abruptly releasing the pressure can cause the sole to shift or, heaven forbid, detach again. And that’s not what we want, after all your painstaking efforts.
Once you’ve liberated your shoes from their clamping friends, it’s time for a thorough inspection. Our arch-nemesis: excess glue. Sometimes, during the repair process, glue sneaks its way out, leaving unsightly blobs. Fear not. Equip yourself with a sharp utility knife or a pair of scissors and commence Operation Trim Excess Glue. Gently and meticulously trim away any visible excess glue lurking around the edges of the sole. Take your time; precision is key. Smooth cuts will preserve your shoe’s beauty and prevent any rough edges.
Speaking of rough edges, don’t forget to check for any unevenness along the repaired area. If you spot any rebels, fetch some fine-grit sandpaper and gently sand them down. This will create a seamless transition between the sole and the shoe – comfort and durability united.
By prudently removing clamps or books and trimming excess glue or uneven edges, you’ll elevate not only the appearance but also the structural integrity of your repaired shoes. Think of it as adding that final touch to make your shoes sparkle.
Oh, before we wrap up, let me drop some knowledge on you – the different types of glue used in this process. Brace yourself. We have contact cement, epoxy adhesive, and specialized shoe adhesives. Each has its own strengths and weaknesses, so choose wisely. Contact cement is perfect for bonding leather or rubber soles. Epoxy adhesive offers a mighty hold on different materials. Specialized shoe adhesives are the superheroes of shoe repairs, designed to provide flexibility and durability.
Maintenance Tips for a Long-Lasting Repair
We know how disappointing it can be when your favorite pair of shoes breaks at the sole. But fear not. With a little bit of glue and some tender loving care, you can make that repair last for a long time. Here are some maintenance tips to help you keep your shoe sole repair intact for longer.
Clean ’em up:
Just like you wash your hands before using glue, your shoes need a good cleaning too. Use a soft brush or cloth to gently remove any dirt or debris from the soles. A little soap and water can also do the trick. Make sure they are nice and dry before you start repairing.
Store them right:
Shoes need their beauty sleep too. Avoid leaving them in damp or humid places as it can weaken the glue. Give them a cozy spot in a cool and dry place, like a fancy shoe rack or box. This will help them stay strong and prevent any further separation.
Take it easy:
Your repaired shoes need some rest after their makeover. Don’t wear them every single day, switch it up with other pairs. And remember, no rough play like jumping on hard surfaces or running like a cheetah. Be gentle with those soles.
The right shoe for the right job:
Shoes have superpowers too. Make sure you wear the right shoes for different activities. If you’re going on an adventure or playing sports, wear shoes designed for that purpose. They have super strong soles made to withstand all the action.
Check-up time:
Be a detective and inspect your shoes regularly. Look for any signs of separation or wear. If you see something fishy, fix it right away before it gets worse. And if things get out of hand, don’t be shy to ask a professional for help.
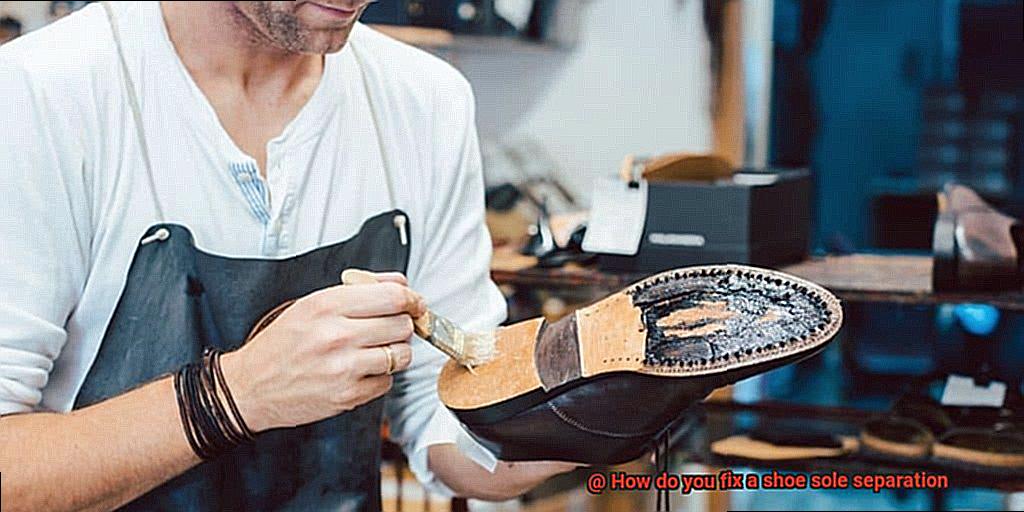
When to Seek Professional Help from a Cobbler or Shoe Repair Specialist
First and foremost, if you find yourself facing extensive or severe sole separation, it’s time to bring in the big guns. A cobbler or shoe repair specialist is your go-to hero when it comes to major repairs. With their skills and specialized tools, they can assess the damage and provide the best solutions to get your shoes back on track.
Let’s talk about glue, shall we? If your separation is due to worn-out adhesive or stitching, it’s definitely time to seek professional help. These experts can skillfully remove the old glue or stitching, meticulously clean the area, and then apply fresh adhesive or stitch it back together. Trust me, they’ll make sure your repair is durable and long-lasting.
But what if your shoe has suffered some serious material damage? Cracks and tears that make you cringe? That’s when you absolutely need a cobbler. These master craftsmen can perform intricate repairs like patching up the damaged area with matching materials or reinforcing it to prevent further separation.
Now, let’s talk luxury and specialty footwear. If you’re sporting some fancy high-end designer shoes or unique specialty footwear, it’s important not to risk DIY repairs. Instead, find a cobbler who specializes in luxury shoes or has experience working with specific materials. They possess the knowledge and expertise necessary to ensure your repairs are done right without compromising the original design and quality.
Remember, attempting DIY repairs on complex sole separations can lead to even more damage – and nobody wants that. So save yourself the headache and seek professional help from a skilled cobbler or shoe repair specialist.
Not only will these experts work their magic to fix your shoes, but they’ll also provide you with priceless advice on how to prevent future sole separations. They’ll recommend proper maintenance practices like regular cleaning and conditioning, as well as suggest products that will help extend the life of your shoes.
IdM-a8be7QM” >
Conclusion
Shoe sole separation can be a frustrating problem, but fear not, there are ways to fix it.
By following some simple steps and using the right materials, you can restore your shoes to their former glory. One method involves using shoe glue or adhesive to reattach the separated sole.
Another option is stitching the sole back in place using a sturdy needle and thread. If you’re feeling adventurous, you can even try using a heat gun to melt the sole and bond it back together.
Whichever method you choose, make sure to clean and prep the area beforehand for optimal results.