Is your shoe sole playing a game of hide and seek?
Annoying, right? Walking with one foot higher than the other is no fun.
But don’t worry, fixing a detached sole is easier than you think. In this blog post, we’ll show you exactly how to bring your beloved shoes back to life.
So let’s get started and reunite those soles with their rightful place.
What Materials and Tools are Needed to Fix a Detached Sole?
Contents
- 1 What Materials and Tools are Needed to Fix a Detached Sole?
- 2 How to Clean the Sole and Shoe Before Applying Adhesive?
- 3 How to Apply Adhesive on the Detached Sole and Shoe?
- 4 Aligning the Detached Sole and Pressing it Firmly onto the Shoe
- 5 Removing Excess Glue After Bonding
- 6 Reinforcing the Bond Through Stitching
- 7 Allowing Ample Time for Drying and Curing
- 8 Conclusion
Don’t worry, with the right materials and tools, fixing a detached sole is easier than you might think. In this step-by-step guide, we’ll walk you through the process of repairing your shoes and ensuring a long-lasting fix. So grab your adhesive and let’s get started.
Step 1: Gather Your Materials and Tools
To fix a detached sole, you will need the following materials and tools:
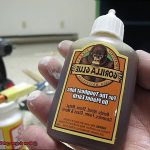
- High-quality shoe adhesive: Look for an adhesive specifically designed for shoe repairs, such as Barge All-Purpose Cement or Shoe Goo.
- Primer (if required by the adhesive manufacturer): Some adhesives may require the use of a primer to improve adhesion.
- Sandpaper (medium grit): Use sandpaper to roughen up both the detached sole and the shoe upper for better bonding.
- Clamps or weights: These will help hold the sole in place while the adhesive sets.
- Protective gloves: Wear disposable gloves to protect your hands from adhesive and ensure cleanliness.
- Cotton swabs or brushes: Use these tools to apply adhesive evenly on both surfaces.
- Cleaning agents: Mild soap, warm water, and specific cleaning agents recommended by the adhesive manufacturer to thoroughly clean the surfaces.
- Painter’s tape: Use painter’s tape to create boundaries for neater application of adhesive.
- Utility knife: This tool will come in handy for removing excess glue.
Step 2: Prepare the Surfaces
Start by cleaning both the detached sole and the shoe upper using mild soap, warm water, and any recommended cleaning agents. Remove any dirt, debris, or old adhesive residue. Then, use medium-grit sandpaper to roughen up both surfaces for better adhesion.
Step 3: Apply Adhesive
Follow the instructions provided by the adhesive manufacturer. Use cotton swabs or brushes to apply an even layer of adhesive onto both surfaces, ensuring complete coverage.
Step 4: Align and Press

Carefully align the detached sole with the shoe upper, making sure it is in the correct position. Press the two surfaces firmly together, applying consistent pressure for a few minutes. Use clamps or weights to hold them in place while the adhesive sets.
Step 5: Remove Excess Glue
After allowing sufficient drying time, check for any excess glue that may have squeezed out during bonding. Use a damp cloth or cotton swab to remove any visible glue and create a neat finish.
Step 6: Consider Additional Reinforcement (Optional)
For extra durability, consider stitching the sole back onto the shoe using a strong thread and a needle suitable for leather or fabric. This step is particularly beneficial for heavily used shoes or those subjected to frequent stress.
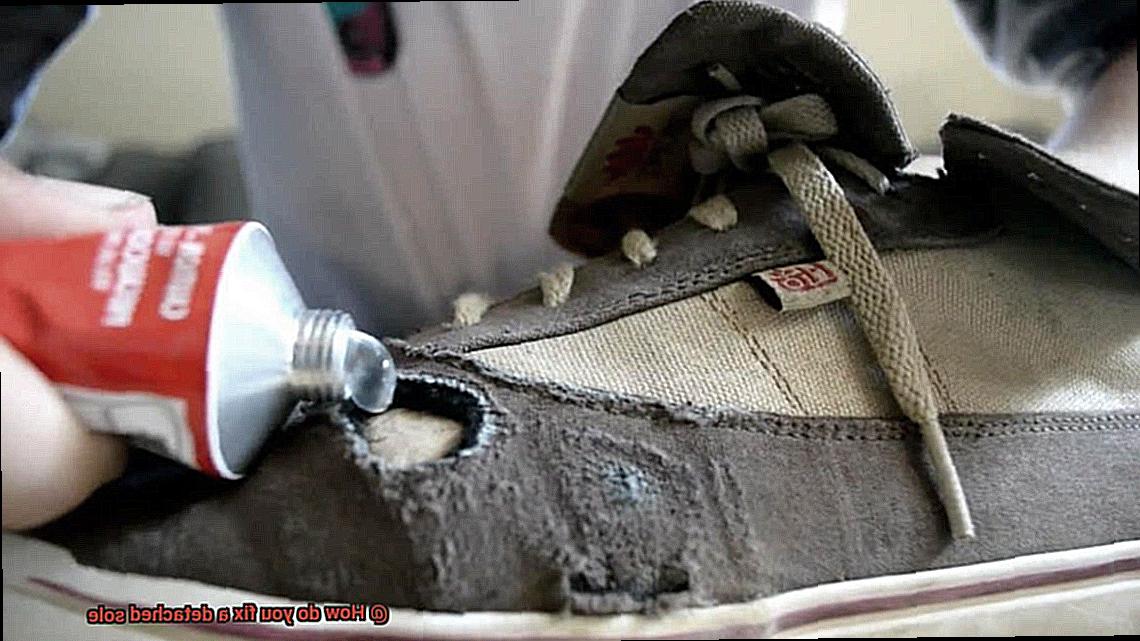
How to Clean the Sole and Shoe Before Applying Adhesive?
If you’ve noticed a detached sole, don’t fret. With the right tools and proper cleaning techniques, you can fix it yourself. Before applying adhesive, it is essential to clean both the sole and shoe thoroughly. In this comprehensive guide, we will take you through step-by-step instructions on how to clean your shoes like a professional before applying adhesive for a strong and long-lasting repair.
Step 1: Remove dirt and debris
Start by removing any dirt, dust, or debris from the sole and shoe. Use a stiff brush or an old toothbrush to gently scrub away loose particles. Pay extra attention to the area where the sole has detached, ensuring that it is free from any obstructions.
Step 2: Treat adhesive residue
If there is any remaining adhesive residue on the sole, apply a small amount of acetone or rubbing alcohol to a cloth. Gently rub the affected area until the residue is completely gone. However, it is important to note that acetone should not be used on leather or suede shoes as it may cause damage. In such cases, consult the manufacturer’s guidelines or seek professional help.
Step 3: Clean the inside of the shoe
To clean the inside of the shoe, remove any insoles or inserts and shake out any loose dirt. Use a damp cloth or mild soap solution to wipe away any remaining dirt or odors. Ensure that the inside is thoroughly cleaned and allow it to air dry completely.
Step 4: Wipe down the outside of the shoe
Using a soft cloth or sponge dampened with soapy water, gently wipe away dirt and stains from the outside of the shoe. Be cautious not to damage any delicate materials. If stubborn stains persist, use a specialized shoe cleaner designed for your shoe’s specific material.
Step 5: Let everything dry thoroughly
After cleaning both the sole and shoe, allow them to air dry naturally in a well-ventilated area. Avoid using heat sources like hairdryers, as excessive heat can damage certain shoe materials. Ensure that both the sole and shoe are completely dry before proceeding to apply adhesive.
Step 6: Inspect and repeat if necessary
Once everything is dry, inspect both the sole and shoe for any remaining dirt or debris. If needed, repeat the cleaning process until both surfaces are clean and ready for adhesive application. It is crucial to have a clean surface to ensure proper adhesion and a successful repair.
How to Apply Adhesive on the Detached Sole and Shoe?
We’ve all experienced the frustration of a detached sole on our favorite pair of shoes. However, with the right materials and technique, you can easily fix this problem and get your shoes back in action. In this step-by-step guide, we will walk you through the process of applying adhesive to reattach a detached sole and shoe.
Step 1: Gather Your Materials
Before you begin, make sure you have all the necessary materials at hand. These include a strong adhesive suitable for shoe repair, a clean cloth or rag, rubbing alcohol or acetone, masking tape or clamps, and a well-ventilated work area.
Step 2: Clean the Surfaces
Cleaning the surfaces is crucial for a successful repair. Use rubbing alcohol or acetone and a clean cloth to thoroughly clean both the detached sole and the area on the shoe where they will be reattached. This step removes any dirt, oils, or residue that could hinder the adhesive bond. Ensure the surfaces are completely dry before proceeding.
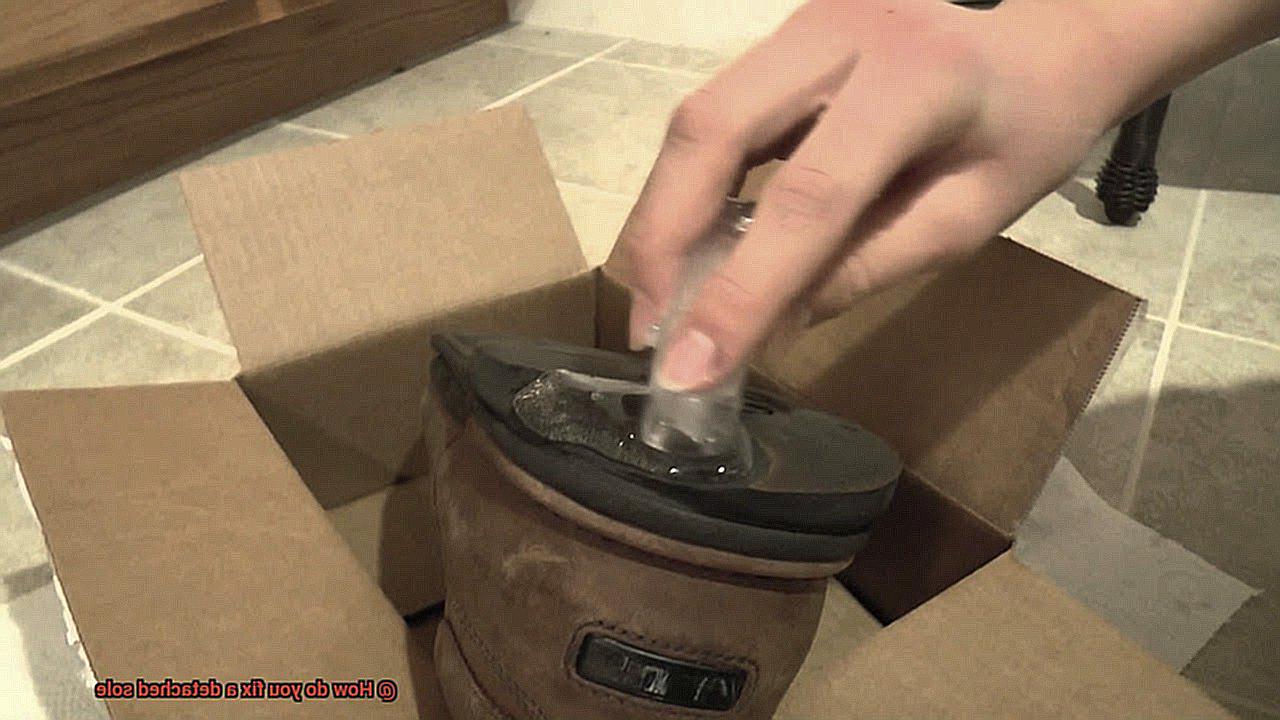
Step 3: Apply the Adhesive
Follow the instructions provided by the adhesive manufacturer. Apply an even layer of adhesive to both the detached sole and the shoe surface. Be sure to cover the entire surface area that will be bonded together. Use a brush or applicator recommended by the adhesive manufacturer for precise application.
Step 4: Press and Hold
Carefully align the detached sole with the shoe and press them firmly together. Apply steady pressure for a few minutes to ensure a strong bond. If needed, use masking tape or clamps to hold them in place while the adhesive dries. This step is crucial for creating a secure attachment.
Step 5: Allow Proper Curing Time
It is important to allow sufficient time for the adhesive to cure. Follow the manufacturer’s instructions regarding curing time, as it can vary depending on the adhesive used. Avoid wearing or putting any weight on the repaired shoe until the adhesive has fully cured to ensure a strong and long-lasting bond.
Step 6: Finishing Touches
Once the adhesive has completely dried, remove any excess glue that may have squeezed out from between the sole and shoe using a clean cloth or rag. Take care not to disrupt the adhesive bond while doing so. This step provides a clean and polished finish to your repair.
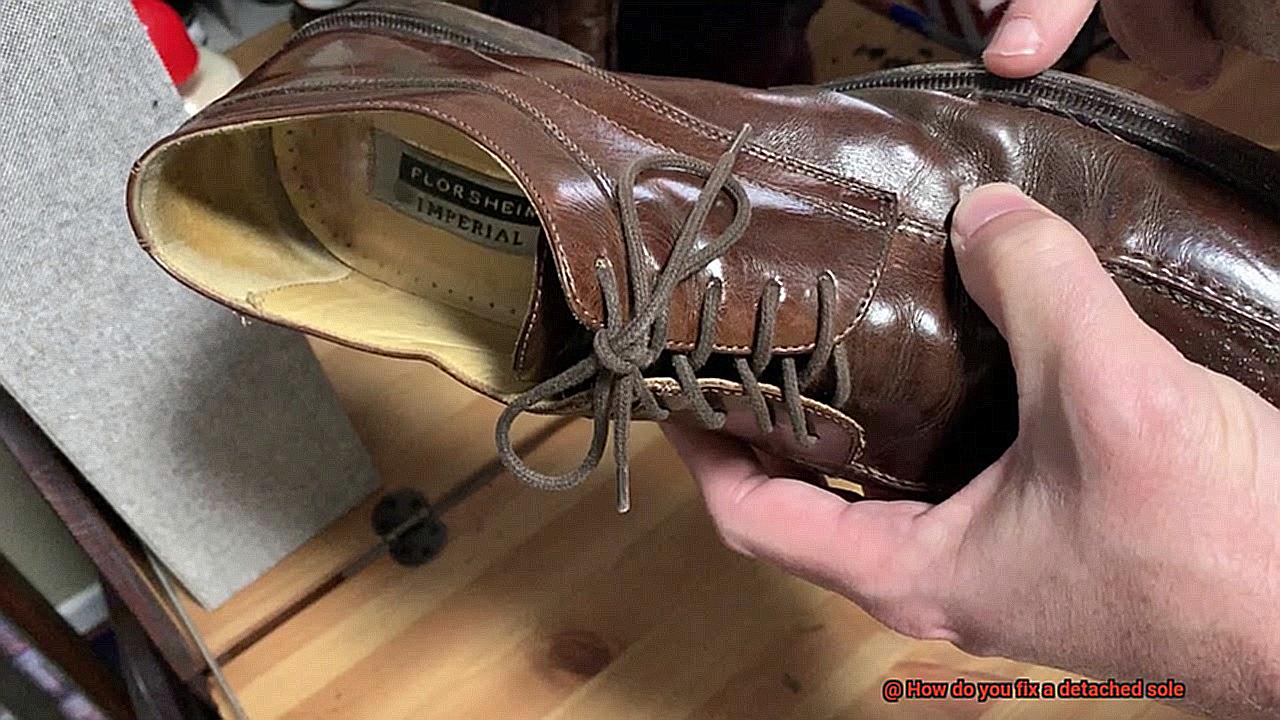
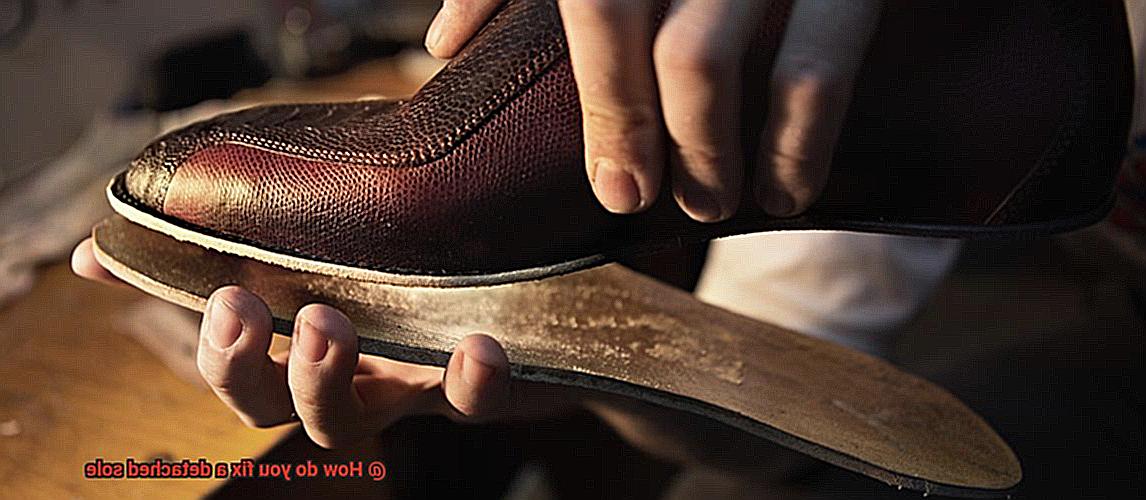
Aligning the Detached Sole and Pressing it Firmly onto the Shoe
Don’t let a detached sole bring down your favorite pair of shoes. With the right techniques and a little patience, you can easily fix this problem and have your shoes looking as good as new. In this comprehensive guide, we’ll take you through the process of aligning the detached sole and pressing it firmly onto the shoe, ensuring a strong and long-lasting bond.
Step 1: Cleanliness is Key
Before diving into the repair process, make sure to thoroughly clean both the shoe and the detached sole. Eliminate any pesky dirt or debris that could hinder the adhesive’s ability to create a robust bond. A soft brush or cloth will do the trick, leaving your surfaces pristine and ready for repair.
Step 2: Choose the Right Adhesive
Selecting an adhesive specifically designed for shoe repairs is paramount to achieving success. Look for a high-quality adhesive that offers flexibility, durability, and compatibility with different materials. This will ensure a bond that can withstand the demands of everyday wear.
Step 3: Apply Adhesive with Precision
To achieve optimal results, apply a thin, even layer of adhesive to both the shoe and the detached sole. Use a small brush or spatula to spread it evenly, covering every inch of both surfaces. Avoid applying excessive amounts of glue, as this can lead to an uneven bond that compromises the integrity of the repair.
Step 4: Align with Perfection
Take your time to align the detached sole precisely onto the shoe. Carefully position it to ensure a seamless fit, marking reference points on both surfaces if necessary. This attention to detail will guarantee that your repaired shoes look impeccable.
Step 5: Firmly Press for a Solid Bond
Achieving a secure bond means exerting firm pressure on the sole. Start from the center and gradually work your way towards the edges, using a rubber mallet or a heavy object wrapped in protective cloth. This technique eliminates air bubbles and creates a robust connection that will withstand the test of time.
Step 6: Clean Up Excess Glue
After pressing, take a moment to wipe away any excess glue that may have squeezed out from between the sole and the shoe. A quick swipe with a damp cloth or a cotton swab will ensure a clean and polished finish.
Step 7: Allow Adequate Drying Time
Patience is key when it comes to allowing the adhesive to fully cure. Follow the manufacturer’s instructions regarding drying time, as rushing this step may compromise the bond and lead to future detachment. Give your repaired shoes the time they need to become as good as new.
Removing Excess Glue After Bonding
We’ve all experienced the frustration of successfully bonding a detached sole onto our favorite shoes, only to be left with stubborn excess glue. But fear not. In this guide, we’ll explore various methods to safely and effectively remove that pesky glue, ensuring a clean and professional repair.
Method 1: Solvent Power
One of the most effective ways to remove excess glue is by using a solvent. Acetone or nail polish remover with acetone can work wonders. Start by testing it on a small area to ensure no damage or discoloration occurs. Then, apply the solvent to a cotton ball or clean cloth and gently rub it over the excess glue. Watch as the glue softens and dissolves before your eyes, making it easy to wipe away. Repeat as necessary until all traces of excess glue are gone.
Method 2: Heat It Up
For shoes with detachable soles made of rubber or thermoplastic materials, heat can be your secret weapon. Grab a hairdryer or heat gun set on low or medium heat. Hold it 6 to 8 inches away from the glued area and direct the hot air towards the excess glue. As the glue warms up, it becomes more pliable, allowing you to peel or scrape it away with a plastic scraper or your fingers. Just remember not to go overboard with the heat – we don’t want any shoe casualties.
Method 3: Freeze and Scrape
For an unconventional approach, try freezing the excess glue. Seal the shoe in a plastic bag and place it in the freezer for a few hours or overnight. The extreme cold will make the glue brittle and less sticky. Retrieve your chilled shoe and gently scrape away the excess glue with a plastic scraper or your fingers. For stubborn residue, a small amount of solvent or heat can help loosen it up.
Reinforcing the Bond Through Stitching
When it comes to repairing a detached sole on your beloved shoes, one highly effective method is reinforcing the bond through stitching. This technique involves using a needle and thread to sew the detached sole back onto the shoe, creating a strong and durable bond that will withstand the test of time.
Before diving into the stitching process, it is crucial to prepare the area by cleaning it thoroughly. Removing any dirt or debris will ensure that the bonding process is not hindered in any way. Use a soft brush or cloth to gently scrub away any dirt or dust that may have accumulated on the surface.
Once the area is clean, it’s time to gather your materials. Choosing the right thread is essential for a successful stitch. Opt for a strong and durable thread such as nylon or polyester. These materials will provide the necessary strength to keep your sole securely attached to your shoe.
To begin stitching, you’ll need a shoemaker’s awl or a leather punch. These tools will allow you to create small holes along the edge of the detached sole and the corresponding area on the shoe where the sole will be attached. It’s important to make these holes evenly spaced and close to the edge of the material for a secure bond.
With your holes in place, thread your needle with the chosen thread and insert it through one of the holes, starting from inside the shoe and going out through the sole. Then, reinsert the needle through the next hole, again starting from inside the shoe, and pull tightly to bring the sole and shoe closer together. Repeat this process until all the holes have been stitched, creating a strong and secure bond.
Once you have completed stitching, it’s recommended to tie off the thread securely and trim any excess for a neat finish. Depending on the material of both the sole and shoe, you may also consider using additional adhesive or glue in conjunction with stitching for extra reinforcement.
However, it’s important to note that stitching is not suitable for all types of shoes or materials. In some cases, it may be more appropriate to seek professional assistance or explore alternative repair options such as adhesive bonding or sole replacement.
Allowing Ample Time for Drying and Curing
We all have those favorite pair of shoes that we can’t bear to part with, even when the sole decides to go on an unexpected adventure. Fear not, because today we’re diving into the world of glue and the importance of patience when it comes to fixing a detached sole.
Why Rushing is a No-Go:
Now, you might be thinking, “Why should I wait around for glue to dry? Can’t I just slap it on and be done with it?” Well, hold your horses, my friend. Rushing the drying and curing process can lead to a weak bond between your sole and shoe, which means you’ll find yourself back at square one sooner than you think.
Improved Adhesion:
So why is allowing ample time for drying and curing so crucial? Let’s break it down:
Different adhesives have different properties and requirements. By giving them the time they need to dry properly, you’re ensuring a strong bond between your sole and shoe. Think of it like letting a good friendship blossom – it takes time for that trust to build.
Longevity:
We all want our repaired shoes to last as long as possible, right? By following the recommended drying and curing times, you’re giving your repaired shoes the best shot at a long-lasting relationship. It’s like adding a layer of armor to your shoes.
Tips for Achieving Adhesive Nirvana:
- Follow the instructions: Each adhesive comes with its own set of guidelines. Make sure to read them carefully and stick (pun intended) to the recommended drying and curing times.
- Consider environmental factors: Temperature, humidity, and ventilation can influence how quickly the adhesive sets. Aim for a well-ventilated area with moderate temperatures to help speed up the drying process without compromising the integrity of your shoe.
- Be patient: Rome wasn’t built in a day, and your repaired shoes won’t be either. Allow the adhesive to dry completely before strutting your stuff. Remember, good things come to those who wait.
Conclusion:
In conclusion, by practicing the art of patience and allowing ample time for drying and curing when fixing a detached sole, you’re ensuring a strong bond between your sole and shoe. This means improved adhesion and longevity for your repaired footwear. So, grab your favorite pair of shoes, gather your supplies, and embark on this adhesive adventure with confidence. Your shoes will thank you.
Conclusion
Fixing a detached sole on your shoe can be a frustrating experience. However, with the right tools and techniques, you can restore your favorite pair of footwear to its former glory. So, how do you fix a detached sole?
Firstly, gather the necessary materials: a strong adhesive suitable for repairing shoes, such as shoe glue or contact cement, and clamps or heavy objects to apply pressure during the drying process.
Next, clean both the sole and the shoe upper thoroughly to ensure proper adhesion. Use a mild soap and warm water to remove any dirt or debris that may interfere with the bonding process. Allow them to dry completely before proceeding.
Apply a generous amount of adhesive to both the sole and the shoe upper. Make sure to spread it evenly and cover all areas that need repair. Then, press the two surfaces firmly together, aligning them as accurately as possible.
Use clamps or place heavy objects on top of the shoe to provide consistent pressure while the adhesive dries. Follow the manufacturer’s instructions regarding drying time, but typically this process takes several hours or overnight.
Once the adhesive has fully cured, remove any excess glue that may have seeped out from between the sole and upper using a cotton swab soaked in acetone or nail polish remover.
Inspect your repair job carefully before wearing your shoes again. Ensure that the sole is securely attached and there are no visible gaps or weak spots.
In conclusion, fixing a detached sole requires patience and attention to detail. By following these steps and using quality materials, you can successfully restore your shoes and prolong their lifespan.