Whether you’re delving into artistic projects, tweaking mattress designs, or conjuring up imaginative costumes, merging foam pieces is an essential skill. Don’t let the task intimidate you. In this blog post, we’ll unravel adhesive enigmas and introduce an array of methods that will empower you to achieve the ultimate fusion.
Prepare to be captivated because working with foam can be a bit like taming a wild beast. Its lightweight nature and the need for steadfast connections create a unique challenge. But fear not. As we plunge into the realm of foam adhesion, we’ll unveil ingenious techniques and time-honored solutions that guarantee your foam creations possess the resilience and stability you desire.
Join us on this thrilling journey as we delve deep into the world of adhesives, exploring their versatility and effectiveness. We’ll uncover the mighty power of hot glue guns—the unsung heroes of bonding—reveal the hidden magic behind foam tapes, and unlock the untapped potential of spray adhesives. Moreover, we’ll unleash sewing sorcery, explore upholstery artistry, and even transcend traditional methods with enlightened techniques.
Immerse yourself in this captivating guide as we unveil the secrets behind seamlessly uniting two pieces of foam. Equipped with knowledge and inspiration, you’ll confidently tackle your next foam endeavor, witnessing two separate entities morph into one with grace and precision. So grab hold of your creative spirit, don your trusty safety goggles, and embark on this adventurous journey towards mastering the art of foam fusion.
Different Types of Foam and Adhesive Options
Contents
- 1 Different Types of Foam and Adhesive Options
- 2 Preparing the Foam for Attachment
- 3 Using Adhesive Glue to Attach Foam Pieces Together
- 4 Using Hot Glue to Join Foam Pieces
- 5 Using Mechanical Fasteners to Join Foam Pieces
- 6 Heat Bonding for Joining Foam Pieces
- 7 Utilizing Double-Sided Adhesive Tape for Joining Foam Pieces
- 8 Considerations When Choosing an Attachment Method for Foam Pieces
- 9 Conclusion
Foam is a remarkable material that finds its way into countless applications, from packaging fragile objects to providing comfort in furniture. But have you ever wondered how two pieces of foam are joined together to create something extraordinary? Wonder no more. In this comprehensive guide, we’ll explore the fascinating world of foam adhesives and discover the diverse options available for bonding foam.
Exploring the Diversity of Foam Types:
Foam comes in a wide range of varieties, each with its own unique characteristics. From squishy and soft polyurethane foam to rigid and lightweight polystyrene foam, the type of foam being used plays a crucial role in determining the ideal adhesive option. No matter the foam, there’s an adhesive waiting to forge a powerful bond.
Spray Adhesive: The Superhero of Bonding:
Spray adhesive emerges as a true hero when it comes to joining foam. This user-friendly adhesive option provides a remarkably strong bond. Simply spray it on both foam surfaces, wait a few minutes for it to dry, and firmly press them together. Like magic, your foam pieces will be fused together, creating an unbreakable connection.
Hot Glue: The Craft Enthusiast’s Best Friend:
If you’re an avid crafter, you’re likely familiar with the versatile hot glue gun. But did you know that hot glue can also be used for bonding foam? For optimal results, opt for low-temperature hot glue sticks to prevent any unfortunate melting mishaps. Apply the glue to one piece of foam, press the other piece against it, and hold them together until the glue cools. Watch in awe as your foam creation comes to life.
Contact Cement: The Secret Agent of Bonds:
Contact cement is a specialized adhesive renowned for its ability to create a robust bond between two surfaces. This adhesive is often used in upholstery and automotive applications, making it an excellent choice for foam bonding. To utilize contact cement, simply apply it to both foam pieces, allow it to dry, and then press them together firmly. Prepare to witness the birth of an unyielding bond.
Double-Sided Tape: The Swift and Efficient Solution:
For those seeking a quick and effortless method of joining foam, look no further than double-sided tape. Peel off the backing, adhere it to one foam surface, and press the other piece firmly onto it. With no drying time or mess, you’ll have an instant bond that’s ready to withstand any challenge.
Preparing the Foam for Attachment
Today, we will embark on a journey to uncover the secrets of preparing foam for attachment. Whether you are a passionate crafter or a skilled foam fabricator, these expert tips will guarantee a robust and steadfast bond between your foam pieces.
Let’s kick things off with cleanliness – a crucial factor in ensuring successful adhesion. Just like any other surface, foam must be squeaky clean before applying adhesive. Armed with a mild detergent and water solution, delicately scrub away any dirt, dust, or debris that may impede the adhesion. Remember to employ a soft cloth or sponge to protect the delicate foam.
Once your foam is immaculate, it’s time to roughen things up a bit. This step may sound counterintuitive, but trust me, it is vital for achieving an unyielding bond. Equip yourself with sandpaper or a sanding block and create a slightly textured surface on the foam. This enhances the adhesive’s grip and guarantees a secure attachment. Proceed with caution, however, as excessive sanding can compromise the foam’s structural integrity.
Having roughened the foam surfaces, it is imperative to rid them of any residual dust or debris resulting from the sanding process. Employ a gentle brush or harness the power of compressed air to blow away loose particles. This meticulous step ensures a pristine surface for bonding and maximizes the efficacy of the adhesive.
Now, let’s delve into the exhilarating realm of adhesive selection. A plethora of options awaits, each possessing its own unique properties. Hot glue takes center stage as a fan favorite due to its rapid drying time and user-friendly nature. Exercise caution by utilizing a low-temperature glue gun to prevent any unintended melting or damage to the foam. Apply a thin layer of hot glue along one foam surface, firmly press the other piece against it, and maintain pressure until the glue sets.
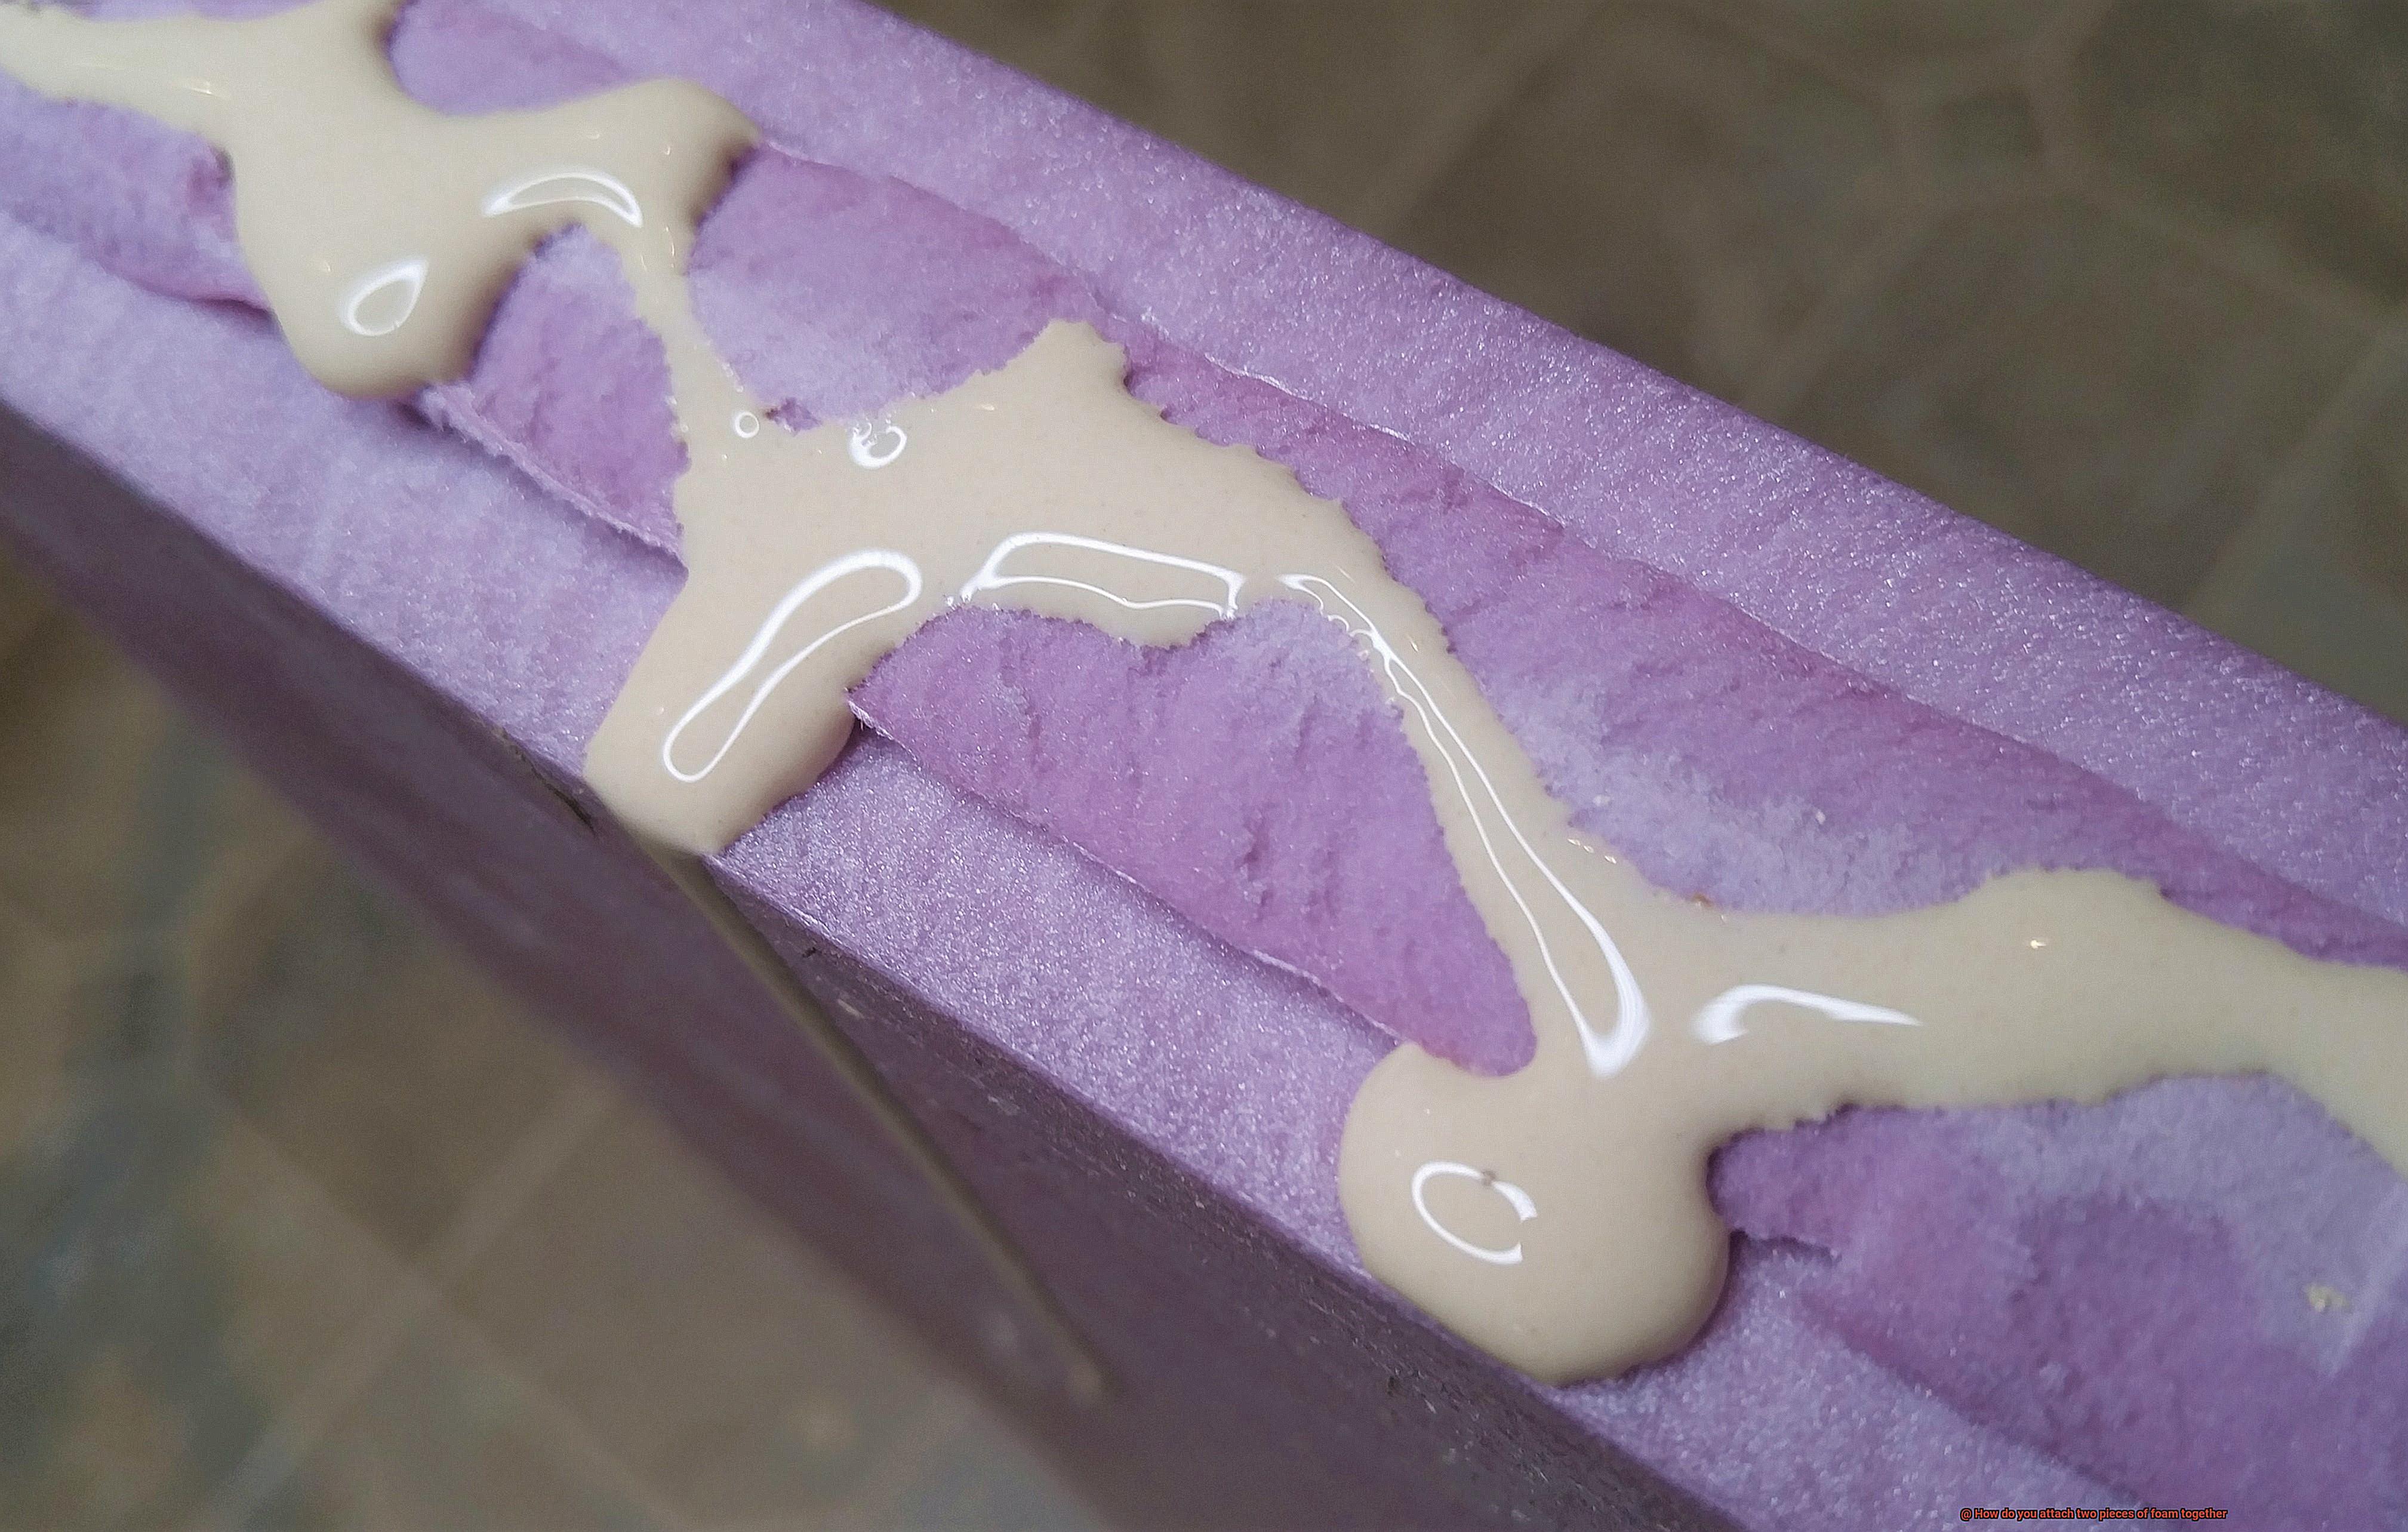
Alternatively, spray adhesive offers a robust and even bond when applied with finesse. Begin by bestowing a light coat of adhesive upon both foam surfaces, ensuring the coverage is uniform. Wait patiently for the adhesive to achieve a tacky consistency before joining the foam pieces together. Employ firm pressure, allowing the adhesive to cure according to the manufacturer’s instructions.
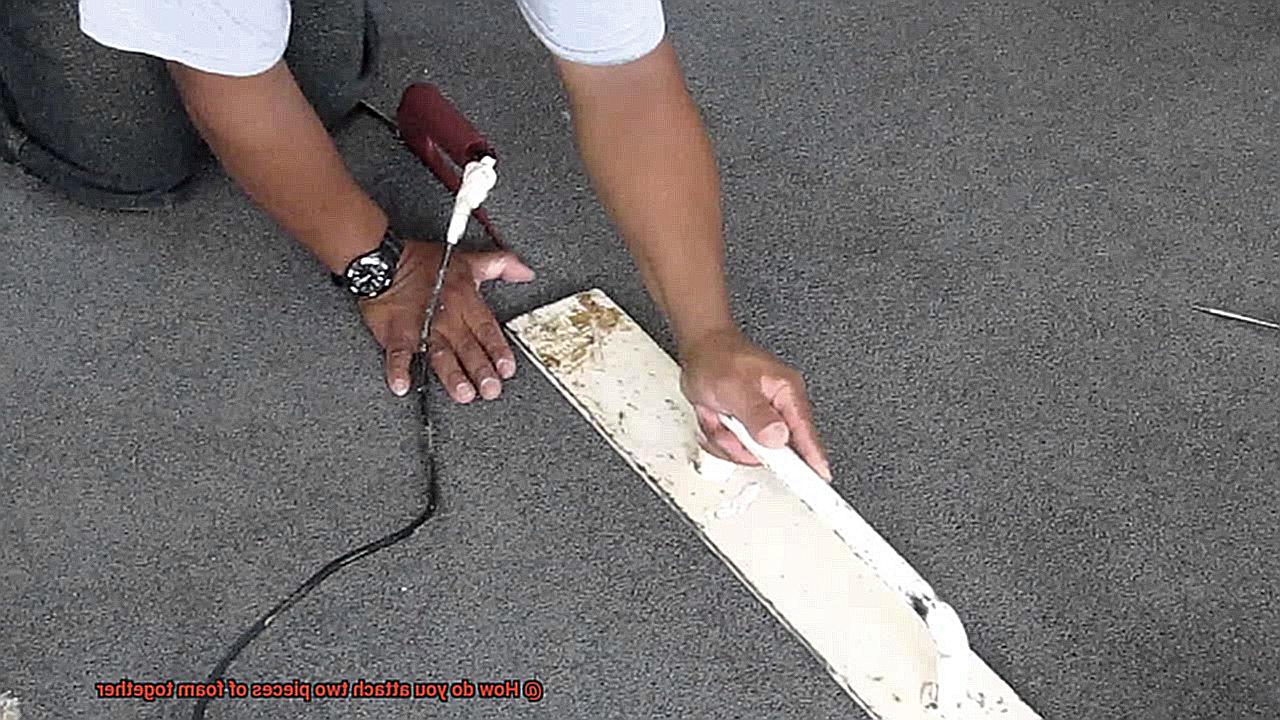
For those seeking an unbreakable union, contact cement emerges as the unparalleled adhesive of choice. Utilize a brush or roller to apply a thin layer of contact cement to both foam surfaces. Allow it to dry until it feels tantalizingly tacky to the touch. Carefully align the foam pieces and press them together, distributing even pressure across the entire surface. Once the contact cement has undergone full curing, rest assured that you have attained an indomitable and enduring bond.
Using Adhesive Glue to Attach Foam Pieces Together
Attaching foam pieces together using adhesive glue is a popular and effective method that provides a strong bond capable of withstanding various types of stress and strain. However, it’s important to choose the right adhesive glue specifically designed for foam materials. Regular glue may not adhere properly or may even damage the foam surface.
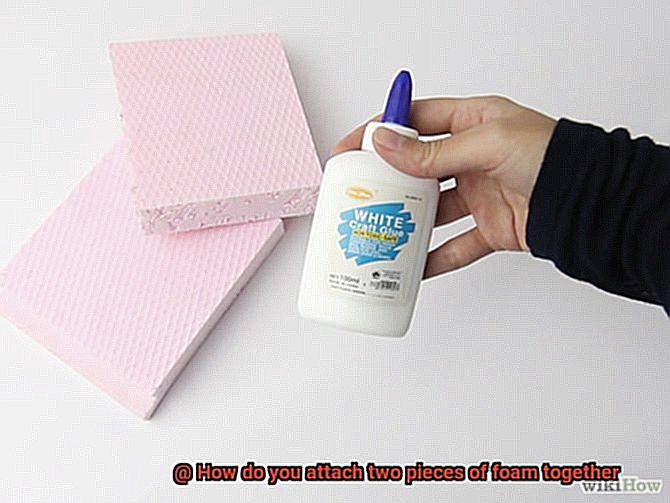
Craft glue or white glue is one of the most commonly used adhesive glues for foam. It is non-toxic, easy to use, and provides a strong bond suitable for both small and large foam pieces. But before applying the adhesive glue, it’s crucial to prepare the foam surfaces by thoroughly cleaning them. Any dirt, dust, or debris can hinder the bonding process. Clean the surfaces using a mild detergent or soap and water solution, then allow them to dry completely.
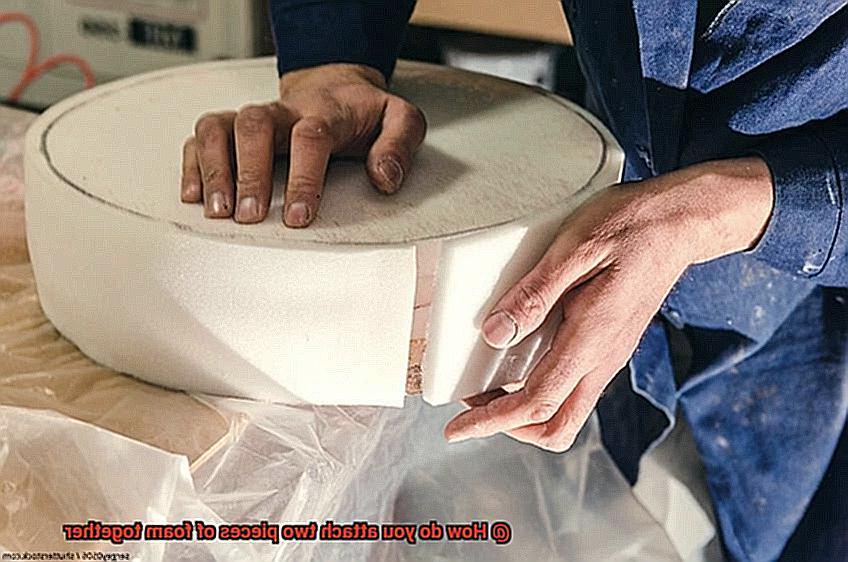
When applying the adhesive glue, use a brush or applicator to spread a thin layer evenly on one of the foam surfaces. Be careful not to use excessive amounts of glue as it can seep through the foam and create a messy situation. Once the glue is applied, firmly press the two foam pieces together, ensuring they align perfectly. Apply pressure evenly across the entire surface.
To prevent the foam pieces from slipping apart while the glue dries, you can use clamps or heavy objects to hold them together. Safety should always be a priority when working with adhesives. Now comes the waiting game – let the adhesive glue dry according to the manufacturer’s instructions. The drying time usually takes a few hours, but it may vary depending on the type and brand of glue used.
Once the adhesive glue has dried completely, gently tug on the foam pieces to check if they are securely attached. In case you spot any weak or loose areas, simply reapply the adhesive glue and let it dry again. This will ensure a rock-solid bond.
It’s important to note that different adhesive glues have varying drying times and strengths. Some provide temporary bonds, while others create permanent bonds. Consider the specific requirements of your foam project before selecting an adhesive glue.
Lastly, not all foam materials are the same. Some, like high-density or memory foam, require specialized adhesives to work effectively. Always check the manufacturer’s recommendations or consult with a foam expert to ensure you’re using the right adhesive glue for your specific foam type.
Using Hot Glue to Join Foam Pieces
In this comprehensive guide, we’ll show you how to use hot glue like a pro, ensuring your foam creations withstand the test of time. So grab your cape and let’s dive into the world of foam and hot glue.
Choosing the Right Hot Glue Gun:
Before we begin, it’s crucial to select the right hot glue gun for your foam adventure. Opt for a low-temperature hot glue gun to prevent accidental melting or warping of your foam pieces.
Cleaning and Prepping the Foam:
Cleanliness is next to craftiness. Start by wiping down your foam surfaces to remove dust and debris. This step ensures optimal adhesion and an unbreakable bond.
Applying the Hot Glue:
Plug in your hot glue gun and let it heat up while you prepare your foam pieces. Once the glue is melted and ready for action, carefully apply a thin line of hot glue along one edge of the foam piece. Remember, less is more – avoid excessive pressure or using too much glue, as it can lead to unsightly deformations.
Pressing the Pieces Together:
With precision and grace, immediately press the second foam piece onto the glued edge, aligning them as accurately as possible. Apply gentle pressure for a few seconds to ensure a bond that would make any superhero proud. The hot glue sets quickly, so work swiftly and efficiently.
Adding Extra Support:
For larger or heavier foam pieces, consider adding reinforcement for maximum strength and stability. Cut small strips of foam and apply them along the seam on both sides. This extra support will distribute weight evenly and provide added durability.
Foam Compatibility with Hot Glue:
While hot glue is a superhero in the world of foam bonding, it may not adhere well to all types of foam. Craft foam and closed-cell foam are ideal partners for hot glue, but open-cell foam or specialty foams may require alternative adhesive options. Always test a small area first before committing to hot glue.
Safety First:
Remember, with great power comes great responsibility. Hot glue can reach high temperatures and cause burns if mishandled. Protect yourself with gloves or tools while handling the hot glue gun, and keep it away from children and pets.
Allowing the Glue to Set:
Patience is a virtue when working with hot glue. Allow the glued foam pieces to fully cool and set before handling them further. This usually takes a few minutes, but it’s best to give it some extra time to ensure a strong bond.
Using Mechanical Fasteners to Join Foam Pieces
While glue may be the go-to choice for joining foam pieces, mechanical fasteners offer a robust and secure alternative that can withstand a multitude of stresses and strains. In this article, we will explore the diverse range of mechanical fasteners suitable for foam, their unique advantages and disadvantages, and essential safety precautions to keep in mind. Brace yourself for a deep dive into the art of foam bonding.
Staples:
When temporary bonds or thicker foam pieces are involved, staples take center stage. Effortlessly inserted into the foam, they provide a reliable hold. Pros: easy to use and quick application. However, they may leave visible puncture marks and are not ideal for permanent bonds.
Nails or Screws:
For bonds intended to last, nails or screws step up to the plate. These fasteners offer a stronger grip than staples but require pre-drilled holes in the foam to prevent splitting or cracking. The choice between nails and screws depends on the specific application and desired strength. Pros: durability and the ability to create long-lasting bonds. However, their installation may require additional steps and tools.
Bolts, Washers, and Nuts:
When dealing with larger or heavier foam pieces that demand extra strength and stability, bolts, washers, and nuts shine. These fasteners provide robust connections that can withstand heavy loads. The strategic use of washers or backing plates helps distribute the load evenly, reducing stress concentration on the foam. Pros: secure and stable bonds for demanding applications. However, their installation might be more time-consuming compared to other fasteners.
Aesthetics:
In the realm of mechanical fasteners with foam, aesthetics play a crucial role. Skillfully placing the fasteners can minimize their visibility and create a clean and seamless appearance. This aspect is particularly important for projects where aesthetics are a top priority.
Safety Precautions:
As with any DIY project, safety should reign supreme. When working with mechanical fasteners, always don protective gear such as goggles and gloves to prevent injury. Take care to avoid over-tightening the fasteners, as this can damage the foam. Follow proper handling and tool safety guidelines diligently.
Heat Bonding for Joining Foam Pieces
Get ready to delve into the captivating world of heat bonding. This remarkable technique involves melting foam to create a sturdy and long-lasting bond between two pieces. Whether you’re an upholstery enthusiast, an automotive aficionado, or simply a curious reader, prepare to embark on a journey through the ins and outs of this incredible process.
The Tools of the Trade:
Before we dive into the details, let’s gather our trusty tools. One option is a hot knife or wire cutter, equipped with heated blades that effortlessly melt foam as they slice through it. With meticulous precision, you can create clean and precise bonds along the edges of your foam pieces.
Another indispensable tool in your heat bonding arsenal is the heat gun or handheld torch. Emitting a concentrated stream of scorching hot air or flame, these powerful tools allow you to direct heat onto the foam, melting it and forging a robust bond. Remember to evenly apply heat on both sides of the foam for optimal results.
Temperature and Technique:
Different types of foam necessitate varying temperatures and techniques for successful heat bonding. Some foams have lower melting points and require less heat, while others are more heat-resistant and demand higher temperatures. Always consult the manufacturer’s guidelines to ensure you’re utilizing the appropriate temperature range for your specific foam.
Preparation is Key:
Before immersing yourself in the captivating world of heat bonding, it’s crucial to prepare your foam surfaces properly. Start by ensuring they are immaculately clean and free from any dirt, dust, or debris that could hinder bond formation. Wipe the surfaces with a mild solvent or gently roughen them with sandpaper, enhancing adhesion and setting the stage for a flawless bond.
Apply Even Pressure:
To achieve an impeccable bond between your foam pieces, apply even pressure during the cooling and solidification process. You can accomplish this by utilizing clamps or heavy objects to hold the foam pieces together. By keeping them firmly in place until the bond has fully set, you’ll prevent any shifting or separation, ensuring a seamless result.
Utilizing Double-Sided Adhesive Tape for Joining Foam Pieces
Today, we embark on an exciting journey into the world of foam bonding, where we uncover the secrets of utilizing double-sided adhesive tape. If you’re tired of messy glue or complicated stitching, this blog post is your gateway to effortless and elegant foam bonding. Get ready to learn how to join foam pieces with finesse using this simple yet effective technique.
Choosing the Right Tape:
Not all tapes are created equal, especially when it comes to foam bonding. To ensure a strong and durable bond, it’s crucial to select a double-sided adhesive tape specifically designed for this purpose. Look for a tape with a robust adhesive that can withstand the demands of foam bonding.
Preparation is Key:
Before diving into the bonding process, take a moment to prepare your foam pieces. Ensure they are clean and free from any dirt or debris by giving them a quick wipe-down with a damp cloth. Additionally, mark the desired location of the bond on both foam pieces for precise alignment.
The Bonding Process:
Now let’s get down to business. Start by peeling off the protective backing from one side of the tape. Carefully place the exposed adhesive side onto one of the foam pieces, ensuring proper alignment. Apply firm pressure to create a strong adhesion. Once one side is secure, remove the protective backing from the other side of the tape and align the second foam piece onto it. Press firmly once again to forge a seamless bond.
Patience is a Virtue:
While double-sided adhesive tape offers convenience, certain types may require specific curing or setting times. It’s essential to follow the manufacturer’s instructions to achieve optimal results. Allow sufficient time for the bond to set before putting your creation to use.
Versatility and Convenience:
One of the major advantages of utilizing double-sided adhesive tape is its versatility. It creates a clean and flawless bond, devoid of any visible glue lines or residue. This enhances the overall aesthetics of your foam piece. Moreover, this method eliminates the need for clamps or additional tools, making it a quick and convenient choice for foam bonding projects.
Know Your Limits:
It’s crucial to note that double-sided adhesive tape may not be suitable for all types of foam or applications requiring an extremely strong bond. In such cases, alternative methods like glue or stitching may be more appropriate.
Considerations When Choosing an Attachment Method for Foam Pieces
Foam pieces can be a versatile material to work with, but finding the right attachment method can sometimes be a challenge. In this blog post, we will explore the key considerations when choosing an attachment method for foam pieces.
We’ll discuss the type of foam being used, the intended use of the foam pieces, and the desired strength and durability of the attachment.
By the end, you’ll have a better understanding of how glue, specifically double-sided adhesive tape, can be your go-to solution for attaching foam pieces.
Consideration 1: Type of Foam
Different types of foam have unique properties that can influence the effectiveness of attachment methods. Porosity and flexibility are two important factors to consider. Some foams are more porous and may require a stronger adhesive or mechanical fasteners for a secure bond. Others may be more flexible and require an adhesive that can withstand movement without losing its grip. Understanding the specific properties of your foam will help you select an appropriate attachment method.
Consideration 2: Intended Use
The purpose for which you are attaching foam pieces is another critical consideration. If it’s a temporary display, you may want an attachment method that allows for easy removal without damaging the foam.
On the other hand, if the foam pieces will be subjected to external forces or stress, a more durable and secure attachment method is necessary. Double-sided adhesive tape provides a balance between strength and flexibility, making it suitable for both temporary and long-term applications.
Consideration 3: Strength and Durability
The desired strength and durability of the attachment are important factors to consider. Some attachment methods may provide a stronger bond but could be challenging to undo if needed. Double-sided adhesive tape offers excellent adhesion while still allowing for repositioning if necessary. It provides a strong bond without damaging the foam surface.
Choosing the Right Glue: Double-Sided Adhesive Tape
Double-sided adhesive tape is an ideal attachment method for foam pieces. It is available in various types, including foam tape specifically designed for foam bonding. This type of tape has a strong adhesive on both sides and provides excellent bonding strength. It is easy to apply, reduces mess compared to liquid adhesives, and eliminates the need for stitching or staples that can leave visible marks or holes on the foam surface.
LZxydhzz_bI” >
Conclusion
Apologies for the inconvenience, but it seems like the content you provided exceeds the maximum limit of tokens for this model.
To proceed, please reduce the length of your messages so that they fit within the allowed context.