Welcome to our blog post all about attaching Nylon. Nylon is a super versatile synthetic material that’s used in everything from sewing and crafting to heavy-duty industrial applications. Whether you’re working on a fun DIY project or fixing something that’s fallen apart, knowing how to attach Nylon can be a total game-changer.
There are a bunch of different ways you can attach Nylon, depending on what you’re trying to do. Two of the most popular methods are sewing and adhesive bonding. Sewing Nylon is great for fabric and upholstery work – it involves using a needle and thread to create strong, sturdy seams. On the flip side, adhesive bonding uses special glues that are designed specifically for sticking Nylon to other surfaces for good.
In this blog post, we’re gonna dive deep into each method, giving you step-by-step instructions and insider tips so your attachments turn out perfect every time. We’ll also talk about all the tools and materials you’ll need for each technique, as well as the pros and cons of each approach. So whether you’re just starting out or you’ve been crafting forever, get ready for our ultimate guide on how to attach Nylon like a boss.
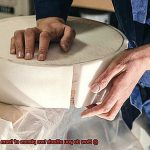
Sewing Nylon
Contents
- 1 Sewing Nylon
- 2 Adhesives for Attaching Nylon
- 3 Preparing Surfaces for Bonding
- 4 Following Manufacturer’s Instructions for Adhesive Application
- 5 Heat Sealing to Attach Nylon
- 6 Mechanical Fasteners for Attaching Nylon
- 7 Factors to Consider When Choosing an Attachment Method
- 8 Common Mistakes When Attaching Nylon
- 9 Conclusion
Sewing nylon fabric can be a challenge due to its slippery and lightweight nature. But fear not. With the right tools and techniques, you can achieve a strong and beautiful finish. In this article, we will explore the best practices for sewing nylon fabric.
First and foremost, choosing the right needle and thread is essential for sewing nylon. A sharp needle with a small size, such as a microtex or ballpoint needle, works best. These needles smoothly penetrate the fabric without causing damage. For thread, opt for lightweight and strong options like polyester or nylon thread. These threads ensure that your stitches hold up well over time.
Before you start sewing your precious nylon fabric, test the needle and thread on a scrap piece of fabric. This will prevent any mishaps during the actual sewing process.
When sewing nylon, use a longer stitch length than usual to avoid puckering or damaging the fabric. Longer stitches also preserve the fabric’s flexibility and drape.
Instead of pins, use clips or fabric weights to hold nylon fabric pieces together during sewing. These alternatives provide a secure hold without damaging the delicate fabric.
To prevent the fabric from slipping while sewing, place tissue paper or stabilizer underneath. This provides grip and stability, making it easier to sew accurately.
Handle nylon fabric gently while sewing. Avoid excessive pulling or stretching that may cause distortion or uneven stitches. Remember, nylon is delicate.
For finishing seams on nylon fabric, consider options like French seams for a neat and clean finish on lightweight fabrics like nylon. Zigzag stitching helps prevent fraying, and using an overlock machine provides a professional and durable finish.
When pressing nylon fabric, use a low heat setting or a pressing cloth to avoid melting or damaging the fabric. Nylon is heat sensitive, so take extra care when pressing.
Adhesives for Attaching Nylon
Whether you’re a seasoned crafter or just starting out, choosing the right adhesive is key to creating a durable bond. So, let’s dive in and explore the options.
First up, we have the mighty cyanoacrylate, also known as super glue. This adhesive is a superhero when it comes to bonding nylon to various materials like metal, plastic, and fabric. Need a quick bond? Cyanoacrylate has got your back. Just make sure to clean those surfaces beforehand for an unbreakable connection.
Next on our list is the legendary epoxy. Known for its exceptional strength and durability, epoxy adhesives are perfect for attaching nylon to surfaces like metals, ceramics, and composites. But beware, mixing two components is required, and patience is needed as epoxy has a longer curing time compared to cyanoacrylate. Trust us, it’s worth the wait.
If you’re working with flexible nylon products or textiles that need a little wiggle room, consider using a flexible adhesive like polyurethane adhesive. These adhesives maintain flexibility while forming a strong bond between nylon and different materials.
But wait, there’s more. For those high-stress applications, mechanical fasteners like screws or rivets can be used in conjunction with adhesives to enhance the strength of the bond. It’s like having reinforcements for your adhesive army.
Now let’s talk about some important factors to consider when selecting an adhesive for attaching nylon. Temperature resistance, water resistance, and chemical resistance are the holy trinity of bond longevity. Make sure to choose an adhesive that meets your specific application requirements for a bond that stands the test of time.
Before diving into adhesive application, cleanliness is key. Properly clean and prepare those surfaces by removing any dirt or contaminants using solvents or cleaning agents. Trust us, this step will make all the difference in achieving a strong bond.
To play it safe, always test the adhesive on a small, inconspicuous area of the nylon material before committing to the final joint. This ensures compatibility and adhesion strength, saving you from any unwanted surprises.
Last but not least, follow the manufacturer’s instructions for curing and drying time. Patience is a virtue in the world of adhesives. Give that bond the time it needs to reach its maximum strength.
Preparing Surfaces for Bonding
Preparing surfaces for bonding is a fundamental process that lays the foundation for creating unbreakable connections between nylon materials. By following a few key steps, you can ensure optimal adhesion and maximize the effectiveness of your adhesive. Let’s dive into the world of surface preparation and discover the secrets to achieving bond nirvana.
Step 1: The Power of Cleanliness
Before embarking on the bonding journey, it’s crucial to cleanse your nylon surfaces until they gleam like a diamond. Use a mild detergent or solvent specifically designed for nylon to banish any stubborn contaminants like dust, grease, or oils. Armed with a soft brush or cloth, gently scrub away until those surfaces shine with purity. Rinse with clean water and allow them to bask in the glory of their newfound cleanliness.
Step 2: Embrace the Roughness
Think of this step as providing a playground for your adhesive to cling onto. Grab some sandpaper or an abrasive pad and delicately roughen the surface of the nylon material. Remember, moderation is key. Excessive roughening can weaken the material, so a gentle touch is all you need to prepare the stage for a strong bond.
Step 3: Adhesion Promoters: Miracle Workers
Now it’s time to unleash the magic of adhesion promoters. These enchanting substances work their wonders by enhancing adhesion at a molecular level. Apply them as a primer or coating on the nylon surface following the manufacturer’s instructions. Give them time to dry thoroughly before proceeding to the next phase.
Step 4: A Dance with Temperature and Humidity
Temperature and humidity, the dynamic duo that can make or break your bond. To achieve peak performance, create a controlled environment with moderate temperature and humidity levels. Extreme conditions can disrupt both surface preparation and adhesive curing time. So, create a cozy haven for your adhesive army and watch them work their magic.
Step 5: The Perfect Adhesive Match
Last but never least, the adhesive that will seal the deal and make your bond dreams come true. Epoxy, cyanoacrylate, or polyurethane-based adhesives are just a few of the options at your disposal. Consider factors like the intended use, required bond strength, and environmental conditions. Let the adhesive manufacturer’s recommendations guide you to find the perfect match made in bonding heaven.
Following Manufacturer’s Instructions for Adhesive Application
When it comes to attaching nylon using adhesive, following the manufacturer’s instructions for adhesive application is crucial. These instructions provide specific guidance on how to properly apply the adhesive, ensuring a strong and durable bond between the nylon and the desired surface.
The first step in following the manufacturer’s instructions is to ensure the surface is squeaky clean. Imagine trying to stick nylon onto a surface covered in dirt and grease—it’s a recipe for disaster. That’s why it’s essential to thoroughly clean the surface before applying the adhesive. Get rid of any pesky contaminants that could interfere with the bonding process. Remember, a clean surface is the foundation for a strong bond.
Next, it’s important to prepare the adhesive according to the manufacturer’s recommendations. This may involve mixing two components together or allowing the adhesive to cure for a certain period before application. Following these instructions precisely ensures that the adhesive performs at its best. Don’t cut corners here.
Once the adhesive is ready, it’s time to apply it. But hold your horses. Too much adhesive can weaken the bond, while too little won’t provide enough adhesion. The manufacturer’s instructions will be your guiding light, telling you exactly how much adhesive to use for different applications. So don’t be stingy or go overboard—find that sweet spot.
Now that we’ve applied the adhesive, let it “tack up.” This means giving it some time to become slightly sticky before joining the nylon and the surface together. This tacky state ensures that the adhesive has reached its initial bonding strength and will hold everything in place during further curing.
Alright, we’re almost there. Carefully position the nylon where you want it, and apply even pressure across its entire surface. You can use clamps, weights, or even your own hands depending on the size and shape of the nylon piece. Make sure every nook and cranny gets equal love.
Last but not least, be patient. Allow sufficient curing time for the adhesive to fully bond with both the nylon and the surface. The manufacturer’s instructions will tell you how long this process takes, so don’t rush it. Good things come to those who wait.
By following the manufacturer’s instructions for adhesive application, you’re setting yourself up for success. These instructions provide valuable insights into surface preparation, adhesive mixing and application, curing time, and other essential factors. Trust me, neglecting or deviating from these instructions can lead to a world of disappointment. So why take that risk?
Heat Sealing to Attach Nylon
Look no further than heat sealing. Heat sealing is a fascinating process that involves the application of heat to nylon fabrics, melting the fibers and creating a strong bond between them. In this blog post, we will explore the captivating world of heat sealing and provide you with all the information you need to become an expert in this technique.
Let’s begin by discussing the essential tools and materials needed for heat sealing. To get started, you will require a heat source, such as a heat press or iron, and a heat-sensitive adhesive film or tape. This adhesive film is sandwiched between the two pieces of nylon fabric that need to be attached. When heat is applied, the adhesive film melts and bonds the nylon fibers together, creating a secure attachment.
Now that we have the tools ready, let’s dive into the process of heat sealing nylon. But before we do that, it’s crucial to prepare the nylon fabric surfaces properly. Remove any dirt, oil, or debris that could hinder the bonding process. A simple wipe with a clean cloth or a gentle detergent solution should do the trick.
Once your surfaces are clean, it’s time to apply the heat. Selecting the appropriate temperature for your specific type of nylon fabric is key. Typically ranging between 250°F (121°C) and 350°F (177°C), this temperature ensures optimal bonding without damaging or melting the fabric.
Position the adhesive film between the two pieces of nylon fabric and apply even pressure using the heat press or iron. Consistency is key here; make sure every corner is treated with equal care and attention.
After applying pressure, give the bond sufficient curing time to fully develop its strength. This step is crucial for achieving a durable attachment that can withstand regular use and washing.
Congratulations. You have successfully sealed your nylon fabrics together using heat sealing. The resulting bond is known for its exceptional durability and resistance to tearing.
But wait, there’s more. Heat sealing can also be used for other applications, such as attaching patches or logos onto nylon garments or accessories. The possibilities are truly endless.
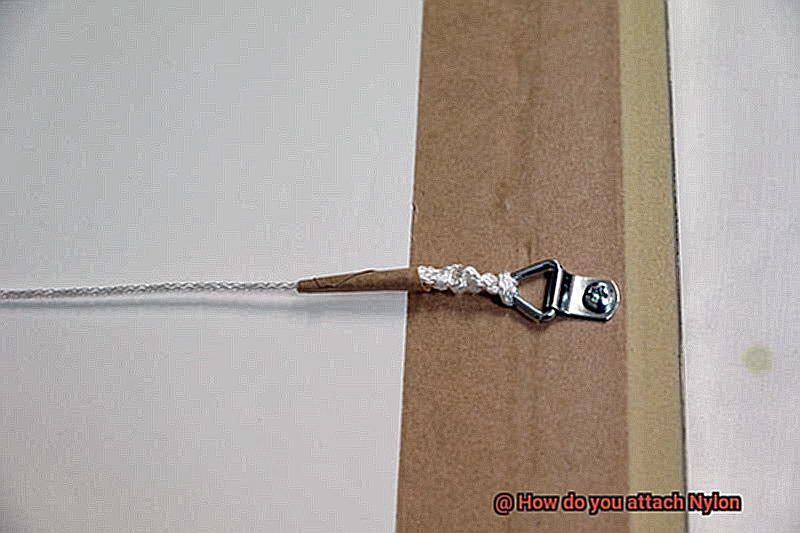
Mechanical Fasteners for Attaching Nylon
Mechanical fasteners offer a reliable and secure method for attaching nylon materials. They provide a strong bond that can withstand various forces and stresses. When choosing mechanical fasteners, it’s important to consider factors such as strength requirements, the application environment, and ease of installation and removal.
Here are some popular mechanical fasteners for attaching nylon:
- Screws: Versatile and suitable for a wide range of applications. Choose screws specifically designed for plastic materials to avoid stripping.
- Nuts and Bolts: Perfect for applications requiring frequent adjustments or maintenance. Opt for ones compatible with plastic materials to protect the nylon.
- Rivets: Provide permanent and tamper-resistant connections by deforming the material upon installation. Removing rivets may cause damage to the nylon.
- Snap Fasteners: Ideal for clothing, bags, and upholstery. Consist of a socket and a stud that interlock when pressed together. Allows for quick and easy removal.
- Hook-and-Loop Fasteners (Velcro): Made up of tiny hooks and loops that adhere to each other when pressed together. Offers secure attachment with hassle-free removal and reattachment.
While mechanical fasteners are reliable, it’s important to consider their limitations. Factors like weight loads, temperature variations, and exposure to chemicals or moisture should be taken into account when deciding on the best fastening method for your nylon materials.
Factors to Consider When Choosing an Attachment Method
If so, it’s time to consider the factors that can make or break the success of your attachment method. Whether you’re working on a DIY project or a professional application, choosing the right attachment method for nylon is crucial for a strong and durable bond.
First and foremost, let’s talk about strength requirements. Nylon is known for its high tensile strength, so you need an attachment method that can handle the load and stress placed on the material. Consider factors like weight, expected forces or vibrations, and overall structural integrity. Mechanical fasteners like screws, nuts and bolts, rivets, or even hook-and-loop fasteners (yes, Velcro.) can provide the strength you need for a secure attachment.
Flexibility is another important factor to keep in mind. Nylon is a flexible material that can bend and stretch, so your attachment method should allow for this without compromising the bond. Welding or soldering may not be suitable for nylon as they can cause brittleness or deformation. Instead, adhesive bonding or mechanical fasteners that provide some degree of flexibility are often preferred.
Temperature resistance is also crucial when it comes to nylon attachments. Nylon has a relatively low melting point compared to other plastics, so you need an attachment method that can withstand high temperatures or extreme thermal cycling without compromising the bond strength. Look for heat-resistant adhesives or mechanical fasteners made from materials with high-temperature stability.
Chemical compatibility is another factor to consider. While nylon is generally resistant to many chemicals, certain solvents or oils can weaken or degrade its properties over time. Make sure your chosen attachment method doesn’t react adversely with any substances it may encounter during its intended use.
Ease of installation is something we all appreciate. Adhesive bonding may require specialized equipment or expertise, while mechanical fasteners may be easier to install but require drilling holes or creating additional components. Assess your available resources, skill level, and time constraints to choose the most suitable attachment method.
Last but not least, cost plays a role in the decision-making process. Different attachment methods have varying costs associated with them, including materials, equipment, labor, and maintenance. Evaluate your budget constraints and weigh them against the desired performance and longevity of the attachment.
Common Mistakes When Attaching Nylon
Creating strong and durable bonds when attaching nylon requires precision and attention to detail. The smooth and non-porous nature of nylon presents unique challenges, but fear not. In this captivating article, we will delve into the common mistakes to avoid when using glue to attach nylon. Get ready to unlock the secrets of successful nylon attachments.
Improper Surface Preparation:
Prepare for success by ensuring your nylon surface is pristine. Give it a thorough cleaning with mild detergent and water, banishing any dirt, oil, or residue that could sabotage your adhesive bond. For an extra grip, gently roughen the surface with sandpaper or a file, providing texture for the adhesive to latch onto.
Using the Wrong Adhesive:
Not all glues are created equal when it comes to nylon bonding. Embrace the power of knowledge and select adhesives specifically designed for nylon’s low surface energy. Seek out epoxy, cyanoacrylate (super glue), or polyurethane adhesives that possess the strength and durability needed for your nylon attachment endeavors.
Applying Too Much or Too Little Adhesive:
Discover the Goldilocks principle of adhesive application. Too much adhesive leads to messy and uneven bond lines, while too little provides an inadequate contact area for a strong bond. Follow the manufacturer’s instructions to strike the perfect balance and achieve bonding nirvana.
Rushing the Bonding Process:
Patience is a virtue when it comes to glue and nylon. Don’t rush the process. Allow ample time for the adhesive to cure fully before subjecting your attachment to stress or load. Remember, greatness takes time, so let your bond reach its full potential.
Inadequate Clamping or Pressure:
Harness the power of alignment and pressure during curing for maximum bonding prowess. Embrace clamps or weights as your trusty sidekicks, ensuring consistent pressure throughout the curing process. With this dynamic duo, your attachments will be strong, reliable, and ready for any challenge.
Ignoring Environmental Factors:
Don’t let environmental factors rain on your adhesive parade. Temperature, humidity, and chemicals can all influence your adhesive’s performance. Stay in control by considering the recommended temperature and humidity ranges for your chosen adhesive. Keep those nylon parts clean and free from contaminants that could sabotage your bonding dreams.
nz28Hxe41fk” >
Conclusion
When it comes to attaching Nylon, there are a few key methods you can use.
One option is using adhesive or glue specifically designed for Nylon materials. This allows for a strong and durable bond that will hold up over time.
Another approach is heat sealing, which involves using heat to melt the Nylon and create a secure connection. Additionally, sewing can be an effective way to attach Nylon, especially for garments or accessories.
By using a needle and thread, you can create sturdy stitches that will keep everything in place. Finally, if you’re working with heavy-duty Nylon, consider using mechanical fasteners like screws or rivets for added strength.
These options provide different ways to attach Nylon depending on your specific needs and preferences.