Ready for a fresh new look in your space? Tired of staring at that worn-out linoleum flooring? Well, you’re in luck. In this blog post, we’ll take a peek into the world of professional linoleum floor removal. Whether you’re a DIY fanatic or considering hiring a pro, knowing the ins and outs of this process will help you make smart choices and ensure success.
Linoleum flooring has been a go-to option for ages because it’s tough and easy on the wallet. But hey, even the best things can lose their charm over time. When that happens, it’s time to say goodbye to that old linoleum and welcome something new. Don’t worry though, removing linoleum flooring isn’t as scary as it seems – especially when you’ve got the right tools and techniques up your sleeve.
In this guide, we’ll walk you through the step-by-step process that pros use to remove linoleum flooring. From prepping your space to getting rid of every last bit of that pesky adhesive, we’ll be there with tips and tricks along the way. So let’s dive in and discover how professionals tackle the challenge of removing linoleum flooring.
Preparing the Work Area
Contents
- 1 Preparing the Work Area
- 2 Cutting the Linoleum
- 2.1 Step 1: Setting the Stage for Success
- 2.2 Step 2: Scoring the Lines with Precision
- 2.3 Step 3: Embracing Curves and Conquering Complexity
- 2.4 Step 4: Unwavering Commitment to Safety
- 2.5 Step 5: The Artistry of Removal
- 2.6 Step 6: Harnessing the Power of Heat
- 2.7 Step 7: Safeguarding Against Airborne Threats
- 3 Loosening the Adhesive
- 4 Lifting and Removing the Linoleum
- 5 Additional Layers of Linoleum
- 6 Cleaning the Subfloor
- 7 Removing Stubborn Residue
- 8 Final Steps for Removal
- 9 Conclusion
When it comes to removing linoleum flooring, professionals understand the importance of thorough preparation. By properly preparing the work area, they ensure a smooth and efficient process while minimizing any potential damage to surrounding surfaces. In this article, we will explore the steps professionals take to prepare the work area for linoleum removal, from clearing the space to testing for asbestos.
Clearing the Space:
Professionals know that a clutter-free work area is essential for a successful linoleum removal. They meticulously remove all furniture and items that may obstruct their work, creating an empty space that allows them to move freely and have better access to the flooring.
Ventilation:
Adequate ventilation is crucial during any home renovation project, including linoleum removal. Professionals open windows and doors, inviting fresh air to circulate and prevent the accumulation of dust and fumes. If natural ventilation is insufficient, they employ fans or air purifiers, ensuring a healthy work environment throughout the process.
Safety Measures:
Professionals prioritize safety by donning protective gear such as gloves, safety glasses, and dust masks. These precautions shield them from potential hazards like sharp objects or harmful chemicals. Additionally, they carefully lay down drop cloths or plastic sheets to protect adjacent surfaces from damage or debris.
Tools and Equipment:
Before commencing the linoleum removal process, professionals gather all necessary tools and equipment. This includes a utility knife with extra blades for precision cutting, a heat gun or hairdryer for loosening adhesive, a pry bar or scraper for skillfully lifting the linoleum, and a bucket or trash bags for efficient waste disposal.
Inspecting the Subfloor:
To ensure a successful removal process, professionals meticulously inspect the subfloor before removing the linoleum. They diligently search for signs of damage or moisture that may require repair prior to removal, ensuring the subfloor’s integrity remains intact throughout the project.
Testing for Asbestos:
Professionals are well-versed in identifying potential asbestos-containing materials in older linoleum flooring. They take the necessary precautions if they suspect its presence, utilizing testing kits or professional asbestos testers to confirm before proceeding with removal. This ensures the safety and well-being of everyone involved.
Cutting the Linoleum
When it comes to flooring options, linoleum stands as a true champion in terms of versatility and durability. Whether you’re embarking on a home renovation project or tackling a commercial endeavor, cutting linoleum requires finesse and the right tools.
Join us on an exhilarating journey as we delve into the secrets of professionals who wield their expertise to seamlessly cut linoleum flooring, with a special focus on the glue that binds it all together.
Step 1: Setting the Stage for Success
Before the symphony of cuts begins, professionals meticulously prepare the stage. They clear the area of any furniture or obstacles that could hinder their performance. Safety takes center stage as they ensure proper ventilation to allow fresh air to circulate, minimizing exposure to potentially harmful fumes.
Step 2: Scoring the Lines with Precision
Armed with their trusty utility knife, professionals skillfully score the linoleum along straight lines. This initial scoring acts as a guiding light for more intricate and deeper cuts. To maintain flawless precision, they may enlist the assistance of straightedges or rulers.
Step 3: Embracing Curves and Conquering Complexity
Linoleum often demands cuts around curves or irregular shapes such as door frames or built-in fixtures. Professionals rise to the challenge armed with specialized tools like jigsaws or rotary tools equipped with cutting attachments. These tools grant them control in tight spaces, ensuring an impeccable finish.
Step 4: Unwavering Commitment to Safety
The safety of both professionals and their surroundings takes precedence when dealing with sharp tools and potentially hazardous materials. Masters of their craft protect their eyes behind purposeful goggles and shield their hands with sturdy gloves. They remain vigilant, keeping their fingers safely away from the blade’s path at all times.
Step 5: The Artistry of Removal
As each section of linoleum is cut with precision, professionals embark on the meticulous process of removing it from the subfloor. They delicately lift one corner of the cut linoleum and proceed to peel it back gradually. To facilitate this artistry, they may employ putty knives or scrapers to loosen any adhesive or glue stubbornly clinging to the linoleum’s embrace.
Step 6: Harnessing the Power of Heat
In the face of steadfast linoleum or multiple layers of flooring, professionals unveil their secret weapon – heat. They unleash the power of heat guns or hairdryers to warm up the linoleum, tenderly softening the adhesive and making its separation a seamless endeavor.
Step 7: Safeguarding Against Airborne Threats
The act of cutting linoleum can release potentially harmful dust and particles into the air. Professionals take proactive measures to safeguard their well-being and that of their surroundings. Donning protective dust masks and ensuring proper ventilation throughout the cutting process, they keep both air and ambiance free from any airborne threats.
Loosening the Adhesive
Loosening the adhesive that holds linoleum flooring in place can be a daunting task, but fear not. Professionals have an array of techniques at their disposal to make this process a breeze. So, grab your tool belt and let’s dive into the world of glue removal.
First and foremost, let’s talk about the trusty heat gun or hot air blower. These powerful tools are like the superheroes of linoleum removal. By applying heat to the adhesive, it becomes soft and pliable, allowing you to effortlessly peel away the flooring. However, caution must be exercised not to overheat the linoleum itself, as it can sustain damage in the process.
If heat alone doesn’t do the trick, it’s time to bring out the big guns – chemical adhesive removers. These specially formulated products are designed to break down the adhesive and make it easier to remove. When choosing a remover, ensure that it is safe for use on linoleum and follow the instructions meticulously. Remember, safety first.
Sometimes, you need a little extra muscle to get the job done. That’s where scrapers and putty knives come into play. Gently prying up the edges of the linoleum creates space for either heat or adhesive remover to penetrate and loosen the adhesive underneath. It’s like a delicate dance between you and the glue.
But what about those stubborn adhesive residues that just won’t budge? Enter the floor sander or floor buffer with an abrasive pad attachment. These mechanical marvels will effectively grind away any remnants of adhesive, leaving you with a clean slate for your new flooring.
Now, let’s emphasize the importance of safety when working with chemicals or using mechanical tools. Protect yourself by donning gloves and goggles to avoid any potential injuries. We want you to emerge from this adventure unscathed.
Once you’ve successfully loosened the adhesive, it’s time for the grand finale – removing the linoleum flooring. With the adhesive no longer holding it in place, you can easily lift and peel away the flooring. Don’t be surprised if you have to repeat the loosening process in certain areas where the adhesive is particularly stubborn. Remember, persistence is key.
Before you can install your new flooring, it’s crucial to clean any remaining adhesive residue from the subfloor. This ensures a smooth and even surface for your fresh floor to shine.
Lifting and Removing the Linoleum
Prepare yourself for an epic quest to conquer the daunting task of lifting and removing linoleum flooring. Fear not, for I shall be your trusted guide, equipping you with the knowledge and tools necessary to emerge victorious over the fierce grip of linoleum glue. Whether you are a DIY enthusiast or a seasoned professional, this step-by-step guide will empower you to unravel the secrets of linoleum removal.
Unleashing your Superpowers:
Begin your journey by locating a starting point. Arm yourself with a putty knife or floor scraper and gently lift a corner of the linoleum, revealing the hidden world beneath.
As the linoleum surrenders its hold, employ the power of heat to conquer stubborn areas. Unleash the heat gun or hairdryer upon the adhesive, softening its grip and making it easier to vanquish. Remember to wield this power with caution, avoiding excessive heat that could cause harm.
Confronting the Formidable Adhesive:
As you peel back the layers of linoleum, prepare to do battle with tenacious adhesive spots. Equip yourself with a trusty floor scraper or putty knife and engage in a careful dance of scraping away the adhesive while preserving the integrity of the subfloor.
Calling in Reinforcements:
When all seems lost in the face of adhesive resistance, it is time to summon the aid of chemical solvents. These powerful elixirs are applied to the affected areas, working their magic to soften and weaken the adhesive’s grip. Armed once more with your scraping tool, you can now triumphantly remove the softened glue.
Cleaning Up the Battlefield:
With linoleum conquered and adhesive banished, it is time to restore order to the battlefield. Take up arms in the form of a vacuum cleaner, broom, or mop and meticulously cleanse the subfloor of any lingering residue or debris.
Inspecting the Subfloor:
As a true hero, your quest does not end with the removal of linoleum. Carefully examine the now-exposed subfloor for signs of damage or imperfections. If necessary, embark on the noble task of repairing or preparing it for its next flooring adventure.
Additional Layers of Linoleum
Get ready to unleash your inner DIY superhero, because we’re about to dive into the process of conquering this formidable task.
Before you start ripping up those layers, it’s crucial to assess the condition of the existing linoleum. Check for any signs of damage like cracks or tears. If the layers are in good shape and firmly stuck to the subfloor, you might consider leaving them in place and installing new flooring over them. Just make sure to prep the subfloor properly and fix any imperfections.
But if you’re determined to rid yourself of those extra layers, let’s talk techniques. One powerful method is heat application. Grab a heat gun or specialized heat tool and gently warm up the linoleum. This will soften the adhesive, making it easier to lift and remove. Work in sections, applying heat and then carefully scraping away the linoleum layer by layer.
Encountering stubborn glue? Time to bring out the big guns – chemical solvents. Apply these mighty liquids to the linoleum and let them penetrate and dissolve the adhesive. Once the glue has been weakened, use scrapers or putty knives to scrape away the linoleum.
But remember, my fellow warriors, chemical solvents can be harsh. Follow safety guidelines and protect yourself with gloves and goggles.
Once you’ve successfully vanquished those additional layers of linoleum, it’s time to clean up. Use a solvent or adhesive remover to get rid of any remaining adhesive residue. Then give the subfloor a thorough cleaning with warm water and mild detergent.
Inspect your conquered subfloor for hidden damage or imperfections that may need repair. Fix them up so your new flooring can be installed on a strong, sturdy foundation.
And there you have it, brave warriors. You’ve triumphed over the challenge of removing additional layers of linoleum flooring. Now go forth and conquer your next DIY adventure with confidence.
To recap, here are the main steps for removing additional layers of linoleum:
- Assess the condition of the existing linoleum.
- Consider leaving the layers in place if they are in good shape and firmly stuck to the subfloor.
- Use heat application to soften the adhesive and scrape away the linoleum layer by layer.
- If necessary, use chemical solvents to dissolve stubborn glue.
- Follow safety guidelines when using chemical solvents.
- Clean the subfloor thoroughly after removing the linoleum.
- Inspect the subfloor for any hidden damage or imperfections that need repair.
- Prepare the subfloor properly before installing new flooring.
Cleaning the Subfloor
Before you embark on the journey of removing linoleum flooring, it’s crucial to give some attention to an often overlooked step – cleaning the subfloor. Cleaning the subfloor is essential for ensuring a smooth and successful installation of new flooring. In this article, we will guide you through the process of cleaning the subfloor before removing linoleum flooring, providing you with the knowledge and tools to achieve a pristine and ready-to-go surface.
To begin, it is imperative to eliminate any loose debris or dirt that may be lingering on the subfloor. Grab your trusty broom or vacuum and give the area a thorough sweep or vacuuming. This initial step sets the stage for a clean canvas.
Next up, it’s time to tackle the adhesive residue left behind by the linoleum flooring. This can be a bit tricky, as it depends on factors such as the type of adhesive used and the condition of the subfloor. Professionals often employ a scraping technique, using a scraper or putty knife to delicately remove the residue. Take care not to damage the subfloor during this process. In some cases, applying heat to soften the adhesive before scraping may be necessary.
If scraping alone doesn’t do the trick, chemical adhesive removers can come to your rescue. These specially formulated products are readily available at most home improvement stores. However, exercise caution and carefully follow the manufacturer’s instructions while using these potent solutions. Adequate ventilation is also crucial when working with these products.
For stubborn adhesive residue, experienced individuals may opt for using a floor buffer with a sanding attachment. However, it’s important to highlight that this method should only be attempted by professionals, as improper execution can potentially damage the subfloor.
Once all adhesive residue has been eliminated, it’s time to give the subfloor a thorough cleaning. Utilize a damp mop or cloth along with a mild detergent or cleaning solution to meticulously cleanse the surface and remove any remaining debris or residue.
After the cleaning process, it is vital to allow the subfloor to completely dry before proceeding with the installation of new flooring. Failure to ensure proper drying can result in moisture-related damage and negatively impact the longevity of your new flooring.
Cleaning the subfloor is an essential step in the process of removing linoleum flooring. It lays the foundation for a clean and smooth surface, ensuring optimal conditions for the successful installation of new flooring. By adhering to proper techniques, utilizing suitable tools and products, you can effectively clean the subfloor and prepare it for the next phase in your flooring journey.
Removing Stubborn Residue
Professionals have an array of effective techniques to tackle even the most stubborn residues, from glue to adhesive and everything in between. With their expertise and tools, they’ll have your linoleum looking brand new in no time.
One popular method used by professionals involves the application of heat. They use a heat gun or handheld steamer to soften the residue, making it easier to scrape off. By directing the heat or steam onto small sections at a time, they gradually break down the sticky substance without harming the linoleum flooring underneath.
Another approach professionals take is using commercial adhesive removers or solvents. They apply these products directly to the residue and allow them to penetrate and break down the adhesive. After a specified amount of time, professionals gently scrape off the residue using a putty knife or scraper, being careful not to damage the linoleum flooring.
For more stubborn residues, professionals may turn to a floor buffer with an abrasive pad. They work slowly and apply gentle pressure, avoiding scratching or damaging the linoleum. The buffer helps remove the residue gradually, and any remaining bits can be scraped off with a putty knife or similar tool.
In rare cases where other methods fail, professionals may consider sanding the affected area. However, this should only be used as a last resort and requires expertise to prevent damage to the linoleum flooring.
Before attempting any removal techniques yourself, it’s best to consult with a professional. They can assess the type of adhesive used and the condition of your flooring to determine the best course of action. And remember to properly ventilate the area and wear protective gear when working with adhesive removers or solvents.
Final Steps for Removal
You’ve successfully removed your linoleum flooring, but now it’s time to face the last obstacle – the stubborn remnants of glue or adhesive on the subfloor. Fear not, for in this article, we will delve into the final steps that professionals take to guarantee a pristine and flawless surface. So, let’s dive in and conquer that glue once and for all.
Step 1: Unleash the Power of Commercial Adhesive Removers
Professionals swear by the magic of commercial adhesive removers, specially crafted to dissolve even the most obstinate residues without inflicting harm on the subfloor. Simply apply this elixir directly onto the lingering glue, adhering to the manufacturer’s instructions for optimal results.
Step 2: The Artful Dance of Gentle Scraping
After allowing the adhesive remover to perform its enchantment, it’s time to embark on a graceful scraping routine, wielding a scraper or putty knife. Remember to maintain a slight angle and apply just enough pressure to lift the glue without blemishing or gouging the surface. Patience is your virtue here, as certain areas may require multiple rounds of adhesive removal.
Step 3: The Subfloor Spa Treatment
Once all traces of adhesive have been vanquished, pamper your subfloor with a thorough cleanse using mild soap and warm water. This rejuvenating step eliminates any residue left behind by both the adhesive remover and the departed linoleum. Take hold of a sponge or mop and lovingly scrub away any sticky or greasy vestiges.
Step 4: A Meticulous Inspection
With a subfloor gleaming with newfound radiance, it’s time for a discerning examination to uncover any signs of damage or irregularities. If necessary, professionals may employ additional remedies such as filling in holes or cracks with wood filler or leveling compounds. This meticulous step ensures that your subfloor is primed and ready for its next flooring adventure.
F28FwR7WWcw” >
Conclusion
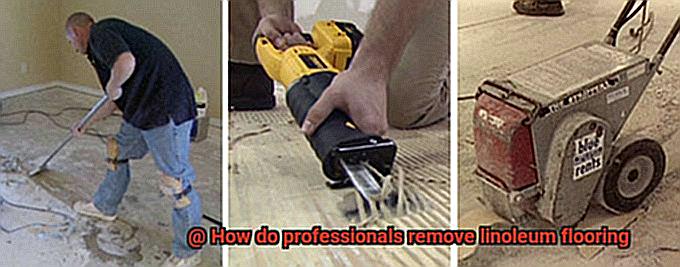
Professionals know exactly how to tackle the task of removing linoleum flooring. With their expertise and experience, they have developed efficient techniques that guarantee success. They approach the job with precision and care, taking into account the specific characteristics of the linoleum and the underlying surface.
First, professionals start by preparing the area. They clear out any furniture or obstacles that might hinder their progress. This ensures a smooth and uninterrupted workflow. Next, they assess the condition of the linoleum to determine the best approach for removal.
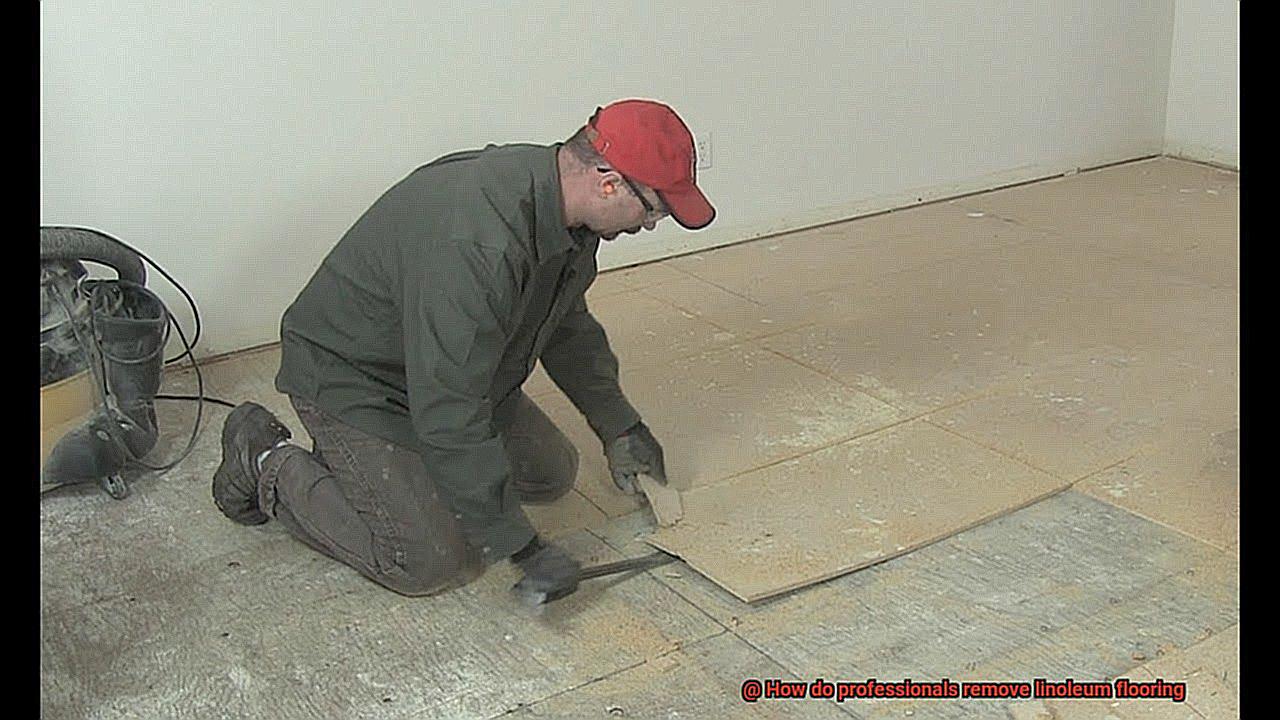
Once they have determined the most suitable method, professionals begin by loosening the linoleum from its adhesive bond. They carefully lift one corner using specialized tools designed for this purpose. Slowly but surely, they work their way across the floor, steadily peeling away the linoleum as they go.
In cases where the linoleum is particularly stubborn or heavily glued down, professionals may resort to using heat or steam to soften it. This makes it easier to remove without causing damage to the underlying surface.
Throughout the process, professionals pay close attention to detail. They ensure that all remnants of adhesive are removed from both the linoleum and the floor beneath it. This meticulousness guarantees a clean and smooth surface for whatever comes next – whether it’s installing new flooring or preparing for a different renovation project.
Removing linoleum flooring is no easy feat, but professionals make it seem effortless. Their expertise and skill shine through as they navigate each step with finesse.