Got a leather project that needs some serious sticking power? We’ve all been there. Whether you’re fixing up an old jacket or getting crafty with a brand-new creation, finding the best glue for sticking leather to leather is crucial. But with so many options out there, it can feel like navigating a sticky maze.
But fear not. In this blog post, we’re going to break it down for you. We’ll dive deep into the world of glues and unveil the top contenders for your leather bonding needs. From tried-and-true classics like contact cement to cutting-edge wonders like urethane adhesives, we’ve got you covered.
We’ll explore each adhesive’s unique characteristics, advantages, and yes, even their downsides. So whether you’re a seasoned leatherworker or just someone who loves getting their hands dirty in DIY projects, we’ll help you find the perfect glue to make your leather creations last a lifetime.
So grab your apron and get ready to become a glue aficionado. It’s time to discover which adhesive will give your leather projects the strength they deserve. Let’s dive in and uncover the secrets of gluing leather to leather.
Types of Glues for Bonding Leather to Leather
Contents
- 1 Types of Glues for Bonding Leather to Leather
- 2 Preparing the Surfaces for Gluing
- 3 Applying the Glue to Create a Durable Bond
- 4 Benefits of Contact Cement for Bonding Leather to Leather
- 5 Benefits of Epoxy Adhesive for Bonding Leather to Leather
- 6 Benefits of Specialized Leather Glues for Bonding Leather to Leather
- 7 Best Practices When Using Any Type of Glue on Leather
When it comes to bonding leather to leather, selecting the right glue is crucial for achieving a durable and flexible bond. With a range of options available, it can be overwhelming to determine which glue is best suited for your project. However, as an expert in the field, I’m here to provide a comprehensive guide on the different types of glues available, along with their advantages and disadvantages.
Contact Cement
When it comes to sticking leather to leather, finding the perfect glue can be a game-changer. That’s where contact cement comes into play. Let’s dive deep into the world of contact cement and explore its advantages and limitations for bonding leather.
Advantages:
- Instant Bond: With contact cement, you get an immediate bond that eliminates the need for clamping or holding the surfaces together. No more waiting around for the glue to dry while your project sits in limbo. Efficiency and speed are the name of the game here.
- Versatility: Contact cement isn’t just limited to leather-to-leather bonding; it’s a true jack-of-all-trades. You can use it on wood, metal, plastic, fabric – you name it. Having a versatile adhesive in your toolkit is always an advantage.
- Strength and Durability: Contact cement doesn’t mess around when it comes to strength. It creates a bond that can withstand heavy usage and stress. Plus, it’s resistant to both heat and moisture, making it perfect for projects that may face these elements head-on.
Limitations:
- Irreversible Bond: Once you’ve glued two leather surfaces together with contact cement, there’s no turning back. The bond is permanent and cannot be easily separated without causing damage. So, make sure you have precision alignment before joining those pieces.
- Strong Fumes: Contact cement isn’t for the faint of heart when it comes to odor. It emits strong fumes during application due to its solvent content. Proper ventilation is a must to ensure safety and prevent any unwanted headaches.
- Compatibility: Not all materials play well with contact cement. Some may be sensitive to solvents or chemicals present in the adhesive, so always test it on a small, inconspicuous area first. Better safe than sorry.
Epoxy Adhesive
Unleashing the Power of Epoxy Adhesive: The Perfect Bond for Leather Projects
Welcome, glue enthusiasts. Today, we embark on a journey into the world of epoxy adhesive and its remarkable ability to create an unbreakable bond between leather surfaces. Whether you’re a casual DIYer or a professional leatherworker, this versatile glue is here to save the day. So, fasten your seatbelts and let’s explore the advantages and considerations of using epoxy adhesive for your next leather project.
Advantages:
Unbeatable Strength:
Prepare to be amazed by the unrivaled bonding strength of epoxy adhesive. This adhesive surpasses many others on the market, ensuring that once applied correctly, your leather pieces stay securely together. No more worries about your carefully crafted leather items falling apart under stress or movement.
A Shield Against the Elements:
Bid farewell to concerns about moisture, chemicals, or temperature fluctuations ruining your hard work. Epoxy adhesive is your knight in shining armor, resistant to these environmental factors. Whether it’s outdoor furniture or car interiors, your leather projects will stand strong against the test of time.
Considerations:
Precision is Key:
To unlock the full potential of epoxy adhesive, precision in application and preparation is paramount. Diligently follow the manufacturer’s instructions, accurately mixing the resin and hardener within the designated working time. Attention to detail is the secret ingredient for a flawless bond that will withstand anything.
Cleanliness is Next to Bondiness:
Before diving into gluing, ensure that your leather surfaces are immaculately clean, dry, and free from any dirt or oils that could hinder the bonding process. This seemingly mundane step is essential for achieving an optimal bond that lasts.
Transparent Brilliance:
Epoxy adhesives often dry to a clear or translucent finish, showcasing their brilliance. While this is perfect for most applications, it may not suit projects where you want the glued area to be completely invisible. Fear not. Experiment with different brands or types of epoxy adhesives that offer varying levels of transparency to achieve your desired outcome.
Specialized Leather Glues
Leather crafting is an art that demands precision and the right tools. When it comes to bonding leather, using specialized leather glues is essential for achieving perfection. In this comprehensive guide, we’ll delve into the world of these extraordinary adhesives, exploring their types and factors to consider when selecting the ideal one for your leather projects.
Contact Adhesive: The Instant Bond
For a bond that’s as quick as lightning, contact adhesive is your ultimate choice. This versatile glue is applied to both surfaces, left to dry until it becomes delightfully tacky, and then firmly pressed together. Its strong adhesion makes it perfect for leather-to-leather applications, guaranteeing a secure bond that won’t let you down.
Epoxy Adhesive: Unleashing Super Strength
When you need Herculean strength and durability in your leather bonding, turn to epoxy adhesive. This superhero of glues consists of two components that are mixed together before application. Once cured, epoxy glue forms an unbreakable bond resistant to heat, moisture, and chemicals. It’s the go-to choice for heavy-duty leather projects that demand ultimate strength.
Polyurethane Adhesives: Flexibility Meets Waterproofing
For outdoor leather projects or applications requiring flexibility, polyurethane adhesives are your best bet. These remarkable glues create a flexible and waterproof bond that can withstand various environmental conditions. Whether you’re working on shoes, bags, or furniture, polyurethane adhesives will keep your leather creations intact for years to come.
Selecting the Perfect Leather Glue:
- Type of Leather: Consider the type of leather you’re working with—genuine, synthetic, or suede—to ensure compatibility with the glue.
- Intended Use: Think about the purpose of the bonded items. Different projects may require different levels of strength and flexibility.
- Specific Requirements: Identify any specific preferences, such as fast-drying, clear-drying, or odorless glues, to meet your individual needs.
Testing and Application Tips:
Before committing to a full leather surface application, always test the glue on a small, inconspicuous area to ensure compatibility and avoid unwanted damage or discoloration. Cleanliness is key when working with specialized leather glues, so prepare your surfaces properly before application for optimal results.
Preparing the Surfaces for Gluing
Welcome to the captivating world of leather crafting, where the right glue can unlock boundless possibilities. Before we delve into the realm of glues, it is imperative to prepare your leather surfaces diligently. By following these expert guidelines, you will ensure a bond that withstands the test of time.
Firstly, embark on the journey of thorough cleaning. Gently cleanse your leather using a mild soap or leather cleaner, meticulously eliminating any dirt, oils, or residue that may mar the glue’s effectiveness. Stay away from harsh chemicals or solvents that could harm the delicate nature of leather. Once cleansed, allow the leather to bask in its newfound purity and dry completely before proceeding.
Moving on to step two – roughening the surfaces. This transformative process involves employing fine-grit sandpaper or an abrasive pad to gently sand the areas that will be joined together. Through artful circular motions, create a delicately textured surface that generously offers more area for the glue to adhere to. Remember, we aim not to remove excessive material but rather to create a canvas that is primed for a strong bond.
Having achieved a textured surface, it is essential to eliminate any remnants of dust and debris that may hinder optimal bonding. A clean cloth or brush will dutifully serve as your trusty companion throughout this endeavor, ensuring that no unwanted particles tarnish your masterpiece.
Moisture, with its mischievous ways, can disrupt adhesive bonding. Thus, banishing it from your leather surfaces is paramount. Ensure that not even a trace of moisture remains by employing a hairdryer on low heat settings, gently coaxing out any lingering dampness.
Should you find yourself grappling with thick or stiff leather, fear not. There is a solution – thinning it out ever so slightly. Equip yourself with a leather skiver or a sharp knife, and with precision and finesse, delicately pare down the excess thickness. This artful thinning process creates an even surface and enhances the bond between the intertwined leather pieces.
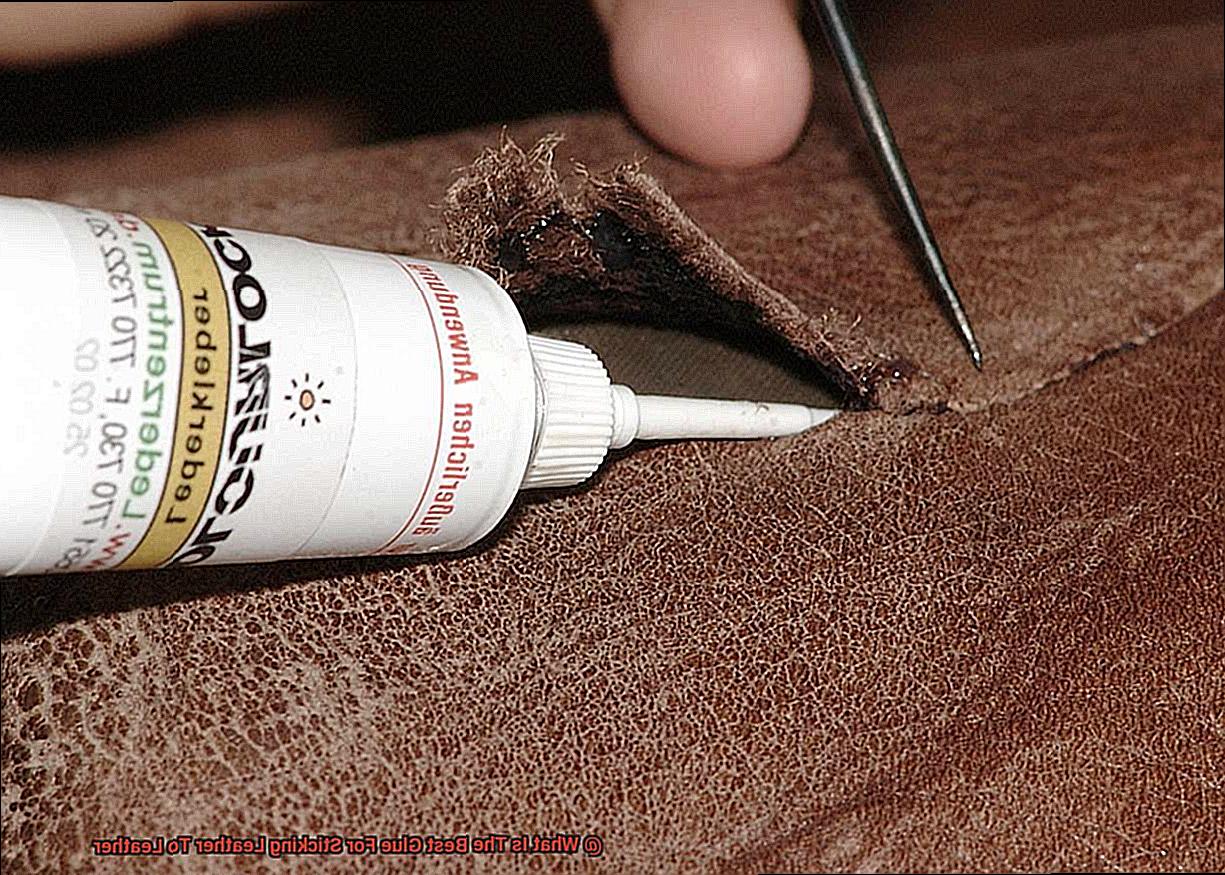
Applying the Glue to Create a Durable Bond
In this article, we will uncover the best practices for applying glue to ensure a strong and long-lasting bond. Whether you’re a DIY enthusiast or a professional leatherworker, these tips will help you achieve excellent results that withstand the test of time.
Step 1: Prepare the Surfaces
Before diving into the gluing process, it’s crucial to prepare the surfaces properly. Imagine trying to build a house on an unstable foundation – it’s doomed to crumble. The same principle applies here. Start by cleaning both pieces of leather with a mild soap or leather cleaner. Wipe away any dirt, dust, or oils that might hinder the adhesive’s effectiveness. We want a clean canvas for our glue masterpiece. Allow the leather to dry completely before proceeding to the next step.
Step 2: Choose the Right Glue
Now that our surfaces are pristine, it’s time to choose our weapon of choice – glue. The market offers an array of options, each with its own set of strengths and weaknesses. Our contenders include contact cement, fabric glue, or adhesive specifically designed for leather. Think of them as gluing superheroes, each with their own unique powers. It’s important to select the glue that best suits your needs and adhere (pun intended) to its specific instructions for application and drying time.
Step 3: Apply the Glue
With our surfaces prepped and our glue selected, it’s time for the magic to happen. Grab a small brush or applicator and dive into a world of sticky wonder. Apply a thin and even layer of glue to both pieces of leather, ensuring complete coverage of the areas that will be bonded together. This step is crucial for optimal bonding strength and longevity. We want our bond to hold strong, like the grip of a champion weightlifter.
Step 4: Allow Proper Drying Time
Ah, patience, the virtue that separates the amateurs from the pros. Rushing this step is like trying to sprint before learning to walk – it’s a recipe for disaster. Allow the glue to dry for the specified time mentioned in the product instructions. This time may vary depending on the glue chosen, but trust us, it’s worth the wait. Impatience can result in a weak bond that won’t survive the wear and tear of daily life. Follow the manufacturer’s guidelines meticulously, like a master following their secret recipe.
Benefits of Contact Cement for Bonding Leather to Leather
Its strong adhesive properties make it the go-to option for creating a permanent bond between leather surfaces. Let’s explore the benefits of using contact cement and why it is the top pick for all your leather projects.
First and foremost, contact cement creates an instant bond. Gone are the days of waiting around for glue to dry or clamping your materials together. Once you apply the contact cement and press the surfaces together, they stick immediately. It’s like magic. This feature alone saves you time and frustration, allowing you to move on to the next steps of your project without delay.
Strength is another key advantage of contact cement. It can withstand heavy loads and resist pulling or peeling forces. This durability is crucial when working with leather, a material that can endure a fair amount of stress. Whether you’re repairing a beloved handbag or creating a sturdy pair of shoes, contact cement has got your back.
Flexibility is also a major benefit of using contact cement for leather bonding. Leather is a material that can stretch and move, and contact cement allows the bonded surfaces to flex without compromising the bond. So go ahead and bend, twist, and stretch – your glued leather will stay put.
One of the most impressive qualities of contact cement is its resistance to moisture and heat. No need to worry about your glued leather falling apart in the rain or melting under the scorching sun. Contact cement can handle exposure to water, humidity, and temperature fluctuations without losing its adhesive properties.
Not only is contact cement strong, flexible, and resistant, but it’s also incredibly versatile. It can be used on different types of leather, such as genuine leather, suede, or even faux leather. Plus, it’s suitable for various leather projects, from repairing shoes to upholstering furniture. The possibilities are endless.
And let’s not forget about the aesthetic aspect. Contact cement dries clear, leaving no visible residue or marks on the leather surface. You can achieve a clean and professional finish every time.
Remember to follow the manufacturer’s instructions when using contact cement, as it does have a strong odor. Proper ventilation and storage are also essential for maximizing its longevity.
Benefits of Epoxy Adhesive for Bonding Leather to Leather
When it comes to bonding leather to leather, epoxy adhesive is the perfect choice. This powerful adhesive offers numerous benefits that make it an ideal option for all your leather bonding needs.
First and foremost, epoxy adhesive forms a strong and durable bond that can withstand heavy use and stress. Whether you’re repairing a beloved pair of shoes or creating a stunning leather craft, epoxy adhesive ensures that your bonded leather pieces will stay together for the long haul.
One of the standout features of epoxy adhesive is its excellent adhesion properties. With its high level of surface wetting, it can penetrate the pores of the leather and create a secure bond. This means that the adhesive grips both surfaces tightly, resulting in a bond that is built to last.
Versatility is another advantage of epoxy adhesive. It can be used to bond different types of leather, including genuine leather, suede, and bonded leather. This makes it a go-to choice for all sorts of leather projects, from repairing bags and furniture upholstery to creating stunning leather crafts.
But that’s not all – epoxy adhesive also boasts resistance to temperature and moisture. It can handle high temperatures without losing its bonding strength, making it perfect for applications where the bonded leather may be exposed to heat or sunlight. Additionally, it is resistant to water and moisture, ensuring that your bond remains intact even in humid conditions.
Flexibility is another key benefit of epoxy adhesive. Once cured, it offers good flexibility, allowing the bonded leather pieces to move and flex without compromising the integrity of the bond. This is especially important for applications like footwear or garments where natural movement is essential.
In terms of aesthetics, epoxy adhesive dries clear or can be tinted to match the color of the leather. This means that your adhesive remains inconspicuous and doesn’t distract from the overall appearance of the bonded leather. With epoxy adhesive, you can achieve a clean and seamless finish that enhances the visual appeal of your project.
Last but not least, epoxy adhesive offers excellent chemical resistance. It can withstand oils, solvents, and other household or industrial chemicals, ensuring that your bond remains unaffected even in challenging environments.
Benefits of Specialized Leather Glues for Bonding Leather to Leather
Specialized leather glues are the ultimate choice for bonding leather to leather due to their unique properties and numerous benefits. Let’s delve into why these glues are a must-have for any leather enthusiast.
First and foremost, specialized leather glues offer exceptional flexibility. Leather is a material that moves, stretches, and bends, and regular glues simply can’t withstand these movements. However, specialized leather glues are specifically formulated to be flexible, ensuring that the bond remains strong even when put to the test.
In addition to flexibility, these glues maintain the natural look and feel of leather. Unlike regular adhesives that leave behind a visible residue or alter the texture of the leather, specialized leather glues are transparent and non-intrusive. This means that the bonded area remains seamless and retains its original appearance.
Adhesion strength is another key benefit of specialized leather glues. Leather has a smooth surface and low porosity, making it challenging for regular adhesives to form a strong bond. However, specialized leather glues are formulated to penetrate the surface of the leather, creating a tight grip that can withstand various stresses and strains.
But that’s not all. Specialized leather glues often offer additional advantages such as resistance to moisture and temperature fluctuations. This is crucial for leather items that may encounter different environmental conditions. You don’t want your hard work to fall apart when exposed to water or extreme temperatures, do you? These glues have got you covered.
Ease of use is another perk of specialized leather glues. They come in convenient packaging with applicators that allow for precise and controlled application. Plus, many of them dry quickly, so you don’t have to wait around forever for your bond to set.
It’s worth mentioning that some specialized leather glues are tailored to specific types of leather, such as genuine leather or suede. These glues take into account the unique properties of each type, ensuring optimal bonding performance.
Last but not least, specialized leather glues often have a longer shelf life compared to regular adhesives. So you can stock up and have them ready for your next leather project without worrying about them losing their effectiveness.
Best Practices When Using Any Type of Glue on Leather
When it comes to gluing leather, achieving a strong and long-lasting bond requires a delicate touch and careful attention to detail. Fear not, for with the right techniques and know-how, you can transform your leather projects into works of art that stand the test of time. In this comprehensive guide, we will explore the best practices for using any type of glue on leather. So, grab your glue, don your creative hat, and let’s dive in.
Step 1: Cleanse for Success
Before embarking on your gluing journey, it is vital to cleanse the leather surfaces that will be bonded together. Leather may harbor natural oils, dirt, or other substances that impede proper adhesion. Utilize a gentle soap and water solution or a specialized leather cleaner to delicately cleanse the surfaces. Ensuring they are thoroughly dry is paramount before proceeding to the next step.
Step 2: Roughen Up for Improved Grip
Leather possesses a smooth and somewhat non-porous surface that challenges glue’s ability to adhere effectively. Overcome this obstacle by lightly roughening the surfaces with sandpaper or a fine-grit abrasive pad. This creates texture, providing the glue with ample grip and resulting in an unyielding bond.
Step 3: Compatibility Testing – No Surprises Allowed
Avoid unwanted surprises by conducting a compatibility test on a small, inconspicuous area of the leather before proceeding. Apply a minuscule amount of glue and allow it to dry according to the manufacturer’s instructions. Vigilantly inspect for any adverse reactions such as discoloration or damage before embarking on your full-scale project.
Step 4: Apply with Precision
When applying glue, remember that less is more. Employ a thin and even layer to ensure impeccable adhesion without excessive buildup. Employ an applicator recommended by the manufacturer or a brush/sponge to achieve precision in your application. Always adhere to the specific instructions provided by the glue manufacturer.
Step 5: Setting the Stage – Patience is Key
Grant the glue the time it needs to set before joining the leather pieces together. Refer to the manufacturer’s recommendation for the ideal duration. During this period, secure the bond by applying gentle pressure or employing clamps to hold the bonded area in place. This step guarantees a steadfast and secure bond that will withstand the test of time.
Step 6: Maintain and Protect – A Recipe for Longevity
Once the glue has dried, it is imperative to protect and maintain the bonded leather. Treat it with a leather conditioner or protector to preserve its suppleness and ward off drying or cracking. Shield the glued area from excessive heat, moisture, or harsh chemicals, as these may weaken or dissolve the adhesive over time.