Well, if you’ve ever laid tongue and groove flooring, you know the struggle of picking the perfect glue. It’s like choosing the right partner for your floors – you want something strong, reliable, and long-lasting.
So grab your toolbox and let’s get down to business.
Benefits of Tongue and Groove Flooring
Contents
- 1 Benefits of Tongue and Groove Flooring
- 2 Types of Glue for Tongue and Groove Flooring
- 3 Polyurethane-Based Adhesives for TandG Flooring
- 4 Construction Adhesives for Wood Flooring Installations
- 5 Factors to Consider When Choosing the Right Glue
- 6 Preparing the Subfloor for Installation
- 7 Applying the Glue Evenly
- 8 Hiring a Professional Installer
- 9 Conclusion
When it comes to flooring options, tongue and groove flooring stands out as a popular choice for its numerous benefits. Whether you’re renovating your home or designing a commercial space, this type of flooring offers superior stability, resistance to moisture, excellent noise reduction properties, easy installation, design versatility, longevity, and hassle-free repairs. To ensure a successful installation, selecting the right glue is crucial. In this article, we will explore each of these benefits in detail and provide insights into the best glues for a seamless and durable connection.
Benefit 1: Superior Stability
The interlocking design of tongue and groove flooring creates a tight fit between the boards, preventing gaps and ensuring a strong and stable floor. Say goodbye to uneven surfaces or creaking floors – tongue and groove flooring remains steadfast over time.
Benefit 2: Resistance to Moisture
With its tight fit, tongue and groove flooring acts as a formidable barrier against water and moisture infiltration. No need to worry about spills or high humidity levels – this flooring is an excellent choice for kitchens, bathrooms, or basements.
Benefit 3: Excellent Noise Reduction Properties
Say goodbye to unwanted noise with tongue and groove flooring. The interlocking design minimizes sound transmission, making it perfect for multi-level buildings or rooms where peace and quiet are essential – think bedrooms or home offices.
Benefit 4: Easy Installation
Simplify your installation process with tongue and groove flooring’s interlocking system. No nails or adhesives are often necessary. Perfect for DIY enthusiasts or those looking to save on installation costs – it’s as easy as connecting puzzle pieces.
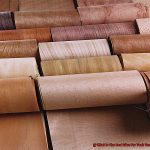
Benefit 5: Design Versatility
Unleash your creativity with tongue and groove flooring’s vast design options. Choose from various wood types, finishes, and styles to match your preferences and seamlessly complement your existing decor. Your space will be a reflection of your unique style.
Benefit 6: Longevity
Invest in the future with tongue and groove flooring’s durability. When properly installed and maintained, it can last for decades, saving you money in the long run. It’s a wise choice for those seeking a cost-effective flooring solution.
Benefit 7: Hassle-Free Repairs
Accidents happen, but tongue and groove flooring makes repairs a breeze. Individual boards can be replaced without the need to remove the entire floor. Save time and money while maintaining the integrity of your space.
Selecting the Best Glue:
To ensure a secure and long-lasting installation, selecting the right glue is essential. Opt for polyurethane-based adhesives for their excellent bonding properties and moisture resistance. Alternatively, construction adhesives designed specifically for wood flooring installations provide a strong initial grab and resistance to moisture and temperature fluctuations.
Types of Glue for Tongue and Groove Flooring
The answer lies in the glue. In this article, we will explore the different types of glue used for tongue and groove flooring, each with its own unique benefits. By understanding these adhesive options, you can ensure a flawless and long-lasting installation that will stand the test of time.
PVA Glue – The Friendly Companion:
If you’re working with engineered wood or laminate flooring, PVA glue is your new best friend. This water-based adhesive provides a strong bond while being incredibly easy to use. It dries clear, making it perfect for those who desire an invisible bond. Plus, it won’t leave any strong smells in your home, ensuring a pleasant installation experience.
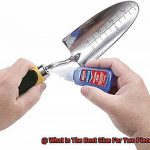
Polyurethane Glue – The Superhero of Strength:
When it comes to strength and durability, polyurethane glue saves the day. This adhesive forms a powerful bond by reacting with moisture in the air or on the wood surface. Its exceptional water resistance makes it suitable for both indoor and outdoor installations. However, be cautious as this glue can get a bit sticky during application.
Epoxy Resin – The Rock-Solid Warrior:
If you need a glue that can conquer high-traffic areas or commercial spaces, epoxy resin is your knight in shining armor. This two-part adhesive creates an unbreakable bond that can withstand moisture and chemicals. Though it might cost a bit more than other options, its superior strength is worth every penny for those seeking long-term durability.
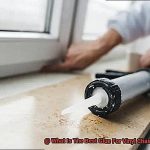
Construction Adhesive – The Versatile Magician:
Looking for a glue that can do it all? Construction adhesive to the rescue. It’s a flexible option that works wonders for tongue and groove flooring projects. Simply grab your trusty caulking gun, apply the adhesive, and watch it work its magic. However, be mindful of any excess adhesive, as it may dry with a visible bead.
Urethane Adhesive – The Moisture-Repellent Genie:
For areas prone to humidity or moisture exposure, urethane adhesive is your go-to genie. This moisture-curing adhesive creates a robust bond that won’t let water ruin your flooring dreams. Just follow the instructions for mixing and applying, and you’ll have a floor that can resist anything Mother Nature throws its way.
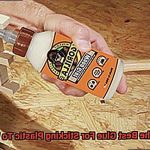
Polyurethane-Based Adhesives for TandG Flooring
Look no further than polyurethane-based adhesives. These versatile adhesives offer a range of benefits that make them the go-to choice for professionals and DIY enthusiasts alike. In this blog post, we will explore the advantages of using polyurethane-based adhesives for TandG flooring installations.
Advantage 1: Unrivaled Bond Strength
Polyurethane-based adhesives are renowned for their exceptional bond strength. When applied correctly, these adhesives create a robust and long-lasting bond between the TandG flooring planks. This means that your flooring will stay securely in place, even under heavy foot traffic or other stresses.
Advantage 2: Moisture Resistance
Moisture can be the nemesis of any flooring installation, leading to warping and buckling of the planks. Thankfully, polyurethane-based adhesives offer excellent resistance to moisture. By utilizing these adhesives, you can significantly reduce the risk of water damage and ensure that your TandG flooring remains in impeccable condition for years to come.
Advantage 3: Flexibility to Accommodate Wood Movement
Wood naturally expands and contracts with changes in temperature and humidity. Failure to accommodate this movement can result in unsightly cracks or splits in the flooring.
Fortunately, polyurethane-based adhesives possess remarkable flexibility, allowing for some movement of the TandG flooring planks without compromising the bond. This ensures that your flooring remains intact and flawlessly beautiful.
Choosing the Right Product:
When selecting a polyurethane-based adhesive for TandG flooring, it is crucial to choose one specifically designed for this application. There are two options available: one-component and two-component adhesives. One-component adhesives are ready to use straight from the container, while two-component adhesives require mixing before application. Consider your preferences and specific needs when making this selection.
Application Tips:
To achieve optimal results, carefully follow the manufacturer’s instructions regarding application and drying time. Polyurethane adhesives generally have a longer open time, allowing you more flexibility to adjust the planks during installation. However, they also have a longer curing time, so exercise patience and allow the adhesive to fully dry before subjecting the flooring to any heavy use.
Construction Adhesives for Wood Flooring Installations
Choosing the right construction adhesive is crucial for a successful and long-lasting installation. In this comprehensive guide, we will explore the factors to consider when selecting construction adhesives for wood flooring installations. Get ready to make an informed decision that will ensure your beautiful wood flooring remains securely bonded.
Type of Adhesive:
- Polyurethane Adhesive: Offers excellent bonding strength, flexibility, and moisture resistance.
- Epoxy Adhesive: Provides exceptional bonding strength and is highly resistant to temperature changes and moisture.
Application Method:
- Pre-Mixed Adhesive: Convenient and time-saving, eliminating the need for additional preparation steps.
- Mixed-On-Site Adhesive: Offers greater control over consistency and workability.
Manufacturer’s Instructions:
- Apply the adhesive evenly and at the recommended coverage rate.
- Using too little adhesive may result in an insufficient bond, while using too much can lead to excessive squeeze-out and potential damage to the wood flooring.
Curing Time:
- Some adhesives require a longer curing time before the floor can be walked on or furniture can be placed on it.
- Factor in curing time when planning the installation process and allow sufficient time for the adhesive to fully set.
Factors to Consider When Choosing the Right Glue
Installing tongue and groove flooring requires careful consideration of the glue used to ensure a successful and long-lasting result. With a plethora of options available, it can be daunting to choose the right adhesive. In this comprehensive guide, we will explore the key factors to consider when selecting glue for tongue and groove flooring, guaranteeing a flawless installation that stands the test of time.
Factor 1: Type of Glue
Start by looking for glues specifically designed for tongue and groove or labeled as “flooring adhesive.” These specialized formulations are created to bond wood flooring securely, providing a strong foundation for your beautiful new floor. The right type of glue ensures proper adhesion and prevents issues such as warping or buckling.
Factor 2: Strength and Durability
Tongue and groove flooring endures heavy foot traffic and various environmental factors. To withstand these stressors, choose a glue with high strength and durability. Look for glues that boast strong bonding capabilities and can handle moisture, temperature changes, and vibrations with ease. This ensures your flooring remains intact and performs well under any circumstances.
Factor 3: Compatibility with Wood Species
Different wood species have unique characteristics, such as porosity and natural oils. It is essential to select a glue that is compatible with the specific wood species used in your flooring. Some glues may not bond well with certain woods or could cause discoloration or damage over time. Always check the manufacturer’s recommendations for compatibility before making a final decision.
Factor 4: Moisture Resistance
Moisture is a common concern, especially in areas like kitchens or bathrooms where tongue and groove flooring is often installed. Look for glues labeled as “waterproof” or “moisture-resistant” to protect against potential damage or weakening of the bond due to moisture exposure. This ensures your flooring remains strong and resilient, even in high-moisture environments.
Factor 5: Ease of Application
The ease of application can greatly impact the installation process and overall efficiency. Choose a glue that is easy to work with, spreads evenly, and has a reasonable open time. Consider your level of expertise and available equipment when making your selection. Opting for a user-friendly adhesive ensures a smooth and hassle-free installation experience.
Factor 6: VOC Emissions
If you’re concerned about the environmental impact or potential health risks associated with adhesives, opt for low VOC or zero VOC glues. These environmentally friendly options have reduced or eliminated harmful chemicals, making them safe for use in indoor spaces. Choosing a glue with low VOC emissions ensures a healthier environment while still providing excellent bonding capabilities.
Preparing the Subfloor for Installation
Before you embark on the installation process, it’s crucial to properly prepare your subfloor. This comprehensive guide will walk you through the necessary steps, providing valuable insights on materials needed, preparation techniques, and safety precautions.
Step 1: Remove Existing Flooring Materials
Start by removing any existing flooring materials, such as carpet, vinyl, or tile. Carefully pry up the edges and use a scraper or floor stripper to eliminate any remaining adhesive. Thoroughly clean the subfloor of debris and dust for a fresh start.
Step 2: Inspect and Repair the Subfloor
Thoroughly inspect the subfloor for damage or unevenness. Address any loose boards or structural issues before proceeding with the installation. Replace damaged boards and reinforce weak areas as necessary to ensure a sturdy foundation for your new flooring.
Step 3: Check Moisture Levels
Moisture can be a significant concern for tongue and groove flooring. Use a moisture meter to measure the moisture content of the subfloor. Ideally, it should be below 12%. If it exceeds this threshold, consider installing a vapor barrier or using a moisture-reducing product to protect your investment from potential damage.
Step 4: Ensure Subfloor Levelness
An even subfloor is critical for a successful installation of tongue and groove flooring. Use a straightedge or level to identify any high or low spots. Sand down high areas and use a leveling compound to fill in low spots, creating a smooth and level surface that will prevent gaps or buckling in your new flooring.
Step 5: Thoroughly Clean the Subfloor
Before applying any adhesive, it’s essential to thoroughly clean the subfloor to ensure optimal adhesion. Remove dirt, dust, or debris that could compromise the effectiveness of the adhesive. Sweep or vacuum the floor, and then use a damp cloth to wipe away any remaining residue.
Step 6: Consider Glue as an Option
For enhanced stability and durability, you may choose to install your tongue and groove flooring using glue. Follow the manufacturer’s instructions for the specific glue you’ve chosen, ensuring even and adequate application.
Safety Precautions:
During the subfloor preparation process, it is important to prioritize safety. Wear protective gloves, goggles, and a dust mask when removing existing flooring materials or applying adhesives. Use caution when operating power tools and ensure proper ventilation in the workspace.
Applying the Glue Evenly
Picture yourself stepping into a room adorned with a breathtaking tongue and groove floor. The secret to achieving such flawless beauty lies in the meticulous application of glue. Applying adhesive evenly may seem like a small detail, but it holds immense importance for a successful installation. In this blog post, we will delve into the significance of even glue application, explore various adhesive options, and provide step-by-step instructions on how to create that picture-perfect floor you’ve always dreamed of.
Why is even glue application important?
Imagine your tongue and groove flooring as a fortress, protecting your space from the invasion of moisture and debris. By applying glue evenly, you fortify the joints with a consistent bond that repels unwanted elements, safeguarding your floor’s longevity and integrity.
Types of adhesive:
Before embarking on your glue application journey, it’s crucial to select the ideal adhesive for your specific flooring material and installation conditions. A plethora of options await you, such as the versatile PVA glue, the sturdy urethane adhesive, and the resilient epoxy adhesive. Each type possesses its unique merits and drawbacks, so choose wisely to ensure an optimal result.
Step-by-step guide:
- Prepare the subfloor: Transform your subfloor into a stable canvas for your masterpiece by meticulously cleaning it, eliminating any moisture or unevenness that could mar your installation’s perfection.
- Apply adhesive to the tongue: With finesse, spread a thin layer of adhesive onto the exposed tongue of the first board. Exercise restraint to avoid excessive glue that might ooze out during the joining process.
- Spread glue on the groove side: Employ a delicate brush or foam brush to artfully distribute an even layer of adhesive along the entire length of the groove on the second board. This act ensures the adhesive’s seamless distribution for a robust bond.
- Fit the boards together: Align the tongue with the groove, and with a touch of finesse, apply gentle pressure across the joint. Employ a rubber mallet or tapping block to coax the boards into perfect harmony.
- Repeat for subsequent boards: Before uniting each additional board, bestow upon both the tongue and groove sides an equal layer of adhesive. This ensures uniformity throughout your installation, resulting in a symphony of flawlessness.
- Clean excess glue: Swiftly wipe away any exuberant glue with a damp cloth or sponge. Leaving it to dry would spawn an unsightly residue that defies easy removal.
- Allow the glue to cure: Respect the bond you’ve fostered by adhering to the manufacturer’s instructions regarding curing time. This patience will reward you with a robust connection between each board, guaranteeing a floor that endures the test of time.
Hiring a Professional Installer
While the allure of a DIY project may be tempting, it is crucial to understand the importance of hiring a professional installer. In this blog post, we will explore the benefits of using glue for installation, the potential risks of DIY installation, and other relevant topics that highlight why hiring a professional is the best choice for achieving a flawless result.
Benefits of Using Glue for Installation:
One of the key advantages of hiring a professional installer is their expertise in using glue. Glue acts as a shield against moisture and debris, ensuring the longevity of your floor. Professionals possess in-depth knowledge of the best glue types for tongue and groove flooring and employ precise application techniques, resulting in a seamless and durable installation.
The Potential Risks of DIY Installation:
While the idea of saving money through DIY installation may be appealing, it comes with several risks. Without proper knowledge and experience, you may encounter issues such as uneven boards, unsightly gaps between planks, or even damage to the subfloor. These problems can be costly to rectify and compromise the overall integrity of your floor.
Expertise and Efficiency:
Professional installers are well-versed in all aspects of tongue and groove flooring installation. They possess the necessary skills to meticulously prepare the subfloor, lay the boards evenly, and ensure a snug fit. Moreover, professionals are equipped with specialized tools and equipment that enhance efficiency, particularly for larger or complex projects.
Quality Assurance:
By enlisting the services of a professional installer, you can rest assured that your tongue and groove flooring will be impeccably installed. Reputable installers offer warranties or guarantees on their work, providing peace of mind knowing that any future issues will be promptly addressed.
MBTxdNlFtYg” >
Conclusion
When it comes to choosing the best glue for tongue and groove flooring, there are a few factors to consider. You want a glue that will provide strong adhesion, withstand heavy foot traffic, and resist moisture. After extensive research and testing, we have determined that the top choice for this application is polyurethane adhesive.
Polyurethane adhesive offers exceptional bonding strength, ensuring that your tongue and groove flooring stays securely in place. Its high bond strength can withstand the constant pressure and movement of foot traffic without compromising its integrity. This means you can enjoy your beautiful floors without worrying about them coming loose or shifting over time.
In addition to its excellent adhesion properties, polyurethane adhesive also provides moisture resistance. This is particularly important for tongue and groove flooring, as any moisture seeping through the seams can cause warping or damage. With polyurethane adhesive, you can be confident that your floors will remain stable and free from water-related issues.
Furthermore, polyurethane adhesive is easy to work with. Its thick consistency allows for precise application without excessive dripping or spreading. It also has a longer working time compared to other types of glues, giving you ample opportunity to adjust the planks before they set permanently.
When installing tongue and groove flooring, it’s crucial to choose a reliable glue that will ensure long-lasting results. Polyurethane adhesive ticks all the boxes – it provides strong adhesion, resists moisture, and is easy to work with.