If you’re anything like me, you know the pure delight of completing a puzzle. The feeling of triumph as that final piece clicks into place is unmatched.
But what’s next? How do we make sure our masterpiece stands the test of time and looks oh-so-fabulous?
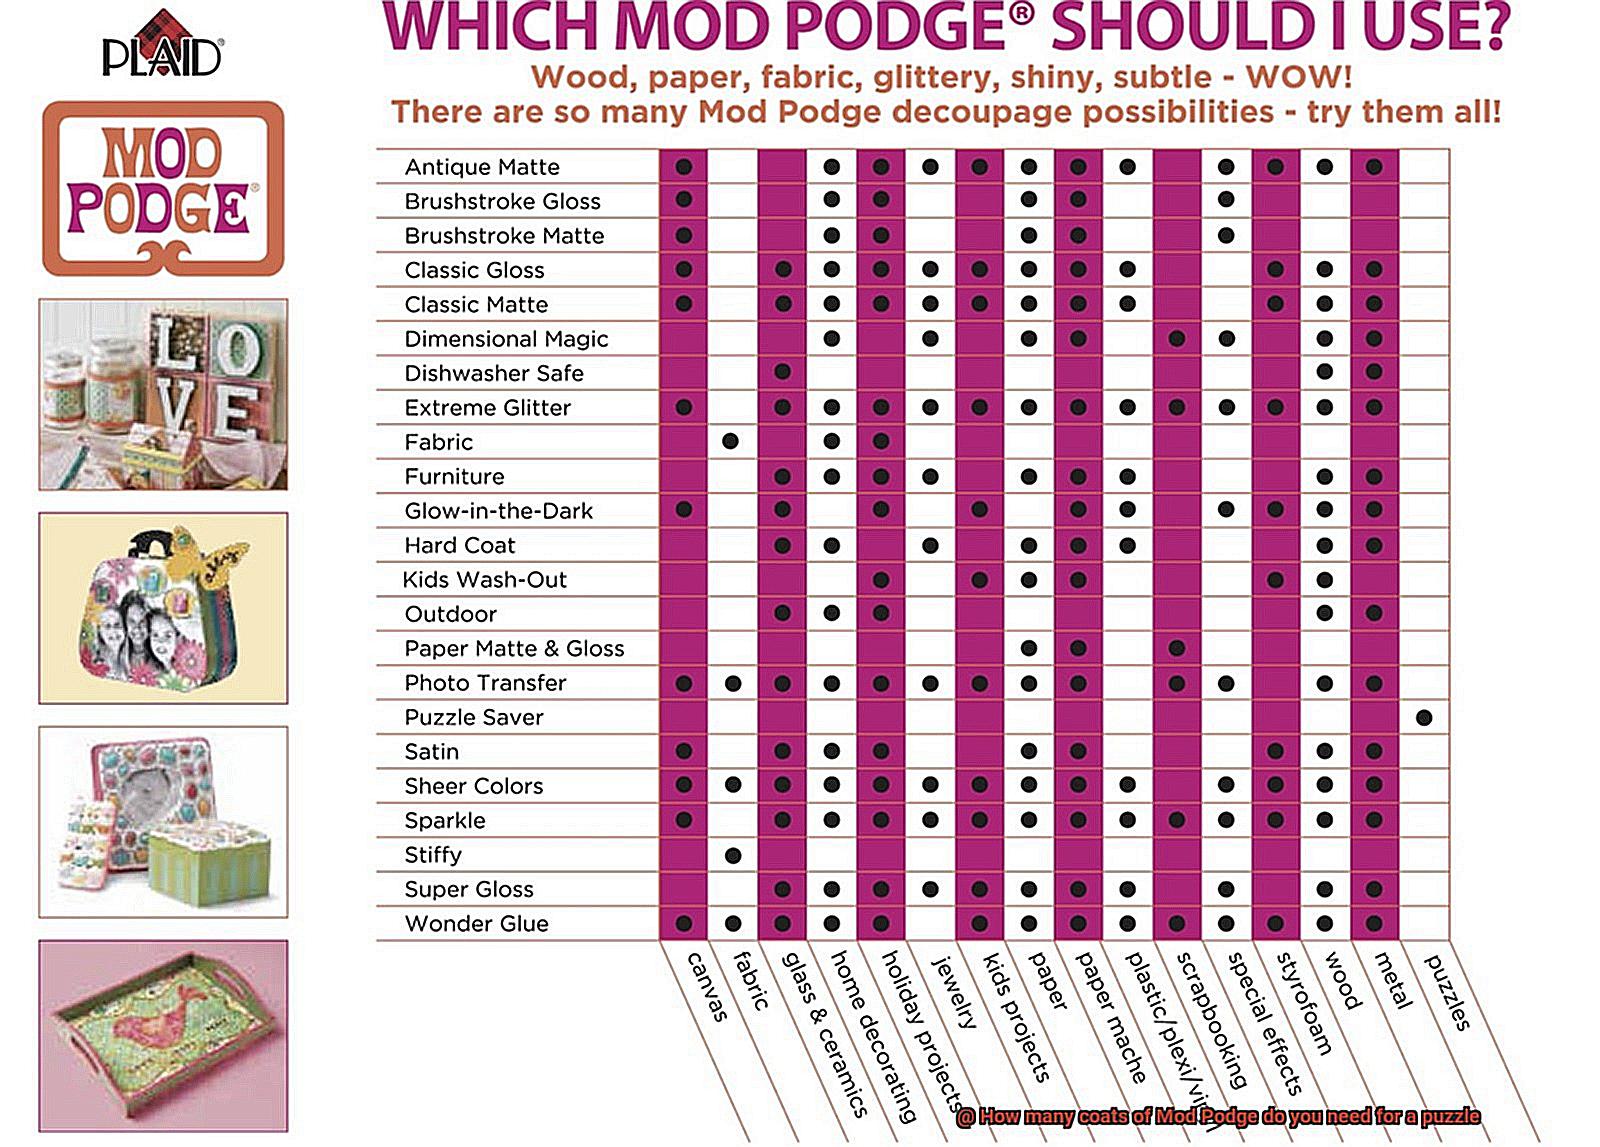
Enter Mod Podge – the crafters’ holy grail. This magical concoction serves as glue, sealer, and finish all in one.
But here’s the million-dollar question: how many coats of Mod Podge should you slap on your puzzle to keep it intact and looking flawless? Fear not, my fellow puzzlers.
In this blog post, we’ll uncover the secret formula for preserving your puzzles using Mod Podge. Whether you’re new to the game or a seasoned pro, stick around to discover how many coats will give your puzzle that unbeatable durability and shine it deserves.
Let’s dive in.
Factors to Consider
Contents
Look no further. In this ultimate guide, we will explore the key factors that should be taken into account when determining the number of Mod Podge coats required for a puzzle. Whether you’re a beginner or a seasoned puzzler, understanding these factors will help you achieve a beautifully preserved puzzle that will stand the test of time.
Factor 1: Puzzle Material
The material of the puzzle itself is a crucial factor to consider. Cardboard puzzles generally require fewer coats compared to wooden or plastic puzzles. Why? Because cardboard has a more porous surface that allows the Mod Podge to adhere better with fewer coats. On the other hand, wooden and plastic puzzles may need additional coats to ensure proper adhesion and longevity.
Factor 2: Puzzle Size
Size matters when it comes to applying Mod Podge. Larger puzzles tend to require more coats as there is a larger surface area to cover. Picture spending hours on that 1000-piece puzzle only for it to fall apart because you skimped on the Mod Podge. Smaller puzzles, however, may only need a couple of coats for adequate protection and preservation.
Factor 3: Puzzle Complexity
The complexity of the puzzle design can also influence the number of Mod Podge coats needed. Puzzles with intricate details, fine lines, or small pieces may require additional coats to ensure that every part of the puzzle is properly sealed and protected. Don’t let those beautiful details go unnoticed.
Factor 4: Intended Use
Understanding how you plan to use your puzzle will help determine the number of Mod Podge coats required. Is it going to be displayed as a decorative piece, or will it be handled frequently?
If it’s purely for display purposes, fewer coats may be sufficient. However, if you’re planning to use it as functional items like coasters or placemats, additional coats are recommended for better durability and protection against wear and tear. Let your puzzle shine in its intended role.
Factor 5: Desired Finish
Consider the desired finish for your puzzle. Do you prefer a glossy finish that reflects light beautifully, or a matte finish that exudes a more subtle elegance? Keep in mind that achieving a glossy finish may require more coats compared to a matte finish. Glossy finishes often need those extra layers to achieve a smooth and shiny surface that truly dazzles.
Applying the First Coat
Preserving a puzzle is like capturing a fleeting moment of triumph, allowing you to revel in your hard work and cherish it for years to come. However, to ensure its longevity, applying the first coat of Mod Podge is an essential step in the preservation process. Join us on this journey as we guide you through the meticulous art of preserving your puzzle masterpiece.
Step 1: Prepare Your Puzzle
Before embarking on the preservation journey, take a moment to admire your completed puzzle in all its glory. Gently place it on a flat surface, ensuring each piece rests harmoniously in its rightful place. This meticulous preparation guarantees that your preserved puzzle will radiate perfection.
Step 2: Shield Your Surface
Like an artist protecting their canvas, safeguard the surface beneath your puzzle. With a deft touch, lift one corner using a spatula or your nimble fingers. Create an impenetrable fortress against glue mishaps by sliding a delicate sheet of wax paper beneath your creation. This guardian angel will ward off any glue seepage, preserving the sanctity of your workspace.
Step 3: Stir the Mod Podge
Intrigue dances in every swirl as you gently stir the Mod Podge, coaxing it to reach an ethereal balance of consistency. Avoid shaking the bottle with reckless abandon, for we seek a sublime application free from unsightly air bubbles. Let tranquility guide your hand as you strive for seamless perfection.
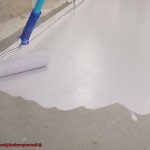
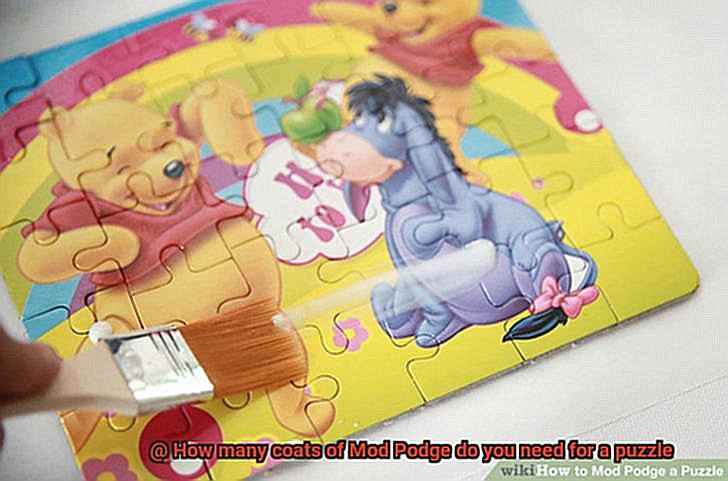
Step 4: Apply the First Coat
With poised determination, embrace your foam brush or soft paintbrush as an extension of your artistic vision. Begin at one end and embark on a purposeful journey across the entire surface of your puzzle, leaving no inch untouched by the transformative touch of Mod Podge.

Each stroke brings you closer to preserving its magic for eternity. Remember, moderation is the key to success; apply the glue gently, layer by layer, to avoid drowning your puzzle in a sea of saturation.
Step 5: Fill in Gaps (if needed)
Like a master sculptor refining their masterpiece, take a moment to scrutinize your puzzle. If you detect any gaps between the pieces that threaten your puzzle’s flawless aesthetic, embrace gentle persuasion.
Enveloped in the embrace of Mod Podge, coax those unruly pieces into perfect alignment. This meticulous attention to detail ensures an unblemished finish that will stand the test of time.
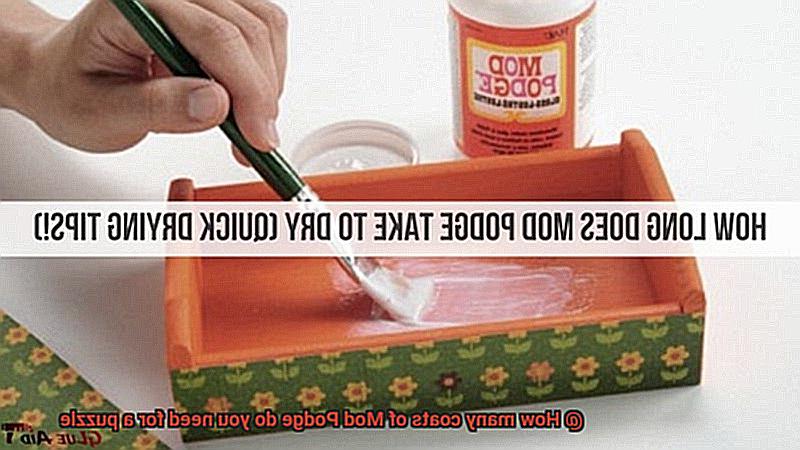
Step 6: Allow Drying Time
In this world of instant gratification, patience becomes a virtue. Step back and allow the first coat of Mod Podge to dry completely. The passage of time becomes your ally as you wait for 1-2 hours, surrendering to the whims of temperature and humidity. Be assured: your patience will be rewarded with a puzzle that gleams with perfection.
Drying Time and Preparation for Additional Coats
If you’re anything like me, you know the feeling of pure satisfaction that comes with completing a challenging puzzle. But what if I told you that you could take that completed masterpiece and transform it into a stunning work of art? That’s where Mod Podge comes in. This versatile glue is the key to sealing and protecting your puzzles, but understanding the drying time and preparation for additional coats is crucial to achieving a flawless finish.
Let’s dive into why these factors are so important. The drying time of Mod Podge can vary depending on a few key variables: the thickness of the layer, the temperature and humidity of your environment, and even the material of your puzzle. To speed up the drying process, it’s best to apply thin coats. This not only ensures faster drying but also guarantees an even application and improved adhesion. Remember, multiple thin coats are always better than one thick coat.
But how can you tell if a coat of Mod Podge is dry and ready for another coat? Here’s a simple trick: gently touch a small inconspicuous area with your finger. If it feels dry and leaves no residue or smudges, you’re good to go. However, if it feels sticky or leaves behind marks, it needs more time to dry. Patience is key here.
To expedite the drying process, you can use a fan or a hairdryer set on low heat. Just be cautious not to overdo it with the heat, as excessive heat can cause the puzzle pieces to warp or deform – and nobody wants that.
Before applying additional coats, take some time to inspect the surface of the puzzle for imperfections or bubbles that may have formed during the initial application. Gently press down any bubbles with your fingers or use a clean cloth to smooth them out. And don’t forget to clean up any excess Mod Podge that may have dripped onto the puzzle edges or surrounding surface.
Last but not least, always ensure that each coat is completely dry and free from imperfections before moving on to the next one. This will guarantee a smooth and professional-looking finish that will make your puzzle shine.
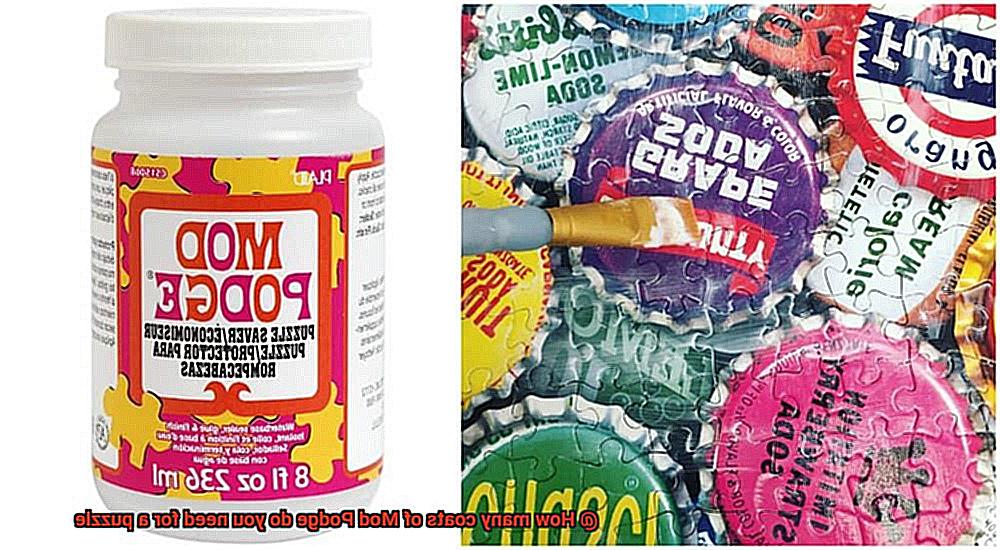
Applying Additional Coats
Preserving and sealing a completed puzzle is a must if you want to keep those precious pieces intact. And there’s no better solution than Mod Podge. Applying additional coats of Mod Podge is a crucial step in the puzzle preservation process that ensures your masterpiece stays together and protected from potential damage.
So, how many coats should you apply? Well, that depends on factors such as the puzzle’s size, the type of Mod Podge you’re using, and personal preference. However, for optimal results, it is generally recommended to apply at least two to three additional coats.
Before diving into those additional coats, it’s important to let the initial coat dry completely. Patience is key here. Usually, it takes around 15-20 minutes for the first coat to dry, but it’s always best to follow the instructions on the Mod Podge bottle for specific drying times.
Now, let’s talk application techniques. To apply those extra coats, grab a foam brush or a soft bristle brush. Start by applying a thin and even layer of Mod Podge over the entire surface of the puzzle. Be sure to cover all the edges and corners to ensure thorough protection.
Once you’ve applied a coat, allow it to dry completely before moving on to the next one. The drying time can vary depending on factors such as coat thickness and environmental conditions. It could take anywhere from 15 minutes to a few hours.
If you’re looking for an extra touch of smoothness, lightly sand the puzzle between coats using fine-grit sandpaper or a sanding block. This simple step helps create a smoother surface and promotes better adhesion between the layers of Mod Podge.
Now, don’t fret if you notice some streaks or brush marks as you apply subsequent coats. These imperfections will typically disappear as the Mod Podge dries. If necessary, lightly sand these areas after the final coat has dried for a flawless finish.
Here’s a crucial tip: avoid the temptation to rush the process by applying thick layers of Mod Podge. Thick coats can take longer to dry and may result in uneven drying or a tacky finish. Take your time and apply thin, even coats for the best results.
After you’ve applied the desired number of additional coats, it’s time to let your puzzle dry completely. Give it at least 24 hours to ensure that the Mod Podge has fully cured and hardened, providing a durable and long-lasting finish.
Feeling adventurous? You can take your puzzle preservation to the next level by applying a clear varnish or sealer over the Mod Podge. This adds an extra layer of protection and can give your puzzle a glossy or satin finish, depending on the product used.
Remember, always follow any specific instructions provided by the manufacturer of the Mod Podge or additional products used in the sealing process. Different brands or types of Mod Podge may have slightly different application techniques or drying times.
Recommended Number of Coats
Look no further than Mod Podge, the trusty glue that seals and protects your puzzles. But here’s the million-dollar question: how many coats should you apply? Let’s plunge into the factors that determine the recommended number of coats for your puzzle.
First on the list is the size and type of your puzzle. If you’re tackling a smaller puzzle with fewer pieces, two coats might suffice. However, if you’re dealing with a larger puzzle boasting intricate designs, consider adding an extra coat or two for that extra layer of protection.
Next up is your desired level of safeguarding. Are you content with just enough to keep your puzzle intact, or do you want it to withstand the test of time? Generally, two coats of Mod Podge will do the trick for most puzzles. The first coat acts as a sturdy base layer, securing any loose pieces and providing a smooth surface for subsequent coats. But if you crave that peace of mind or a lustrous finish, feel free to apply additional coats.
Now, let’s talk about patience – an essential virtue when it comes to drying time. Each coat must dry completely before applying the next one. This process can take anywhere from 24 hours or longer, depending on your climate and humidity levels. Trust me, the wait is worth it to ensure proper adhesion and avoid any unsightly wrinkles or bubbles.
Remember, it’s always better to start with fewer coats and add more if necessary. After each coat dries, evaluate the coverage and finish, then decide if additional coats are needed. Be mindful though – too many coats can result in a thick and uneven finish that might impact the overall appearance of your puzzle.
Lastly, consider the type of Mod Podge you’re using. Matte, gloss, or satin finishes all require different numbers of coats to achieve the desired effect. So, double-check the instructions and recommendations for your specific Mod Podge.
Ultimately, the recommended number of coats for your puzzle relies on your personal preferences and the puzzle’s characteristics. Don’t be afraid to experiment and find what works best for you. Just remember: take your time, apply thin and even coats, and let each layer dry thoroughly before moving on.
Maintaining Flexibility and Durability
Step into the world of puzzle preservation and discover the secret weapon that will transform your completed puzzles into timeless masterpieces. Say hello to Mod Podge, the magical adhesive that not only protects your puzzles but also adds a touch of enchantment to their appearance. However, achieving the perfect balance of flexibility and durability is the key to ensuring a long-lasting and visually stunning result. In this blog post, we will explore the significance of maintaining flexibility and durability when using Mod Podge on puzzles, unlocking the secrets that will make your creations stand the test of time.
Mastering the Application Technique:
To maintain the flexibility of your puzzle, it is essential to use the right application technique. Reach for a foam brush or a soft bristle brush, which will glide smoothly over your puzzle surface, ensuring a seamless and even coating. This prevents any unsightly buildup or clumping that might compromise the flexibility of the Mod Podge layers.
Thin is In:
When it comes to preserving puzzles, thin is definitely in. Applying thin layers of Mod Podge is vital for retaining flexibility. Thick layers can dry stiff and inflexible, hindering the movement of puzzle pieces. By applying thin layers, you allow the Mod Podge to dry evenly, preserving its natural flexibility while providing a protective seal.
Patience Pays Off:
In the world of puzzle preservation, patience is truly a virtue. Each layer of Mod Podge must be given sufficient time to dry completely before applying another coat. Rushing this process can lead to uneven drying and jeopardize the flexibility and durability of the Mod Podge layers. Remember, good things come to those who wait.
The Power of Multiple Coats:
For enhanced durability, consider applying multiple coats of Mod Podge. The number of coats may vary depending on the complexity of the puzzle and personal preference. Applying at least two to three coats creates a stronger protective seal while maintaining flexibility, ensuring that your puzzle masterpiece can withstand the test of time.
Environmental Factors:
Don’t forget to consider the environmental conditions when working with Mod Podge. Factors such as humidity levels and temperature can impact the drying time. It is crucial to work in a well-ventilated area with moderate humidity and temperature conditions to achieve optimal drying and adherence.
Trimming Excess Mod Podge
In this article, I will be your guiding light through the process of trimming excess Mod Podge from your puzzle surface, ensuring a clean and professional finish that will make your creation truly shine.
Once you’ve painstakingly applied multiple coats of Mod Podge to safeguard and seal your puzzle, it’s not uncommon to discover dried glue lingering around the edges. This surplus Mod Podge can detract from the overall aesthetic appeal and leave your puzzle looking incomplete. But fret not. With just a few simple steps, you can effortlessly trim away this excess and achieve a polished result that will leave you beaming with pride.
To embark on this endeavor, assemble your arsenal of tools. A sharp craft knife or a pair of scissors will be your trusted companions. It is crucial to select a tool that offers precision and ease of maneuverability. Once you have secured your weapon of choice, gingerly glide the blade along the edges of the puzzle, exerting slight pressure to dislodge any dried Mod Podge. Remember to approach this task with gentle finesse and take your time; applying excessive force or engaging in careless cutting can potentially harm the puzzle pieces themselves.
Should you happen upon any areas where the Mod Podge has insidiously seeped through the cracks between the puzzle pieces, there’s no need to panic. Simply arm yourself with a toothpick or a small brush and delicately eradicate it before proceeding with trimming. This additional step ensures that your finished product exudes flawlessness.
Once all excess Mod Podge has been meticulously trimmed away, pause for a moment to bask in the glory of your handiwork. Do you behold an expanse that is clean and immaculate? If you happen upon any rough spots or uneven edges, fear not. Reach for some fine-grit sandpaper and gently caress those areas to achieve a smoother finish. While this step is optional, it can truly make a discernible difference in attaining that coveted professional look.
Now that you’ve completed the trimming and sanding process, take a step back and marvel at the metamorphosis that has befallen your puzzle. The excess Mod Podge has vanished, leaving behind a creation that is primed for display or framing. Whether you choose to bestow it as a gift or proudly exhibit it in your own abode, you can be certain that your puzzle will ignite envy in all who lay eyes upon it.
Different Finishes and Their Effects on Puzzle Appearance
Prepare to be dazzled as we delve into the enchanting world of different finishes and their mesmerizing effects on puzzle appearance. From the understated allure of matte finishes to the captivating shimmer of sparkle finishes, we’ve got all the secrets to transform your puzzles into works of art. Let’s embark on this magical journey together.
Matte Finish:
Immerse yourself in the realm of elegance with a matte finish. This finish is perfect for puzzles with darker or muted colors, as it tames glare and accentuates their overall aesthetic. With just one or two coats of matte Mod Podge, your puzzle will radiate a flat, non-glossy allure that is simply irresistible.
Gloss Finish:
Prepare to be spellbound by the captivating brilliance of a gloss finish. This shiny and reflective surface intensifies the visual impact of bright and bold puzzles, making their colors pop like never before. Apply two to three coats of gloss Mod Podge and watch your puzzle come alive with a radiant, sleek sheen that demands attention.
Satin Finish:
Discover the delicate balance between subtlety and sophistication with a satin finish. Offering a gentle sheen, this finish enhances the colors of your puzzle without overwhelming it with excessive shine. A few coats of satin Mod Podge will impart an air of elegance and refinement, ensuring your puzzle is always ready for its close-up.
Sparkle Finish:
Unleash your inner child and embrace whimsy with a sprinkle of sparkle. The sparkle finish adds a touch of magic to your puzzle, making it shine with enchantment. Whether you’re working on a children’s puzzle or one with a fantastical theme, multiple coats of sparkle-infused Mod Podge will create a dazzling masterpiece that captivates the imagination.
Number of Coats:
The number of coats required depends on your desired finish and personal preference. For a sophisticated matte look, one to two coats are usually sufficient, while gloss and satin finishes typically require two to three coats for maximum impact. Sparkle finishes often demand multiple coats to ensure an even distribution of glitter or shimmer, creating a mesmerizing effect.
UixBw2tC2Fo” >
Conclusion
When it comes to sealing a puzzle with Mod Podge, the number of coats you need depends on the level of protection and durability you desire.
Generally, two to three coats are recommended for optimal results. However, some puzzle enthusiasts prefer adding an extra coat or two for added security.
This ensures a smooth and even finish without any lumps or bubbles.