Are you a DIY enthusiast or an artist looking to try something new?
Ever wondered if acrylic paint can stick to glass? Well, wonder no more.
In this blog post, we’ll explore the world of acrylic paint on glass. We’ll uncover its secrets, from how it works to how to make it last.
So get ready to unleash your creativity and let’s dive into the mesmerizing world of acrylic paint on glass.
What is Acrylic Paint?
Contents
- 1 What is Acrylic Paint?
- 2 Adhesion Issues with Acrylic on Glass
- 3 Surface Preparation for Painting on Glass
- 4 Priming for Improved Adhesion
- 5 Varnishing to Enhance Durability
- 6 Best Practices and Maintenance Tips
- 7 Choosing the Right Varnish for Your Project
- 8 Alternatives to Acrylic Paint on Glass
- 9 Conclusion
Acrylic paint is an incredibly versatile and vibrant medium that artists adore. Its fast-drying properties make it perfect for those who crave immediate results. But what about using acrylic paint on glass? Can it create permanent and long-lasting artwork? Let’s dive into the world of acrylic paint and discover its potential on glass surfaces.
Firstly, it’s essential to understand the challenges that come with using acrylic paint on glass. Unlike other surfaces, such as canvas or wood, acrylic paint doesn’t naturally bond well with smooth glass. This means that without proper care and preparation, your artwork may be prone to peeling, flaking, or fading over time.
To enhance the permanence of acrylic paint on glass, thorough surface preparation is crucial. Begin by cleaning the glass meticulously with mild soap or a glass cleaner. Ensuring that all dirt, dust, and oils are removed will provide a better foundation for the paint to adhere to.
Consider applying a primer specifically designed for glass surfaces after cleaning. This step helps create a better surface for the acrylic paint to grip onto, improving its adhesion and durability. Look for primers compatible with both acrylic paint and glass for optimal results.
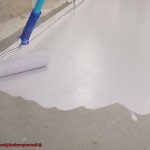
Once your acrylic painting on glass has dried completely, it’s time to think about protection. Applying a varnish or sealant acts as an additional layer of safeguarding against moisture, UV rays, and physical damage. Be sure to choose a varnish that is compatible with both acrylic paint and glass to avoid adverse reactions or discoloration.
Regular maintenance and gentle handling are key to preserving the longevity of your acrylic paint on glass. Avoid using abrasive materials or harsh cleaning agents that could damage the painted surface. Instead, opt for gentle cleaning using a soft cloth or sponge with mild soap or glass cleaner.
Adhesion Issues with Acrylic on Glass
Adhesion issues are a common challenge when working with acrylic paint on glass. Glass surfaces are notoriously smooth, making it difficult for the paint to grip onto them. Without proper preparation, your masterpiece could easily chip or peel off over time. But fear not. I’m here to share some expert tips and techniques to ensure that your acrylic paint sticks to glass like glue.
First and foremost, thoroughly clean the glass surface to remove any dirt, dust, or oils that may hinder adhesion. A mild detergent solution or rubbing alcohol can do the trick. Just make sure the glass is completely dry before moving on.

Now, let’s talk about the secret weapon: primer. Using a primer specifically designed for glass surfaces will create a rougher texture that allows the acrylic paint to adhere more effectively. Look for one with an adhesive or etching effect for maximum adhesion and durability.
To take your adhesion game to the next level, consider lightly sanding the glass surface. This creates micro abrasions that provide even more texture for the paint to grip onto. Use a fine-grit sandpaper and be gentle to avoid scratching or damaging the glass.
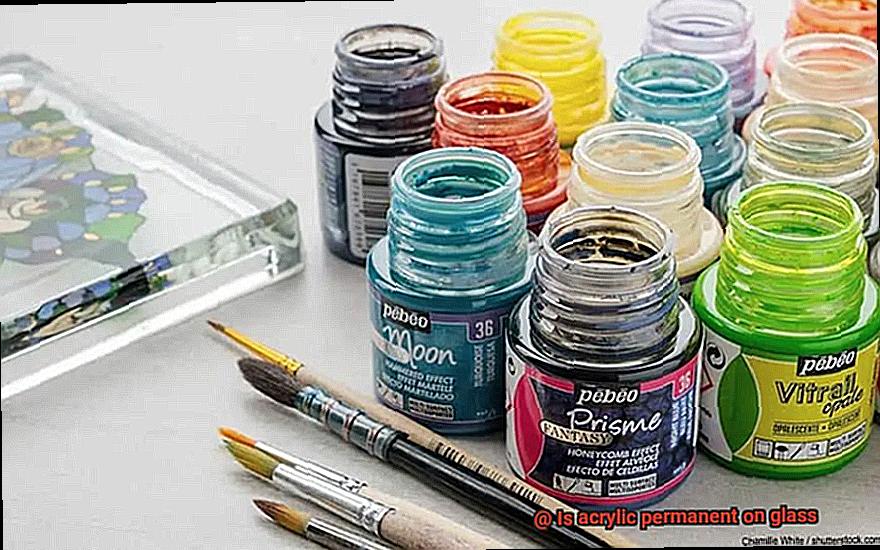
Next, choose high-quality acrylic paints formulated for use on glass. These paints often contain special additives that enhance their ability to bond with the smooth surface. Look for labels like “glass paint” or “glass-friendly” for better adhesion and longevity.
When applying the paint, remember that thin and even coats are key. Applying multiple layers allows each coat to properly adhere and dry before adding the next one. Avoid slathering on thick layers, as this can lead to cracking or peeling.
To protect your masterpiece from wear and tear, apply a clear sealant or varnish over the painted surface. Not only does this enhance the appearance of your artwork, but it also provides an extra layer of protection against chipping and fading.
Surface Preparation for Painting on Glass
Creating a stunning art piece on glass requires proper surface preparation to ensure the longevity and adhesion of your acrylic paint. Follow these steps to prepare your glass surface for painting:
- Thoroughly clean the glass: Remove any dust, grease, or dirt with a mild detergent or glass cleaner. Rinse it well with water to ensure a clean surface.
- Remove contaminants: To eliminate any remaining residues or oils, use rubbing alcohol or acetone after cleaning. This step guarantees a pristine surface for your artwork.
- Lightly roughen the surface: Use fine-grit sandpaper or a glass etching compound to gently sand the glass in circular motions until it feels slightly rough to the touch. This improves paint adhesion.
- Apply a primer: Use a primer specifically designed for glass surfaces to create a strong bond between the glass and the paint. Apply thin, even coats with a brush or roller, following the manufacturer’s instructions.
- Choose high-quality acrylic paints: Look for paints labeled as “glass paints” or “glass enamels” at art supply stores. Apply thin layers of paint, allowing each layer to dry before applying the next one. Multiple layers may be needed for desired opacity and intensity of color.
- Seal with a clear topcoat: Once your artwork is complete and all layers have dried, protect it with a clear topcoat or varnish. This adds durability and guards against scratches and fading. Apply thin, even coats following the manufacturer’s instructions.
Remember to handle your painted glass artwork with care. Avoid abrasive cleaners and vigorous scrubbing that can damage the paint. Protect your artwork from extreme temperature changes, as they can cause cracking or peeling. Consider using UV-resistant varnishes or coatings if displaying outdoors or in sunlight-exposed areas.
Priming for Improved Adhesion
Are you tired of your acrylic projects falling apart? Do you long for a bond between acrylic and glass that is unyielding and unwavering? Well, fear not, my friend. Today, we shall embark on a journey into the realm of priming for improved adhesion.
Priming, the superhero of the adhesion world, swoops in to prepare the surface and ensure a strong bond between acrylic and glass. But how does it work? Let’s delve deeper into this captivating process.
Silane-based primers, the chameleons of adhesion, are one popular choice for this magical bonding act. These primers possess molecules that possess an affinity for water (hydrophilic) and an aversion to water (hydrophobic). This unique combination allows them to cling to the glass surface while providing the ideal foundation for the acrylic adhesive.
To begin, ensure your glass surface is pristine by cleaning and drying it thoroughly. Then, armed with your trusty brush or spray, apply the silane-based primer evenly across the entire area to be bonded. Allow it to dry for a mere 10-15 minutes before proceeding.
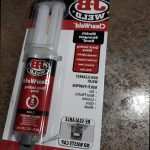
If silane doesn’t tickle your fancy, fret not. There is another hero in our midst – the epoxy-based primer. Renowned for its exceptional bonding properties, this primer forms a formidable chemical bond between glass and acrylic.
Much like its silane counterpart, proper surface preparation holds the key to success. Cleanse your glass surface until it gleams, free from any pesky dust or grease. Then, wield your brush or roller and apply a uniform coat of epoxy primer. Let it cure for a respectable 24-48 hours before moving forward.
Ah, but there is more. Do not forget the other factors that influence adhesion, such as surface roughness and compatibility between adhesive and primer. Take the time to prepare your surface by cleaning and sanding if necessary.
Varnishing to Enhance Durability
Today, we embark on a journey into the realm of varnishing and its remarkable ability to enhance the durability of acrylic paint on glass surfaces. Just like an invincible shield, varnishing creates a protective layer that shields your precious artwork from the nefarious forces of UV light, moisture, dust, and scratches.
The Varnishing Process:
- Cleanliness is Key: Before applying varnish, cleanliness reigns supreme. Ensure your painted glass surface is pristine by using a lint-free cloth or a soft brush to abolish any dirt, dust, or oily residue. A flawless canvas is vital for an impeccable finish.
- Choose Your Weapon: The arsenal of varnishes at your disposal is vast – spray-on, brush-on, pour-on – take your pick. Select the one that aligns with your preferences and project requirements.
- Applying the Varnish: Begin by bestowing thin coats of varnish upon your creation. Avoid the temptation of one thick coat, as it may result in unsightly drips and uneven drying. Employ a soft brush or a lint-free cloth to bestow an even layer of protection upon the glass surface. Abide by the manufacturer’s instructions for drying time between each coating.
- Drying Time: Patience is virtue. Grant the varnish ample time to dry completely as per the manufacturer’s guidelines. This ensures an unyielding and enduring finish.
- The Perfect Finish: Varnishes are not merely guardians; they also offer various finishes – glossy, matte, satin – a spectrum of aesthetic possibilities awaits. Experiment and find the sheen that best complements your artwork and personal style.
Maintenance and Longevity:
While varnishing fortifies durability, it is essential to acknowledge that acrylic paint on glass may experience some fading or wear over time. Fear not. With proper care and maintenance, you can maximize the lifespan of your artwork:
- Handle with Care: Treat your varnished glass artwork as a delicate treasure. Shield it from excessive exposure to direct sunlight and capricious temperature changes.
- Regular Maintenance: Tenderly dust your artwork with a soft brush or a lint-free cloth to keep it immaculate. Refrain from employing harsh chemicals or abrasive materials that could tarnish the varnish.
- Reapplication: As time ebbs away, the protective prowess of varnish may wane. Monitor your masterpiece and consider reapplying varnish every few years or as needed to bolster its safeguarding abilities.
Best Practices and Maintenance Tips
Acrylic is a versatile medium that can create stunning artwork on glass surfaces. However, to ensure the longevity and durability of your acrylic artwork on glass, it’s important to follow best practices and maintenance tips. In this article, we will explore five key areas to consider when using acrylic on glass: surface preparation, application techniques, drying and curing, protection, and cleaning. By following these guidelines, you can create lasting and vibrant acrylic artwork on glass.
Surface Preparation:
Before applying acrylic on glass, it’s crucial to prepare the surface properly. Start by cleaning the glass with a mild detergent solution to remove any dirt, oils, or residues. Rinse it with clean water and dry it with a lint-free cloth. This will ensure a clean surface for better adhesion between the acrylic and glass.
Application Techniques:
When applying acrylic on glass, use the right technique for optimal results. Brush application works well for smaller areas, while spray application is ideal for larger surfaces. Ensure even coverage and avoid excessive layering, as this can lead to uneven drying and potential peeling or cracking.
Drying and Curing:
After applying acrylic on glass, allow sufficient time for drying and curing. Follow the manufacturer’s instructions regarding drying times, as they may vary depending on the type and brand of acrylic used. Avoid touching or moving the artwork during this process to prevent smudging or distortion.
Protection:
To protect your acrylic artwork on glass from dust, scratches, and UV damage, consider applying a clear varnish or protective coating specifically formulated for acrylics. Apply this protective layer once the acrylic has fully dried and cured. It will help maintain the vibrancy of colors and provide an additional barrier against environmental elements.
Cleaning:
Regular cleaning is essential to preserve the appearance of your acrylic artwork on glass. Use a soft, lint-free cloth or sponge with mild soap and water to gently wipe the surface. Avoid using abrasive cleaners or rough materials that may scratch or damage the acrylic layer. Additionally, avoid ammonia-based products as they can cause cloudiness or discoloration.
Choosing the Right Varnish for Your Project
You’ve poured your heart and soul into creating a breathtaking acrylic artwork on a delicate glass surface. Now, it’s time to safeguard your masterpiece from the ravages of time. Enter varnish – the secret weapon that will protect and preserve your creation for years to come. But with an overwhelming array of varnishes out there, how do you choose the perfect one? Fear not, my artistic friend, because I’ve got your back. Here are some key factors to consider when selecting the best varnish for your acrylic on glass project:
- Permanence: Are you looking for your artwork to stand the test of time? If so, opt for a permanent varnish. These beauties create a resilient shield that defies moisture, UV rays, and other environmental foes. They ensure that your artwork maintains its vibrant glory, no matter how many years pass.
- Removability: On the flip side, if you fancy the idea of tweaking or removing the varnish in the future, go for a removable option. These varnishes offer flexibility, allowing you to make changes without harming the underlying layers of paint.
- Finish: Consider the aesthetic appeal you desire. Gloss finishes deliver a lustrous sheen that dazzles like sunlight dancing on water. Satin finishes offer a subtle elegance with their soft sheen. And matte finishes bestow a velvety smoothness that adds depth and sophistication.
- Application process: Pay close attention to the application instructions. Some varnishes may require multiple coats or need to be thinned with a specific medium. Following these guidelines ensures that your varnish goes on like silk, creating a flawless finish.
- Compatibility: Play it safe by testing your chosen varnish on a small area before coating your entire artwork. This trial run will reveal any adverse reactions with the acrylic paint and help you preserve the true colors and transparency of your masterpiece.
- Drying time: Patience, dear artist, is a virtue. Allow sufficient drying time between coats to ensure that your varnish adheres flawlessly to the glass surface. This will ensure optimal protection and longevity for your artwork.
Alternatives to Acrylic Paint on Glass
When it comes to expressing artistic vision on glass, acrylic paint often takes center stage. However, there is a whole world of alternatives waiting to be discovered. In this blog post, we will delve into the realm of alternative options for painting on glass, exploring the versatility and stunning effects they can offer. From glue and food coloring to enamel paint, glass stain markers, watercolor paints, oil-based paint markers, and window cling films or decals, each alternative opens up a unique opportunity for creativity.
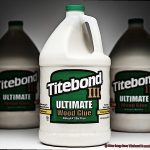
Glue and Food Coloring:
Unleash vibrant colors and create mesmerizing stained glass effects with a simple mixture of clear glue and food coloring. Blend a small amount of clear glue with a few drops of your desired food coloring, then apply the mixture to the glass surface using a brush or sponge. Once dried, the glue creates a translucent and glossy finish that captures and reflects light in captivating ways.
Glue and Glitter:
Add a touch of sparkle to your glass artwork by mixing clear glue with your favorite glitter color. Apply the mixture to the glass surface using a brush or sponge, and watch as the glue acts as an adhesive, ensuring the glitter adheres firmly. The result is a dazzling masterpiece that shines from every angle.
Glue Resist Technique:
For intricate designs or patterns on glass, the glue resist technique offers an excellent option. Apply regular white school glue onto the glass surface, creating your desired design or pattern. Allow the glue to dry completely before applying any paint or ink. Once ready, paint over the entire surface with acrylic paint or ink, ensuring full coverage. After drying, peel off the dried glue to reveal your stunning design beneath.
Glass Stain Markers:
Glass stain markers are specifically designed to bond with glass surfaces, providing a permanent and translucent effect. With a wide range of colors available, these markers allow you to create intricate designs or vibrant illustrations on glass. Their permanence ensures your artwork will withstand the test of time.
Enamel Paint:
Enamel paint is formulated specifically for use on glass surfaces, offering a durable and permanent finish. Ideal for decorative items such as glassware or window art, enamel paints adhere well to glass and can withstand heat.
Watercolor Paints:
For a delicate and ethereal look, watercolor paints on glass create a translucent effect that allows light to pass through, mimicking the beauty of stained glass. While not as permanent as other options, watercolors offer a unique charm and can be used for temporary or experimental projects.
Oil-based Paint Markers:
Oil-based paint markers provide vibrant colors and an opaque finish on glass surfaces. These markers adhere well to various surfaces, including glass, and offer a highly permanent result resistant to fading or smudging.
8f_xCul7V_Q” >
Conclusion
Acrylic, when applied to glass, can indeed create a permanent bond.
The unique properties of acrylic make it ideal for adhering to glass surfaces, ensuring longevity and durability. Once the acrylic dries and cures, it forms a strong and resilient layer that is resistant to fading, peeling, or cracking.
Whether you’re creating stunning stained glass windows or adding decorative touches to glassware, acrylic provides a permanent solution that won’t disappoint.