Picture this: you’re knee-deep in a thrilling DIY project, buzzing with excitement as you piece everything together. But then, reality hits. You’re faced with the dreaded waiting game – how long should you let adhesive dry? We’ve all been there, anxiously pondering whether to forge ahead or risk ruining our hard work by rushing the drying process.
In the realm of adhesives and bonding agents, patience truly is a virtue. Understanding the ideal drying time isn’t just crucial for achieving top-notch results; it’s also vital for ensuring your project’s long-term success. Whether you’re joining two wooden pieces, installing tiles on your kitchen backsplash, or delicately securing crafts, this guide has got you covered.
Throughout this comprehensive post, we’ll delve into different types of adhesives and their unique drying times. We’ll also explore external factors that can influence drying time, such as temperature and humidity. By the end of our journey together, you’ll be equipped with the knowledge to make informed decisions about allowing adhesive to dry properly – guaranteeing the durability and resilience of your projects.
So grab a steaming cup of coffee, settle in comfortably, and embark on an adventure through the captivating world of adhesive drying times.
Different Types of Adhesives and Their Drying Times
Contents
- 1 Different Types of Adhesives and Their Drying Times
- 2 Factors that Affect the Drying Time of Adhesives
- 3 How to Ensure a Proper Bond During the Drying Process
- 4 The Difference Between Drying and Curing
- 5 Temperature and Humidity Effects on Adhesive Drying Time
- 6 Manufacturer’s Recommendations for Optimal Results
- 7 Risks of Hurrying the Drying Process
- 8 Storing Adhesives Properly
- 9 Conclusion
Adhesives are the unsung heroes of our everyday lives, holding things together and making repairs possible. But did you know that different types of adhesives have varying drying times? In this comprehensive guide, we will explore the fascinating world of adhesives and their drying times, helping you achieve strong and durable bonds in your projects.
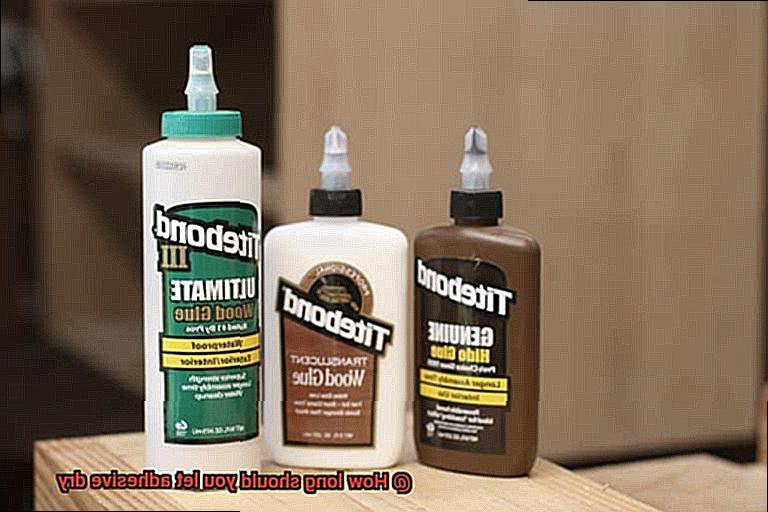
Water-Based Adhesives: Quick and Versatile
Water-based adhesives, such as white glue and wood glue, are commonly used for household projects and crafting. These adhesives offer versatility and ease of use, making them a popular choice. However, it’s important to note that water-based adhesives have a longer drying time compared to other types.
Depending on the specific adhesive, drying times can range from 24 to 48 hours. It may seem like a long wait, but patience is key when it comes to achieving a strong bond. Rushing the drying process can result in weaker bonds that may not hold up over time. So be sure to let your water-based adhesive fully dry before subjecting the bonded surfaces to any pressure or stress. Remember, good things take time.
Solvent-Based Adhesives: Fast and Reliable
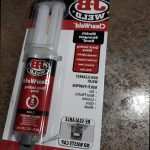
If you’re looking for an adhesive that offers quick results, solvent-based adhesives are the way to go. Super glue and epoxy fall under this category and are commonly used for bonding materials like metal, plastic, and wood. Solvent-based adhesives have a much faster drying time compared to water-based options, usually within minutes.
However, it is still recommended to give them some time to fully cure and reach their maximum strength. While it may be tempting to rush the process, a little extra time can make a big difference in the durability of your bond. So exercise patience and allow your solvent-based adhesive adequate time to dry and cure effectively.
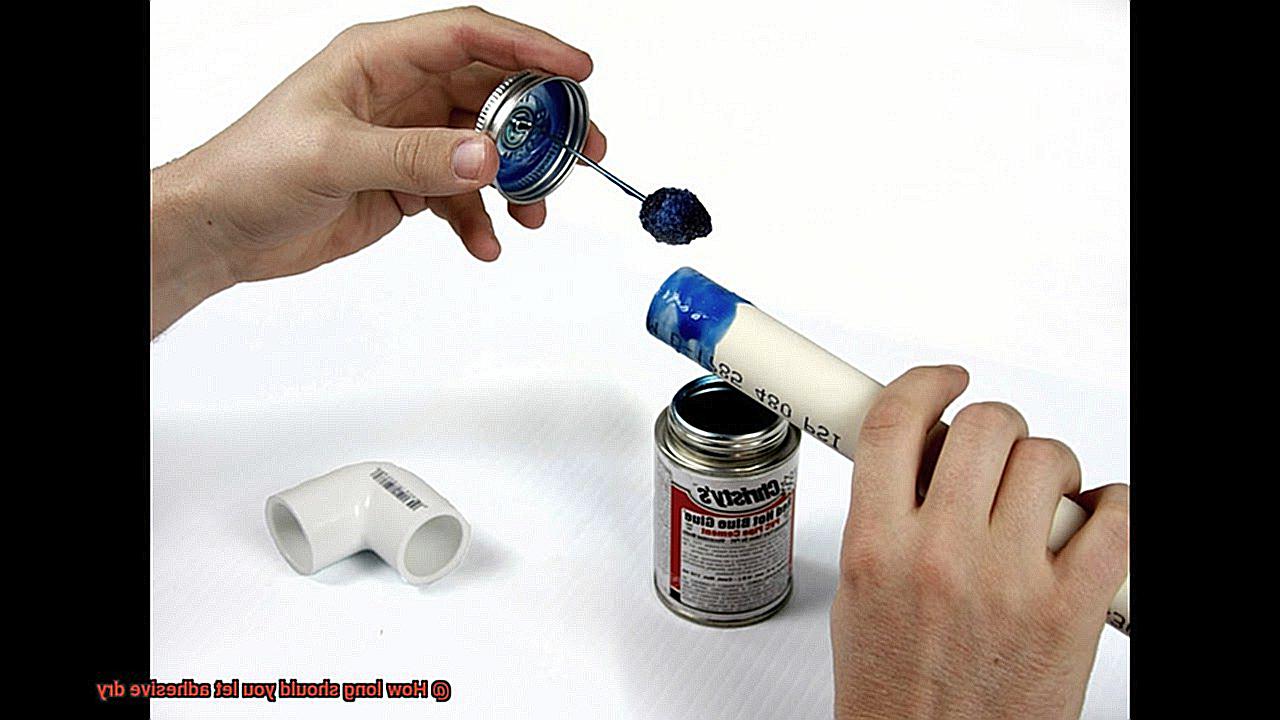
Contact Cement: The Tacky Solution
Contact cement is a unique type of adhesive that requires a specific drying time before joining surfaces together. Unlike other adhesives, contact cement needs to dry until it becomes tacky or no longer feels wet to the touch. This typically takes around 15 to 20 minutes, but it’s important to follow the manufacturer’s instructions for the recommended drying time.
Applying surfaces together too early can result in a weak bond that may not hold up over time. So be sure to give your contact cement the necessary drying time it needs to create a strong and durable bond.
Temperature and Humidity: Factors That Influence Drying Time
When working with adhesives, it’s important to consider the influence of temperature and humidity on drying times. Higher temperatures generally accelerate the drying process, allowing the adhesive to set more quickly. On the other hand, cooler temperatures can slow down drying times, requiring a longer wait for the adhesive to fully dry.
Factors that Affect the Drying Time of Adhesives
Adhesives, the unsung heroes that hold our world together, come in various forms with different drying times. Ever wondered why some adhesives dry in a flash while others take ages? This comprehensive guide unveils the factors that affect adhesive drying time, empowering you to select and apply adhesives wisely.
Type of adhesive:
The type of adhesive has a significant impact on drying time. Super glue, also known as cyanoacrylate adhesive, dries upon contact with air, instantly bonding materials. In contrast, epoxy adhesives may take minutes or even hours to fully dry and cure, depending on the formulation.
Temperature and humidity:
Environmental conditions play a vital role in adhesive drying time. Higher temperatures turbocharge the drying process, while lower temperatures slow it down. Low humidity levels expedite drying, while high humidity prolongs it. Extreme conditions can also compromise bonding strength and adhesive performance.
Thickness of the adhesive layer:
Drying time is directly proportional to the thickness of the adhesive layer. Thicker layers require more moisture evaporation for complete curing, resulting in longer drying times. Applying thin and even layers ensures faster drying and optimal bonding strength.
Porosity of the substrate:
The material being bonded affects drying time. Porous materials like wood or fabric absorb adhesive, extending drying time. Non-porous surfaces like glass or metal allow for faster evaporation, hastening drying time.
Mixing ratios (for two-part adhesives):
Two-part adhesives require precise mixing ratios for proper curing and optimal drying time. Deviating from these ratios can lead to improper curing and significantly affect drying time.
Ventilation:
Proper ventilation is crucial for efficient adhesive drying. Adequate airflow promotes moisture evaporation, particularly for solvent-based adhesives. Insufficient ventilation prolongs drying and weakens bond strength.
Substrate temperature:
The temperature of the material being bonded impacts drying time. Cold substrates slow down drying, while overly hot substrates cause adhesive to dry too quickly, compromising bonding properties. Following the recommended substrate temperature range ensures optimal results.
How to Ensure a Proper Bond During the Drying Process
Let’s explore how to ensure a proper bond during the drying process of adhesive. By following these simple steps, you can achieve a strong and long-lasting bond that will hold things together securely.
Choose the Right Adhesive:
Selecting the right adhesive for the materials you’re bonding is essential. Different adhesives have different drying times and adhering properties. Make sure to read the instructions or consult with an expert to choose the best adhesive for your specific needs. Whether you’re working with wood, metal, glass, or fabric, there’s an adhesive out there that will provide optimal bonding results.
Prepare the Surfaces:
Before applying adhesive, it’s crucial to prepare the surfaces properly. Clean them thoroughly and remove any dirt, dust, or grease that could hinder the bonding process. A clean surface ensures better adhesion and a stronger bond. Imagine trying to stick two pieces of paper together with a layer of sand in between – it just won’t work. So take the time to clean and dry the surfaces before applying adhesive for a bond that will last.
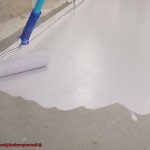
Apply Adhesive Evenly:
When applying adhesive, make sure to do it evenly and in the recommended amount. Applying too little adhesive may result in a weak bond, while applying too much can create a mess. Use brushes, rollers, or spreaders to achieve a smooth and uniform application. Think of it like spreading butter on toast – you want an even layer that covers every inch for a tasty and satisfying bite.
Follow Recommended Drying Time:
Patience is key when it comes to letting adhesive dry. Follow the recommended drying time provided by the manufacturer. Rushing this process can compromise bond strength and integrity. Remember, good things come to those who wait. Give the adhesive enough time to fully cure and bond the surfaces together. It’s like waiting for a cake to bake – you wouldn’t take it out of the oven too soon, would you? Let that adhesive work its magic.
Avoid Disturbances:
During the drying process, it’s essential to keep the bonded materials undisturbed. Any movement or stress on the bond before it has fully dried can weaken or break it. Use clamps or other fixtures to hold everything in place until the adhesive has completely cured. Imagine trying to build a house of cards and someone comes along and knocks it down before the glue has dried – disaster. So be patient and let that bond set before subjecting it to any stress.
The Difference Between Drying and Curing
Understanding the distinction between drying and curing is crucial for achieving a robust and long-lasting bond with adhesive. In this article, we’ll delve into the captivating world of glue and explore the intricate processes of drying and curing.
Drying:
Drying is the initial phase that occurs after applying adhesive to a surface. During this stage, the solvent or water in the adhesive evaporates, leaving behind a solid film. The adhesive becomes tacky, embracing the surface with its sticky touch. Drying typically takes a relatively brief period, ranging from a few minutes to a few hours, depending on environmental conditions and the adhesive type.
Curing:
Curing is a more intricate process that involves chemical reactions within the adhesive. It is the metamorphosis of the adhesive from a liquid or semi-solid state to a fully hardened and durable state.
Unlike drying, curing demands significant patience as it can take several hours, days, or even weeks. The duration of curing is influenced by temperature, humidity, and the specific formulation of the adhesive.
The Importance of Following Curing Time:
It’s critical to note that even though an adhesive may feel dry to the touch, it may not be fully cured. The adhesive might still be vulnerable to damage or may not have reached its maximum strength. Therefore, it’s essential to adhere to the manufacturer’s instructions regarding the recommended curing time before subjecting the bond to stress or load.
Accelerated Curing Methods:
In certain situations, expedited curing methods can be employed to reduce overall curing time. These methods include harnessing heat or UV light. However, caution should be exercised when using these methods, as they may impact the performance or properties of certain adhesives.
Differences Between Adhesive Types:
It’s worth mentioning that different types of adhesives have varying drying and curing times. Super glues, also known as cyanoacrylate adhesives, dry within seconds but may take several hours to fully cure. On the other hand, epoxy adhesives can take several hours to dry and cure completely.
Temperature and Humidity Effects on Adhesive Drying Time
Glue, the magical substance that binds our projects together. But have you ever wondered why it takes so long for it to dry? Today, we embark on a journey through the captivating world of adhesive drying time. Join me as we unravel the impact of temperature and humidity on this crucial process.
Temperature: A Fiery Accelerator or a Chilly Snail’s Pace?
Temperature, the conductor of an orchestra, determines the speed of the performance. Higher temperatures are the maestros that accelerate drying, causing chemical reactions to occur at warp speed. But beware. Too much heat can lead to hasty drying with weak bonds. On the flip side, lower temperatures are like an icy breeze, slowing down those reactions and extending drying time. In extreme cold, your glue might just decide it’s on vacation.
Humidity: The Moisture Maestro
Now, let’s talk about humidity – the moisture maestro in this symphony of adhesive drying. High humidity levels are like that friend who always shows up fashionably late. The excess moisture in the air slows down evaporation and extends drying time.
It can even play havoc with certain adhesives, causing improper curing or weaker bonds. On the other hand, low humidity is like a swift gust of wind, whisking away moisture and expediting the drying process. Just be cautious not to dry out your glue too much.
The Perfect Balance: Temperature + Humidity
Like yin and yang or peanut butter and jelly, temperature and humidity must find harmony for optimal adhesive drying time. Finding that sweet spot can be a bit tricky, but it’s worth the effort. Consult the manufacturer’s instructions and consider your workspace’s environmental conditions. Strike that balance, and you’ll be rewarded with strong, durable bonds.
Now you understand the intricate dance between temperature and humidity when it comes to adhesive drying time. Remember, drying is just the appetizer – curing is the main course. Patience is key, so give your glue the time it needs to reach its full potential. Follow the manufacturer’s instructions, consider the environment, and you’ll achieve adhesive greatness in no time.
Manufacturer’s Recommendations for Optimal Results
In this captivating exploration, we will delve into the importance of heeding the manufacturer’s recommendations for adhesive drying time. Prepare to be spellbound as we unravel the mesmerizing factors that influence this magical process.
Discover the Alchemy of Adhesives:
- Quick-drying wonders: Perfect for urgent projects, these adhesives work their magic in just a few minutes.
- Heavy-duty sorcery: Patience is crucial with these mystical concoctions, as they may require several hours or even an entire night to reach their full potential.
Unveiling the Influencers of Drying Time:
- Temperature: Like fiery accelerators, higher temperatures ignite a swift transformation, expediting drying time.
- Humidity: Low humidity acts as a gust of wind, rushing in to assist in faster drying, leaving no trace behind.
- Substrate material: Each material holds its own secret, absorbing moisture uniquely and affecting drying time accordingly.
- Application Type: Certain incantations demand extended drying times to ensure an unbreakable bond that withstands any trial.
Beware the Perils of Hasty Drying Time:
- Feeble enchantments: Hastening through the drying process may result in weak bonds that crumble under pressure.
- Adhesion’s demise: Inadequate drying time can lead to a tragic separation between surfaces, causing your project to unravel over time.
- Disastrous spells: Ignoring recommended drying times can ultimately result in adhesive failure, casting your project into oblivion.
Embrace the Power of Curing Time:
- Some adhesives require additional curing time after drying to unlock their true potential and achieve maximum strength.
- Epoxy or polyurethane-based potions often demand longer curing times, allowing their magic to solidify.
- Following the manufacturer’s instructions for curing ensures that your adhesive masterpiece reaches its full power.
Risks of Hurrying the Drying Process
In this journey, we will explore the risks that lie beneath the surface when we rush this crucial step. So grab your potions and wands as we embark on this magical adventure into the art of adhesive bonding.
Weak Bonds:
Rushing the drying process can result in weak bonds that compromise the durability and performance of your project. Insufficient drying time prevents adhesives from forming a strong bond between surfaces, leaving them vulnerable to separation with even the slightest touch.
Tacky Surfaces:
When adhesives are hurried, surfaces can remain tacky or sticky. This not only affects the appearance of your project but also attracts unwanted dirt, dust, and particles. Keeping our adhesives clean and free from contaminants is essential for achieving optimal results.
Solvent Entrapment:
Many adhesives contain solvents that evaporate during drying. Speeding up this process can cause solvents to become trapped within the adhesive layer, leading to bubbling, blistering, reduced bond strength, and ultimately, a failed bond. Allowing sufficient time for proper solvent evaporation is crucial for successful bonding.
Premature Stress:
Rushing the drying process creates premature stress on bonded materials. As adhesives cure, they undergo changes in volume and properties. Rapid or uneven drying can result in excessive stress, leading to cracking, delamination, or complete bond failure. Patience is key to ensure long-lasting and reliable bonds.
Safety Concerns:
Hastening the drying process can release volatile organic compounds (VOCs) into the air. Inhaling high concentrations of these chemicals can be harmful to health. By following recommended drying times, we can control and minimize VOC release, creating a safer working environment for all involved.
Storing Adhesives Properly
Properly storing adhesives is more than just keeping your glue collection organized – it’s about ensuring that your glue works its magic when you need it most. Adhesives, my friend, are not just ordinary glue. They require special care to maintain their effectiveness and longevity.
First and foremost, adhesives should be stored in a cool, dry place. Why? Extreme temperatures can wreak havoc on the quality of your adhesives. So, keep them far away from direct sunlight and any sources of heat. You don’t want your glue to turn into a sticky mess or dry out completely, do you?
Next, it’s crucial to store adhesives in their original containers or tightly sealed containers. Why? Because exposure to air can lead to evaporation and drying. And let’s be honest, nobody wants a dried-up tube of glue when they’re in the middle of an important project. So, make sure that lid is securely closed and those containers are sealed tight.
- Oh, and here’s a pro tip – storing your adhesives upright can help prevent any leakage. After all, nobody wants a sticky mess all over their storage area.
- Now, here’s something to keep in mind – different types of adhesives may have different storage requirements. Some may even need to be refrigerated or kept away from freezing temperatures. So, always read the instructions on the package to make sure you’re storing your glue correctly.
And let’s not forget about safety. Keep those adhesives out of reach of children and pets. They can be harmful if ingested or come into contact with the skin or eyes. So, store them in a safe place where curious hands and paws can’t get to them.
Lastly, regularly inspect your stored adhesives for any signs of deterioration. If you notice any changes in color, consistency, or odor, it’s best to dispose of them properly and get a fresh batch. Using glue that’s gone bad won’t perform as well and could potentially ruin your project.
U0hhFjjW5EU” >
Conclusion
When it comes to adhesive, patience is key. You might be tempted to rush the process and move on to the next step, but giving the adhesive enough time to dry is crucial for a strong and long-lasting bond. So, how long should you let adhesive dry? Well, it depends on the type of adhesive you’re using.
For quick-drying adhesives like super glue or cyanoacrylate, you’ll typically need only a few seconds or minutes for the bond to set. However, for stronger adhesives like epoxy or construction adhesive, you’ll need to wait a bit longer.
In general, it’s recommended to let the adhesive dry for at least 24 hours before subjecting it to any stress or load. This allows the adhesive to fully cure and reach its maximum strength. Keep in mind that drying times can vary depending on factors such as temperature, humidity, and the materials being bonded.
During this waiting period, make sure not to disturb or manipulate the bonded surfaces. Any movement can compromise the integrity of the bond and result in a weaker hold. It’s also important to ensure proper ventilation during drying to prevent any fumes from accumulating.
So remember, don’t rush it. Take your time and give that adhesive ample opportunity to dry properly.