Fed up with sticky disasters every time you wield that trusty hot glue gun? We understand the struggle. Crafting and DIY projects can quickly devolve into frustrating clean-up sessions when things go haywire with this handy yet often messy tool.
But fret not, fellow perfectionists and neat-freaks. We’ve got your back.
In this blog post, we’ll spill the beans on some invaluable tips and tricks to help you use a hot glue gun like a pro while keeping chaos at bay. From nifty techniques for applying glue to sneaky workspace hacks, get ready to elevate your hot glue game.
Let’s dive right in.
Preparing Your Workspace
Contents
Preparing your workspace is crucial when using a hot glue gun to ensure safety and efficiency. Here’s why:
- Safety Precautions: Hot glue guns operate at high temperatures, and improper handling can lead to burns. Before starting, make sure you have a heat-resistant work surface, like a silicone craft mat or a metal sheet. This will protect your table or countertop from heat damage and provide insulation against accidental contact with the hot glue.
- Adequate Lighting: Good lighting is essential to see what you’re doing and prevent accidents. Ensure your workspace is well-lit, either by natural light or by using additional lamps or task lights.
- Ventilation: Hot glue guns emit fumes that can be irritating to the eyes and lungs. Proper ventilation in your workspace is important. Open windows or use a fan to circulate air, minimizing the concentration of fumes and keeping the air fresh.
- Organized Work Area: Keep your work area clutter-free and organized. Clear away any unnecessary items to avoid accidentally knocking them over or getting them tangled in the hot glue gun cord.
- Protective Covering: Lay down a protective covering on your workspace, such as newspaper or an old tablecloth. This will catch any drips or spills, making cleanup easier and preventing damage to your furniture or surfaces.
- Essential Tools: Have essential tools within reach, such as scissors for cutting glue sticks and a small container or tray to hold the glue gun when not in use. This will prevent accidental glue drips from spreading onto your workspace.
- Cleaning Supplies: Hot glue can sometimes leave behind residue or stickiness on surfaces. Keep rubbing alcohol or adhesive remover nearby to quickly clean up any messes.
Heating the Glue Gun
Using a hot glue gun without creating chaos is like conducting a symphony – it requires careful preparation and the right tools. One crucial step in this process is properly heating the glue gun before use. Let’s explore why correctly heating a glue gun is essential for a clean and consistent glue application.
Most hot glue guns have a heating element inside that melts the glue sticks. This element, typically located near the tip of the gun, is powered by electricity. Each glue gun model may have different heating times and temperature settings, so following the manufacturer’s instructions is crucial.
To heat the glue gun, simply plug it into an electrical outlet and turn it on. Some models have an indicator light that illuminates when the gun is heating up. It’s important to give the gun enough time to heat up fully, which can take anywhere from a few minutes to several minutes depending on the model.
While waiting for the glue gun to heat up, prepare your workspace. Lay down a protective covering, like a silicone mat or cardboard, to catch any drips or spills. This not only prevents messy mishaps but also makes cleanup easier.
Once the glue gun has reached the proper temperature, it’s ready to be used. To ensure smooth and even flow of melted glue without clumps or stringy strands, test its consistency by gently squeezing the trigger. If it doesn’t flow smoothly, it may indicate insufficient heating or a nozzle clog.
In such cases, turn off the glue gun and allow it to cool down before troubleshooting or attempting to unclog the nozzle. This precaution prevents accidental burns from the extremely hot glue.
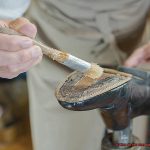
Applying the Glue
Applying the glue correctly is the secret ingredient to successful project outcomes. It’s the difference between a messy disaster and a masterpiece that withstands the test of time. So, let’s dive into the world of hot glue and discover the tips and tricks that will elevate your crafting game.
First things first, you need to know which surfaces are hot glue’s best friends. Fabric, wood, plastic, and metal are its preferred companions. These materials provide enough texture for the glue to grip onto, ensuring a strong bond. However, be cautious when it comes to glass or smooth surfaces – hot glue may not stick as well in those situations.
Now that you’ve got your surface sorted, let’s talk about cleanliness. Just like a clean canvas is crucial for a painting, a clean surface is essential for successful glue application. Dust, grease, or any other residue can be the enemy of adhesion. So, before you bust out that trusty glue gun, give your surface a good wipe-down with a damp cloth or mild cleaner. This will remove any unwanted particles and pave the way for a solid bond.
With your surface prepped and ready, it’s time to unleash the power of the hot glue gun. But wait. Before you dive in, make sure your glue gun is fully heated. Just like a chef preheats their oven before baking, you need to give your glue gun some time to reach its optimal temperature. Trust me, this step is crucial for achieving smooth flow and consistent application.
Now that your glue gun is heated and raring to go, hold it at a comfortable angle for better control and precision. But remember, don’t touch that nozzle. Hot glue means business and can leave you with some painful burns if you’re not careful.
When it comes to applying the glue itself, embrace a steady and controlled approach. Start from one end of your project and move towards the other, with a slow and continuous motion. Avoid the temptation to unleash your inner Hulk and apply excessive pressure – that’s a recipe for glue oozing out where it shouldn’t. We want even distribution, not a sticky mess.
To prevent those pesky strings or drips of excess glue, smoothly pull the glue gun away after each application. This graceful technique minimizes the formation of unwanted strings. However, if an excess drip does make an unwelcome appearance, fear not. Grab a trusty pair of tweezers or a toothpick and swiftly remove it while the glue is still warm.
Before you call it a day, don’t forget to give your hot glue gun some love. Clean that nozzle. Wipe it down with a damp cloth or paper towel to remove any dried glue that could clog it up. This simple act will ensure smooth application in your future projects and keep your hot glue gun ready for action.
Working Quickly and Carefully
Working quickly and carefully when using a hot glue gun is crucial for several reasons.
Firstly, it ensures that the glue is applied precisely and accurately, resulting in clean and professional-looking projects.
Secondly, working quickly helps to prevent the hot glue from drying before you have finished positioning your materials, reducing the risk of misalignment or having to reapply glue.
Lastly, working carefully helps to minimize the chances of making a mess or getting burned by the hot glue.
To work quickly and carefully with a hot glue gun, there are several important steps to follow:
- Prepare your workspace: Clear any clutter and have all your materials and tools ready before you start. This will help you work efficiently without any unnecessary delays.
- Control the flow of glue: Hold the glue gun at a slight angle and squeeze the trigger gently to release small amounts of glue onto the desired area. Starting with a small amount allows for better control and prevents excessive glue from oozing out.
- Position materials before applying glue: Take your time to position your materials correctly before applying the hot glue. This will help ensure that everything is aligned properly and reduces the chances of having to adjust or redo your work.
- Clean up as you go: Keep a damp cloth or paper towel nearby to quickly clean up any excess glue or stringy bits that may form. Wiping them away while they are still soft will prevent them from hardening and creating an untidy appearance.
- Use a heat-resistant surface: When not in use, place the hot glue gun on a heat-resistant mat or surface to prevent damage to your workspace and keep things organized.
- Practice caution: Always exercise caution when handling a hot glue gun. The tip can become extremely hot, so avoid touching it directly. Be mindful when plugging in or unplugging the gun, and never leave it unattended while it is still plugged in.
Using Tools For Better Control
Using the right tools and following tips for better control is crucial when using a hot glue gun. These tools and techniques can help you achieve professional results without any mess or mishaps.
Firstly, it’s important to have a heat-resistant mat or surface. This provides a stable and secure area for placing your glue gun while working, preventing accidental drips or spills onto your work surface. It also protects your tabletop from heat damage.
Next, consider using a precision applicator or nozzle attachment for your glue gun. This attachment allows you to apply the glue in a more controlled manner, giving you the ability to create fine lines or intricate designs with ease. It eliminates guesswork and provides more accuracy when gluing small or delicate objects.
In addition, having a set of tweezers or small pliers on hand can aid in better control. These tools help you hold small objects securely and adjust their position without touching the hot glue directly. They provide a safer and more precise way to handle delicate materials.
Along with using the right tools, there are some tips that can further enhance your control. Start by ensuring that your working surface is clean and dry before applying the glue. Any dust or moisture can affect the adhesion of the glue, so having a clean surface is essential for better results.
When applying the glue, try applying small amounts at a time rather than large blobs. This allows you to have more control over the amount and placement of the glue, minimizing the chances of making a mess. Working slowly and carefully is key, especially when gluing delicate or intricate objects. Take your time and pay attention to detail to achieve precise results.
Finally, if you make a mistake or get excess glue somewhere you didn’t intend, don’t panic. Hot glue is removable when still warm, so you can use a heat-resistant tool like a wooden stick or spatula to gently scrape off any unwanted glue before it cools and hardens.
Dealing With Excess Glue or Strings
Dealing with excess glue or strings when using a hot glue gun can be a frustrating experience, but fear not. With a few simple techniques and tools, you can tackle this issue like a pro.
Here are some tips to effectively deal with excess glue or strings:
- Have a damp cloth or sponge on hand: As soon as you notice any excess glue, gently wipe it away with the damp cloth. This prevents it from drying and hardening, making it easier to remove.
- Use a small scraper or spatula: If the glue has already dried, carefully scrape off the excess glue using a small scraper or spatula. Be cautious not to damage your project while doing this, especially if you’re working with delicate materials.
- Melt away those hot glue spiderwebs: For strings of glue, use a heat gun or hairdryer to melt them away. Direct the heat towards the strings and watch them quickly melt, allowing you to easily remove them.
- Incorporate excess glue into your design: In some cases, excess glue may be unavoidable. Instead of fretting over it, consider incorporating it into your design. For unintentional drips, strategically add more glue in the same area to create a textured effect.
- Prevention is key: To avoid excess glue altogether, start with small amounts and gradually add more if needed. Work quickly and efficiently to minimize the chances of excess glue forming.
Remember, different types of glue may require different removal methods, so always refer to the manufacturer’s instructions for specific guidance.
Tips for Successful Glue Gun Use
Prep your workspace: Before using a glue gun, it’s important to prep your workspace to minimize the mess. Lay down a protective covering such as newspaper or a craft mat to catch any drips or spills.
This not only protects your work surface but also makes cleanup much easier.
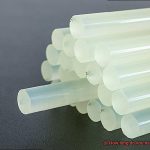
Use the right glue stick
Choosing the right glue stick is crucial for successful glue gun use. Different glue sticks have different melting temperatures and adhesive properties, so make sure to select one that matches your project’s needs. Read the packaging carefully to find a glue stick with the appropriate melting temperature and adhesive strength.
Heat your glue gun properly
To get the best results, it’s important to heat your glue gun properly. Allow it to heat up for the recommended time specified by the manufacturer. This ensures even melting and prevents clumps or uneven application of the glue.
Practice good hand positioning
When using a glue gun, it’s important to have good hand positioning for control and safety. Hold the glue gun with one hand and guide the flow of glue with the other hand. Keep your fingers away from the hot nozzle to avoid burns, and avoid squeezing too hard for better control.
Apply glue with precision
To achieve clean and professional-looking results, apply glue with precision. Start with small dots or lines of glue instead of large blobs. Work slowly and smoothly to distribute the glue evenly without excess oozing out.
Clean excess glue immediately
If you make a mess or accidentally apply too much glue, act quickly before it dries and hardens. Use a heat-resistant tool, such as a popsicle stick or a piece of cardboard, to gently scrape away any excess without damaging your project.
Be patient
Patience is key when using a glue gun. Allow the glue to fully cool and set before handling or moving your project. Rushing can cause smudging or messes, so take your time and let the glue dry completely.
Store your glue gun properly
After using your glue gun, let it cool completely before storing it upright. This ensures a clean nozzle and prevents leaks or messes. Proper storage maintains the longevity of your glue gun and helps it stay in good working condition.
Conclusion
In conclusion, mastering the art of using a hot glue gun without creating chaos is all about careful preparation, skillful technique, and a dash of patience. By following the expert advice presented in this article, you can elevate your hot glue game and achieve flawlessly clean and professional results.
Preparing your workspace is not just a suggestion; it’s an absolute necessity for both safety and efficiency. Ensure you have a heat-resistant surface that can withstand the intensity of the glue gun, ample lighting to avoid any missteps, proper ventilation to keep those fumes at bay, an organized work area that allows for easy access to essential tools and cleaning supplies. This meticulous setup will minimize messes and make cleanup a breeze.
Properly heating up your trusty glue gun is key to achieving that pristine glue application. Give it ample time to reach its optimal temperature before diving into your project. Gauge its consistency by delicately squeezing the trigger, making any necessary adjustments or unclogging the nozzle before proceeding.
When it comes time to apply the adhesive, embrace a steady and controlled approach. Begin at one end of your masterpiece and gracefully move towards the other with slow and continuous motion. Avoid exerting excessive pressure that could result in unsightly oozing or dripping of excess glue.
Working quickly yet meticulously is crucial if you want to leave no trace of mess behind. Prepare your workspace beforehand like a seasoned pro, control the flow of glue by gently squeezing instead of unleashing it like a wild river, position materials precisely before applying any adhesive, clean up as you go to maintain orderliness, utilize a heat-resistant surface when momentarily setting aside your hot glue gun, exercise caution when handling its scorching-hot body.
Equipping yourself with tools designed for better control will undoubtedly enhance your crafting experience. Consider investing in precision applicators or nozzle attachments for more accurate application. Keep tweezers or small pliers within arm’s reach for delicate material handling that requires a surgeon’s touch.
Dealing with excess glue or those pesky strings demands swift action. Wipe away any surplus glue with a damp cloth or sponge before it has the chance to dry and become an unmovable eyesore.
Employ a small scraper or spatula to remove any dried remnants if necessary, eradicating them like an expert artisan. And for those stubborn strings that refuse to cooperate, melt them away with the power of a heat gun or hairdryer.