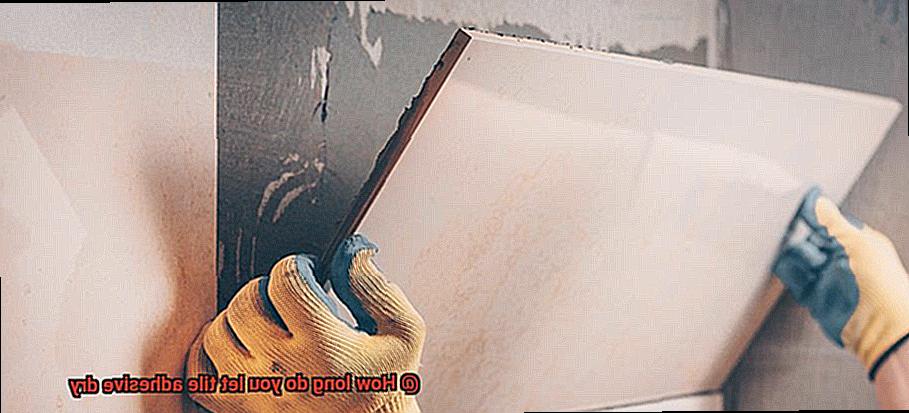
Ready to dive into your tiling project but not sure how long that sticky stuff needs to dry?
Don’t sweat it. Letting tile adhesive dry properly is the secret sauce for a rock-solid tile installation.
But here’s the deal: drying times can be as unpredictable as a rollercoaster ride. Most adhesives need a solid 24 hours to dry, but brace yourself because factors like temperature and humidity can throw a curveball.
Trust me, rushing this step is like playing with fire – tiles might wiggle or even pop off down the road. So, do yourself a favor and give that adhesive all the time it needs to cure.
It’s worth it for a jaw-dropping finish that’ll make your friends go “Wow.”
What is Tile Adhesive?
Contents
- 1 What is Tile Adhesive?
- 2 Different Types of Tile Adhesives and Their Drying Times
- 3 Factors that Affect the Drying Time of Tile Adhesive
- 4 Preparing the Substrate for Tile Installation
- 5 Following Manufacturer’s Instructions for Proper Use and Drying Time
- 6 Avoiding Foot Traffic and Heavy Objects on New Tiles Until Adhesive is Fully Dry
- 7 Accelerating the Drying Time of Tile Adhesive
- 8 Conclusion
Tile adhesive is the unsung hero of tile installations. It’s the magical bonding material that ensures your tiles stay securely in place on walls, floors, or countertops. But what exactly is tile adhesive and how does it work its magic?
Types of Tile Adhesive:
- Ceramic Tile Adhesive: This type of adhesive is specifically formulated for use with ceramic tiles. It provides a strong bond that can withstand the weight and pressure of ceramic tiles, ensuring they stay in place for years to come.
- Porcelain Tile Adhesive: Porcelain tiles are known for their durability and strength, so they require a specialized adhesive. Porcelain tile adhesive is designed to provide an extra strong bond that can handle the weight and stress of porcelain tiles.
- Natural Stone Tile Adhesive: Natural stone tiles, such as marble or granite, require a different type of adhesive due to their unique characteristics. Natural stone tile adhesive is formulated to provide a strong bond while also allowing for flexibility to accommodate the natural movement of the stone.
- Glass Tile Adhesive: Glass tiles are delicate and require a gentle touch when it comes to adhesive. Glass tile adhesive is specially designed to provide a secure bond without damaging or cracking the delicate glass surface.
Composition and Strength:
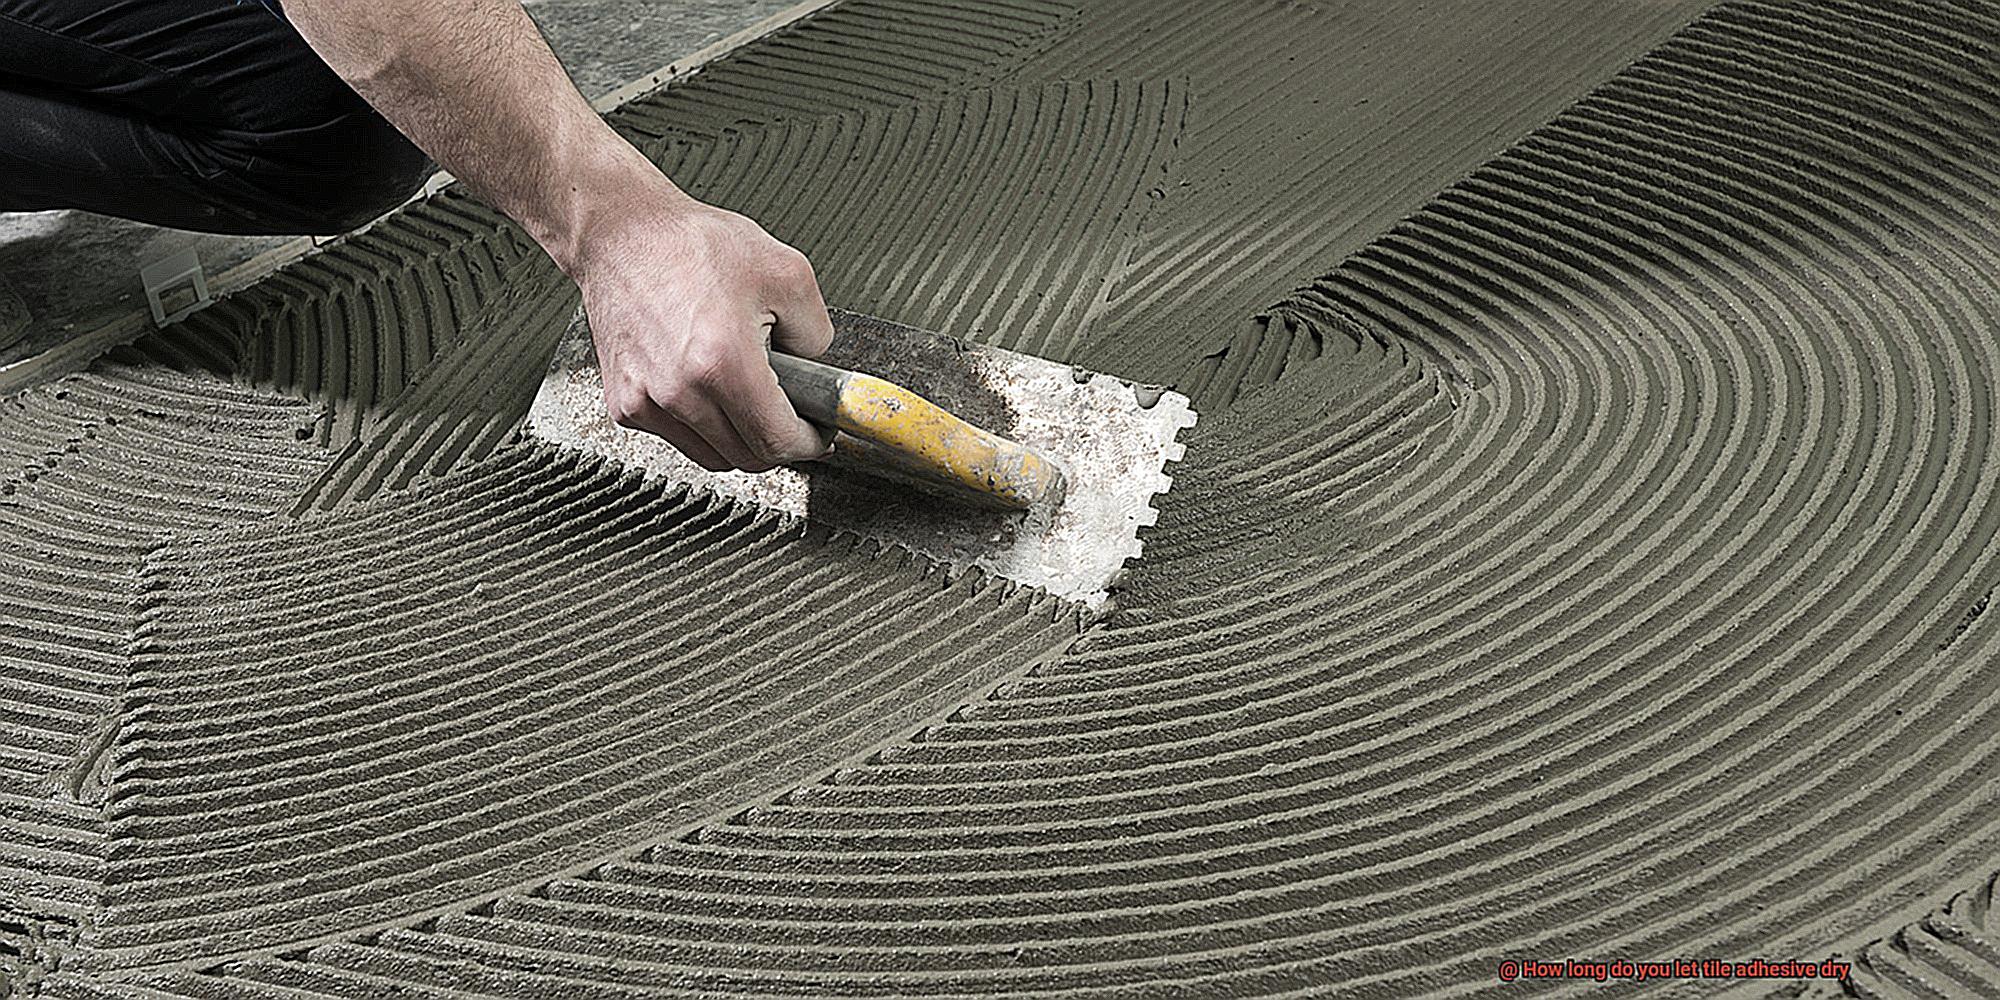
The secret behind the strength of tile adhesive lies in its composition. It’s typically made from a blend of cement, sand, and additives. The cement provides the adhesive quality, allowing it to stick to both the tile and the surface.
The sand adds strength and stability to the mix, ensuring a sturdy bond that can withstand the test of time. Additives are used to enhance various properties such as workability, drying time, and water resistance.
Forms of Tile Adhesive:
Tile adhesive comes in two main forms: powder-based adhesives and ready-to-use pre-mixed adhesives. Powder-based adhesives require mixing with water before use, giving you more control over the consistency and adjustability during installation.
On the other hand, pre-mixed adhesives are convenient and save time, especially for smaller projects where precision is not as critical.
Drying Time Considerations:
Proper drying time is crucial for a successful tile installation. Most adhesives recommend a minimum of 24 hours for curing, but factors like temperature, humidity, and ventilation can influence the drying process. Higher temperatures and lower humidity levels expedite drying, while cooler temperatures and higher humidity levels slow it down. It’s important to follow the manufacturer’s instructions and consider these factors for optimal results.
Different Types of Tile Adhesives and Their Drying Times
Understanding the different types of tile adhesives and their drying times is essential for a successful and long-lasting tile surface. In this article, we will explore the various types of adhesives available in the market and their corresponding drying times. So, let’s dive in.
Cement-Based Adhesives
The most commonly used type of tile adhesive is cement-based adhesives. Made from a mixture of cement, sand, and additives, these adhesives offer reliable bonding for tile installations.
Cement-based adhesives have a drying time of approximately 24 to 48 hours. However, it’s important to note that factors such as adhesive layer thickness and environmental conditions can affect the drying time.
If you’re looking for a quicker drying option, rapid-setting cement-based adhesives are available in the market, which can dry in as little as 2 to 4 hours. These rapid-setting adhesives are perfect for projects that require a faster turnaround time.
Epoxy-Based Adhesives
For exceptional strength and durability, epoxy-based adhesives are the way to go. These adhesives are created by combining epoxy resin and hardener. While they offer superior bonding properties, epoxy adhesives have a longer drying time compared to cement-based options. It generally takes anywhere from 24 to 72 hours for epoxy-based adhesives to fully cure and achieve their maximum strength. The longer drying time is worth it for areas exposed to heavy traffic or moisture, as epoxy adhesives provide excellent resistance against wear and water damage.
Organic Adhesives
Organic adhesives, also known as mastic adhesives, are made from natural materials like plant resins or animal by-products. These adhesives are easy to work with and have a faster drying time compared to cement-based and epoxy adhesives.
Typically, organic adhesives take around 12 to 24 hours to dry. This shorter drying time makes them a popular choice for smaller tile installations or projects that require a quick turnaround. It’s important to note that organic adhesives may not be suitable for areas exposed to moisture or heavy traffic.
Factors Affecting Drying Time
While the drying times mentioned above are general estimates, it’s important to consider other factors that can affect the drying process. Temperature, humidity, and ventilation play a significant role in how quickly the adhesive dries. Higher temperatures and lower humidity levels can speed up drying, while lower temperatures and higher humidity levels can prolong it.
It’s crucial to follow the manufacturer’s instructions regarding recommended temperature and humidity ranges for optimal drying conditions. Additionally, proper substrate preparation is essential for ensuring good bonding and optimal drying. Make sure the surface is clean, free from dust and debris, and properly primed before applying the adhesive.
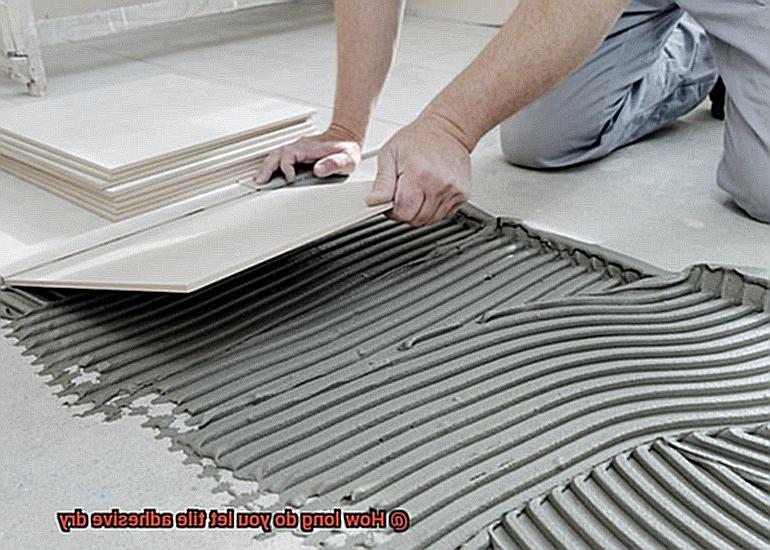
Factors that Affect the Drying Time of Tile Adhesive
Achieving a flawless and long-lasting tile surface involves understanding the factors that affect the drying time of tile adhesive. In this article, we will explore the various factors that influence the drying time of tile adhesive, from the type of adhesive used to environmental conditions and substrate preparation. By understanding these factors, you can optimize drying times and ensure a strong bond between the tiles and the substrate.
Type of Tile Adhesive:
The type of adhesive used is a crucial factor in determining drying time. Cement-based adhesives generally require more time to dry compared to epoxy-based or acrylic-based adhesives. Cement-based adhesives typically take 24 to 48 hours to dry completely, while epoxy-based adhesives can take up to 72 hours. Organic adhesives offer faster drying times of 12 to 24 hours, making them ideal for projects with time constraints.
Environmental Conditions:
The environment in which the adhesive is applied plays a significant role in its drying time. Higher temperatures and lower humidity levels promote faster drying, while cooler temperatures and higher humidity levels can prolong drying times. Proper air circulation is also essential for efficient drying. Ventilation through open windows, fans, or dehumidifiers helps remove excess moisture from the adhesive and speeds up drying.
Tile Size and Thickness:
The size and thickness of the tiles being installed can impact the drying time of the adhesive. Larger and thicker tiles require more adhesive, which may increase drying time. Additionally, thicker tiles can retain more moisture, slowing down the drying process. To expedite drying, consider using thinner tiles or adjusting application techniques accordingly.
Substrate Condition:
The condition of the substrate is crucial for optimal drying times. A smooth and properly prepared substrate allows for better adhesion and quicker drying. Uneven surfaces or excessive moisture can hinder the drying process, requiring additional time for the adhesive to dry completely. Ensure that the substrate is clean, dry, and free from any contaminants before applying the adhesive.
Mixing and Application:
Proper mixing ratios and application techniques are vital for achieving optimal drying times. Following the manufacturer’s instructions ensures proper bonding and efficient drying. Uneven or excessive application of adhesive can lead to longer drying times. Use a trowel to achieve a uniform thickness of adhesive and avoid over-application.
Ventilation:
Adequate ventilation in the installation area expedites the drying process. Good airflow helps remove excess moisture from the adhesive, allowing it to dry more efficiently. Opening windows, using fans, or employing dehumidifiers can improve ventilation and speed up drying times. Ensuring proper ventilation is particularly crucial in enclosed spaces or areas with high humidity levels.
Manufacturer’s Recommendations:
Always refer to the manufacturer’s guidelines for the specific adhesive being used. Manufacturers provide detailed information on expected drying times under different conditions, serving as a valuable reference for installers. Following these recommendations ensures optimal results and minimizes potential issues during the drying process.
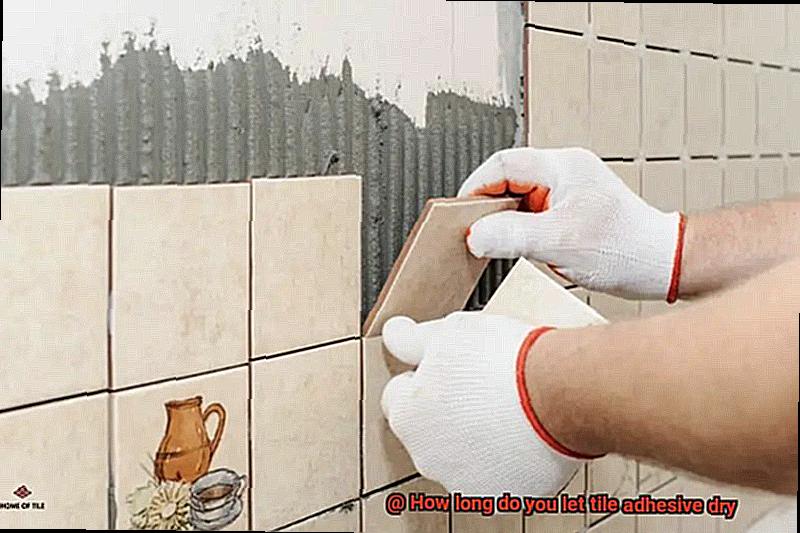
Preparing the Substrate for Tile Installation
Before you dive into the exciting world of tile installation, there’s a crucial step that sets the stage for success – preparing the substrate. This often overlooked process is the secret to achieving a flawless and long-lasting tile installation. Today, we will delve into why preparing the substrate is essential and explore the steps you need to follow for a secure and beautiful tile installation.
Step 1: Clear the Path
To begin, bid farewell to any existing flooring material on the substrate. Whether it’s outdated tiles, carpet remnants, or vinyl remnants clinging on for dear life, they all need to go. Once you’ve cleared the way, take a moment to thoroughly clean the surface. Rid it of any dirt, dust, or grease that could hinder proper adhesion. A pristine substrate is key to ensuring that your tiles bond securely and maintain their allure.
Step 2: Level Up
With a clean slate before you, it’s time to assess the levelness of your substrate. Uneven surfaces can cause headaches during tile installation, leading to unsightly cracks and uneven tiles. Employ a straightedge or level to inspect for any high or low spots. Fear not if you uncover significant variations. Utilize self-leveling compounds or adjust thinset in specific areas to remedy these imperfections. By leveling up your substrate, you lay the groundwork for a harmonious tile installation.
Step 3: Patience is Virtuous
Before embarking on your tile installation journey, exercise patience by allowing your substrate ample time to cure fully. The curing time varies depending on the type of substrate. Concrete substrates generally necessitate at least 28 days of curing, while plywood may require different durations. During this period, shield your substrate from moisture and excessive humidity using protective measures like plastic sheeting or dehumidifiers. This patience will pay off, ensuring that your tiles adhere firmly without compromising their integrity.
Step 4: Primed for Success
Now that your substrate is dry and primed for action, it’s time to introduce the magic touch of priming. Primers play a pivotal role in enhancing adhesion and safeguarding against moisture infiltration. Select the appropriate primer based on your substrate material and the type of tile you’re installing. This additional step fortifies the bond between the adhesive and the tiles, securing their place in your design.
Following Manufacturer’s Instructions for Proper Use and Drying Time
Today, we’re diving into the intricate world of tile adhesive, an unsung hero in the realm of home improvement. While we all know that proper preparation is crucial for a successful tile installation, have you ever considered the profound impact of following manufacturer’s instructions and understanding drying time? Prepare to be amazed as we uncover why these seemingly mundane details can make or break your project.
The Importance of Following Manufacturer’s Instructions:

Think of manufacturer’s instructions as your trusty guidebook on the path to perfection. Each adhesive product possesses its own distinct qualities and requirements, demanding strict adherence for flawless results. Neglecting these instructions may result in a litany of unfortunate issues – from feeble bonding to an unsightly finish. Let’s not allow our hard work to dissipate into thin air.
Understanding Different Types of Tile Adhesives:
Not all adhesives are created equal, my friends. Cement-based adhesives, epoxy adhesives, and premixed adhesives boast their own unique properties and drying times. By selecting the appropriate adhesive for your particular project and dutifully following the manufacturer’s instructions, you can forge an unbreakable bond that defies the test of time.
The Lowdown on Drying Time:
Ah, drying time – the waiting game we all love to hate. Yet, let me assure you that this step is a paramount component of a secure tile installation. Drying time refers to the period required for the adhesive to fully cure and solidify, ensuring steadfast tiles that will not budge. Variables such as temperature, humidity, adhesive type, and tile size all wield influence over this crucial phase.
Factors Affecting Drying Time:
Did you know that temperature and humidity can toy with your drying time? Higher temperatures accelerate the process, while chilly conditions extend it. Similarly, high humidity levels hinder drying, while low humidity expedites it. By considering these factors, you can meticulously plan your project and sidestep any unexpected setbacks.
Using a Moisture Meter:
To eradicate any guesswork in determining if your adhesive has adequately dried, consider employing a moisture meter. This invaluable tool gauges the moisture content within the adhesive or substrate, providing a crystal-clear indication of when it’s safe to proceed with further work or tile installation. Trust me – it’s a game-changer that will revolutionize your DIY endeavors.
Additional Considerations:
In addition to dutifully following instructions and mindful consideration of drying time, there are a few extra nuggets of wisdom to bear in mind. Ensure the adhesive is evenly applied and at the correct thickness to evade uneven drying and bonding mishaps. And remember – patience is key. Resist the urge to tread upon or exert pressure on freshly laid tiles until the adhesive has fully cured, thus averting any potential quagmires.
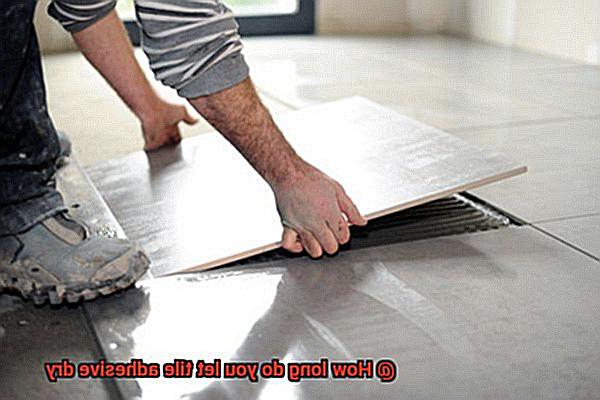
Avoiding Foot Traffic and Heavy Objects on New Tiles Until Adhesive is Fully Dry
Today, we embark on a journey into the captivating realm of tile installation and explore the delicate dance between adhesive drying time and protecting your newly tiled surfaces. We’ll delve into the science behind proper drying techniques, the potential consequences of impatience, and practical measures to avoid foot traffic and heavy objects until your adhesive is fully dry. So, grab a steaming cup of joe, settle into your favorite chair, and let’s dive in.
The Science Behind Drying Time:
Ah, the art of patience. When it comes to tile adhesive, it’s vital to give it ample time to set and harden, creating a tenacious bond between the tiles and substrate. This bond is the essence of longevity and ensures your tiles remain steadfast against the tests of time.
Factors Affecting Drying Time:
Now, my dear friends, let us consider the variables that influence drying time. The type of adhesive used, environmental conditions such as temperature and humidity, as well as tile size and type – all these factors play their part in the grand performance. Remember, each adhesive has its unique requirements, so consult the manufacturer’s instructions for specific guidance.
Avoid Foot Traffic:
Picture this: you’ve just unveiled your magnificent new kitchen tiles, brimming with excitement. But beware. Stepping on them prematurely can spell disaster. Walking on freshly installed tiles before the adhesive has fully dried disrupts the setting process, leading to shifting or even dreaded cracks. To prevent this calamity, cordoning off the area or placing attention-grabbing warning signs will serve as gentle reminders for passersby to keep their eager feet at bay.
Heavy Objects Beware:
Ah, our beloved furniture and appliances – so grand and majestic. Alas, they can wreak havoc on young tiled surfaces if introduced too soon. Placing these weighty objects before the adhesive has fully dried exerts pressure on both the tiles and adhesive, causing sinking or unsightly unevenness. To honor the sanctity of your new tiles, exercise restraint and wait a minimum of 48 hours (or even longer) before allowing heavy objects to grace their presence.
Temporary Protection Measures:
As life would have it, there are moments when we cannot resist treading upon our brand-new tiles or must place objects on them before the recommended drying time has elapsed. Fear not. Temporary protection measures come to our rescue. Imagine sturdy plywood pathways or protective coverings that gracefully distribute weight, minimizing direct pressure on the adhesive. Ah, the beauty of ingenuity.
Final Thoughts:
Dear readers, even after the recommended drying time has passed, remember that the adhesive will continue to cure and strengthen over several weeks. During this period, it is wise to limit foot traffic and heavy loads whenever possible. By embracing patience and prudence, you ensure your new tiles form an unbreakable bond with their substrate, guaranteeing years of durability and breathtaking beauty in your sacred space.
Accelerating the Drying Time of Tile Adhesive
In this blog post, we’ll explore various techniques that can help accelerate the drying time of tile adhesive, allowing you to complete your project efficiently without compromising on quality.
Rapid-Setting Tile Adhesive: Lightning-Fast Bonding
When time is of the essence, rapid-setting tile adhesives come to the rescue. These specially formulated adhesives dry and set at an accelerated pace, sometimes within just a few hours. With shorter open times, they allow you to grout and walk on your tiles sooner. Their quick-drying properties make them an ideal choice when working against the clock.
Environmental Control: Harnessing Nature’s Speed
Take control of your project’s environment to speed up drying time. Elevate room temperature and reduce humidity levels by utilizing fans or dehumidifiers. However, it is vital to stay within the adhesive manufacturer’s recommended temperature guidelines to maintain optimal performance.
Thin-Bed Adhesive: The Need for Speed
Embrace the efficiency of thin-bed adhesives to expedite drying time. Designed for application in thinner layers, these adhesives enhance moisture evaporation and promote faster drying times. Say goodbye to long waiting periods and hello to accelerated project completion.
Surface Preparation: A Solid Foundation for Speed
Prepare your surface diligently for rapid drying. Cleanliness and dryness are paramount to promote better adhesion and faster setting. Remove any dust, debris, or remnants of previous adhesives from the surface to establish a strong bond between the tiles and substrate.
High-Quality Primers: The Accelerators
Give your project a head start by utilizing high-quality primers. These primers act as a barrier between the substrate and adhesive, facilitating better bonding and minimizing excessive moisture absorption. The result? Reduced drying time and enhanced overall performance.
078TKs3EgD8″ >
Conclusion
When it comes to tile adhesive, patience is key. You must allow ample time for the adhesive to dry before moving forward with your tiling project. But how long exactly should you wait? Well, the drying time depends on various factors such as humidity levels, temperature, and the type of adhesive used.
Typically, it is recommended to wait at least 24 hours before walking on or grouting tiles that have been installed with adhesive. This allows the adhesive to fully set and bond with the tiles and substrate. However, in some cases, especially when using fast-setting adhesives, you may be able to proceed sooner.
To ensure a successful outcome, it’s crucial not to rush this step. Rushing can lead to tiles shifting or even popping out later on. So take a deep breath and give your tile adhesive the time it needs to dry completely.
Remember that humidity plays a significant role in drying time. If you’re working in a particularly humid environment, the drying process may take longer than usual. In such cases, consider using dehumidifiers or fans to help speed up the process.
Similarly, temperature affects drying time as well. Cooler temperatures tend to slow down the drying process while warmer temperatures can expedite it. Ideally, aim for an ambient temperature of around 70°F (21°C) during the drying period.
In conclusion, there is no one-size-fits-all answer to how long you should let tile adhesive dry. It’s essential to consider factors like humidity levels and temperature and follow manufacturer guidelines for best results.