Welcome to the world of DIY crafts and upcycling, where creativity knows no bounds. If you’re looking to add a one-of-a-kind touch to your woodwork, sticking bottle caps to wood is an idea that oozes novelty and nostalgia. Whether you’re a seasoned craftsman or just starting out on your creative journey, this guide will take you through the fascinating process of affixing bottle caps to wood in a way that’s simple yet effective.
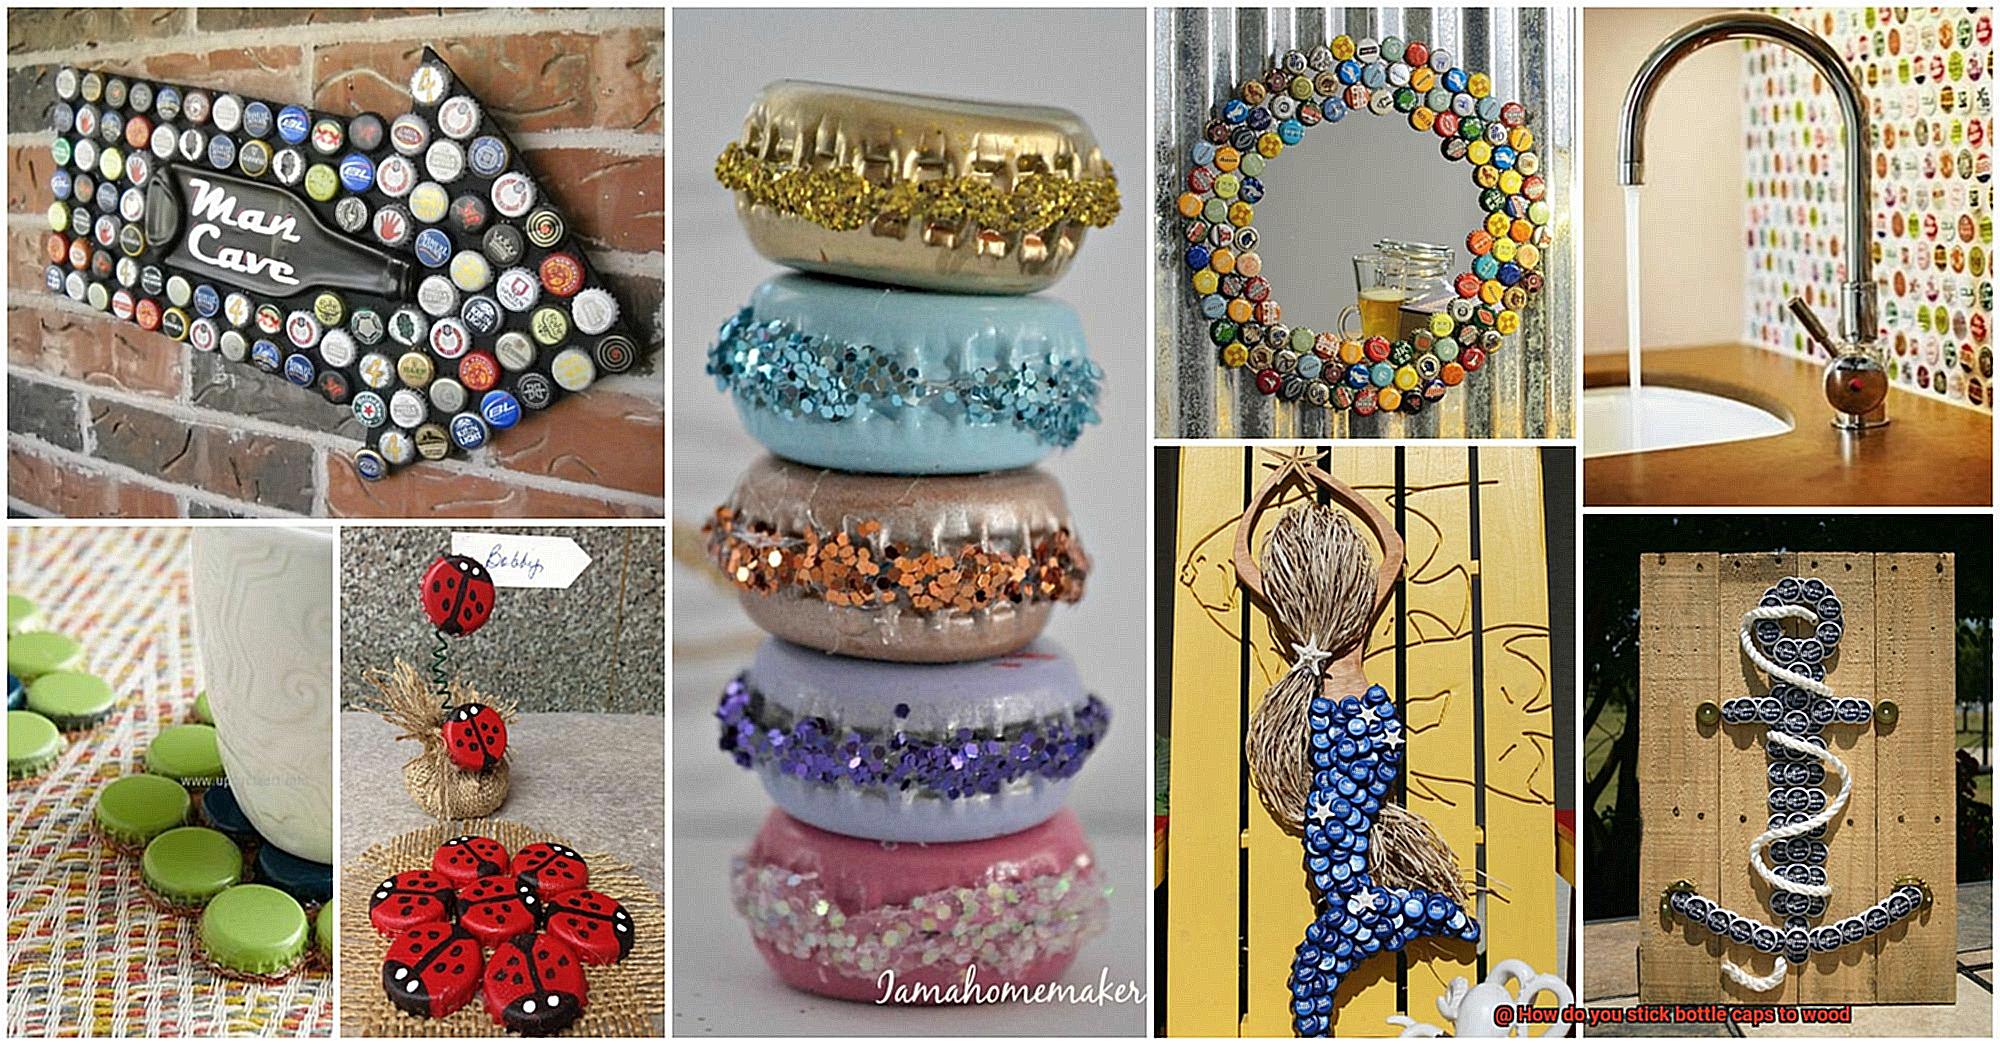
But why bottle caps? Well, these tiny metal or plastic wonders come in all shapes, sizes, and colors, offering endless possibilities for expressing your personal style, showcasing your favorite beverages, or commemorating special events. From man caves to kitchen backsplashes, woodwork adorned with bottle caps brings an eye-catching and eclectic charm to any space.
Now you might be wondering how on earth these little caps actually stay put on the wood surface. Fear not. We’ve got you covered with tried-and-true techniques, adhesive options that stick like glue (pun intended), and essential tips for ensuring a bond that lasts.
In the upcoming sections, we’ll dive deep into the nitty-gritty details of the process. From prepping the wood surface to choosing the perfect adhesive and sealing those bottle caps for long-lasting durability – we’ve got it all covered. So let’s roll up our sleeves and unlock the secrets behind creating a true masterpiece with your bottle cap-adorned woodwork.
What You Need to Know Before Attaching Bottle Caps
Contents
- 1 What You Need to Know Before Attaching Bottle Caps
- 2 Preparing the Bottle Cap and Wood Surface
- 3 Increasing Adhesive Grip with Roughening
- 4 Applying the Adhesive
- 5 Clamping the Bottle Cap in Place
- 6 Curing Time Considerations
- 7 Different Types of Adhesives Used for Sticking Bottle Caps to Wood
- 8 Conclusion
Before attaching bottle caps to wood, there are several important things you need to know. To begin with, gather all the necessary materials and tools. You will need bottle caps, a smooth and clean wooden surface, adhesive or glue, and any additional embellishments or decorations you want to incorporate into your project.
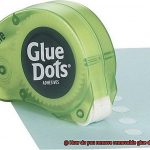
When selecting bottle caps, ensure they are clean and free from any liquid or debris. It’s best to wash and dry them thoroughly before use. Additionally, consider the type of adhesive or glue you will be using. Craft glue, hot glue, epoxy resin, or strong adhesive tapes are all options to consider. Each type of adhesive has its own characteristics and suitability for different surfaces.
Before attaching the bottle caps, it is recommended to test the adhesive on a small area of wood. This ensures proper adhesion without damaging the surface. Prepare the wood surface by lightly sanding it to create a smooth and even base for the bottle caps. This helps improve adhesion and prevents rough edges from interfering with the attachment process.
Plan your design or pattern before starting. Sketch it out on paper or use a digital design tool to visualize it beforehand. Consider using a template or guide for precise placement of the bottle caps, especially for larger projects or intricate patterns.
Once you are ready to attach the bottle caps, apply a small amount of adhesive to each cap and press firmly onto the wood surface. Hold in place for a few seconds to allow the adhesive to bond. If you want to incorporate additional embellishments or decorations, secure them alongside the bottle caps using the same adhesive.
Allow sufficient drying time as per the instructions provided by the adhesive manufacturer. Avoid moving or disturbing the bottle caps until the adhesive has fully dried. To add extra durability, consider applying a clear coat of varnish or sealant to protect the bottle caps and enhance their appearance.
Preparing the Bottle Cap and Wood Surface
Preparing the bottle caps and wood surface is a crucial step in ensuring a strong and long-lasting bond when gluing them together. Let’s break down the process into sub-topics for a clear understanding:
Cleaning the bottle caps:
- Rinse the caps with warm soapy water to remove dirt, dust, and residue.
- Gently scrub the caps with a soft-bristled brush to eliminate grime and oils.
- Dry the bottle caps completely to ensure proper adhesion.
Smoothing the inner rim of the bottle caps:
- Examine the inner rim for sharp edges or burrs.
- Use a small file or sandpaper to smooth out rough areas.
- Ensure a safe and seamless application.
Cleaning the wood surface:
- Use a mild detergent or wood cleaner to remove dirt, grease, and contaminants from the wood.
- Gently scrub the surface with a soft cloth or sponge.
- Rinse thoroughly with water and allow the wood to dry completely.
Sanding the wood surface:
- Smooth out rough patches, splinters, or unevenness on the area where you plan to attach the bottle caps.
- Use fine-grit sandpaper or an electric sander for efficient results.
- Wipe away sanding dust with a clean cloth or brush after sanding.
Applying primer or sealant:
- Consider applying a primer or sealant to enhance adhesion and durability.
- Follow the manufacturer’s instructions for proper application.
- Allow the primer or sealant to dry completely before proceeding.
Increasing Adhesive Grip with Roughening
Increasing adhesive grip with roughening is a scientifically proven technique that can greatly enhance the bond between bottle caps and wood. By creating a rougher surface, we increase the contact area between the adhesive and the wood, resulting in a stronger and more durable bond that can withstand everyday use and handling.
There are several methods available to roughen the wood surface, each with its own benefits. The most common methods include sanding, scraping, or using a wire brush. Sanding the wood with coarse sandpaper is an effective way to remove any smooth or glossy finish, creating a rougher surface that allows for better adhesion. It is important to sand evenly across the entire surface to ensure consistent adhesive grip.
Another method is scraping the wood surface using a knife or scraper. This process creates small grooves and scratches that provide additional grip for the adhesive. Similar to sanding, it is crucial to scrape evenly across the entire surface to achieve optimal results.
Using a wire brush is another effective way to roughen the wood surface. In addition to removing any loose fibers from the wood, it also creates texture that further enhances adhesive grip. This method is particularly useful for certain types of wood that may have more pronounced grain patterns.
Once the roughening process is complete, it is essential to clean off any dust or debris from the wood surface before applying adhesive. This can be done by wiping the surface with a clean cloth or using compressed air to blow away any particles. Ensuring a clean surface is crucial for achieving maximum adhesion.
Applying the Adhesive
Crafting unique and decorative pieces by sticking bottle caps to wood requires a careful and precise process. Here is a step-by-step guide to help you achieve a strong and durable bond:
- Choose the right adhesive: Consider factors such as drying time, strength, and durability when selecting the adhesive. Options like epoxy resin, super glue, or hot glue are commonly used for this project.
- Prepare the surfaces: Clean the bottle caps and wood surface thoroughly to remove any dirt, dust, or grease. Use a mild detergent and water to clean the bottle caps, and lightly sand the wood surface to create a rough texture that promotes adhesion.
- Apply adhesive to the bottle caps: With a toothpick or small brush, apply a small amount of adhesive onto the back of each bottle cap. Start with a conservative amount and spread it evenly across the back of the cap.
- Press the bottle caps onto the wood: Firmly press each bottle cap onto the desired location on the wood surface. Apply gentle pressure for a few seconds to ensure proper bonding. If using hot glue, work efficiently as it dries quickly.
- Allow the adhesive to dry: Follow the manufacturer’s instructions regarding drying time. Avoid touching or disturbing the bottle caps during this time to prevent them from shifting or coming loose.
- Inspect and reapply if necessary: Once the adhesive has dried, inspect each bottle cap to ensure they are securely attached to the wood. Reapply adhesive as needed and repeat the pressing process for any loose or improperly bonded caps.
- Clean up excess adhesive: Use a cotton swab or small brush dipped in an appropriate solvent for the adhesive used to remove any excess adhesive that may have seeped out from under the bottle caps. Be careful not to damage the wood surface.
- Enhance durability if needed: Depending on various factors like temperature and humidity, consider additional measures to enhance the longevity of the bond. Applying a sealant over the bottle caps or using a more robust adhesive can help improve durability.
Clamping the Bottle Cap in Place
When it comes to sticking bottle caps to wood, there is a key step that cannot be overlooked: clamping. This method is not only effective but also essential in ensuring that the caps remain securely attached to the wood surface, with no room for shifting or falling off.
To begin this artistic endeavor, gather the necessary materials: bottle caps, a clean wood surface, adhesive, and trusty clamps. Before anything else, make sure the wood surface is free from any pesky dust or debris that could compromise the adhesion process.
Now, let’s dive into the process. Start by applying a small amount of adhesive to the back of each bottle cap. It is crucial to choose an adhesive that can withstand both metal and wood surfaces. Options like epoxy resin or specialized bonding agents designed for these materials are highly recommended.
Once you have your adhesive applied, carefully position each bottle cap on the desired area of the wood surface. Take your time with this step, arranging them evenly and creating a visually pleasing pattern that will catch everyone’s eye. After placing them just right, press down firmly on each cap to ensure a solid connection between the adhesive and both the cap and wood.
Now comes the star of the show: clamps. Select clamps that suit your project size and have enough pressure to hold those caps firmly against the wood. Strategically position them around the bottle caps, making sure they apply even pressure across every single cap’s surface area.
Gently tighten the clamps until you achieve a secure hold. Be careful not to overdo it, as excessive tightening could spell disaster for both your precious bottle caps and the delicate wood surface. If needed, don’t hesitate to include additional clamps for extra support and stability during the drying process.
Allow the clamps to work their magic for the duration specified by the adhesive manufacturer. Depending on the type of adhesive used, this can range from a few hours to overnight. Patience is key here, as sufficient drying time is crucial to create a rock-solid bond between the bottle caps and wood surface.
Once the adhesive has fully dried, it’s time to remove those clamps carefully. Take your time and ensure that the bottle caps remain firmly attached to the wood. If any caps seem even slightly loose, reapply adhesive and clamp them again until they are securely in place.
Curing Time Considerations
Curing time considerations are crucial when it comes to sticking bottle caps to wood. The duration required for the adhesive to fully dry and bond the materials together directly affects the strength and durability of the bond. Here are some key reasons why curing time should be carefully considered:
- Bond Strength: Rushing the curing process can result in a weaker bond that may easily break or detach over time. Allowing the adhesive to cure completely ensures a sturdy connection that can withstand various stresses and strains.
- Adhesive Properties: Different types of adhesives have specific curing requirements to reach their maximum strength. Understanding the curing time for each adhesive helps you choose the right one for your project and ensures optimal performance. Some adhesives may require longer curing times to develop their full strength, while others may achieve adequate bonding in a shorter period.
- Surface Preparation: Before applying the adhesive, it is crucial to clean and prepare both the bottle caps and wood to remove any contaminants or oils that could hinder adhesion. Curing time provides an opportunity for the adhesive to penetrate and adhere properly to the surfaces being joined, creating a stronger bond.
- Stability and Longevity: Prematurely disturbing or moving the project before the adhesive has fully cured can compromise its integrity and result in failure. Allowing sufficient curing time ensures that the bond remains stable and long-lasting.
Different Types of Adhesives Used for Sticking Bottle Caps to Wood
When it comes to sticking bottle caps to wood, there are several types of adhesives that can be used. Each type has its own unique properties and considerations. Let’s explore these different types in more detail.
Epoxy Resin
Epoxy resin is a popular choice for bonding bottle caps to wood due to its strength and durability. It consists of two components – a resin and a hardener – that are mixed together to create a strong bond. Epoxy resin is particularly effective for bonding metal bottle caps to wood surfaces.
It offers excellent resistance to moisture and temperature fluctuations, making it suitable for both indoor and outdoor applications.
Craft Glue
Craft glue, also known as white glue or school glue, is a versatile adhesive option for sticking bottle caps to wood. It is easy to use and readily available in most craft stores. Craft glue dries clear and offers a strong bond. However, it may not be as durable as epoxy resin, especially when exposed to moisture or extreme temperatures.
Hot Glue
Hot glue is commonly used in arts and crafts projects and can also be used for sticking bottle caps to wood. Hot glue guns melt solid adhesive sticks, allowing you to apply the glue directly onto the wood surface. This adhesive sets quickly and offers good initial bond strength. However, it may not be as long-lasting as epoxy resin or some other adhesives.
Silicone Adhesive
Silicone adhesive provides a flexible bond that can withstand some movement and vibrations. It is particularly useful when there is a need for some flexibility in the bond. However, silicone adhesive may not be as strong as epoxy resin or other types of adhesives, so it may not be suitable for heavy or large bottle caps.
Super Glue
Some people also use super glue or cyanoacrylate adhesive to stick bottle caps to wood. Super glue offers a fast setting time and a strong bond. However, it may not provide the same level of durability as epoxy resin or other specialized adhesives.
When choosing an adhesive, it’s important to consider factors such as drying time, flexibility, water resistance, and temperature resistance. It’s also a good idea to test the adhesive on a small area of the wood surface before applying it to the entire project to ensure compatibility and desired results.
20msO7eqfek” >
Conclusion
In conclusion, incorporating bottle caps into your woodworking projects is a brilliant way to infuse them with personal flair. By employing the right techniques and selecting the appropriate adhesives, you can establish an enduring and robust bond between these caps and the wooden surface.
Before affixing the bottle caps, it is crucial to gather all necessary materials and prepare both the caps themselves and the wood surface. Thoroughly cleansing the bottle caps, smoothing their inner rims, as well as cleaning and sanding the wood surface are indispensable steps in ensuring impeccable adhesion.
Enhancing adhesive grip through roughening is yet another highly effective technique that can significantly bolster the connection between bottle caps and wood. By creating a rougher texture on the wood surface, you expand the contact area for superior adhesion.
The choice of adhesive plays a pivotal role in this process. Epoxy resin, craft glue, hot glue, silicone adhesive, or super glue are commonly employed options that depend on factors such as drying time, strength, flexibility, water resistance, and temperature endurance.
Clamping is an imperative step to guarantee that bottle caps remain steadfastly attached to the wooden surface. By strategically positioning clamps around each cap during drying time, you ensure uniform pressure for a rock-solid connection.
The importance of allowing sufficient curing time should not be underestimated. Granting ample time for the adhesive to dry completely ensures a sturdy bond capable of withstanding various stresses and strains.
All in all, attaching bottle caps to wood demands meticulous attention to detail and unwavering patience. With proper preparation techniques, judicious selection of adhesives, strategic clamping during drying time, and meticulous consideration of curing requirements, you can fashion awe-inspiring works of art that showcase your creativity while imparting an unparalleled touch to your woodworking projects.