Hey there. Are you tired of dealing with those pesky glued-on cactus flowers? We’ve all been there, struggling to clean up the mess after a craft project or trying to give our beloved cacti a fresh look. Well, fear not. I’m here to share some simple and safe techniques that will help you remove those stubborn glued-on flowers without causing any harm to your precious cacti.
In this blog post, we’re going to dive into various methods for getting rid of those annoying glued-on cactus flowers. From using everyday household items to specialized glue removers, we’ve got you covered. Whether you’re a seasoned green thumb or just starting out in the world of cacti, get ready for some expert tips that will have your prickly pals looking as good as new in a jiffy.
So, if you’re ready to bid farewell to those clingy flowers and restore your cacti’s natural beauty, let’s get started.
Assessing the Situation: Identifying the Type of Glue Used and Determining How Firmly Attached the Flowers Are
Contents
- 1 Assessing the Situation: Identifying the Type of Glue Used and Determining How Firmly Attached the Flowers Are
- 2 Preparing the Necessary Tools: Gathering Tweezers, a Small Knife, Rubbing Alcohol or Adhesive Remover, Cotton Swabs or Soft Cloth, and Gloves
- 3 Softening the Glue: Using Heat or Moisture to Loosen Adhesive
- 4 Gently Prying off Flowers: Starting at Base and Lifting Away from Cactus with Care
- 5 Removing Residual Glue: Dabbing Cotton Swab or Soft Cloth in Rubbing Alcohol or Adhesive Remover
- 6 Cleaning and Caring for Cactus: Wiping Away Dust or Debris with Soft Brush or Cloth
- 7 Applying Horticultural Wax to Damaged Areas
- 8 Allowing for Recovery: Placing in Well-Lit Area Away from Direct Sunlight and Avoiding Watering for Few Days
- 9 Conclusion
Removing glued on cactus flowers requires careful consideration of the type of glue used and the level of attachment. It is crucial to approach this delicate task with precision to avoid any damage to the flowers or the cactus itself. In this guide, we will delve into the art of assessing the situation when removing glued on cactus flowers, providing step-by-step guidance for a successful removal process.
Identifying the Type of Glue Used:
To begin, it is important to identify the type of glue used to attach the flowers. Craft glue, hot glue, and epoxy adhesive are commonly used adhesives in this context. Craft glue is water-based and can be easily removed with a mild soap solution or water. Hot glue, a thermoplastic adhesive, hardens quickly and may require additional efforts for removal. Epoxy adhesive forms a strong and permanent bond, making it the most challenging type of glue to remove.
Determining How Firmly Attached the Flowers Are:
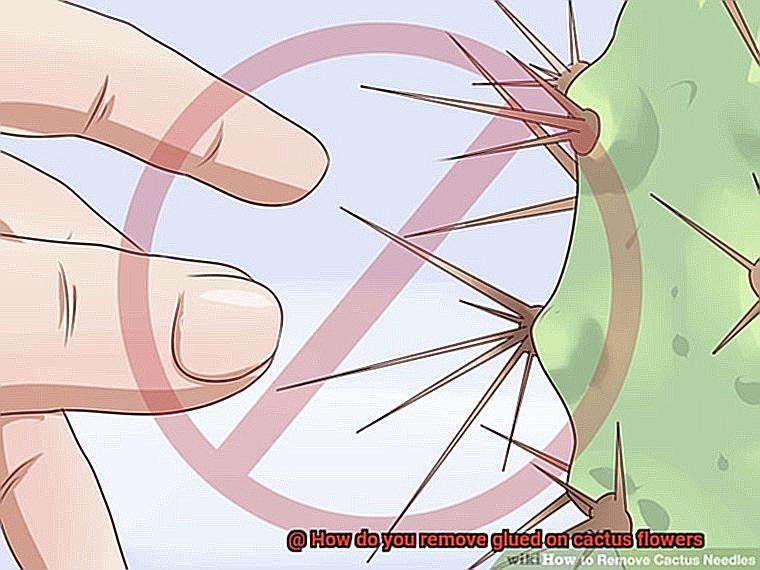
Once you have identified the type of glue used, it is time to assess how firmly attached the flowers are. Gently wiggling or applying slight pressure to the flowers will help determine their attachment level. If they move or wiggle easily, they are likely less firmly attached and can be removed with minimal effort. However, if they resist movement or appear firmly stuck, it indicates a stronger bond that requires special techniques for removal.
The Removal Process: A Gentle Approach:
After assessing the situation and determining how firmly attached the flowers are, it is important to proceed with caution during the removal process. Here are some steps to follow:
- Soften the glue: If the glue is not too strong, you can soften it by applying heat or moisture. Use a hairdryer to blow hot air over the glued area or place a warm, moist cloth over the glue for a few minutes.
- Gently pry off the flowers: Once the glue has softened, use tweezers or forceps to carefully pry off the flowers. Start at the base of each flower and lift it away from the cactus with gentle, steady pressure. Avoid applying excessive force to prevent damage.
- Remove residual glue: After removing the flowers, you may notice residual glue on the cactus or flowers themselves. Use a cotton swab or soft cloth dipped in rubbing alcohol or adhesive remover to gently rub away any remaining adhesive. Be mindful not to rub too vigorously to avoid causing damage.
- Clean and care for the cactus: Take a moment to clean and care for the cactus after removing the glue and flowers. Use a soft brush or cloth to gently wipe away any dust or debris from the cactus. If any parts of the cactus were damaged during removal, apply horticultural wax to protect them.
-
Preparing the Necessary Tools: Gathering Tweezers, a Small Knife, Rubbing Alcohol or Adhesive Remover, Cotton Swabs or Soft Cloth, and Gloves
Don’t worry, we’ve got you covered with a list of essential tools that will make this task a breeze.
First on our list is the trusty pair of tweezers. These little heroes will be your saving grace when it comes to delicately removing those flowers. Look for tweezers with a fine tip that will allow you to grasp the flowers firmly without causing any harm to the cactus or its spines.
Next up is a small knife. I know, it sounds scary, but hear me out. This knife will come in handy for cutting away any excess glue or adhesive residue that may be left behind. Just be sure to handle it with caution and keep your fingers away from the blade. Safety first.
Now, let’s talk about our secret weapons – rubbing alcohol or adhesive remover. These magical liquids are like superheroes when it comes to dissolving glue and making it easier to peel off. Whether you choose rubbing alcohol or adhesive remover, both options will work wonders in breaking down that sticky mess.
To apply the rubbing alcohol or adhesive remover, grab some cotton swabs or a soft cloth. Gently scrub away any residual adhesive using these soft materials. They’ll help prevent any scratching or damage to the cactus while still effectively removing the pesky glue.
Last but certainly not least, don’t forget to protect yourself. Wear gloves during this process to shield your hands from any potential irritants in the adhesive remover or rubbing alcohol. Plus, they’ll keep those prickly cactus spines from giving you an unexpected surprise.
Softening the Glue: Using Heat or Moisture to Loosen Adhesive
Intro:
Are you stuck in a sticky situation, desperately trying to remove glued-on cactus flowers without causing any damage? Fear not, for we have the ultimate guide to help you soften the glue and loosen the adhesive, making this task a breeze. In this blog post, we will explore two effective techniques: using heat and utilizing moisture. So, grab your tools and get ready to free those stubborn blooms.
Technique 1: Using Heat
One surefire method is to harness the power of heat. Grab your trusty hairdryer or heat gun and set it on a low heat setting. Gently apply the warmth to the glued area, melting the adhesive and making it more pliable for removal. Remember, though, too much heat can harm your precious cacti. Keep a safe distance and monitor the temperature closely.
Technique 2: Utilizing Moisture
Another approach involves employing the power of moisture. Soak the glued area in warm soapy water or use a damp cloth to directly apply moisture to the glue. The moisture breaks down the adhesive, loosening its grip on those stubborn flowers. Depending on the glue’s strength, you might need to repeat this process multiple times.
Patience and Gentle Removal
Regardless of whether you choose heat or moisture, patience and gentleness are key during the removal process. Avoid forcing off the flowers or applying excessive pressure, as this can harm both the flowers and the surface they’re attached to. Take your time and work slowly, gradually loosening the adhesive until you can safely remove the flowers.
Cleaning Up
After successfully removing the cactus flowers, don’t forget to clean up any residue left behind by the glue. Opt for a gentle adhesive remover or create a mixture of warm water and mild soap. Stay away from harsh chemicals or abrasive materials, as they can cause damage. Treat both the surface and the cactus with utmost care.
Professional Assistance
Sometimes, seeking professional help becomes necessary, especially if the glue proves stubborn or there’s a risk of damaging the plant. Professional florists or plant specialists possess the expertise and tools to safely remove the flowers without causing any harm.
Gently Prying off Flowers: Starting at Base and Lifting Away from Cactus with Care
Fear not. In this informative blog post, we will delve into the delicate art of prying off these pesky attachments with precision and care. With a little patience and the right technique, you can restore the natural beauty of your cactus without causing any harm. Let’s dive in.
Technique 1: Softening the Glue with Heat
When faced with stubborn adhesive, applying gentle heat can be highly effective. Here’s how:
- Gather your supplies: Prepare a hairdryer set on its lowest setting or find a warm location for your cactus.
- Start at the base: Using a small, thin tool like a toothpick or cotton swab, carefully insert it between the flower and the cactus, starting at the base.
- Apply heat: If using a hairdryer, hold it at a safe distance and direct the warm air towards the glued area. Alternatively, move your cactus to a warm location.
- Gradually pry off: As the adhesive softens, gently lift the flower away from the cactus. Proceed slowly and cautiously to avoid any damage.
Technique 2: Embracing Moisture
Another effective approach involves introducing moisture to loosen the glue. Let’s take a look:
- Prepare your tools: Grab a small spray bottle filled with lukewarm water and a thin tool like a toothpick or cotton swab.
- Start at the base: Just as in technique 1, begin by inserting the tool between the flower and the cactus, starting at its base.
- Spritz with water: Lightly mist the glued area with lukewarm water. The moisture will seep into the adhesive and help weaken its grip.
- Lift away carefully: With a gentle touch, lift the flower away from the cactus, ensuring you don’t damage either of them. Slow and steady wins the race.
Conclusion:
Removing glued-on flowers from your cactus requires delicacy, but armed with patience and these techniques, you can achieve success without causing harm. Start at the base, proceed slowly, and lift the flower away from the cactus to minimize potential damage. If encountering stubborn adhesive, consider using heat or moisture to soften it before removal. Remember, seek professional assistance if needed.
Removing Residual Glue: Dabbing Cotton Swab or Soft Cloth in Rubbing Alcohol or Adhesive Remover
Removing Residual Glue: Dabbing Cotton Swab or Soft Cloth in Rubbing Alcohol or Adhesive Remover
When it comes to removing residual glue from cactus flowers, there are two effective methods that can be employed: using rubbing alcohol or adhesive remover. Both of these substances can dissolve the glue, making it easier to remove. However, it is important to handle the cactus flowers with care and be patient throughout the process.
Technique 1: Rubbing Alcohol
Rubbing alcohol, a common household item found in most medicine cabinets, can effectively dissolve many types of adhesives, including glue. Here’s how to use it:
Gather your supplies: You will need rubbing alcohol, a cotton swab or soft cloth, and mild soap.
- Moisten the cotton swab or cloth: Dip the cotton swab or cloth into rubbing alcohol, ensuring it is moist but not dripping.
- Dab the affected area: Gently dab the area where the glue residue is present, applying enough pressure to allow the rubbing alcohol to penetrate the glue. As you dab, you may notice the glue starting to soften and dissolve.
- Be patient and gentle: Avoid scrubbing too vigorously, as it can damage the delicate cactus flowers. Take your time and continue dabbing until the majority of the glue residue is removed.
- Clean the flowers: After removing the residual glue, wash the affected area with a mild soap and warm water solution to remove any remaining residue from the rubbing alcohol. Rinse thoroughly with clean water and pat dry with a soft towel or allow them to air dry before placing them back on display.
Technique 2: Adhesive Remover
If rubbing alcohol is not readily available, an adhesive remover can also be used to break down glues and adhesives without causing damage to surfaces. Follow these steps:
- Obtain an adhesive remover: Adhesive removers can be found in most hardware stores or online. Read the instructions carefully before using.
- Apply the adhesive remover: Apply a small amount of the adhesive remover onto a soft cloth or cotton swab. Gently dab the affected area, allowing the adhesive remover to sit for a few minutes to penetrate and dissolve the glue.
- Wipe away the residue: Once the glue has softened, use a clean cloth or cotton swab to wipe away the residue. If needed, repeat the process until all traces of glue have been removed.
- Clean and dry the flowers: After removing the residual glue, wash the affected area with mild soap and warm water solution. Rinse thoroughly and pat dry with a soft towel or allow them to air dry before placing them back on display.
-
Cleaning and Caring for Cactus: Wiping Away Dust or Debris with Soft Brush or Cloth
Cleaning and caring for cactus plants is not only important for their appearance but also for their overall health. Dust and debris can accumulate on the surface of the plant, hindering its ability to photosynthesize and potentially leading to pest infestations or diseases. Wiping away this unwanted buildup with a soft brush or cloth is a simple yet effective method to maintain your cactus’s well-being.
When it comes to choosing the right tool, a soft brush is ideal. A paintbrush or toothbrush with soft bristles will gently remove dust and debris without damaging the delicate skin of the cactus. Alternatively, a clean microfiber cloth or an old t-shirt can be used. Just ensure that the cloth is free from any abrasive materials that may scratch the surface.
Before you embark on the cleaning process, protect your hands by wearing gloves. Cactus spines can easily prick your skin, and some plants may have irritants that could cause discomfort.
To clean your cactus with a soft brush, start at the top of the plant and work your way down, covering all sides. Use light strokes, applying minimal pressure to avoid damaging the spines. If you prefer using a soft cloth, slightly dampen it with water before gently wiping the cactus, starting from the top and working downward. Remember not to over-wet the cloth, as excessive moisture can harm certain cactus species.
Beware of directing water onto the plant’s spines or crown while cleaning. Water trapped in these areas can lead to fungal or bacterial infections, compromising your cactus’s health.
Regular cleaning frequency depends on factors such as environmental conditions, cactus type, and dust accumulation rate. Aim to maintain a clean environment to prevent dust build-up and ensure optimal health for your cactus.
Applying Horticultural Wax to Damaged Areas
Caring for your cactus goes beyond the basics of watering and sunlight. It involves pampering and protecting your beloved plants. If your cactus flowers have suffered damage from glue or other mishaps, fear not. The solution lies in horticultural wax. This magical substance can heal and shield those delicate blooms, giving them a well-deserved spa treatment that will rejuvenate their beauty and promote healthy growth. Let’s dive into the process of applying horticultural wax to damaged areas of cactus flowers, unlocking the secrets to reviving your plant’s natural glory.
Step 1: Assess the Damage
Take a close look at your cactus flowers to determine the extent of the damage. If the glue is confined to a small area, you may be able to peel it off gently. However, if it has spread or seeped into the plant tissues, exercise caution.
Step 2: Cleanse the Damaged Area
Prepare a mild soap and water solution to cleanse the affected area of the cactus flower. This step ensures a clean surface for the horticultural wax application, removing any dirt or debris that may hinder its effectiveness. Use a soft cloth or paper towel to pat dry.
Step 3: Apply the Magic Wax
Take a small amount of horticultural wax and warm it between your fingers, making it more pliable for spreading. With gentle strokes, apply a thin layer of wax over the damaged area, ensuring complete coverage. Avoid exerting too much pressure or rubbing vigorously, as this could cause further harm.
Step 4: Allow Time to Work its Magic
Give the horticultural wax time to dry completely before handling or moving the plant. Drying times vary depending on temperature and humidity levels in your growing environment, but typically take about 24 hours. Keep a watchful eye to ensure optimal conditions for healing.
Step 5: Bid Farewell to Wax Residue
When it’s time to bid farewell to the horticultural wax, do so with utmost care. Use a soft, non-abrasive tool like a plastic spoon or wooden stick to gently scrape off any remaining wax. Should any traces persist, dip a cotton swab in rubbing alcohol and delicately wipe them away.
Step 6: Nurture and Observe
After removing the horticultural wax, closely monitor your cactus flowers for any signs of further damage or stress. Provide additional care and attention if needed, as your plant recovers its natural vibrancy.
Allowing for Recovery: Placing in Well-Lit Area Away from Direct Sunlight and Avoiding Watering for Few Days
But before you continue, it’s important to understand the necessary steps for proper care after this process. In this blog post, we will explore the significance of placing your cactus in a well-lit area away from direct sunlight and avoiding watering for a few days to ensure its recovery.
Placing in a Well-Lit Area:
Cacti are sun worshippers, thriving in bright light conditions. To stimulate their natural growth processes, find a spot with ample sunlight. However, immediate exposure to direct sunlight after removing glued-on flowers can be harmful. The adhesive used may have damaged the cactus skin, making it more vulnerable to sunburn. By placing your cactus in a well-lit area away from direct sunlight, you create an optimal environment for recovery and strength regain.
Avoid Watering for a Few Days:
Resist the temptation to water your cactus immediately after removing glued-on flowers. Moisture can introduce risks like rot or infection, especially when the plant’s skin has been compromised by adhesive removal. Cacti are adapted to survive in arid conditions and have specialized water storage mechanisms. Allowing them time to dry out naturally prevents potential complications during the recovery process.
Conclusion:
Proper care is crucial for your cactus’s recovery after removing glued-on flowers. Placing it in a well-lit area away from direct sunlight and avoiding watering for a few days provide an optimal environment for healing and growth. Remember, patience is key in ensuring your cactus thrives. Give your cactus the love and care it deserves, and witness its natural glory restored.
MMcMEbMZfdw” >
Conclusion
Removing glued on cactus flowers can be a tricky task, but fear not. With a few simple steps, you can bid farewell to those stubborn petals and restore your cactus to its natural beauty.
Firstly, gather your supplies. You’ll need a pair of gloves to protect your hands from any prickly surprises, a gentle adhesive remover or rubbing alcohol, cotton swabs or a soft cloth, and some patience.
Carefully inspect the glued area and assess the extent of the damage. Gently peel away any loose petals or debris with your fingers, being mindful not to damage the cactus itself.
Next, apply a small amount of adhesive remover or rubbing alcohol to a cotton swab or soft cloth. Dab it onto the glued-on flowers, allowing it to penetrate the adhesive. Give it some time to work its magic.
Using gentle circular motions, start rubbing the glue away. Be patient and persistent – it may take several attempts before all traces of adhesive are gone. Avoid using excessive force that could harm the cactus.
If necessary, repeat the process until all the glue is removed. Take breaks if needed to avoid frustration or potential damage.
Once you’ve successfully removed all the glue, gently wipe down the area with a clean cloth dampened with water. This will help remove any residue from the adhesive remover or rubbing alcohol.
Finally, step back and admire your handiwork. Your cactus is now free from those stubborn glued-on flowers and ready to shine once again.
Remember, taking care when removing glued on cactus flowers is crucial to prevent any harm to these delicate plants.