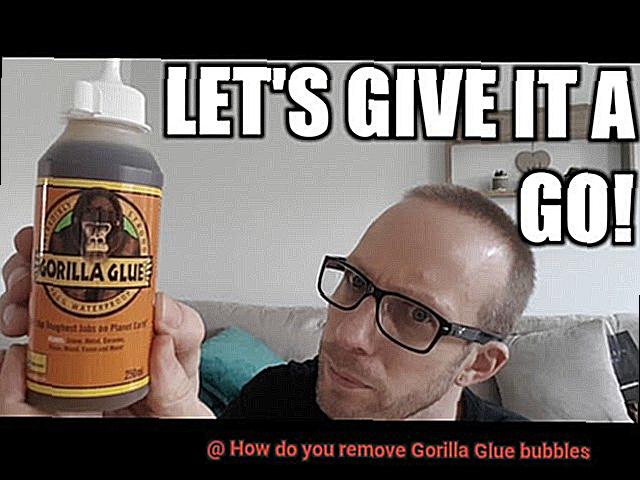
Title: Say Goodbye to Gorilla Glue Bubbles with These Easy Tips.
Introduction:
Hey there, DIY enthusiast. Picture this: you just wrapped up your latest project, using trusty Gorilla Glue to bond everything together perfectly. But wait… what’s that? Annoying bubbles have popped up, ruining your hard work. Ugh. Take a deep breath and relax because I’ve got your back. Dealing with Gorilla Glue bubbles is no biggie when you know the right tricks. In this blog post, I’ll spill the beans on some tried-and-true methods to banish those pesky bubbles once and for all. Whether you’re battling bubbles on wood, plastic, metal, or any other surface, worry not – we’ve got it covered. Get ready to reclaim that sleek and polished finish without breaking a sweat. Let’s jump right in.
What Are Gorilla Glue Bubbles?
Contents
- 1 What Are Gorilla Glue Bubbles?
- 2 Why Do Gorilla Glue Bubbles Need to Be Removed?
- 3 Heat Method for Removing Gorilla Glue Bubbles
- 4 Pin or Needle Method for Removing Gorilla Glue Bubbles
- 5 Sanding Method for Removing Gorilla Glue Bubbles
- 5.1 Step 1: Ensure Proper Curing – The Foundation of Success
- 5.2 Step 2: Begin with Coarse Grit Sandpaper – Taming the Beast
- 5.3 Step 3: Check Your Progress – Unveiling a Flawless Canvas
- 5.4 Step 4: Switch to Finer Grit Sandpaper – Refining Perfection
- 5.5 Step 5: Embrace Patience – The Key Ingredient
- 5.6 Step 6: Clean Up – Reveal the True Beauty
- 6 Reapplying Glue Method for Removing Gorilla Glue Bubbles
- 7 Preventative Measures to Avoid Getting Gorilla Glue Bubbles
- 8 Conclusion
Gorilla Glue is a renowned adhesive known for its strength and versatility. However, the appearance of bubbles during the drying process can be a frustrating issue for users. In this article, we will delve into the concept of Gorilla Glue bubbles, exploring their causes and providing effective methods to remove them. By following these tips, you’ll be able to achieve a smooth and professional finish for your projects.
Understanding Gorilla Glue Bubbles:
Gorilla Glue bubbles are small pockets of air that become trapped within the glue as it cures and hardens. These bubbles can create raised spots or bumps on the glued surface, compromising the overall appearance and smoothness of your project.
Causes of Gorilla Glue Bubbles:
- Excessive glue application: Applying an excessive amount of adhesive can generate excess pressure, pushing air into the glue and leading to the formation of bubbles. To avoid this issue, use Gorilla Glue sparingly and apply it evenly.
- Inadequate surface preparation: Ensuring that the surfaces being bonded are clean, dry, and free from any contaminants or residues is crucial. Debris or moisture on the surfaces can create air pockets when the glue is applied, resulting in bubble formation.
- Environmental conditions: Extreme temperatures or high humidity levels can impact how the glue cures and dries, making it more susceptible to trapping air and forming bubbles. Working in a well-ventilated area with moderate temperature and humidity levels reduces this risk.
Removing Gorilla Glue Bubbles:
- Apply heat: Using a hairdryer or heat gun on a low heat setting softens the glue, allowing the trapped air to escape. Gently press down on the glued area with a cloth or your fingers to flatten out the bubbles.
- Use a pin or needle: If the glue has dried, carefully puncture each bubble with a pin or needle to release the trapped air. Flatten out the glue using a cloth or your fingers.
- Sanding: For larger bubbles, gently sand the affected area with fine-grit sandpaper until it becomes smooth and even. Wipe away any residue with a damp cloth before applying additional finishes or coatings.
- Reapply glue: If other methods are not effective, reapply a thin layer of Gorilla Glue over the affected area, ensuring it is clean and free from excess glue. Apply pressure or use a clamp to create a strong bond and eliminate the appearance of bubbles.
Preventing Gorilla Glue Bubbles:
To minimize the occurrence of bubbles, follow these preventive measures:
- Use Gorilla Glue as directed, applying it in thin layers.
- Avoid excessive squeezing or overapplication.
- Ensure surfaces are clean, dry, and properly aligned before applying the glue.
Why Do Gorilla Glue Bubbles Need to Be Removed?
In this article, we will explore why it is crucial to remove these bubbles when working with Gorilla Glue. We’ll delve into the aesthetic and structural implications, as well as the potential issues they can cause down the line. So, let’s jump right in.
Aesthetic Concerns:
When crafting something with care and attention to detail, the last thing you want is for bubbles to mar the overall appearance of your project. Smooth surfaces can become bumpy or distorted, compromising the desired finish. Nobody wants their hard work tarnished by visible imperfections.
Structural Integrity:
Bubbles trapped within Gorilla Glue weaken the bond, compromising its strength and durability. This means that the adhesive may not hold up as expected over time. Removing bubbles ensures a secure and long-lasting bond that won’t let you down.
Functionality at Stake:
Imagine using Gorilla Glue to seal gaps or fill cracks, only to find that bubbles have created weak points or openings that allow moisture and other substances to penetrate through. This can lead to further damage or deterioration over time, undermining the functionality of your project.
Impact on Subsequent Steps:
If you plan on painting over the glued surface, bubbles can create an uneven base that affects the application and appearance of paint. Your carefully chosen colors may not adhere smoothly or evenly, resulting in an inconsistent finish. Removing bubbles ensures a flawlessly smooth surface for subsequent project steps.
Proper Technique is Key:
While removing bubbles is essential, it must be done correctly to avoid unintended consequences like scratching or weakening the bond further. Take your time and employ appropriate techniques, such as gently pressing and smoothing the adhesive, for a successful outcome.
Conclusion:
Removing Gorilla Glue bubbles is essential for achieving visually pleasing and structurally sound results. It guarantees that the adhesive performs optimally and that your project stands up to its intended function over time. So, say goodbye to those pesky bubbles and hello to flawlessly bonded surfaces.
Heat Method for Removing Gorilla Glue Bubbles
The heat method is here to save the day and banish those bubbles once and for all. Let’s dive into this effective technique and discover how to achieve a flawless finish.
So why do these frustrating bubbles even form in the first place? When Gorilla Glue cures, it expands and creates those unsightly blemishes. But don’t worry, we have a solution. By applying heat to the affected area, we can soften the glue and make it easier to manipulate and remove.
Now, let’s talk tools. The most commonly used tool for this method is a hairdryer. It’s convenient, easily accessible, and does the job perfectly. Set your hairdryer to the highest heat setting, and direct that hot air towards those bubbles. Move the hairdryer back and forth, ensuring every inch of the surface is evenly heated.
No hairdryer? No problem. You can also use a heat gun or a clothes iron. Just be cautious with these tools, as they generate higher temperatures. Keep a safe distance from the surface to avoid any damage or scorching.
As you apply heat, you’ll notice the glue becoming more pliable, making it easier to smooth out and eliminate those stubborn bubbles. Once softened, grab a scraper or a putty knife and gently remove them from the surface. Be mindful not to apply too much pressure and damage the underlying material.
After successfully removing the bubbles, give the area a good cleaning with mild detergent or rubbing alcohol to remove any residue left behind by the Gorilla Glue. And voila. Your project is now bubble-free and looking fabulous.
Remember, if any stubborn bubbles remain, don’t give up. Just repeat the heating process until they’re completely eliminated. Always exercise caution when using heat on sensitive surfaces or materials that may be damaged by high temperatures.
Pin or Needle Method for Removing Gorilla Glue Bubbles
Say goodbye to those pesky Gorilla Glue bubbles with the pin or needle method, a simple yet effective technique that will leave your project looking flawless. Whether you’re a DIY enthusiast or a professional craftsman, this method is a must-have in your toolbox.
So, how does it work? Let’s break it down step by step:
First, gather your materials. You’ll need a small pin or needle with a sharp point. Make sure it’s clean and free from any debris. This ensures that you have the right tool for the job, ready to tackle those bubbles head-on.
Next, locate the bubble. It’s usually quite noticeable, resembling a small raised area on your project’s surface. Once you’ve identified it, it’s time to take action.
Carefully insert the pin or needle into the center of the bubble. Be gentle and precise to avoid any damage. You want to pierce through the bubble without disturbing the surrounding area.
Once the pin or needle is inside the bubble, start applying slight pressure. The goal here is to flatten the bubble and release any trapped air. Imagine you’re gently pushing out a soft spot on a piece of dough.
To distribute the pressure evenly and allow the air to escape more effectively, move the pin or needle in a circular motion as you press down. Picture yourself creating a tiny whirlpool that draws out all the trapped air in its path.
Keep repeating these steps until the bubble has been completely flattened. Take your time and be patient – Rome wasn’t built in a day. This method requires precision and finesse, so don’t rush through it.
Once the bubble is gone, use a clean cloth or paper towel to wipe away any excess glue around the area. This final touch will give your project a neat and polished finish, making it look as if those bubbles never existed.
However, it’s important to note that while this method works well for smaller bubbles, it may not be suitable for larger ones or bubbles near the edge of the glued surface. These situations might require alternative solutions, such as consulting with a professional or reaching out to Gorilla Glue’s customer service for guidance.
Sanding Method for Removing Gorilla Glue Bubbles
Fear not. As an expert in the field, I’m here to reveal the ultimate solution: the sanding method. This technique will transform your surfaces, leaving them smooth and bubble-free, as if they were handcrafted by a seasoned pro. So grab your sandpaper and let’s dive into the art of removing Gorilla Glue bubbles.
Step 1: Ensure Proper Curing – The Foundation of Success
Before embarking on the sanding process, it is vital to allow the Gorilla Glue to fully cure. This crucial step, which typically takes around 24 hours (check product instructions for specifics), ensures that the glue is stable. Attempting to sand before complete curing can lead to disastrous consequences, including further damage or spreading of the glue.
Step 2: Begin with Coarse Grit Sandpaper – Taming the Beast
Armed with a coarse-grit sandpaper (80 or 120 grit), embark on a gentle journey to remove excess glue and smoothen the surface. Hold the sandpaper firmly and employ long, even strokes that follow the natural grain or pattern of your material. Remember, too much pressure can wreak havoc on your masterpiece, so proceed with caution.
Step 3: Check Your Progress – Unveiling a Flawless Canvas
As you diligently sand away, take intermittent breaks to evaluate your progress. Are those bothersome bubbles vanishing? Is the surface becoming silkier? If necessary, continue using the coarse-grit sandpaper until you have banished most of the excess glue.
Step 4: Switch to Finer Grit Sandpaper – Refining Perfection
Once you’ve conquered the majority of the glue, it’s time to switch to a finer-grit sandpaper (220 or 320 grit) to refine the surface even further. Employ the same method of long, even strokes, following the grain or pattern of your material.
Step 5: Embrace Patience – The Key Ingredient
Patience is an invaluable virtue during the sanding process. Take breaks when needed, and regularly assess your work to ensure you are achieving the desired results. Remember, greatness cannot be rushed.
Step 6: Clean Up – Reveal the True Beauty
After sanding, wipe away any residual dust or debris using a clean cloth or brush. For stubborn remnants, lightly dampen a cloth with water or rubbing alcohol to restore the pristine condition of your masterpiece.
Step 7: Apply Finish or Sealer (if necessary) – Shielding Your Triumph
Depending on the material you’re working with, consider applying a suitable finish or sealer after sanding to revitalize the appearance and safeguard the surface. Follow product instructions for optimal outcomes.
Reapplying Glue Method for Removing Gorilla Glue Bubbles
Fear not. In this comprehensive guide, we will reveal the secret to removing Gorilla Glue bubbles using the reapplying glue method. Whether you’re a DIY enthusiast or a seasoned craftsman, this technique will help you achieve flawless results and restore your projects to their original glory.
Materials Needed:
Before we dive into the reapplying glue method, let’s make sure you have all the necessary materials at hand:
Clean cloth or towel
Acetone or nail polish remover
Fresh bottle of Gorilla Glue
Thin tool (toothpick or wooden skewer)
Protective gloves (if necessary)
Step-by-Step Instructions:
Now, let’s walk through the reapplying glue method step by step:
- Prepare the surface: Start by gently wiping away any excess glue or debris around the bubble using a clean cloth or towel. This ensures a clean and smooth working area.
- Dampen the cloth: Dampen a corner of the cloth or towel with acetone or nail polish remover, being careful not to oversaturate it. Excessive liquid can damage certain surfaces, so use moderation.
- Soften the glue: Gently dab the dampened cloth onto the bubble, applying light pressure. This helps soften the glue and makes it easier to remove.
- Lift the bubble: With caution, use a thin tool such as a toothpick or wooden skewer to lift the bubble from the surface. Take care not to scratch or damage the material underneath.
- Reapply fresh glue: Once the bubble is lifted, apply a small amount of fresh Gorilla Glue to the affected area. Use just enough glue to cover the exposed surface and smooth it out with your finger or a small brush.
- Ensure proper adhesion: Press down firmly on the glued area for a few seconds to ensure proper adhesion. This guarantees that the new layer of glue bonds securely to the surface.
- Allow drying time: Let the glue dry completely before handling or using the object again. Refer to the instructions on the Gorilla Glue bottle for specific drying times, typically around 24 hours. Patience is key to achieving optimal results.
- Inspect for remaining bubbles: Finally, inspect the repaired surface for any remaining bubbles. If there are still bubbles present, repeat the reapplying glue method until all bubbles are removed. It’s important to strive for perfection.
Remember Safety First:
Working with chemicals like acetone or nail polish remover requires caution. Always work in a well-ventilated area and consider wearing protective gloves if necessary to ensure your safety.
Preventative Measures to Avoid Getting Gorilla Glue Bubbles
Gorilla Glue, renowned for its exceptional strength and versatility, can sometimes create bubbles during the application process, compromising the overall effectiveness of the bond. But fret not. As an expert in the field, I’m here to equip you with preventative measures that will bid farewell to Gorilla Glue bubbles for good.
Prepare the Surface:
To avoid Gorilla Glue bubbles, start by meticulously preparing the surfaces to be bonded. Rid them of any dust, dirt, or grease that might hinder the adhesive’s performance. A thorough cleaning using a mild detergent and warm water will eliminate contaminants and ensure optimal bonding ability.
Apply Wisely:
One of the primary culprits behind bubble formation is an excess amount of glue. Combat this by applying thin layers of Gorilla Glue evenly across the surface. This allows for proper adhesion without an overflow of glue attempting to escape during curing.
Handle with Tender Care:
Resist the urge to fiddle with or disturb the glued surfaces during the curing process. Poking and prodding introduces air into the bond, leading to bubble formation. Instead, exercise patience and let the glue cure undisturbed according to the manufacturer’s instructions before handling or moving your project.
Create Optimal Conditions:
Temperature and humidity play significant roles in bubble prevention when working with Gorilla Glue. Seek out a well-ventilated work area with moderate temperature and humidity levels. Extreme conditions can negatively impact glue performance and increase the likelihood of bubble formation. By maintaining ideal conditions, you ensure a successful bond devoid of unsightly bubbles.
Apply Pressure Perfectly:
Achieving a bubble-free bond requires applying the right amount of pressure between bonded surfaces. Strive for even and consistent pressure distribution throughout, minimizing the chances of bubble formation. Be cautious of excess pressure, which can force out excessive glue and create bubbles, or inadequate pressure, resulting in a weak bond.
Follow Directions:
Finally, always adhere to the manufacturer’s instructions provided with Gorilla Glue. Each variant may have specific application and curing requirements. By diligently following these instructions, you optimize your results and minimize the risk of encountering bubbles.
QYmZSDjLQ9A” >
Conclusion
Removing Gorilla Glue bubbles can be a tricky task, but fear not.
There are effective methods to tackle this sticky situation. To start, gather your supplies: a plastic scraper, rubbing alcohol, cotton swabs, and a cloth.
Begin by gently scraping the surface of the glue bubble with the plastic scraper. Take care not to damage the surrounding area.
Next, dip a cotton swab into some rubbing alcohol and carefully dab it onto the bubble. The alcohol will help loosen the glue’s grip.
As you continue to dab and scrape, you’ll notice the bubble gradually diminishing in size. Persistence is key here.
Once you’ve successfully removed the majority of the bubble, wipe away any remaining residue with a clean cloth dampened with rubbing alcohol. Voila.
Remember to always follow safety precautions when using chemicals and tools, and test any cleaning method on a small inconspicuous area first.