Title: Preserve Your Alcohol Ink Masterpieces on YUPO: The Ultimate Guide to Sealing
Introduction:
Contents
- 1 What is YUPO Paper?
- 2 What is Alcohol Ink?
- 3 Popular Ways to Seal Alcohol Ink on YUPO
- 4 Preparing the YUPO Paper for Sealing
- 5 Applying a Clear Sealer to the Alcohol Ink Artwork
- 6 Using UV-Protective Spray to Preserve the Artwork
- 7 Creating Textured Effects with Heat Guns or Embossing Tools
- 8 Exercise Caution When Using Heat Guns or Embossing Tools
- 9 Conclusion
Are you ready to take your alcohol ink art on YUPO paper to the next level? Well, buckle up because I’m about to spill the secrets on how to seal your stunning creations and keep them looking flawless for years. In this blog post, we’re diving deep into the process of sealing alcohol ink on YUPO paper, giving you all the tips and tricks you need for professional results.
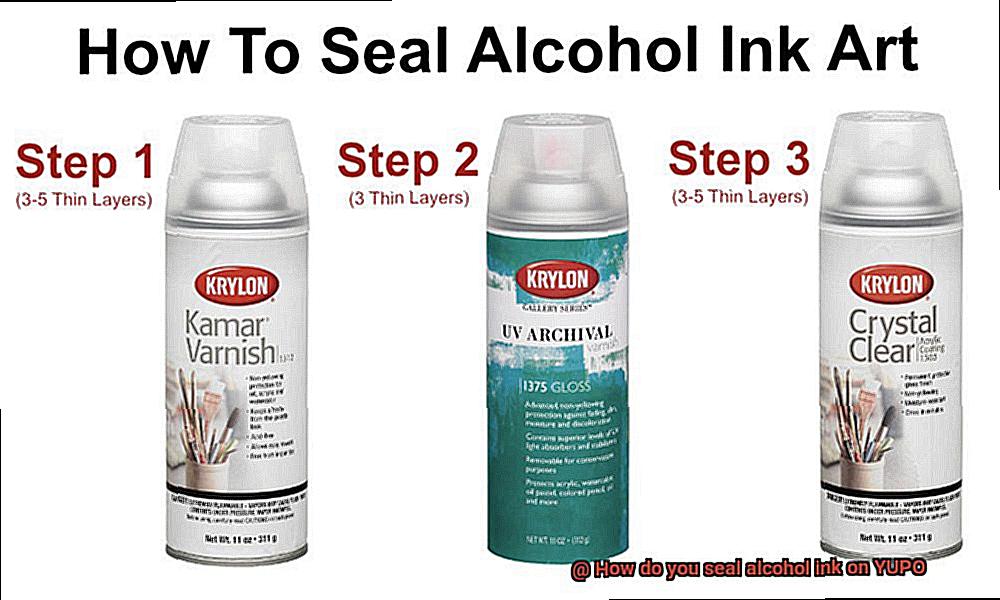
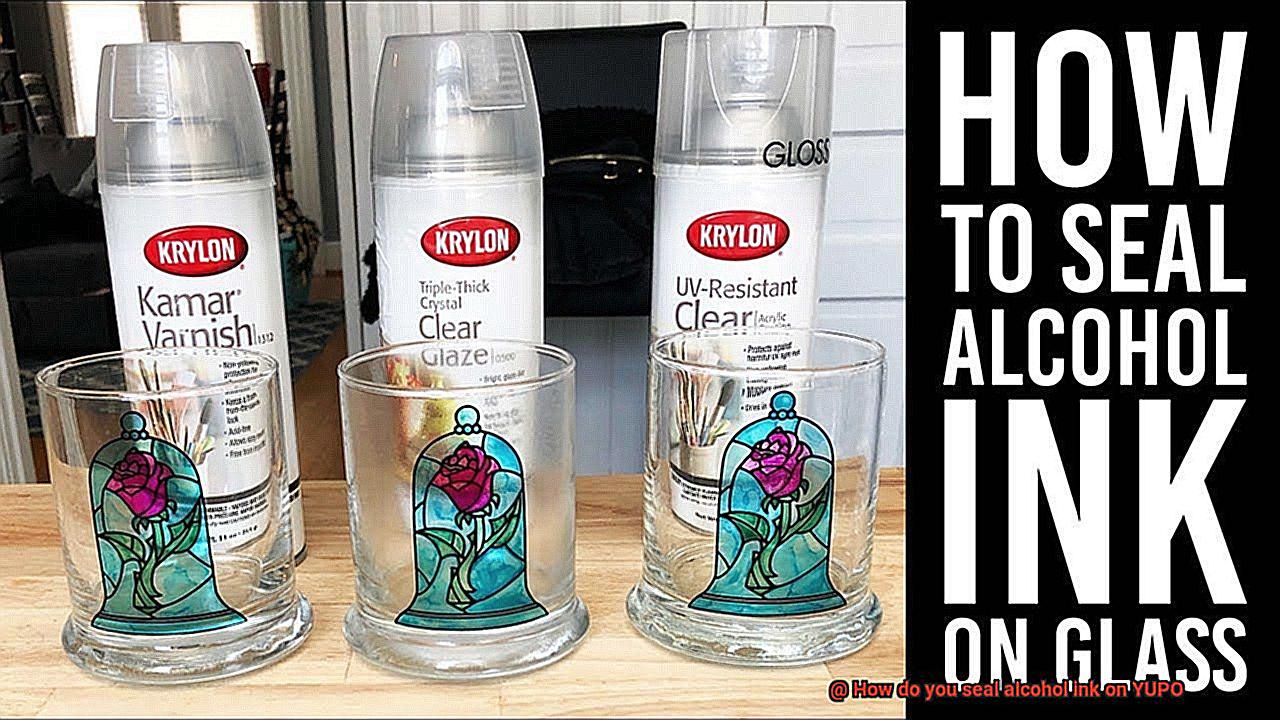
First things first, make sure your artwork is bone dry before sealing. YUPO paper is a bit of a diva when it comes to drying time, so be patient. Once it’s good to go, grab a solvent-based sealer like Krylon Kamar Varnish or Krylon UV-Resistant Clear Coating Spray. Find a well-ventilated area (trust me, you don’t want those fumes in your face) and apply the sealer with smooth sweeps. No pooling or streaking allowed.
Now, let’s talk about avoiding smudging and color bleed – two nightmares for any artist. Speed is key here. Look for a sealant that dries quick like lightning. If you’re feeling fancy, give UV-resistant resin a whirl. It not only protects your art but also adds that glossy finish that screams “I’m a pro.” Apply it evenly with a brush or dropper and follow the manufacturer’s instructions for drying time.
But wait, there’s more. When handling your sealed masterpiece, treat it like royalty. Wear latex gloves to keep those pesky fingerprints at bay. And if you’re stacking artworks (because why have just one?), slip clean cloth or wax paper between layers for extra protection against smudges or accidents.
One last thing – don’t let sunlight or moisture ruin your hard work. Keep your sealed art away from direct sunlight and excessive humidity. Trust me, you don’t want to see your vibrant colors fade or warp over time. Let’s make sure your masterpiece stays breathtakingly beautiful for years to come.
So, my fellow ink artists, it’s time to seal the deal. Grab your sealing products, get those creative juices flowing, and embrace the joy of sealing alcohol ink on YUPO paper like a boss. Your art deserves it, and so do you.
What is YUPO Paper?
Step into the enchanting world of YUPO Paper. Whether you’re an artist or a crafting enthusiast, prepare to be captivated by the possibilities this extraordinary canvas offers. Made from polypropylene, YUPO Paper is a versatile masterpiece in itself, boasting exceptional features that set it apart from traditional paper.
Non-Porous Perfection:
Say goodbye to absorption woes. YUPO Paper’s non-porous surface repels liquid like a charm. It’s a dream come true for alcohol ink artists, as the colors dance and shimmer on the surface, allowing for effortless manipulation and breathtaking effects.
Strength and Durability:
No challenge is too big for YUPO Paper. Its remarkable strength and tear resistance make it an unwavering companion for all your artistic endeavors. Pour, glaze, or layer different mediums with confidence, knowing that this synthetic paper can handle it all.
Weight and Finishes:
YUPO Paper comes in various weights, catering to artists’ individual preferences. Heavier weights offer stability and rigidity, perfect for intricate details that demand precision. On the other hand, lighter weights provide flexibility and ease of handling, enabling artists to let their creativity flow effortlessly. The choice between smooth or textured finishes adds another layer of customization to suit diverse artistic styles.
Forgiving Nature:
Embrace your artistic exploration fearlessly. YUPO Paper’s forgiving nature ensures that mistakes are easily corrected without leaving a trace. Ink doesn’t seep into the surface, allowing you to wipe away errors effortlessly and continue your creative journey unburdened.
Archival Quality:
Preserving your artwork’s vibrancy over time is essential, and YUPO Paper excels in this regard. Bid farewell to yellowing or deterioration that plagues some traditional papers. With YUPO Paper, your creations will remain radiant and intact for generations to come.
Sealing Techniques:
Clear Sealer:
Protect your alcohol ink masterpiece on YUPO Paper with a specialized clear sealer. Choose from matte, satin, or gloss finishes to achieve the desired effect that showcases your artistic vision.
UV-Protective Spray:
Shield your sealed artwork from the fading effects of sunlight or artificial light sources by applying a UV-protective spray. Follow the manufacturer’s instructions for optimal results and rest easy knowing your masterpiece is safeguarded.
Heat Gun or Embossing Tool:
For artists seeking texture and a crackled effect, a heat gun or embossing tool is your secret weapon. Watch as the ink bubbles and cracks under the heat, then seal it with a clear sealer to preserve the captivating texture.
What is Alcohol Ink?
Alcohol ink is an exciting and versatile medium that has captivated artists and crafters alike. This highly pigmented dye-based ink is mixed with alcohol as a solvent, resulting in a stunning fluid consistency that is truly mesmerizing. The intense colors and rapid drying time of alcohol ink make it perfect for a range of creative endeavors, such as painting, stamping, and designing unique pieces.
The key ingredient in alcohol ink is alcohol itself, specifically isopropyl alcohol (rubbing alcohol). Known for its high evaporation rate and compatibility with dye pigments, this alcohol content allows the ink to dry quickly. Artists can effortlessly create layered effects and blend colors seamlessly without enduring long drying times.
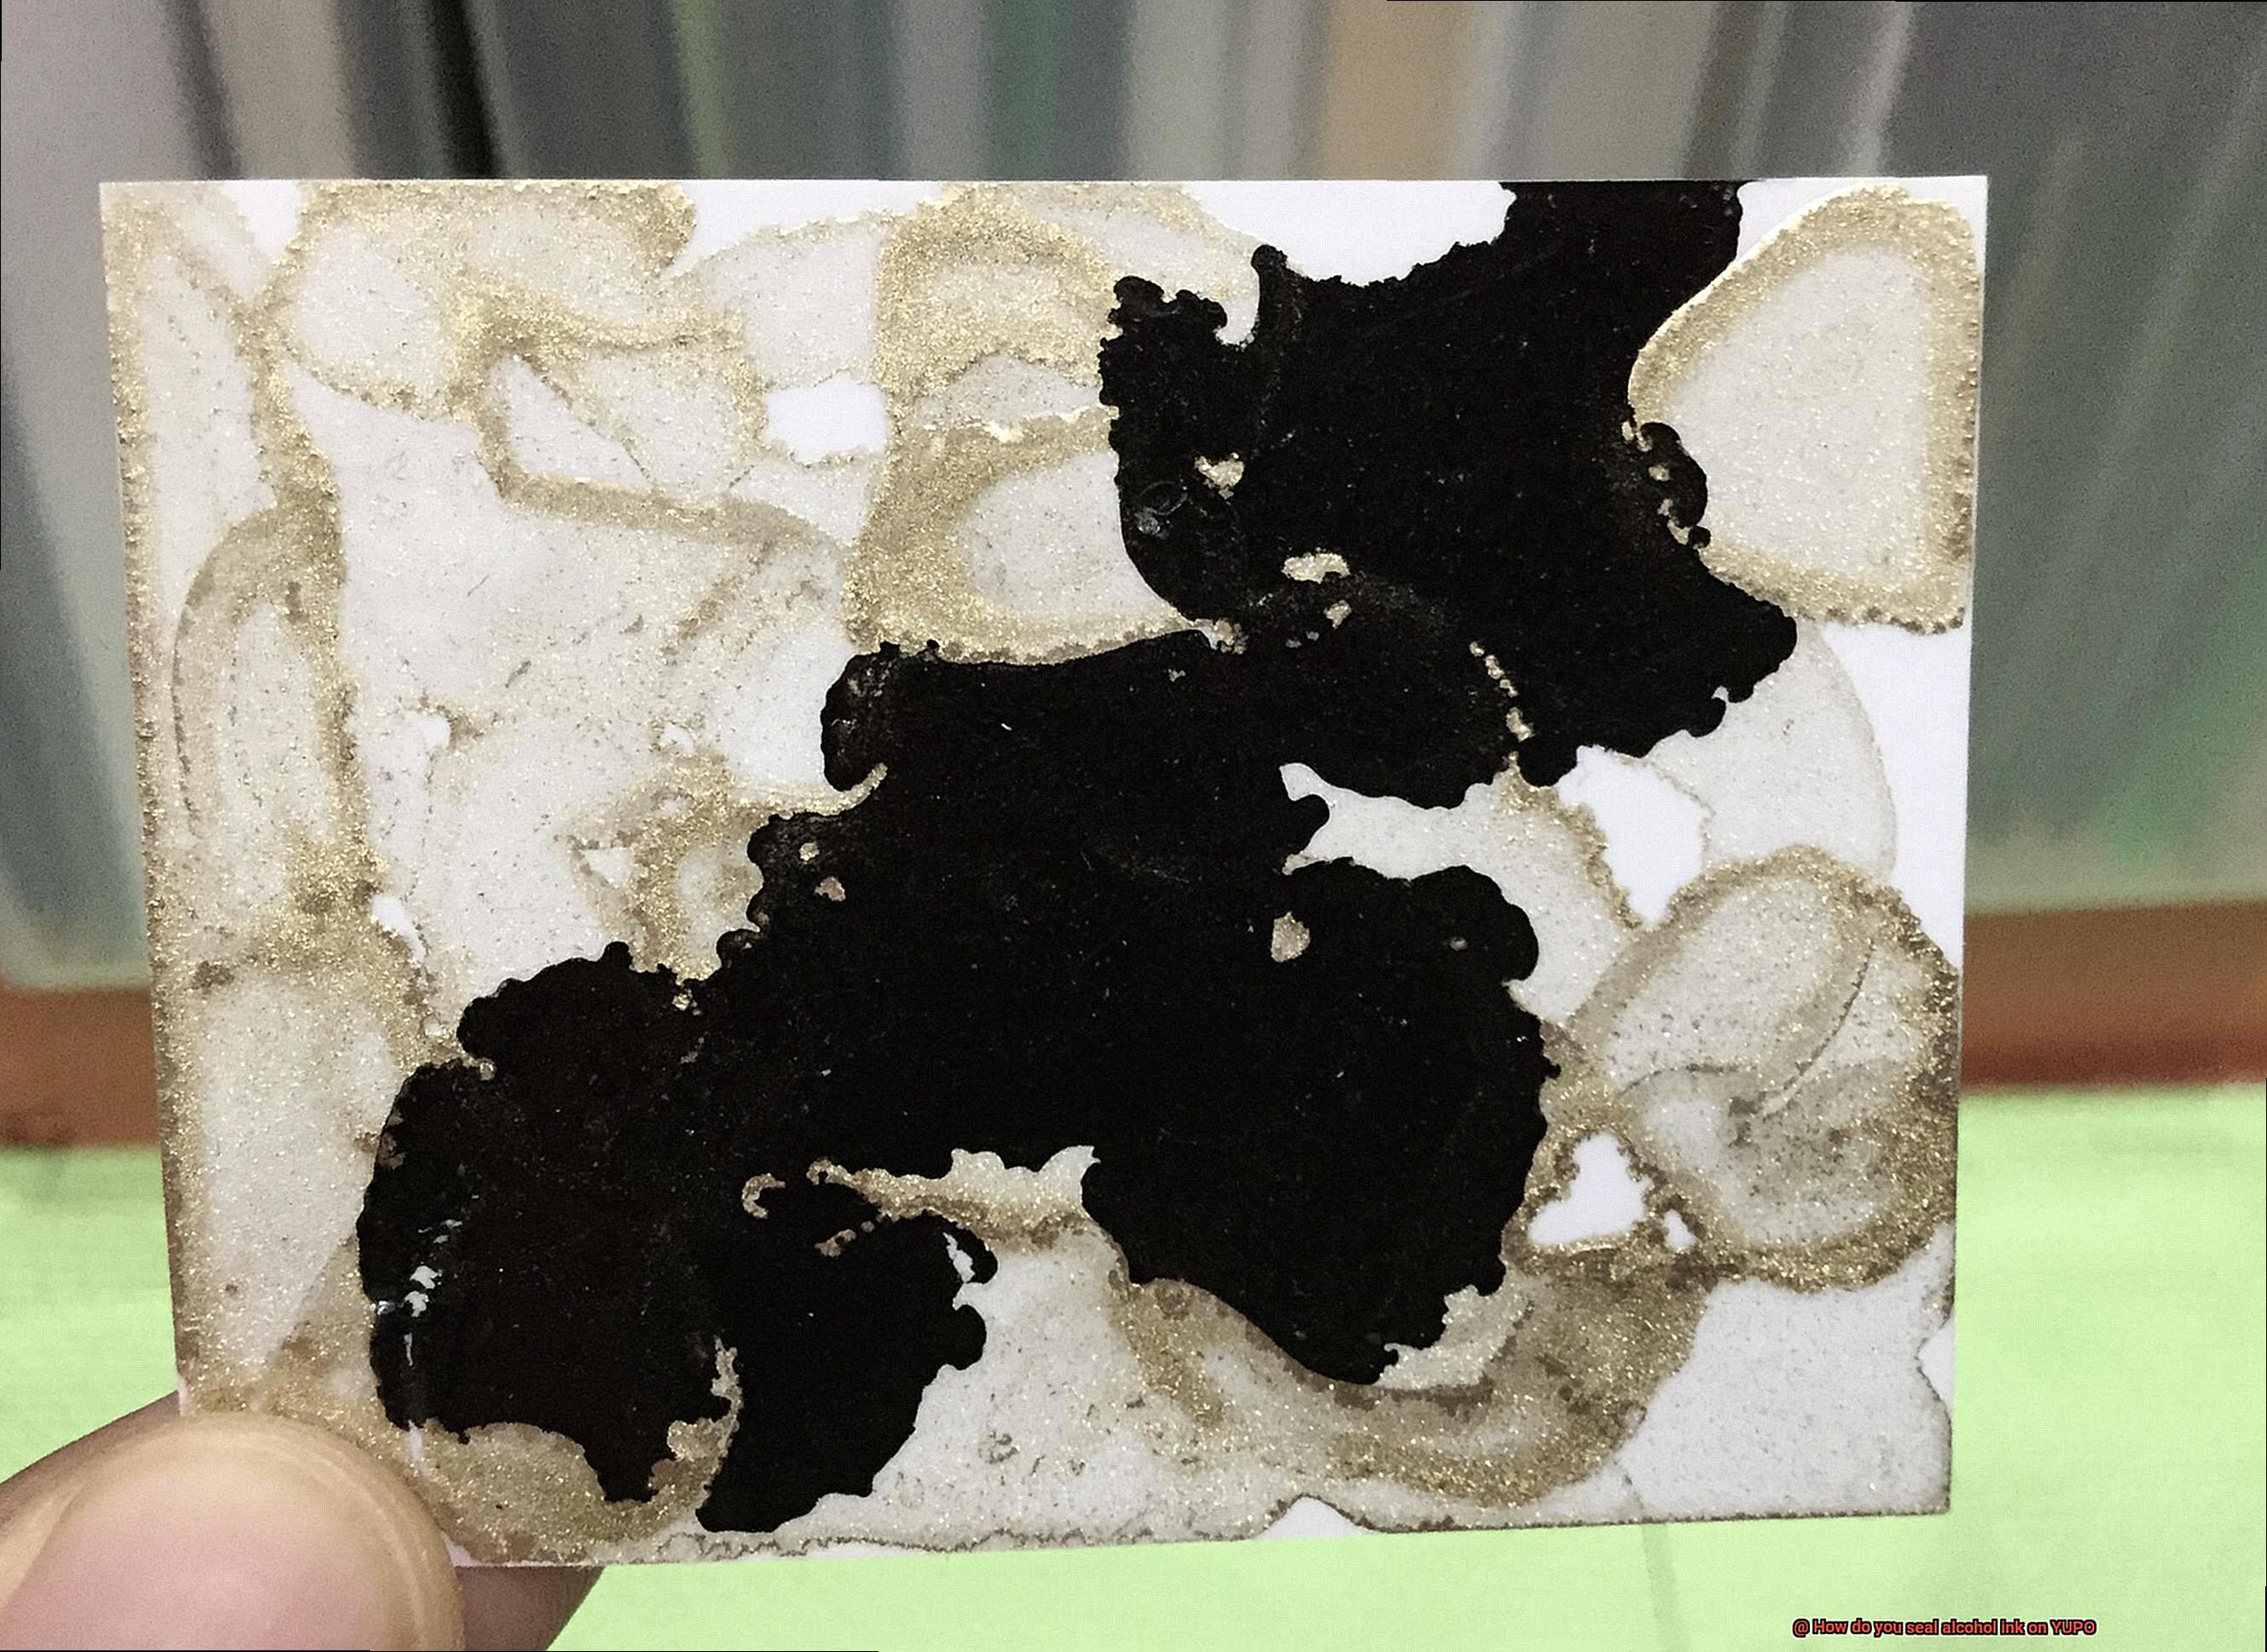
One of the remarkable aspects of alcohol ink is its versatility on different surfaces. This vibrant medium can be applied to non-porous materials like YUPO paper, ceramic tiles, glass, metal, and even plastic. YUPO paper deserves special recognition as a synthetic medium made from polypropylene. Its water and solvent-resistant nature ensures that the alcohol ink spreads smoothly without being absorbed, resulting in vivid and vibrant colors that truly pop.
Artists have endless possibilities when working with alcohol ink. Drip it, pour it, brush it, or even airbrush it onto the chosen surface. Experimentation with different application methods allows for desired effects and textures. Layer the inks to create depth and dimension or blend them together to achieve smooth gradients that will leave you in awe.
One of the magical aspects of alcohol ink is its ability to create stunning abstract patterns and organic designs. The fluid nature of the ink produces unpredictable reactions on the surface, resulting in fascinating textures and patterns as the colors interact. Tilt the surface or blow air across it to guide the flow and create unique compositions that are truly one-of-a-kind.
It’s important to note that alcohol ink is not lightfast or permanent on its own. Without proper sealing, the colors may fade or change over time when exposed to light or environmental factors. Therefore, it is crucial to seal alcohol ink artworks to preserve their vibrancy and longevity. There are various methods of sealing alcohol ink, including using clear sealers in matte, satin, or gloss finishes, applying UV-protective sprays to shield against fading effects, or even using a heat gun or embossing tool for texture and crackled effects followed by sealing with a clear sealer.
Popular Ways to Seal Alcohol Ink on YUPO
If you’re an artist who loves working with alcohol ink on YUPO paper, you understand the importance of properly sealing your artwork. Finding the right sealant is crucial for protecting your masterpiece from smudging, fading, and damage. In this article, we will explore the popular methods of sealing alcohol ink on YUPO paper, providing detailed explanations and tips to help you choose the best option for your artwork.
Spray Sealers: Quick and Even Application
Spray sealers have gained popularity among artists for their quick and even application. Available in glossy, matte, or satin finishes, these sealers not only protect your artwork but also allow you to achieve your desired aesthetic. When choosing a sealer, ensure it is specifically designed for use with alcohol ink and YUPO paper to achieve optimal results.
Brush-on Sealers: Control and Precision
For artists seeking more control over the sealing process, brush-on sealers offer a great solution. Applied in thin layers using a brush, these sealers provide greater precision in achieving the desired level of gloss or matte finish. Additionally, brush-on sealers allow for touch-ups or corrections if needed, ensuring your artwork looks flawless.
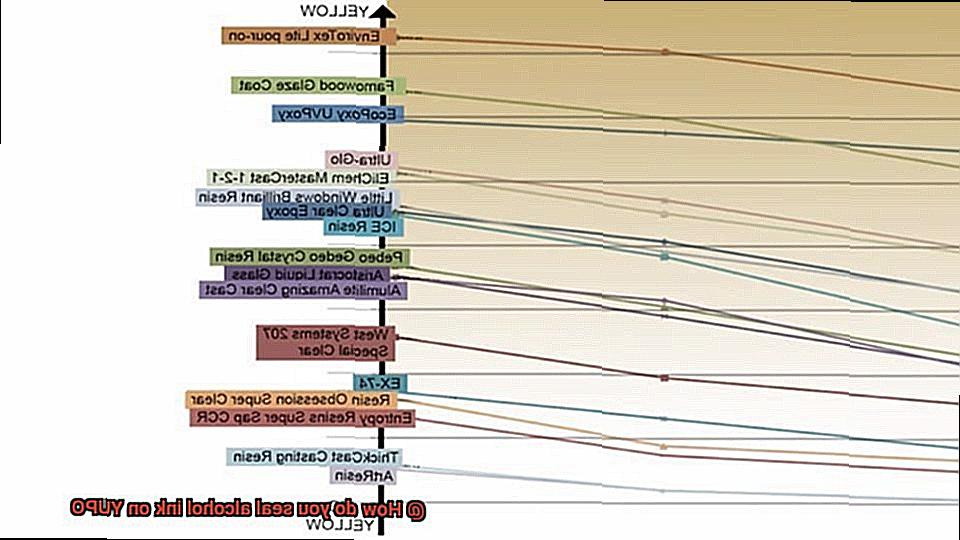
Resin: Thick and Durable Protection
If you desire a thick and durable topcoat with a stunning glossy finish, resin is an excellent choice for sealing alcohol ink on YUPO paper. Whether poured or spread over the artwork, resin creates a mesmerizing visual effect that enhances the vibrancy of colors. However, working with resin requires careful preparation and adherence to safety precautions.
UV-Resistant Varnish: Protection Against Fading
To safeguard your artwork against fading caused by sunlight or artificial light sources, consider using a UV-resistant varnish. This type of varnish adds an extra layer of protection while preserving the vividness of your alcohol ink artwork.
Fixatives: Smudge Prevention
Another option for sealing alcohol ink on YUPO paper is using fixatives or fixative sprays. These products help set the alcohol ink, preventing smudging and ensuring your artwork remains intact. However, it is important to note that fixatives may not offer as long-lasting protection as other sealers. Always use them in well-ventilated areas and follow the manufacturer’s instructions.
Preparing the YUPO Paper for Sealing
If so, then preparing YUPO paper for sealing is an essential step in creating a long-lasting and vibrant masterpiece. Sealing not only protects your artwork from smudging and fading but also adds a beautiful finish to your piece. Let’s dive into the process and explore each step in detail.
Firstly, start by cleaning the surface of the YUPO paper. Use a lint-free cloth or a soft brush to gently remove any dust particles, dirt, or fingerprints that could interfere with the sealing process. This step ensures a pristine surface for the sealant to adhere to.
After cleaning, allow the YUPO paper to dry completely. Moisture can affect the adhesive properties of the sealant, so it’s crucial to ensure that there is no lingering moisture on the surface before proceeding.
Next, test a small area of the YUPO paper with your chosen sealant. This compatibility test will help determine if the sealant interacts well with the alcohol ink and does not cause any unwanted effects like smudging or discoloration.
Now it’s time to choose a sealant specifically designed for use with alcohol inks and compatible with YUPO paper. Options include UV-resistant varnishes, clear acrylic sprays, or resin coatings. Select the one that best suits your needs and preferences.
To apply the sealant, use a soft brush, sponge, or airbrush. Start with thin layers and allow each layer to dry completely before applying the next one. Multiple thin layers ensure even coverage and prevent pooling or unevenness.
After applying the sealant, be patient and allow the YUPO paper ample time to dry completely. The drying time can vary depending on the chosen sealant and environmental conditions. Refer to the manufacturer’s instructions for optimal drying times.
Applying a Clear Sealer to the Alcohol Ink Artwork
Preserving and protecting your alcohol ink artwork on YUPO paper is like adding the final touch to a masterpiece. It’s the cherry on top, ensuring that your vibrant colors stay intact for years to come. So, let’s dive into the process of applying a clear sealer to your alcohol ink artwork and seal the deal.
First things first, patience is key. Make sure your artwork is completely dry before applying the sealer. Depending on how thickly you applied the ink, this may take a few hours or even overnight. Rushing this step could lead to smudging or ruining your artwork, and we definitely don’t want that.
Now that your artwork is dry and ready for the next step, it’s time to choose your clear sealer. There are different options available, such as spray sealers and brush-on varnishes. Spray sealers are great for larger pieces or when you want an even coverage, while brush-on varnishes offer more control and precision.
When selecting your sealer, compatibility is key. Make sure it works well with both alcohol ink and YUPO paper. Some sealers may react with the ink, causing bleeding or color changes – not what we want. To be safe, test the sealer on a small area of your artwork or a test piece before applying it to the entire piece.
Now, let’s get down to business. If you’re using a spray sealer, find a well-ventilated area or head outdoors to avoid inhaling any fumes. Protect the surrounding area with newspaper or a drop cloth to avoid overspray or drips. Hold the can about 12 inches away from your artwork and apply a thin, even coat. Remember, multiple thin coats are better than one heavy coat to avoid pooling or unevenness. Let each coat dry thoroughly before applying the next.
If you’ve opted for a brush-on varnish, grab a soft-bristle brush or foam brush. Start by applying a thin layer in one direction, making sure to cover the entire surface of your artwork. Avoid overworking the varnish to prevent streaking or brush marks. Once again, let the first coat dry completely before applying additional coats if desired.
Now, let’s talk finishes. Some clear sealers may have a slight sheen or gloss, while others provide a matte finish. The choice is yours, my artistic friend. Consider the overall look and feel you want to achieve with your artwork. Read the product labels or consult with art supply professionals to determine the finish of the sealer.
Once your clear sealer is applied and dried, it creates a protective barrier over your alcohol ink artwork, preventing smudging, fading, and general wear and tear. However, remember that it’s still important to handle your artwork with care and avoid excessive exposure to direct sunlight or moisture to ensure its longevity.
Using UV-Protective Spray to Preserve the Artwork
Using UV-Protective Spray to Preserve the Artwork
Preserving artwork is a top priority for artists and collectors alike. One of the most effective methods to protect artwork from damage caused by ultraviolet (UV) light is by using UV-protective spray. This spray creates a protective barrier against harmful UV rays, reducing the risk of fading and discoloration over time.
There are several advantages to using UV-protective spray. Firstly, it is cost-effective compared to other preservation methods such as framing with UV-protective glass or storing artwork in dark storage facilities. UV-protective spray can be applied directly to the artwork, making it a convenient and affordable option for artists and collectors.
Another advantage of using UV-protective spray is its ease of application. The spray can be easily applied using a spray bottle or aerosol can. It is important to follow the manufacturer’s instructions and apply multiple thin layers rather than one thick coat to ensure an even application and avoid any dripping or pooling of the product.
UV-protective spray also provides a long-lasting protective barrier. However, it is important to note that regular reapplication may be necessary, especially if the artwork is exposed to direct sunlight or harsh environmental conditions. This regular maintenance ensures that the protective barrier remains effective in blocking UV rays and preserving the artwork’s quality.
While there are many benefits to using UV-protective spray, there are also some potential drawbacks to consider. One potential drawback is the difficulty in application, especially for larger artworks. Achieving an even application can be challenging, and mistakes can be difficult to correct once the spray has dried. It is recommended to practice on a small test piece before applying the spray to the actual artwork.
Additionally, some artists may prefer not to alter the appearance of their artwork with a glossy or matte finish that some UV-protective sprays may leave behind. It is important to choose a spray that aligns with the desired final appearance of the artwork.
Creating Textured Effects with Heat Guns or Embossing Tools
Creating Textured Effects with Heat Guns or Embossing Tools
Looking to add texture and dimension to your alcohol ink artwork on YUPO paper? Look no further. In this guide, we’ll explore how you can use a heat gun or embossing tool to create stunning textured effects that will take your artwork to the next level.
To get started, gather the following materials:
- YUPO paper
- Alcohol inks
- Heat gun or embossing tool
- Protective gloves
- Ventilated area or a well-ventilated room
Before diving into the creative process, it’s essential to prepare your workspace. Ensure you are working in a well-ventilated area and wear protective gloves to avoid staining your hands.
Now, let’s begin. Apply your desired colors of alcohol ink onto the YUPO paper. You can drop the ink directly onto the paper or use a brush to create unique patterns and designs. Allow the ink to dry completely.
If you choose to use a heat gun, set it to a low or medium heat setting and turn it on. Hold the heat gun about 6-8 inches away from the surface of the YUPO paper. Move it constantly in circular or back-and-forth motions to prevent overheating or scorching. As the heat hits the alcohol ink, watch as it reactivates and starts to move, creating beautiful textures and patterns. Continue heating until you achieve your desired effect.
For those who prefer more precise control, an embossing tool is an excellent option. Hold the tool close to the surface of the YUPO paper and witness as the heat causes the alcohol ink to bubble and create texture. Experiment with different heat settings and distances from the paper to achieve various effects.
Once you have created the desired texture, allow the alcohol ink to dry completely. This usually takes a few minutes. To protect your artwork from smudging or fading, seal it with an appropriate sealant.
Here are some additional tips and tricks:
- Work in small sections at a time to prevent the ink from drying before you can manipulate it with the heat gun or embossing tool.
- Experiment with different colors and layering techniques to create unique textures and patterns.
- Practice on a small test piece before working on your main artwork to get a feel for how the heat gun or embossing tool will interact with the alcohol ink.
Exercise Caution When Using Heat Guns or Embossing Tools
Artists and crafters, I have some valuable advice for you when it comes to using heat guns or embossing tools to enhance your projects. While these tools can elevate your creations by adding detail and texture, it is crucial to exercise caution to ensure the safety of yourself, your materials, and the final result.
First and foremost, carefully read and adhere to the manufacturer’s instructions. Each heat gun or embossing tool may have specific guidelines regarding temperature settings and usage techniques. By following these instructions, you can avoid any potential accidents or damage.
Now, let’s delve into technique. Begin with the lowest heat setting and gradually increase if necessary. This approach allows for better control over the heat and minimizes the risk of warping or distorting delicate materials.
When using a heat gun, keep it in constant motion. A sweeping motion across the surface of your project ensures that the heat is evenly distributed, preventing concentrated heat in one area that could lead to unsightly warping or burning. The same principle applies to embossing tools – keep them moving.
Maintain a safe distance between your heat gun or embossing tool and the material you are working with. Holding them too close can create unwanted bubbles or scorch marks, which can ruin your hard work. Allow your artwork to shine, not sizzle.
Remember, personal safety is paramount. Wear protective gloves and work in a well-ventilated area to minimize exposure to any fumes or chemicals that may be released during the heating process. Prioritize safety at all times.
If you notice any signs of warping or distortion in your material while using a heat gun or embossing tool, immediately cease heating and allow it to cool down. Applying additional heat to damaged areas will only exacerbate the problem.
Once you have finished sealing your masterpiece, allow it to cool completely before handling or framing. This step ensures that the medium has properly set and avoids any smudging or smearing that could occur if it is still warm.
Lastly, when you have completed your project, unplug your heat gun or embossing tool and store it safely. These tools can be dangerous if not handled properly, so keep them out of reach of curious hands or paws.
ofojcZ9i4DY” >
Conclusion
Sealing alcohol ink on YUPO is a crucial step to preserve and protect your artwork. But how exactly do you go about it? Well, fear not, for I am here to guide you through the process.
To seal alcohol ink on YUPO, you have a few options. One popular method is to use a spray sealer specifically designed for use with alcohol inks. These sealers are typically clear and come in aerosol cans, making application a breeze. Simply hold the can about 12 inches away from your artwork and spray evenly in smooth, sweeping motions. Allow the sealer to dry completely before handling or framing your masterpiece.
Another option is to use a brush-on varnish or resin. This method requires a bit more precision and care, as you’ll need to apply the varnish or resin evenly using a soft brush. Make sure to follow the instructions provided by the manufacturer for best results.
Whichever sealing method you choose, it’s important to ensure that your YUPO surface is clean and free from any dust or debris before applying the sealer. Additionally, make sure your artwork has fully dried before sealing to avoid any smudging or bleeding of colors.
Sealing your alcohol ink on YUPO not only enhances its longevity but also adds a protective layer that safeguards against UV damage, moisture, and fading. It gives your artwork that professional finish while allowing its vibrant colors to shine through.