Ever poured your heart and soul into a woodworking masterpiece, only to watch it twist and distort over time? It’s a woodworker’s worst nightmare. But fret not, my friend, because today we’re going to uncover the secrets of keeping glued wood from warping. Get ready to ensure your creations stand strong against the test of time.
Picture this: you’ve just finished an awe-inspiring work of art, only to witness its downfall due to warping. Well, fear no more. We’ve gathered the most crucial tips and tricks that will safeguard your hard work and preserve your craftsmanship in all its glory.
First things first, choosing the right adhesive is absolutely key. We’ll dive into the world of glue types with superior bonding strength and low moisture content – because excessive moisture is one sneaky culprit behind that dreaded warping phenomenon.
But wait, there’s more. Our enlightening guide will take you on a journey through proper wood selection. We’ll clarify which wood species are more prone to warping than others, empowering you to make informed choices that minimize the risk of warping in your projects.
Not only that, we’ll also cover invaluable techniques for preparing and conditioning your wood before gluing. From meticulous joint preparation to precise milling and adequate acclimatization – these steps are essential in combating those pesky warping issues.
So whether you’re a newbie eager to dive into the world of woodworking or a seasoned craftsman looking to solidify your knowledge, join us on this captivating adventure. Unveil the secrets, grab hold of the tools, and bid farewell to warped wood forever.
Stay tuned for our upcoming exploration where we’ll unravel the intricacies, debunk myths, and equip you with the knowledge necessary to conquer that infuriating warping phenomenon. Your treasured woodworking projects will thank you for years to come.
Reasons for Warping in Glued Wood
Contents
- 1 Reasons for Warping in Glued Wood
- 2 Ensuring Properly Dried and Acclimated Wood
- 3 Using a Moisture Meter to Check the Moisture Content of Both Pieces of Wood
- 4 Choosing the Right Glue for the Job
- 5 Clamping Techniques to Prevent Warping
- 6 Reducing Gaps between Two Pieces of Wood
- 7 Applying Enough Pressure during Clamping
- 8 Drying Process and Flat Joints
- 9 Conclusion
Mastering the art of woodworking requires not only skill but also an understanding of the potential challenges that may arise. Warping in glued wood is one such challenge that can leave even the most seasoned woodworkers frustrated. However, fear not. In this article, we will delve into the five primary factors contributing to warping in glued wood and equip you with the knowledge to prevent it from derailing your woodworking projects.
Moisture Imbalance: The Duel of Absorption.
Wood possesses a remarkable ability to absorb and release moisture from its surroundings. However, when one side of the wood absorbs more moisture than the other, it can lead to uneven swelling and unsightly warping. Picture your meticulously crafted project resembling a misshapen banana. To counter this, ensure that both pieces of wood have similar moisture content before initiating the gluing process. This creates a harmonized absorption rate and significantly reduces the risk of warping.
Glue Application: The Art of Bonding.
Gluing is akin to forging an unbreakable bond between wooden pieces. However, if the glue is not applied with precision, all your hard work may crumble like a house of cards. Irregular glue application or gaps in the glue line can create stress points within the wood, ultimately leading to warping. To thwart this calamity, ensure a uniform and continuous application of glue while paying close attention to eliminate any gaps or voids between the glued surfaces. A robust bond guarantees a straight and stable project.
Clamping Pressure: Hold It Tight.
Imagine trying to hold two wooden pieces together with a feeble grip. They would inevitably shift and wiggle, right? The same principle applies when insufficient clamping pressure is exerted during gluing. Gaps between glued surfaces allow for movement, thus paving the way for warping. Thus, it is imperative to tightly clamp your project and apply sufficient pressure to ensure a snug fit. This steadfast grip keeps everything in place as the glue dries, effectively thwarting warping.
Drying Time: Patience is Key.
Visualize this scenario: you are in the midst of crafting a magnificent wooden masterpiece, and anticipation builds to witness the final result. However, rushing through the drying process may spell disaster. Insufficient drying time prevents the glue from reaching its full strength, resulting in weakened bonds and potential warping. To mitigate this risk, exercise patience and adhere to the recommended drying time for your specific glue. This ensures a resilient bond and minimizes the chances of warping in your glued wood project.
Wood Selection: Choose Wisely.
Not all woods are created equal when it comes to warping tendencies. Each wood species possesses unique properties that can influence its susceptibility to warping. While some woods exhibit greater stability and are less prone to warping, others require additional precautions.
Ensuring Properly Dried and Acclimated Wood
Woodworking is a craft that demands precision and finesse, and one of the biggest challenges faced by woodworkers is preventing the dreaded warping of glued wood. But fear not. Today, we are about to unravel the secrets to achieving flawlessly dried and acclimated wood, because no artisan wants their masterpiece to crumble like a house of cards. So grab your cup of coffee, sit back, and prepare to delve into the world of drying and acclimating wood before gluing.
The Essentiality of Proper Drying:
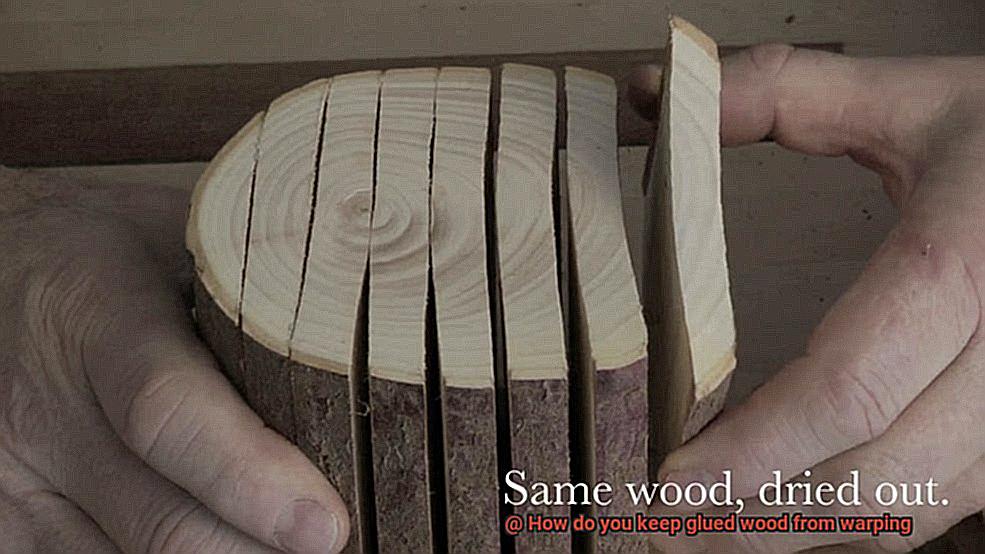
Picture this: you glue two pieces of wood together, only to discover that they have twisted into an unsightly mess. Every woodworker’s worst nightmare. Proper drying is the first step in averting this frustrating catastrophe. Excess moisture within the wood can trigger warping when it is glued, making the removal of moisture absolutely crucial. Air-drying and kiln-drying are two common methods employed for drying wood, each with its own merits and considerations.
The Intricacies of the Drying Process:
Air-drying entails allowing the wood to naturally dry over a prolonged period, while kiln-drying expedites the process using specialized equipment that combines heat and air circulation. Regardless of the chosen method, the ultimate goal is to achieve a moisture content of approximately 6-8%, which is deemed stable for indoor usage. This optimal moisture level diminishes the risk of warping and ensures a robust final product.
Harnessing the Power of Acclimation:
Drying alone cannot guarantee warp-free woodworking; acclimation plays an equally vital role. Wood possesses a unique ability to absorb or release moisture from the surrounding air until it reaches equilibrium with its environment. This phenomenon, known as acclimation, is instrumental in preventing warping once the wood is glued. To acclimate the wood effectively, it is recommended to store it in the same environment where it will be used for a few weeks prior to commencing the gluing process. This allows the wood to adapt to the humidity and temperature conditions, thereby minimizing any fluctuations in moisture content post-gluing.
Using a Moisture Meter to Check the Moisture Content of Both Pieces of Wood
Prepare to embark on a journey that will revolutionize your craft. Today, we delve into the secrets behind using a moisture meter to check the moisture content of both pieces of wood. By mastering this essential technique, your woodworking creations will transcend expectations, standing as timeless testaments to your skill. So, gather your tools, and let us unlock the key to perfect balance in woodworking.
Why Checking Moisture Content Matters:
Imagine pouring your heart and soul into crafting a stunning wooden masterpiece, only to witness it succumb to the dreaded curse of warping. A nightmare for any passionate woodworker. But fear not, for we hold the solution in our hands – the mighty moisture meter. By accurately measuring the moisture content of your wood, you can prevent warping and ensure that your creations stand strong like impregnable fortresses, impervious to the ravages of time.
Decoding the Magic of a Moisture Meter:
A moisture meter may appear deceptively simple, but its power lies in its ability to unveil the secrets hidden within your wood. Armed with two probing sensors, this tool reveals the moisture content lurking beneath the surface. As you insert these probes and patiently await stability, the moisture meter unveils its wisdom, displaying a percentage that speaks volumes about the very essence of your wood.
Crafting with Precision: Taking Accurate Readings
To achieve true mastery, accuracy is paramount. Thus, we must venture beyond single measurements. Instead, embrace multiple readings at various locations on both pieces of wood. This meticulous approach unveils any disparities in moisture content that could sow the seeds of warping later on. Remember, harmony between your pieces is our ultimate goal.
The Sweet Spot: Ideal Moisture Content
Now that we possess the knowledge to wield a moisture meter effectively, let us explore the sacred numerical realm. For indoor use, strive for a moisture content of approximately 6-8%. However, if your creation shall brave the elements outdoors, aim slightly higher, within the range of 12-14%. These sacred thresholds ensure that your wood retains its shape and integrity, regardless of the environment it inhabits.
Choosing the Right Glue for the Job
As we continue our noble pursuit of crafting flawless masterpieces, we must not overlook the pivotal role of glue in preventing the dreaded warping of our beloved wooden creations. Today, we embark on a thrilling expedition into the realm of glue selection, unraveling the intricate factors that guide our choice for each woodworking project. So gather your tools, dear readers, for we are about to unravel the secrets of choosing the perfect glue to defy warping.
PVA Glue: The Trusty Workhorse
In the vast realm of woodworking, polyvinyl acetate (PVA) glue stands tall as a dependable companion – affordable, user-friendly, and boasting an unwavering bond. This versatile glue is ideal for indoor projects with low moisture content, faithfully uniting wood pieces in perfect harmony. However, heed this cautionary whisper: PVA glue lacks water-resistance and shall never venture into the treacherous outdoors or high humidity domains.
Waterproof Glue: Defying Moisture’s Wrath
When our woodworking ventures dare to face nature’s wrath or thrive amidst moisture-laden realms, waterproof glues emerge as our valiant allies. The indomitable duo of polyurethane glue and epoxy resin stand as giants of resilience, their water-resistant prowess safeguarding against warping even in the most sodden conditions. Bid farewell to concerns over outdoor furniture succumbing to nature’s whims or bathroom cabinets surrendering to dampness.
Open Time: Dance with Time’s Grace
Imagine this scene: you toil away on a complex project or maneuver hefty wooden pieces, time slipping through your fingers like fine sawdust. Fret not. Behold the open time or working time of your chosen glue. Certain glues bestow upon you a generous stretch to position and finesse your wooden marvels before they set in their steadfast embrace. A boon for intricate designs demanding meticulous attention and leisurely adjustments.
Clamping Techniques to Prevent Warping
In the captivating world of woodworking, preventing warping is essential to ensure your creations stand the test of time. In our previous section, we explored the secrets of choosing the perfect adhesive. Now, let’s dive into the enchanting realm of clamping techniques. By mastering these techniques, you’ll be able to harness the power of clamps to prevent warping in your glued wood projects. So, grab your tools and let’s embark on a journey of masterful bonding.
Even Distribution of Pressure:
Imagine a warm hug that wraps around every inch of your glued wood project. That’s precisely what you want to achieve with an even distribution of pressure. To achieve this, embrace clamps with broad contact surfaces or use multiple clamps at regular intervals along the glued joint. By spreading the pressure evenly like a gentle caress, you’ll create a uniform bond and minimize any potential stress points that could lead to warping.
Sufficient Clamping Pressure:
Finding the right balance is key when it comes to clamping pressure. You want it to be just right – not too loose and not too tight. Insufficient pressure can result in feeble glue joints, while excessive pressure may compress the wood fibers excessively, leading to deformation. Remember, Goldilocks had it right – aim for a clamping pressure that is just perfect.
Proper Alignment:
Aligning the stars might be difficult, but aligning wood pieces before clamping is crucial. Misalignments or gaps can contribute to warping, so take the time to ensure that the edges of your glued surfaces are perfectly aligned. Don’t forget to clean up any excess glue promptly – it’s like tidying up after a wild party and will help achieve a strong and uniform bond.
Time Considerations:
Patience is a virtue in woodworking, especially when it comes to clamping time. Different glues and ambient conditions require varying durations of clamping. Follow the manufacturer’s instructions carefully to determine the optimal clamping time for your specific glue type. Removing the clamps too early can disrupt the drying process, while leaving them on for too long may lead to excessive compression and potential deformation. Find that sweet spot.
Reducing Gaps between Two Pieces of Wood
Woodworking is a craft that demands precision and finesse. Any woodworker knows the frustration of dealing with gaps between two glued pieces of wood. In this captivating guide, we will explore a range of techniques and considerations to help you achieve flawlessly joined wood with no gaps. So grab your tools and let’s embark on this woodworking adventure.
Perfect Fit, Perfect Bond:
Before applying glue, the key is to ensure an impeccable fit between the pieces of wood. Take advantage of clamps or other tools to hold the pieces firmly in place while the glue sets. Additionally, consider expertly sanding or planing the edges of the wood for a snug fit that leaves no room for gaps. Embrace this attention to detail, and you’ll witness a seamless joint that will impress even the most discerning eye.
The Glue that Holds it All Together:
Not all glues are created equal – choose wisely to prevent gaps from spoiling your masterpiece. Wood glue, also known as carpenter’s glue, is a go-to adhesive for woodworkers due to its exceptional bonding properties with wood and its clear drying finish. Always follow the manufacturer’s instructions for optimal application and adhesion. For projects that require extra strength or resistance to moisture, explore epoxy or polyurethane glues.
Pressure Makes Perfect:
To achieve a bond without gaps, evenly distribute pressure across the glued joint. Employ clamps or strategically positioned weights along the joint to apply consistent pressure. This technique effectively squeezes out excess glue, guaranteeing a tight bond between the pieces.
Taming Environmental Forces:
Wood is a living material that reacts to changes in temperature and humidity. To minimize gaps caused by these environmental factors, create a controlled workspace with stable conditions. Steer clear of extreme temperatures, excessive humidity levels, and direct sunlight. By taming these forces, you’ll prevent unsightly gaps from appearing in your woodwork.
Seal the Deal:
Sealing the wood before gluing serves as a protective shield against moisture, warding off warping and gaps. Apply a coat of sealant or primer to the surfaces that will be glued together. This extra step acts as an impenetrable barrier, ensuring a flawless bond.
Applying Enough Pressure during Clamping
In our previous section, we explored the art of achieving flawlessly joined wood with no gaps. Today, we delve into another crucial aspect of this craft – applying enough pressure during clamping. Join me as we unravel the importance of this technique in preventing wood from warping and discover some practical tips along the way.
Why is applying enough pressure during clamping so important?
When it comes to gluing wood, the right amount of pressure applied during clamping can make all the difference. Let’s take a closer look at the key reasons why this step is so vital:
- Strengthening joints: Weak joints are a woodworker’s worst nightmare. By applying sufficient pressure during clamping, you ensure a strong bond between the pieces of wood. This prevents any potential shifting or bending that could lead to structural instability down the line.
- Even distribution of pressure: Imagine a symphony orchestra playing in perfect harmony. Multiple clamps along the length of the joint create a similar effect, distributing pressure evenly and ensuring that all parts of the wood are pressed together tightly. This harmonious approach minimizes the risk of gaps or unevenness in your project.
- Squeezing out excess glue: Just like Goldilocks and her porridge, finding the right balance is crucial when applying pressure during clamping. You want enough pressure to squeeze out any excess glue but not too much that it causes damage to the wood. Achieving this delicate balance ensures a clean, professional finish.
Practical tips for applying enough pressure during clamping:
- Choosing the right clamp: The world of clamps offers a variety of options – bar clamps, pipe clamps, C-clamps, oh my. Consider factors such as size, reach, and stability when selecting the appropriate clamp for your project. Each type has its own advantages and disadvantages, so choose wisely.
- Using multiple clamps: One clamp may be good, but multiple clamps are even better. To distribute pressure evenly, use multiple clamps along the length of the joint. This technique guarantees a secure bond throughout the wood, leaving no room for warping or shifting.
Drying Process and Flat Joints
Welcome back, woodworking enthusiasts. Today, we embark on an exciting journey into the world of preventing warping in glued wood. Like a skilled conductor guiding an orchestra, mastering drying techniques and harnessing the power of flat joints will bring harmony and stability to your woodworking projects. So, grab your notepad and prepare to unlock the secrets that will keep your creations flawlessly aligned and free from warping.
Drying Techniques: The Slow and Steady Path to Perfection
Picture this: you’ve just delicately glued two wooden pieces together. It’s a moment of triumph, but before you celebrate, there’s a crucial step to consider – the drying process. Properly removing moisture from freshly glued wood is essential to maintain its stability and prevent warping.
Beware, my friends, for rapid drying can lead to disaster. Uneven moisture distribution within the wood causes it to shrink or expand unevenly, ultimately resulting in dreaded warping. To avoid this catastrophe, allow your glued wood to air dry slowly in a controlled environment.
Patience is the key ingredient here. Resist the temptation to hasten the process by subjecting your project to direct sunlight or proximity to a heat source. Such impatience can cause excessive drying and potential warping. So take a deep breath, give it time, and allow nature’s gentle touch to work its magic.
Flat Joints: The Unsung Heroes of Stability
Now that we’ve mastered the art of drying, let’s unveil another secret weapon against warping – flat joints. These unsung heroes play a crucial role in ensuring even stress distribution and weight-bearing across the glued surface, safeguarding your masterpiece from misalignment.
Creating flat joints involves joining two or more pieces of wood together in a perfectly flat position. But wait. Before you embark on the clamping adventure, proper surface preparation is of utmost importance. Straight and smooth edges are the fundamental requirements to achieve a secure and tight fit between the wood pieces.
Remember, my friends, even pressure is your loyal ally. During the clamping process, applying sufficient force ensures that the pieces stay aligned throughout the drying process. It’s akin to a symphony conductor harmonizing each instrument, except in this case, it’s your woodworking project that will be in perfect harmony.
GAyKMotQBDw” >
Conclusion
To prevent glued wood from warping, there are several key steps you can take. First and foremost, it’s crucial to choose the right type of glue for your project. Opt for a high-quality adhesive that is specifically designed for woodworking purposes. This will ensure a strong bond that can withstand potential warping.
Next, proper surface preparation is essential. Make sure both surfaces to be glued are clean, dry, and free from any dust or debris. Any contaminants on the surface can compromise the effectiveness of the glue and lead to warping over time.
Another vital factor in preventing warping is clamping. Apply even pressure across the glued joint by using clamps or other suitable tools. This will help maintain alignment and prevent any shifting as the glue dries.
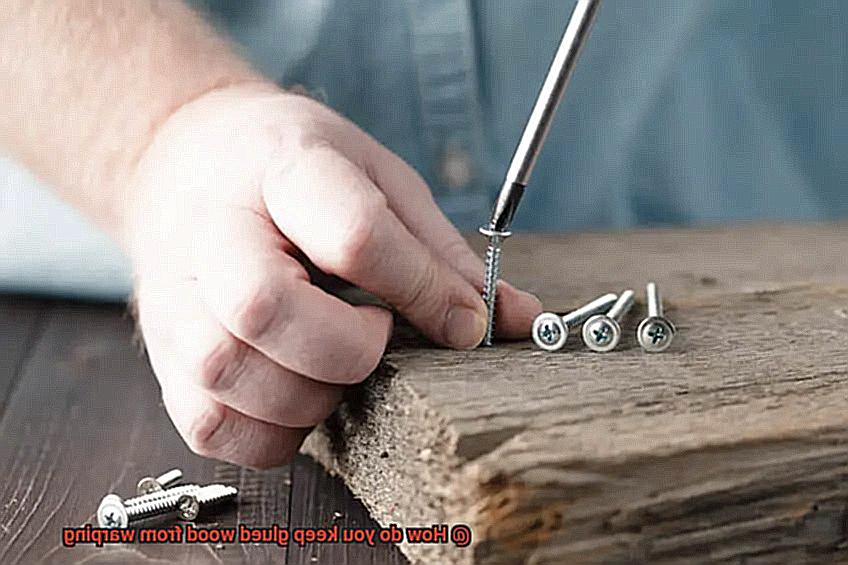
Additionally, consider using reinforcing techniques such as dowels or biscuits in conjunction with glue. These reinforcements add extra strength to the joint and minimize the chances of warping.
Furthermore, controlling humidity levels in your working environment is crucial. Wood tends to expand and contract with changes in moisture content, which can lead to warping. Maintain a stable humidity level in your workshop or storage area to keep your glued wood stable.
Lastly, proper drying time is essential for preventing warping. Follow the manufacturer’s instructions regarding drying times for the specific type of glue you are using. Rushing this process could result in premature stress on the joint and potential warping.
By following these steps diligently, you can greatly reduce the risk of warped glued wood projects.