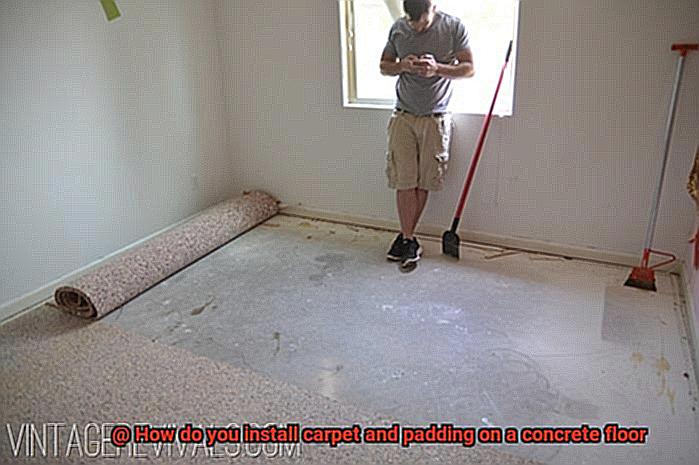
Do you dread walking on your cold and hard concrete floor? Are you yearning for a cozy, inviting living space? Look no further than installing carpet and padding on your concrete floor. Although it may seem daunting at first, with the right tools and a bit of know-how, it can be an easy task.
Carpet and padding offer a comfortable surface to walk on that will transform your space. However, before you can enjoy your new carpet, it’s important to install it correctly. This process includes measuring the room, preparing the surface, laying down padding, and securing the carpet.
To ensure success, you’ll need essential tools such as a measuring tape, utility knife, carpet padding, tack strips and of course – the carpet itself. While patience and attention to detail are required during installation, the end result is well worth the effort.
In this post, we’ll guide you through each step needed to install carpet and padding on your concrete floor. Whether you’re an experienced DIYer or new to home improvement projects – we’ve got you covered with insider tips and tricks for success. So grab your tools and let’s get started creating a warm haven in your home.
Preparing the Concrete Surface
Contents
Before you dive into the installation process, it is crucial to prepare the surface properly. Here are some key steps to follow when preparing the concrete surface for carpet and padding installation:
- Clean the Surface: Start by removing any debris, dirt, or dust from the surface. You can use a broom, vacuum, or mop to ensure that there are no obstacles that could affect the adhesion of the glue used during installation.
- Check Moisture Levels: Excess moisture can negatively impact the installation process and the longevity of the carpet and padding. To check moisture levels, place a plastic sheet on the surface for 24 hours. If there is any condensation on the underside of the sheet after 24 hours, then there may be too much moisture in the concrete. In such cases, use a moisture barrier or sealer before proceeding with installation.
- Repair Cracks and Uneven Areas: Any cracks or uneven areas should be repaired and leveled using a concrete patching compound. This will ensure that your carpet and padding are installed on a smooth and level surface. A smooth surface will prevent any lumps or bumps from developing over time.
- Allow Time for Curing: It’s important to allow sufficient time for the concrete patching compound and any moisture barriers or sealers to fully cure before proceeding with installation. This will ensure that your carpet and padding are securely attached for long-lasting durability.
- Choose Padding and Installation Method: When selecting padding, choose the right thickness of rebond padding according to the type of carpet you will be installing. Then, decide between using tack strips or adhesive for installation.
- Install Padding and Carpet: If using tack strips, place them around the perimeter of the room with a gap between them and the wall. Lay the padding over the strips and then lay your carpet over it with excess material hanging over edges. Trim off excess material using a carpet knife. If using adhesive, apply it evenly across the entire surface of the concrete floor before laying the padding and carpet.
Choosing the Right Padding
Choosing the right padding is a crucial step for a comfortable and long-lasting installation. But with so many options available in the market, it can be overwhelming to choose the right one. Fear not. Let me share some expert advice on what factors to consider when choosing the right padding.
First and foremost, you need to consider the thickness and density of the padding. The thickness of the padding determines how much cushioning it will provide underfoot. If you’re looking for a plush feel, then thicker padding is the way to go. However, thicker padding may not be suitable for high-traffic areas as it may compress over time and lose its bounce. On the other hand, denser padding will hold up better but may not feel as soft underfoot.
Next, consider the material used in the padding. The most common types of carpet padding are foam, rubber, and fiber. Foam padding is the most popular because it’s affordable and provides good cushioning. It’s perfect for residential areas where comfort is a priority. Rubber padding is more durable and can withstand heavy foot traffic but is more expensive. It’s ideal for commercial spaces or high-traffic areas in your home. Fiber padding is eco-friendly and provides excellent insulation but may not be as comfortable as foam or rubber. It’s perfect for those who want to prioritize environmental sustainability.
It’s also important to choose a padding that is compatible with your carpet and installation method. Some carpets require specific types of padding to ensure proper installation and optimal performance. For example, Berber carpets require a low-profile pad to prevent the loops from snagging. Additionally, some installation methods, such as glue-down or double-stick methods, require specific types of padding to ensure a secure bond.
To summarize, here’s a quick checklist of what to look for when choosing the right padding:
- Thickness: Choose thicker padding for a plush feel, but consider density for high-traffic areas.
- Material: Foam is affordable and comfortable, rubber is durable and perfect for high-traffic areas, and fiber is eco-friendly and provides excellent insulation.
- Compatibility: Make sure your padding is compatible with your carpet type and installation method.
Installing the Padding
Let’s delve into the steps involved to ensure a successful installation.
Firstly, it is crucial to create a smooth surface for the padding. Begin by sweeping away any debris and filling in any cracks or holes in the concrete. The last thing you want is an uneven surface that could cause discomfort and instability underfoot.
Once your surface is prepped, it’s time to measure and cut the padding to fit the dimensions of your room. Don’t forget to leave a gap between the padding and the walls to allow for proper carpet tucking later on. Then unroll the padding onto the floor, ensuring that any seams are securely taped together.
To provide additional stability, many installers choose to use adhesive between the padding and the concrete floor. However, it’s crucial to select an adhesive that is suitable for use with both concrete and carpet padding. Follow manufacturer instructions carefully when applying it to ensure a long-lasting hold.
With your padding installed, you’re now ready to lay down your carpet and enjoy your new flooring solution. Remember, installing padding for carpet on a concrete floor requires careful preparation and attention to detail. By taking these steps, you can ensure not only comfort and durability but also a visually appealing floor that will last for years to come.
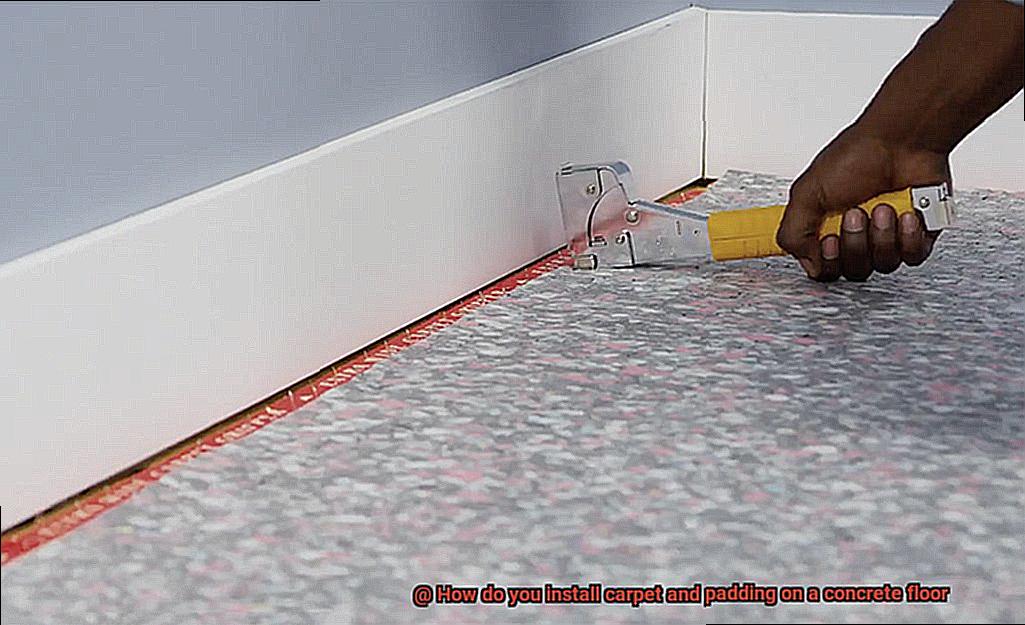
Using Tack Strips for Installation
If you’re looking for an easy and reliable way to install carpet and padding on your concrete floor, using tack strips is the perfect solution. As an expert in this field, I’m excited to guide you through the process of using tack strips for installation on a concrete floor.
The first step is to gather all the necessary materials, including tack strips, padding, and carpet. Measure the length and width of your room to determine how many strips you will need to cover the perimeter. Keep in mind that it’s important to leave a half-inch gap between the tack strips and the wall to allow for any expansion or contraction of the carpet over time.
The next step is to prepare the concrete floor. Make sure it’s clean and dry before laying down the tack strips. Position them around the perimeter of the room, ensuring they are evenly spaced and securely attached. Tack strips are made of either wood or plastic with small nails or tacks protruding from them, providing a stable base for your carpet.
Moving on to the padding, cut it to fit the exact dimensions of your room and lay it over the entire concrete floor. It’s crucial that there are no gaps or overlaps in the padding, so take your time smoothing out any wrinkles or folds before proceeding to the final step.
Last but not least is installing the carpet itself. Begin by stretching it over the tack strips and use a knee kicker or power stretcher to make sure it’s tight and secure. Trim any excess carpet using a carpet knife for a clean finish.
Congratulations on successfully installing your very own carpet and padding on your concrete floor using tack strips. This simple and cost-effective method is perfect for any DIY enthusiast. Just remember, it’s essential to ensure that those tack strips are securely attached to prevent any shifting or movement of your carpet over time.
Applying Adhesive for Installation
To ensure your carpet and padding remain in place and do not shift over time, applying adhesive is a vital step that must be done correctly. As an expert in this field, I have compiled some essential tips and tricks to help you apply adhesive like a pro.
Firstly, it is crucial to ensure that your concrete floor is clean, dry, and free of any debris. Any dust or dirt on the surface can affect the adhesive’s performance, causing your carpet to come loose over time. Therefore, before applying adhesive, sweep and vacuum the floor thoroughly.
There are various types of adhesive available in the market, such as pressure-sensitive adhesive, double-sided tape, and trowel-on adhesive. Choose the one that best suits your needs and follow the manufacturer’s instructions for mixing and applying the adhesive.
Evenly apply the adhesive across the entire surface of the concrete floor using a trowel or roller. This ensures that your carpet and padding adhere correctly to the floor. It’s crucial to follow the manufacturer’s instructions for drying time before proceeding with installation. The drying time can vary depending on the type of adhesive used and environmental conditions such as temperature and humidity.
Patience is key when drying adhesive. Be sure to wait for the recommended time before installing your carpet and padding. Rushing this step may cause unnecessary damage to your newly installed carpet.
Laying the Carpet
It is not one to be taken lightly. Before beginning this step, you must ensure that the padding has been properly installed and secured to the concrete floor. The padding should be completely flat with no wrinkles or bulges, as any imperfections can cause the carpet to become lumpy or uneven.
Determining the direction of the carpet pile is a crucial step to ensure a flawless installation. The arrows on the back of the carpet indicate the direction of the pile, and it is essential to lay all pieces of carpet in the same direction. Here are some reasons why this is important:
- Consistency in texture: If you lay your carpet in different directions, you may notice variations in texture, which can make your carpet look patchy and uneven.
- Uniform color: Some types of carpets have a directional grain that can create a shading effect when installed in different directions. By following the arrow on the back of the carpet, you can ensure that the color and shading are consistent throughout.
- Ease of maintenance: Carpets tend to wear down in areas with high foot traffic. By laying your carpet in the same direction as foot traffic, you can minimize the appearance of wear and tear.
Once you have determined the direction of the pile, it’s time to start laying your carpet. Start from one corner of the room and work your way outwards. Use a utility knife and straight edge to trim any sections that require trimming for a tight fit.
The next step is stretching with a knee kicker. This tool allows you to apply force to the carpet using your knee while providing leverage with a spiked end. Make sure it is securely attached to both the carpet and concrete floor before beginning.
Finally, trim any excess carpet along the edges of the room using a wall trimmer or stair tool for a clean and finished look. By following these steps, your carpet should be securely in place and ready to enjoy.
Trimming Excess Material
Trimming excess material is a crucial step that will help achieve a tight fit against the walls and a clean finish. As an expert in this area, I have compiled some tips to guide you through the process and make it hassle-free.
First things first, you’ll need a sharp utility knife or carpet knife. A dull blade will only make things harder for you, so make sure your knife is sharp before you begin. Starting from one corner of the room, cut along the edge of the wall where it meets the floor. Be cautious not to damage the wall or baseboard.
As you continue cutting around the room, keep your cuts straight and clean. To achieve precision with every cut, maintain a sharp blade throughout the process. If necessary, make several passes with the knife to ensure that you have fully cut through the carpet and padding.
When trimming around obstacles such as doorways or vents, use a straight edge or ruler to guide your cuts and ensure that they are straight and even. This will help you achieve a professional-looking installation that will last for years to come.
Don’t forget to trim any excess material around obstacles and use a carpet tucker or seam roller to tuck in any remaining edges along the walls or obstacles. This final step will help create a clean, finished look.
To sum up, here are some essential tips:
- Use a sharp utility knife or carpet knife
- Cut along the edge of the wall where it meets the floor
- Keep your cuts straight and clean
- Use a straight edge or ruler when trimming around obstacles
- Use a carpet tucker or seam roller to tuck in any remaining edges
Finishing Touches
As a seasoned professional in the flooring industry, I can attest that the finishing touches of any installation are just as important as the initial steps. This holds particularly true when it comes to installing carpet and padding on a concrete floor. Although you may feel relieved after hours of hard work, it’s crucial not to overlook these final steps that can make or break the look and longevity of your new carpet.
To achieve a truly polished and professional finish, here are the essential finishing touches that you need to consider:
- Trim Excess Carpet: Once the carpet and padding have been laid down, it’s time to trim the excess around the edges of the room. Using a sharp utility knife and a straight edge, ensure that your cuts are straight and clean. This step is paramount in achieving a seamless and sophisticated look.
- Install Transition Strips: If your carpet meets another type of flooring, such as hardwood or tile, it’s vital to install transition strips. These not only create a finished look but also prevent tripping hazards. With various styles and finishes available, transition strips can add an elegant touch to your overall design.
- Vacuum Thoroughly: After completing the trimming and installing transition strips, it’s time to vacuum thoroughly. This final step is essential in removing debris and loose fibers that may have accumulated during the installation process. By doing so, you’ll improve the appearance of your carpet and prolong its life.
VdwHDZiuvLc” >
Conclusion
In conclusion, don’t let the idea of installing carpet and padding on a concrete floor intimidate you. With the right tools and techniques, it can be a satisfying DIY project that transforms your space. Proper preparation of the surface is crucial to ensure a successful installation, so take your time with this step. Choosing the right padding is also essential for comfort and longevity, so don’t skimp on quality.
Whether you decide to use tack strips or adhesive for installation, attention to detail is key. Take your time trimming excess material for a tight fit against the walls and a clean finish. And remember, the finishing touches are just as important as the initial steps. Installing transition strips between different flooring types adds an elegant touch to your overall design while vacuuming thoroughly removes debris and loose fibers that may have accumulated during installation.
With these expert tips and tricks in mind, you can create a warm haven in your home that not only looks visually appealing but also provides long-lasting durability.