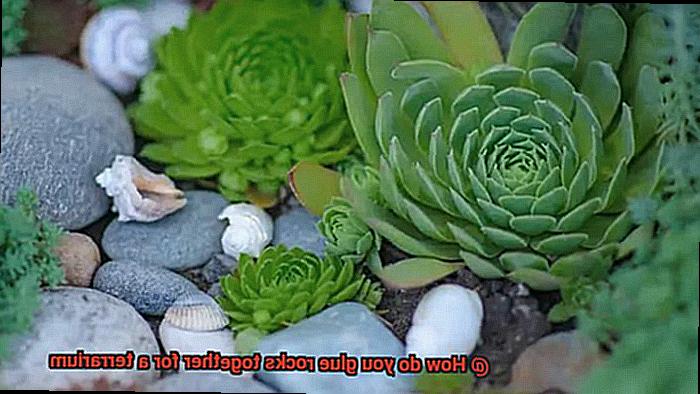
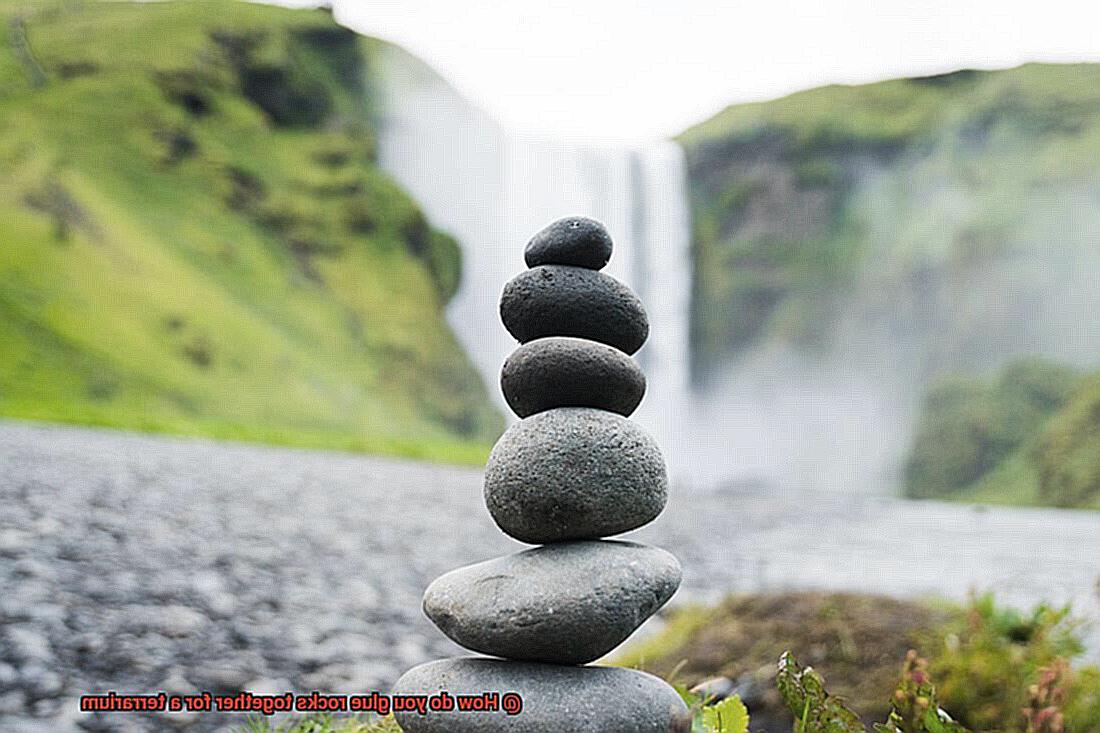
Do you want to create a tiny garden oasis in your home? Terrariums are the perfect way to bring some natural beauty indoors and add a touch of greenery to your living space. However, arranging rocks inside your terrarium can be a bit tricky. Rocks can shift and move around, making your mini-garden look messy. But don’t worry. Gluing rocks together is an easy solution that will make all the difference.
Gluing rocks together might sound intimidating, but it’s actually quite simple and can elevate the appearance of your terrarium. In this post, we’ll guide you through the step-by-step process of how to glue rocks together for a terrarium, along with some helpful tips and tricks.
First things first – let’s gather our materials. We’ll also go over how to prepare your rocks for gluing and explore different glue options available. Plus, we’ll discuss how to arrange the rocks inside your terrarium and emphasize how important it is to let the glue dry properly.
By the end of this post, you’ll be a pro at gluing rocks together for a terrarium. Your mini-garden will look like it was professionally done in no time. So what are we waiting for? Let’s get started on creating a stunning terrarium that will impress everyone who sees it.
What Type of Glue Should You Use?
Contents
Gluing rocks together can provide stability and prevent any unwanted movement. However, selecting the right type of glue is crucial to ensure that your terrarium remains safe for your plants and animals.
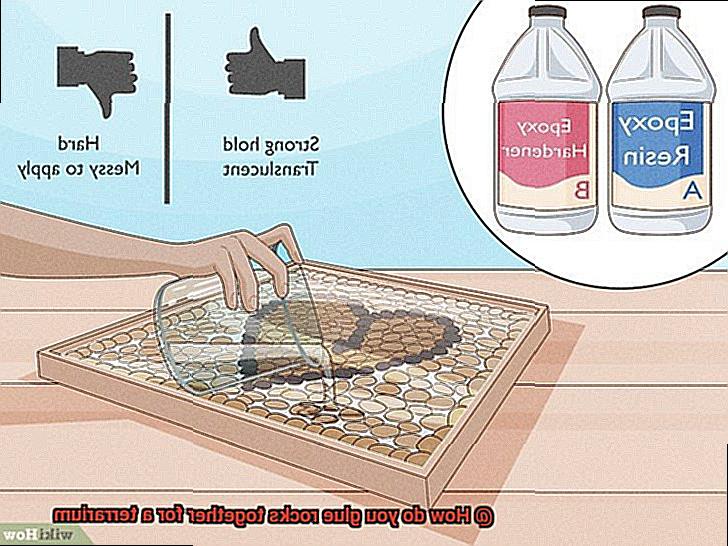
There are various types of glue available in the market, but not all of them are suitable for use with rocks. One of the most commonly used options for this purpose is epoxy. This two-part adhesive creates a strong and durable bond between rocks. It’s perfect for use in terrariums as it dries clear, making it virtually invisible when applied correctly. Epoxy is also waterproof and heat-resistant, making it ideal for use in environments with varying temperatures and moisture levels.
Another type of glue that can be used to attach rocks together is cyanoacrylate, commonly known as superglue. Superglue works by creating a chemical reaction with the moisture present in the air and on the surface of the rocks. While it can provide a strong bond between rocks, it may not be the best option for use in terrariums as it can break down over time when exposed to moisture.
If you prefer a more natural option, then using hot glue may be suitable for your terrarium project. Hot glue is made from natural materials and dries quickly, making it easy to work with. However, it may not provide as strong of a bond as epoxy or superglue, so it may not be ideal for larger or heavier rocks.
When gluing rocks together, it’s important to consider their size and weight. Larger and heavier rocks require a stronger adhesive to create a stable base. Epoxy is generally the best option due to its strength, durability, and resistance to water and heat. However, depending on personal preference and the specific needs of your project, other types of glue such as superglue or hot glue may also be suitable options.
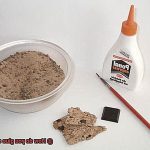
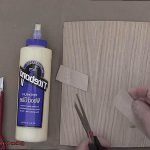
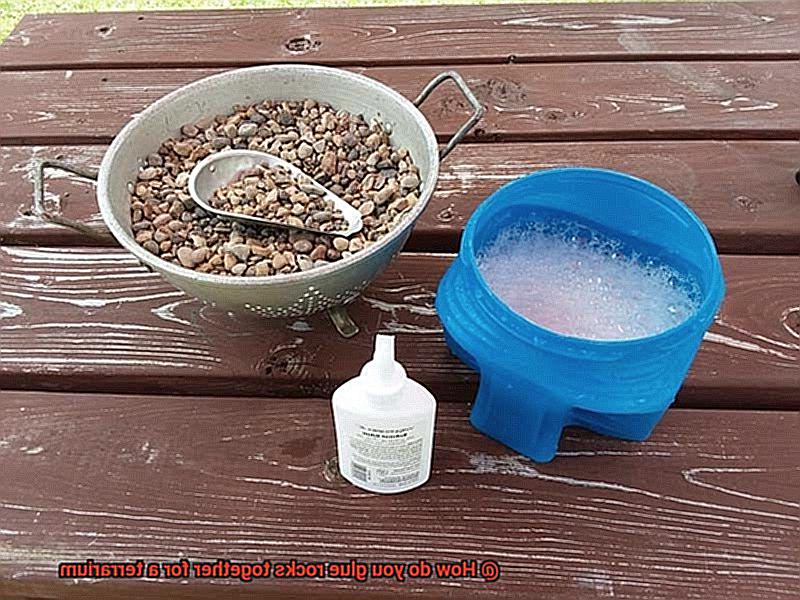
Before applying any glue, ensure that your rocks are clean and dry. This will guarantee that the glue adheres properly and creates a strong bond. You can use a damp cloth to wipe away any dirt or debris from the rocks.
When applying the glue, remember to use it sparingly. Excess glue may not dry properly or may be visible in your terrarium, ruining the aesthetic. Use a toothpick or small brush to spread the glue evenly over the surface of the rock.
Preparing the Rocks for Gluing
In our previous segment, we delved into the critical process of selecting the perfect glue for your rock gluing escapades. Now, let’s embark on the journey of preparing the rocks themselves to ensure an unyielding and enduring bond. Our goal is to create terrariums that stand the test of time and provide a sanctuary for our beloved plants and creatures. So, grab your cleaning tools and let’s begin this transformative adventure.
Clean the Rocks:
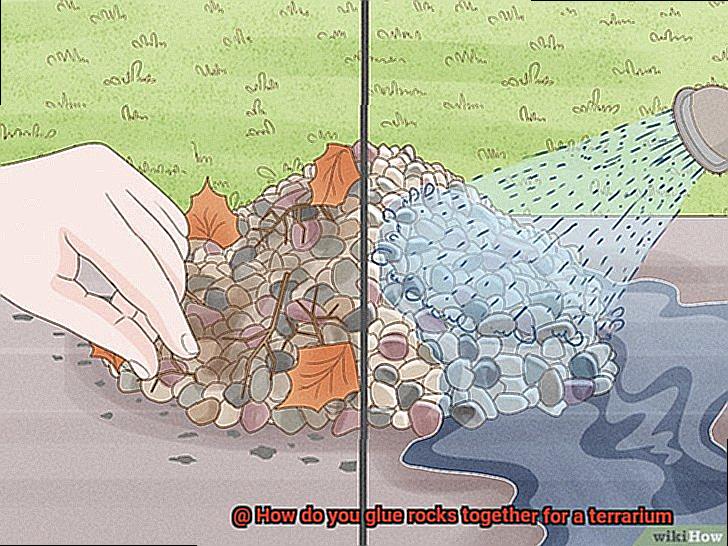
Before we can embark on our rock gluing odyssey, it is imperative to grant our rocks a thorough cleansing. Just like tidying up before a grand event, this step will enhance the adhesive properties of the glue on their surfaces. Armed with a brush or cloth, meticulously scrub away any dirt, dust, or debris clinging stubbornly to these majestic rocks. Remember, a pristine rock is the cornerstone of a successful terrarium.
Dry the Rocks:
Now that our rocks are sparkling clean, it’s time to ensure they are bone-dry before applying any glue. Moisture can disrupt the adhesive prowess of our chosen glue and compromise the bond between rocks. Give them ample time to air dry or employ a towel to expedite the process. Patience is truly a virtue in this endeavor.
Roughen the Surface:
To forge an unbreakable connection between our rocks, we must roughen their surfaces ever so slightly. Armed with sandpaper or a wire brush, gently abrade their exterior. This artful technique grants the glue an optimal bonding surface and guarantees a robust alliance between rocks. However, exercise caution to prevent any undue harm befalling these precious specimens.
Choose the Right Glue:
Ah, behold the moment of truth – selecting the superhero of all glues. The importance of choosing the right adhesive cannot be overstated when it comes to creating an impregnable bond. Consider factors such as the rock type and the terrarium environment. Epoxy, cyanoacrylate (super glue), silicone, or construction adhesive are all formidable contenders. Choose wisely, and our rocks shall forever remain steadfast.
Applying the Glue
In our previous section, we explored the importance of preparing rocks for gluing. Now, let’s embark on the captivating journey of applying the glue itself. Brace yourselves for a sensational experience as we delve into the world of unyielding bonds. Grab your preferred adhesive and let’s make magic happen.
Choosing the Right Glue:
First and foremost, selecting the perfect glue is paramount. Seek out a waterproof, non-toxic adhesive that harmonizes effortlessly with rocks and plants. Our top recommendation? The remarkable aquarium sealant or silicone adhesive. These extraordinary companions are tailor-made for underwater use, ensuring a bond that stands the test of time.
Cleanliness is Key:
Remember, cleanliness reigns supreme in the realm of terrarium-godliness. Thoroughly cleanse your rocks to obliterate any dirt, dust, or debris that threatens the bond. Shower them with water and gently scrub away imperfections with a brush. Remember, blissful rocks pave the way for a blissful terrarium.
Applying the Glue:
Now that your rocks are gleaming and dry, it’s time to unveil the glue. Begin by applying a minuscule amount of adhesive to one of the surfaces destined for bonding. To distribute the glue evenly, wield a small brush or even a trusty toothpick. Pro tip: bask in ample lighting to witness this enchanting process.
The Perfect Squeeze:
Prepare for a moment of sheer exhilaration – pressing those surfaces together. Embrace them firmly, allowing a few precious seconds for the glue to weave its magic. It’s akin to bestowing your rocks with a warm and snug embrace. Remember, precision in alignment and positioning is key; indulge yourself in this transformative act.
Extra Support for Large Rocks:
Should you encounter formidable giants requiring additional fortification, fear not. Enlist the aid of small wood pieces or other materials as supportive props during the drying process. This ensures your rocks remain steadfast, forming an unbreakable bond. Like rock comrades, they’ll stand tall through thick and thin.
Give It Time to Cure:
After applying the glue, summon your patience and grant it a minimum of 24 hours to dry. This waiting game yields remarkable results, safeguarding a bond that is robust and secure. Bear in mind that different types of glue may boast unique drying times and curing processes.
Holding the Rocks in Place
In our previous section, we explored the art of applying glue to create lasting bonds in your terrarium. Now, let’s dive deeper into the topic of holding rocks in place. We’ll discuss different adhesive options and the importance of considering weight and stability. So, grab your favorite adhesive and let’s get started on creating a rock-solid terrarium.
Choosing the Right Adhesive:
When it comes to holding rocks together in a terrarium, selecting the right adhesive is crucial. There are several options available, each with its own pros and cons. Let’s take a closer look at three popular choices:
Aquarium Silicone:
Aquarium silicone is the go-to choice for many terrarium enthusiasts. This specially designed adhesive is safe for aquatic environments and forms a strong, waterproof bond. Its reliability makes it an excellent option for securing rocks in your terrarium.
Epoxy Resin:
For those seeking strength and durability, epoxy resin is a fantastic choice. This two-part adhesive creates a powerful bond when mixed together. It’s perfect for bonding rocks of different shapes and sizes, ensuring your terrarium remains stable and visually stunning.
Hot Glue or Cyanoacrylate:
While not as durable as aquarium silicone or epoxy resin, hot glue and cyanoacrylate (super glue) are still viable options. These adhesives are quick to dry and easy to use, making them suitable for smaller rock arrangements or temporary displays.
Considering Weight and Stability:
In addition to choosing the right adhesive, it’s vital to consider the weight and stability of your rock arrangements. Here are some tips to help you create a stable and visually pleasing terrarium:
Balance is Key:
To prevent top-heavy arrangements, aim for a balance between larger, heavier rocks and smaller ones. This distribution of weight will ensure your terrarium remains stable and won’t topple over.
Strategic Placement:
When positioning your rocks, consider the needs of any living plants or animals in your terrarium. Ensure that the rocks are securely bonded, taking into account climbing plants or burrowing creatures. This will prevent any accidents and ensure long-lasting stability.
Is Gluing Rocks Necessary?
Today, we embark on an exploration of the perennial question that haunts every terrarium hobbyist: Is gluing rocks necessary? As a seasoned expert in the field, I have delved deep into research to present you with a comprehensive guide that dissects the factors influencing this dilemma. Prepare to settle the debate once and for all.
Factor 1: Stability and Strength
Gluing rocks together serves a fundamental purpose – creating structures that defy gravity’s pull. By bonding rocks with adhesive, you ensure their stability and fortitude, eliminating any worries of shifting or crumbling formations. Moreover, if your terrarium houses live plants that depend on a steadfast substrate, gluing rocks can be a game-changer in preventing soil erosion.
Factor 2: Embracing Nature’s Authenticity
For those who seek to replicate nature’s raw beauty within their terrariums, gluing rocks may not align with their vision. Why confine the rocks with adhesive when they can be arranged organically, mirroring the captivating randomness of nature? By allowing rocks to find their own natural resting places, you unlock the potential for a visually stunning and true-to-life landscape.
Factor 3: Flexibility and Adaptability
If you’re someone who revels in change and craves versatility, gluing rocks might not align with your dynamic spirit. Adhering rocks together limits your freedom to rearrange or modify your terrarium layout easily. However, if your design warrants permanence and stability without regular adjustments, gluing rocks can bestow that added strength needed to preserve your creation.
Factor 4: Shielding Fragile Gems
Do delicate miniature figurines or fragile plants grace your terrarium? If so, gluing rocks together emerges as an indispensable technique. By securing the rocks with adhesive, you create a protective fortress, ensuring that these precious elements remain unscathed from accidental bumps or jolts. It’s akin to suiting up your terrarium with its very own armor.
The Benefits of Using Glue for Terrariums
Terrariums have become a popular way to bring the beauty of nature into our homes, creating captivating miniature landscapes. While opinions may differ on whether gluing rocks in terrariums is necessary, there are numerous undeniable benefits to consider. In this article, we will delve into the advantages of using glue for terrariums, exploring how it enhances stability, unleashes creativity, ensures longevity, and simplifies maintenance. So, let’s embark on a journey into the realm of glue and unlock the potential for visually stunning and true-to-life terrarium creations.
Stability and Durability:
In the world of terrariums, stability is paramount. Uniquely shaped or larger rocks may not naturally fit together, leading to instability over time. However, with the use of glue, you can create a firm foundation that secures these rocks in place. Bid farewell to worries about shifting or toppling structures as you embrace a steadfast terrarium that withstands the test of time.
Extra Security:
Life is full of unexpected surprises, especially when pets or young children are involved. By gluing rocks together, you add an extra layer of security to your terrarium. Even if it gets bumped or moved accidentally, your masterpiece will remain intact. With glued rocks, you can breathe a sigh of relief knowing that your carefully crafted terrarium won’t be disturbed by curious paws or playful hands.
Creative Freedom:
Glue is not just a practical tool; it is a gateway to unlimited creative possibilities within your terrarium. Through securely attaching rocks together with adhesive, you can transform your vision into reality by bringing intricate designs and unique landscapes to life. Whether you dream of a majestic mountain range or a mesmerizing cascading waterfall, glue empowers you with the flexibility to unleash your imagination and craft a terrarium that truly reflects your personal style.
Incorporating Other Materials:
Glue opens up a world of endless opportunities for incorporating other materials into your terrarium design. From small figurines to decorative elements, gluing them onto the rocks ensures they stay in place, adding a touch of whimsy and personalization to your creation. Embrace the freedom to let your creativity soar as you transform your terrarium into a magical world of wonders, brimming with enchanting surprises at every corner.
Potential Hazards to Consider When Gluing Rocks
Unlocking the beauty of nature inside your home through a terrarium is an exciting endeavor. Adding stability and creativity by gluing rocks together enhances the overall appeal of your terrarium. However, it is crucial to be aware of potential hazards to ensure the safety of your plants, animals, and yourself. This article delves into seven hazards that must be considered when gluing rocks for your terrarium.
Toxicity of Glue:
Using the wrong adhesive can spell disaster for the delicate ecosystem within your terrarium. Many adhesives contain harmful chemicals that can seep into the environment, causing harm to plants and animals. To safeguard against this, always opt for non-toxic adhesives designed explicitly for use in terrariums or aquariums. Seek out labels indicating their safety for aquatic or reptile environments.
Volatile Organic Compounds (VOCs):
During the drying process, certain glues release volatile organic compounds (VOCs) into the air. These compounds contribute to indoor air pollution and may lead to respiratory irritation or other health concerns. Choose low-VOC or VOC-free adhesives to minimize the release of harmful chemicals into your living space.
Allergies and Sensitivities:
Individuals with allergies or sensitivities must exercise caution when selecting adhesives. Thoroughly read product labels and instructions, paying close attention to any warnings about potential allergic reactions. If you have known allergies or sensitivities, take extra precautions such as wearing gloves or other protective measures to minimize skin contact.
Fumes and Ventilation:
Certain adhesives emit potent fumes during application and drying. It is imperative to work in a well-ventilated area to prevent inhaling these irritating or harmful fumes. Open windows, employ fans, or consider working outside whenever feasible to ensure optimal ventilation.
Skin and Eye Irritation:
Contact with certain glues can lead to skin and eye irritation. Safeguard yourself by wearing protective gloves and safety glasses during the glue application process. In the event of accidental contact, promptly rinse the affected area with copious amounts of water and, if necessary, seek medical attention.
Tips and Tricks for Successful Rock Gluing
Building a terrarium is a creative way to bring a touch of nature into your living space. One crucial step in creating a stable and visually appealing terrarium is gluing rocks together. In this article, we will explore some expert tips and tricks for successful rock gluing, ensuring that your terrarium remains sturdy and beautiful.
Choose the Perfect Adhesive:
Selecting the appropriate adhesive is paramount when it comes to successful rock gluing. Epoxy resin or cyanoacrylate (super glue) are commonly used adhesives for this purpose. Epoxy provides a strong and durable bond, making it ideal for securing rocks of different sizes. On the other hand, cyanoacrylate is fast-drying and perfect for smaller rocks or delicate arrangements that require quick bonding.
Cleanse Thoroughly:
Before applying any adhesive, it is crucial to clean the surfaces of the rocks meticulously. Dirt, dust, and oils can hinder the bonding process. Take a soft brush or cloth and remove any debris from the rocks’ surface. Ensure that they are completely clean before proceeding with gluing.
Enhance Bond Strength by Roughening Surfaces:
To improve the bond strength between rocks, consider roughening their surfaces. Use sandpaper or a file to create small scratches on the areas where you plan to apply the adhesive. This rough texture creates more contact area for the glue to adhere to, resulting in a stronger bond that will withstand the test of time.
Strategic Application of Adhesive:
When applying adhesive, it is important to be strategic in order to achieve optimal results. Apply a thin layer of adhesive to one surface that you want to join. Avoid using excessive amounts of glue as it may overflow and become visible in your terrarium, compromising its aesthetic appeal. Gently press the rocks together and hold them firmly for a few minutes to allow the adhesive to set. Working in small sections rather than attempting to glue all rocks at once ensures better control and precision.
Allow Ample Curing Time:
After gluing the rocks together, exercise patience and allow sufficient curing time for the adhesive to fully bond. Refer to the instructions provided by the adhesive manufacturer to determine the recommended drying duration. During this period, avoid moving or disturbing the rocks to ensure a strong and reliable bond that will withstand any handling or movement.
AySbHYnUtqk” >
Conclusion
Creating a stunning terrarium is all about attention to detail, and one of the key elements is gluing rocks together. But how do you achieve that perfect bond? Fear not, for I am here to guide you through the process with expert precision.
First and foremost, gather your materials: a strong adhesive suitable for outdoor use, such as epoxy or silicone-based glue, and of course, the rocks themselves. It’s important to select rocks that are clean and dry to ensure optimal adhesion.
Now comes the fun part – applying the glue. Start by carefully placing a small amount of adhesive on one rock’s surface using a toothpick or a small brush. Remember, less is more in this case; you don’t want excess glue oozing out from between the rocks.
Next, gently press another rock onto the glued surface, ensuring they fit snugly together. Hold them in place for a few moments to allow the adhesive to set. Repeat this process until all your desired rocks are securely bonded together.
As you work on your terrarium masterpiece, keep in mind that different rock types may require specific adhesives. For example, porous rocks like sandstone may benefit from using super glue gel or even mortar mix for added durability.
Once you’ve completed gluing your rocks together, it’s crucial to let them fully cure before adding them to your terrarium. This curing process can take anywhere from 24 hours to several days depending on the type of adhesive used. Patience is key here.
In conclusion, gluing rocks together for a terrarium is an art form that requires careful consideration and technique. With the right materials and approach, you can create a solid foundation for your miniature ecosystem that will stand the test of time.