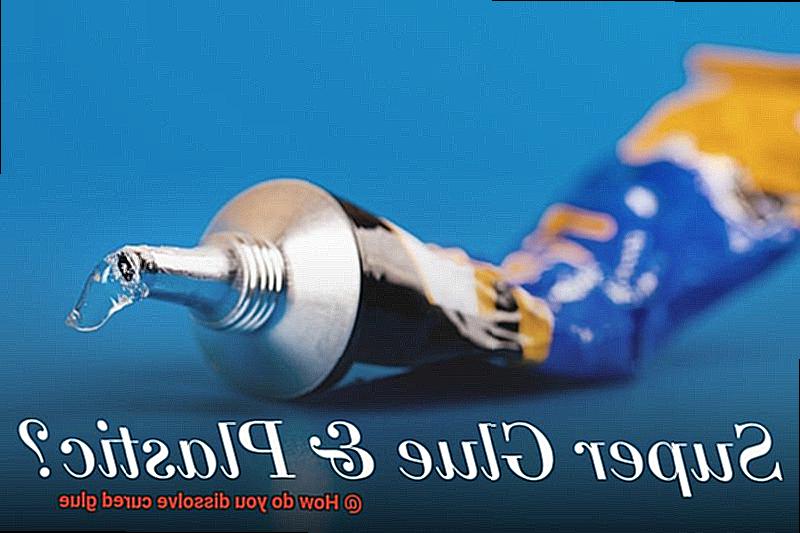
We’ve all been there – you’re knee-deep in a project, and suddenly you realize you need to undo a glue bond. Cue the panic. Cured glue can be a stubborn beast, designed to stick around for the long haul. But fear not, because we’ve got your back. In this comprehensive guide, we’ll show you the ropes on how to dissolve cured glue like a boss.
Now, before we dive into the nitty-gritty of glue removal, it’s crucial to know what kind of adhesive you’re dealing with. Solvent-based glues like epoxy or super glue require a different approach compared to water-based ones like PVA. Safety is paramount here – make sure you’re working in a well-ventilated area, rocking those protective gloves and goggles, and following every instruction from the manufacturer.
In the upcoming sections, get ready for some serious knowledge drop as we unveil specific techniques and solutions for tackling that pesky cured glue. We’ll spill the beans on household heroes like vinegar, nail polish remover, or acetone. And if things get really sticky (pun intended), don’t worry – we’ve got specialized adhesive solvents up our sleeves too. Just remember to test any solvent on a small hidden spot before going all-in on your glued surfaces.
But wait, there’s more. We won’t leave you hanging without some expert tips and tricks to level up your dissolving game. Patience is key here – sometimes gentle scraping with a plastic or wooden tool might be necessary. And hey, don’t lose hope if it takes multiple rounds of application; old and strong bonds can be quite stubborn. We’ll equip you with all the know-how so that no glue bond stands a chance against your determination.
So buckle up and get ready to dissolve cured glue like a pro. With the right techniques and precautions, you’ll conquer even the stickiest of situations. Stay tuned for our upcoming guide, where we’ll empower you with everything you need to know to tackle that pesky glue head-on. Let’s get unstuck together.
What is Cured Glue?
Contents
- 1 What is Cured Glue?
- 2 Acetone as a Solvent for Dissolving Cured Glue
- 3 Isopropyl Alcohol as a Solvent for Dissolving Cured Glue
- 4 Warm Soapy Water to Dissolve Cured Glue
- 5 White Vinegar to Dissolve Cured Glue
- 6 Specialized Adhesive Removers and Solvents for Dissolving Cured Glue
- 7 Mechanical Methods to Remove Cured Glue
- 8 When Professional Assistance is Needed for Removing Cured Glue
- 9 Conclusion
In the realm of adhesives, a mesmerizing metamorphosis takes place when glue dries and hardens. This enchanting process, known as curing, magically transforms liquid or gel-like substances into robust and unyielding bonds. Prepare to embark on a captivating journey through the vast universe of cured glue, as we explore its diverse forms, applications, and ingenious removal techniques.
Types of Cured Glue:
Cured glue manifests in an array of specialized forms, each tailored to meet specific needs. Behold the mighty epoxy glues, revered for their unparalleled strength and resilience against scorching heat and corrosive chemicals. Witness the lightning-fast prowess of super glue, creating instantaneous bonds that defy the limits of time. Enter the realm of woodworking with wood glues, designed to embrace porous materials in an unwavering embrace.
Applications of Cured Glue:
Cured glue finds its purpose across countless domains, from towering constructions and intricate carpentry to mesmerizing crafts and daring DIY projects. Its supernatural ability to unite materials such as wood, metal, plastic, glass, ceramics, fabric, and beyond has bestowed upon it an esteemed status among professionals and hobbyists alike.
Removing Cured Glue:
Yet, as with any enchantment, there are moments when the spell must be broken. Though the resolute grip of cured glue is often advantageous, there arise occasions when dissolution or removal becomes imperative. Summon the forces of acetone, isopropyl alcohol, warm soapy water, or white vinegar to dissolve this tenacious substance. For more formidable adversaries like epoxy or construction adhesives, specialized solvents or adhesive removers may be needed.
When all else fails to shatter its bond, resort to mechanical methods such as scraping or sanding to chip away at its unyielding fortress. Unleash the heat gun’s fiery breath to soften its resolve. Remember, however, to heed the call of safety precautions and honor the sacred instructions bestowed upon you by the glue’s creators.
Conclusion:
Cured glue is an awe-inspiring alchemical marvel, transforming ordinary materials into extraordinary creations with its unwavering bond. By unraveling the secrets of its diverse forms and exploring its limitless applications, we unlock the powers of this mystical adhesive for both practical and artistic endeavors. Yet, in moments when liberation becomes paramount, we wield the knowledge of solvents and mechanical methods as our trusted allies.
Acetone as a Solvent for Dissolving Cured Glue
Unlock the secrets of acetone, the mighty solvent that possesses the power to dissolve even the most stubborn cured glue. Dive into this captivating realm of chemical magic and master the art of glue removal. Acetone, a colorless and volatile liquid with strong solvent properties, is your ally in this battle against adhesive bonds.
Why choose acetone for glue removal? Its remarkable ability to dissolve various types of glue, including cyanoacrylate (super glue), epoxy, and some polyurethane glues. This powerful solvent boasts a quick evaporation rate, ensuring efficient removal without leaving behind any residue.
But before you embark on this epic quest, remember to prioritize safety first. Proper ventilation is crucial to avoid inhaling the strong fumes. And don’t forget to don your trusty gloves, shielding your skin from the potent potion.
Surface compatibility is another key factor to consider. To prevent damage or discoloration, steer clear of plastic, vinyl, and painted surfaces. Conducting a small test on an inconspicuous area before full application will save you from potential mishaps.
Now, let’s delve into the art of dissolving. Soak a cloth or sponge with acetone and gently apply it to the glued surface. Allow the acetone to work its magic for a few minutes as it softens the glue. For particularly stubborn bonds, repeat the process or enlist the aid of a scraper or brush. Remember, patience and caution are essential to prevent any harm to the underlying material.
As you approach the final act, post-glue dissolution cleanup is imperative. Thoroughly clean the surface with soap and water to remove any residual acetone or glue remnants. And now, behold your victory. Admire the pristine surface that has been liberated from the clutches of cured glue.
Isopropyl Alcohol as a Solvent for Dissolving Cured Glue
When it comes to removing cured glue from our cherished belongings, we often find ourselves in a sticky situation. However, fear not. There is a secret weapon that can banish even the toughest adhesive bonds – isopropyl alcohol. This colorless liquid, commonly known as rubbing alcohol, is not only a staple in our first aid kits but also a powerful solvent that can dissolve cured glue with ease. In this comprehensive guide, we will explore the amazing properties of isopropyl alcohol and discover why it is the go-to solution for conquering the glue monster.
The Power of Isopropyl Alcohol:
Isopropyl alcohol possesses exceptional adhesive-breaking abilities, making it an ideal choice for dissolving cured glue. Here’s why it reigns supreme:
- Availability and Affordability: Isopropyl alcohol can be found in almost every pharmacy and store, ensuring its accessibility to all. Moreover, its cost-effective nature means you don’t have to break the bank to obtain this magical elixir.
- Compatibility Check: Before embarking on your glue-dissolving adventure, it is crucial to test isopropyl alcohol on a small, inconspicuous area of the surface. Some materials may be sensitive to the solvent and could potentially suffer damage or discoloration. It is better to be safe than sorry.
The Dissolving Process:
Now that we are armed with isopropyl alcohol, let us delve into the step-by-step process of dissolving cured glue:
- Prep Work: Ensure proper ventilation and protect your skin by wearing gloves, as isopropyl alcohol has a strong odor and may cause irritation.
- Soak and Rub: Take a clean cloth or cotton ball and saturate it with isopropyl alcohol. Gently rub the affected area with the soaked cloth, allowing the solvent to penetrate and soften the glue.
- Patience is Key: For stubborn or thick layers of glue, let the isopropyl alcohol sit on the glue for a few minutes. This extra time will aid in loosening the adhesive bond.
- Gentle Removal: Once the glue has softened, use a plastic scraper or your fingers to carefully peel or scrape off the dissolved glue. Take care not to damage the underlying surface.
- Repeat if Needed: If any residue or traces of glue remain, repeat the process until the surface is free from all remnants of the glue.
Post-Dissolution Cleanup:
To conclude our victorious journey, it is essential to ensure proper post-dissolution cleanup:
Soap and Water: After using isopropyl alcohol, clean the treated surface with soap and water to remove any residual solvent and ensure a pristine finish.
Warm Soapy Water to Dissolve Cured Glue
Warm soapy water is indeed a powerful ally in the battle against cured glue. This tried and true method has been proven effective on various surfaces, whether it’s glass, metal, fabric, or plastic. So, whether you’re dealing with a glue mishap or trying to remove an old sticker, warm soapy water should be your go-to solution.
But how does it work? The secret lies in the combination of warm water and soap. Warm water helps to soften the glue, making it more pliable and easier to remove. And when you introduce a mild soap into the mix, its chemical properties come into play, breaking down the adhesive properties of the glue. It’s a tag team effort that tackles that stubborn residue head-on.
To dissolve cured glue using warm soapy water, you’ll need a container large enough to hold the item or surface you’re treating. Fill it with warm water and add a small amount of mild soap – nothing too abrasive that could potentially cause damage. Stir until the soap is dissolved, creating a bubbly concoction ready to take on that pesky glue.
Now it’s time to immerse the item or surface in the container, making sure that the glue is fully submerged in the warm soapy water. Allow it to soak for around 15-30 minutes, giving science and soap the opportunity to work their magic.
After the soaking period, grab a soft cloth or sponge and gently scrub away the softened glue. You’ll immediately notice how much easier it is to remove now that it has been loosened up by the warm soapy water. For particularly stubborn or thick layers of glue, you may need to repeat this process a few times until all traces have vanished.
Once you’re satisfied with your scrubbing efforts, rinse the item or surface with clean water to remove any residual soap. Finally, dry thoroughly with a clean cloth to ensure no water spots or leftover residue remain.
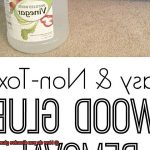
White Vinegar to Dissolve Cured Glue
White vinegar might just be the secret weapon you need. This humble household item has incredible adhesive-dissolving capabilities. In this article, we will guide you through the steps to effectively use white vinegar and bid farewell to that pesky adhesive residue.
Step 1: Gather your supplies
Before diving into the glue-dissolving process, make sure you have everything you need. Grab a bottle of white vinegar, a cloth or sponge, and possibly some warm water. Equipped with these tools, you’re ready to tackle the challenge head-on.
Step 2: Soak it up
Generously soak the cured glue with white vinegar. You can either pour vinegar directly onto the glue or apply it using a cloth or sponge. Let the vinegar sit for a few minutes, allowing it to work its magic and penetrate the adhesive bonds.
Step 3: Get scrubbing
Once the vinegar has had time to do its job, gently scrub the softened glue with your cloth or sponge. You’ll be amazed at how easily it starts to come off. If needed, dip your cloth or sponge in warm water to further loosen the glue and facilitate its removal.
Step 4: Rinse and repeat
After successfully dissolving the cured glue, give the area a good rinse with clean water to remove any remaining vinegar or residue. This step is crucial to ensure a clean and pristine finish.
Important tips and considerations:
- White vinegar is most effective for water-based glues and adhesives. For stronger or solvent-based glues, alternative methods or solvents may be required.
- Always test a small, inconspicuous area before applying white vinegar to larger surfaces. This will help you avoid any potential damage or discoloration.
- Patience is key. Let the vinegar sit on the glue for a sufficient amount of time to achieve the best results.
Specialized Adhesive Removers and Solvents for Dissolving Cured Glue
Bid farewell to the frustration of stubborn glue that refuses to budge. This article delves into the world of specialized adhesive removers and solvents, crafted specifically to dissolve even the most persistent glues. From super glue to heavy-duty adhesives like epoxy, we have you covered. However, before we delve into the details, it’s crucial to understand the safety precautions and considerations when using these potent solutions.
Safety First:
Prioritize your safety while working with adhesive removers and solvents. Remember to:
- Choose a well-ventilated area to avoid inhaling fumes.
- Shield your skin and eyes by wearing gloves and eye protection.
- Keep these products away from open flames or sparks, as they can be flammable.
- Carefully read and follow the manufacturer’s instructions for safe usage.
Types of Specialized Adhesive Removers and Solvents:
- Acetone: This potent solvent, commonly found in nail polish removers, effectively dissolves various glue types, including cyanoacrylate (super glue) and certain epoxies.
- Isopropyl Alcohol: Also known as rubbing alcohol, this milder solvent is ideal for removing glue residue from surfaces such as glass or metal.
- Specialized Adhesive Removers: When dealing with stubborn or heavy-duty glues, specialized adhesive removers come to the rescue. Formulated with a blend of solvents and chemicals designed specifically to break down tough adhesives, these products are available in gel or liquid form.
Tips for Usage:
- Test Compatibility: Before use, test the remover or solvent on a small, inconspicuous area to ensure it doesn’t damage the surface material.
- Follow Instructions: Observe the manufacturer’s instructions on application and contact time.
- Allow Penetration: Let the adhesive remover or solvent sit for a few minutes to allow it to penetrate the glue effectively.
- Gentle Removal: Softened glue can be gently scraped or wiped away using a cloth or sponge.
- Persistent Glue: Stubborn or old glue may require multiple applications and additional effort for complete removal.
- Thorough Cleaning: After removing the glue, thoroughly clean the surface with soap and water or an appropriate cleaner to remove any residue.
Considerations:
While adhesive removers and solvents prove formidable allies against stubborn glue, it’s vital to consider the following:
- Not Universal Solutions: These specialized solutions may not dissolve all adhesives. Some glues may require more aggressive solvents or mechanical methods for removal.
- Surface Sensitivity: Delicate or porous surfaces may react sensitively to these chemicals and sustain damage. Consult professionals or explore alternative removal methods if necessary.
Mechanical Methods to Remove Cured Glue
Whether it’s a DIY disaster or an accidental spill, battling with this tenacious adhesive can be exasperating. But fret not. In this article, we embark on a journey into the world of mechanical methods, arming you with the tools and techniques needed to bid farewell to that obstinate glue. Get ready to unleash your inner handyman and revel in the triumph of a glue-free surface.
Scraping: The Valiant Warrior
First in our arsenal is scraping, the valiant warrior against cured glue. Armed with a trusty putty knife or scraper, gently wage war on the glue, carefully avoiding damage to the underlying material. Remember, slow and steady wins this race.
Sanding: A Spa Day for Wood Surfaces
Wooden surfaces, rejoice. Sanding comes to your rescue, offering them a luxurious spa day. Grab your sandpaper or sanding block and skillfully erase the cured glue. Begin with coarse grit sandpaper, gradually transitioning to finer grits for that impeccable smoothness. Your wood will thank you.
Heat: Igniting the Battle
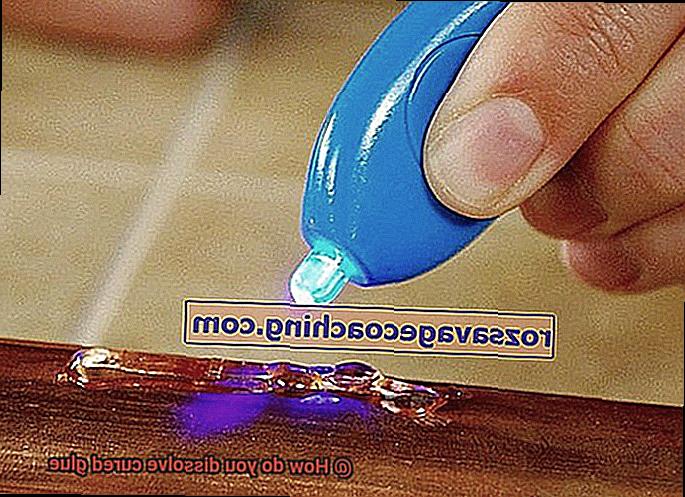
Now it’s time to turn up the heat. By applying warmth to the cured glue, we soften its grip, making it easier to vanquish. But hold your horses, cowboy. Exercise caution to prevent overheating or causing damage. A heat gun or hairdryer, wielded at a safe distance, will serve you well.
Solvent Synergy: An Unstoppable Duo
Sometimes, combining solvents with mechanical methods yields breathtaking results in defeating cured glue. Before scraping or sanding, apply a solvent like acetone or rubbing alcohol onto the glue’s stronghold. Watch as its grip weakens, making removal a breeze. It’s like having a trusty sidekick for your mechanical method adventures.
Safety First: Shield Yourself.
As with any heroic endeavor, safety reigns supreme. Don your protective gloves and goggles, shielding yourself from potential injuries. Additionally, before unleashing your mechanical might, test any solvents or heat sources on a small, inconspicuous area. Better safe than sorry, my friend.
When Professional Assistance is Needed for Removing Cured Glue
Cured glue can be a formidable foe, stubbornly clinging to surfaces and refusing to budge. While DIY methods can work in many cases, there are certain situations where professional assistance becomes necessary. In this article, we will explore when it’s time to bring in the experts and why it’s a wise choice.
Delicate or Sensitive Surfaces:
When dealing with cured glue on delicate or sensitive surfaces like antique furniture or valuable artwork, it’s best to leave it to the professionals. These surfaces require special care and expertise to ensure that the glue is removed without causing any damage. With their knowledge and specialized tools, professionals can delicately handle these situations, preserving the integrity of your prized possessions.
Hard-to-Reach or Inaccessible Areas:
Glue has a sneaky way of seeping into tiny crevices and hiding behind tight spaces. When the cured glue is lurking in these hard-to-reach areas, removing it becomes nearly impossible without specialized tools and techniques. Professional assistance is essential because they have the expertise and equipment to access these hidden nooks and crannies with ease.
Large Scale or Commercial Settings:
In industrial or commercial settings, the scale of the glue removal task may simply be too large for DIY attempts. Whether it’s heavy machinery covered in layers of cured glue or an entire workspace that needs a thorough cleanup, professionals are equipped to handle these challenging situations efficiently. They have the necessary equipment and experience to tackle large-scale projects effectively, saving you time and effort.
Consulting Experts:
Sometimes, all you need is expert advice and guidance. By consulting with knowledgeable professionals, you can gain valuable insights into the best methods and products for removing cured glue without causing damage or complications. Their expertise can help you navigate through the process with confidence.
_59ZzuLJcTw” >
Also Read: Will vinegar remove Gorilla Glue? – Glue Things
Conclusion
When it comes to dealing with cured glue, finding a solution to dissolve it can be quite the challenge. But fear not, for there are methods that can come to your rescue. Whether you’re dealing with a stubborn glob of adhesive on your favorite shirt or trying to remove dried glue from a delicate surface, these techniques will help you get the job done.
One option is to use acetone, a powerful solvent that is commonly found in nail polish removers. This potent substance can break down the chemical bonds in cured glue, making it easier to remove. However, be cautious when using acetone on certain surfaces as it may cause damage or discoloration.
Another method is to employ the power of heat. By applying heat directly to the cured glue, you can soften it and make it more pliable for removal. This can be achieved using a hairdryer or a heat gun set at a low temperature. Remember to keep the heat source moving and avoid overheating the area.
For those looking for a natural alternative, vinegar can also do wonders in dissolving cured glue. Its acidic properties work effectively in breaking down the adhesive bonds. Simply soak a cloth or sponge in vinegar and apply it directly onto the affected area. Allow it to sit for some time before gently scrubbing away the dissolved glue.
In some cases, rubbing alcohol or isopropyl alcohol can also be effective in dissolving cured glue. These substances have solvents that act similarly to acetone but are generally milder and less likely to cause damage.
Now armed with these techniques, you can confidently tackle any encounter with cured glue. Remember to test any method on a small inconspicuous area first and always proceed with caution.