In construction and architecture, this artful fusion not only adds charm to structures but also ensures their strength and endurance.
Bricklaying, or brick masonry as it’s known, is a precise craft that demands skill and an understanding of materials. Over centuries, techniques have evolved from ancient civilizations to modern architectural wonders, resulting in structures that stand strong against time’s relentless march.
To achieve a robust bond, several factors come into play: selecting the right bricks, preparing bonding agents, and executing the bricklaying process with diligence. Master bricklayers blend tradition with innovation, harnessing age-old methods while adapting to modern practices.
Throughout this exploration, we’ll unravel the secrets behind creating a durable bond between bricks. From mortar selection to intricate brick placement, we’ll delve into techniques that ensure both structural integrity and eye-catching aesthetics.
Discover the history and evolution of brick bonding as we draw inspiration from wonders like the Great Wall of China and the Roman Colosseum. Unearth wisdom passed down through generations of artisans as we reveal techniques used by master craftsmen to defy nature’s forces.
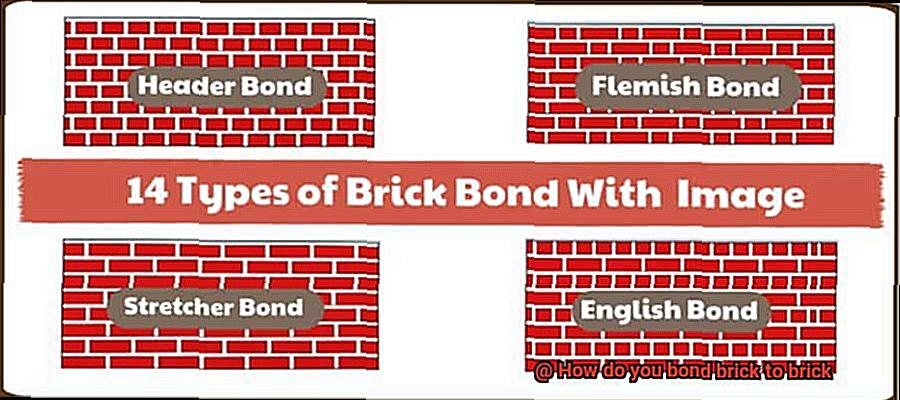
In our forthcoming blog series, we’ll dive into various aspects of brick bonding. We’ll discuss different types of bonds, explore innovations in adhesives and reinforcements, and shed light on challenges faced by today’s bricklayers. Join us as we demystify the artistry and science behind awe-inspiring brick structures and guide you through the secrets of bonding brick to brick.
Preparing the Brick Surfaces
Contents
A successful brick bonding project hinges on the proper preparation of the brick surfaces. In this article, we will delve into the importance of preparing brick surfaces and provide a detailed guide for achieving a strong and durable bond.
Thoroughly Cleaning the Brick Surfaces:
To ensure an optimal bond, start by removing loose dirt and debris from the brick surfaces. Use a stiff brush or broom to sweep away any accumulated dirt, paying special attention to cracks and crevices where dirt may collect. For stubborn stains, employ a power washer or high-pressure water to achieve a thorough cleaning.
Inspecting for Damage:
Carefully inspect each brick for cracks, chips, or crumbling areas. Replace any damaged bricks before proceeding with the bonding process as they can compromise the overall strength and stability of the structure.
Proper Dampening of the Surfaces:
Enhance adhesion by dampening the brick surfaces. Use a spray bottle or a hose with a fine mist setting to ensure even dampness across all surfaces. Allow the surfaces to air dry slightly until they are slightly damp but not dripping wet.
Choosing the Right Bonding Method:
Selecting the appropriate bonding method is crucial for achieving a strong bond between bricks. The most common method is using mortar, which is a mixture of cement, sand, and water. Alternatively, consider using adhesive specifically designed for masonry applications or employing mechanical fasteners for added strength and stability.
Applying Mortar:
Spread mortar on the horizontal joint between two bricks using a trowel, ensuring even coverage and consistent joint thickness for an aesthetically pleasing outcome. Press the bricks firmly together, removing excess mortar as you go along.
Utilizing Adhesive:
Before applying adhesive, clean the surface of the bricks thoroughly. Use a caulking gun or trowel to apply the adhesive directly onto the brick surface. Firmly press the bricks together to ensure proper bonding and alignment.
Considering Mechanical Fasteners:
For extra strength and stability, contemplate using mechanical fasteners such as screws or anchors. Drill these fasteners into the bricks to create a secure connection.
Using Mortar to Bond Bricks
Brick bonding is an ancient technique that has stood the test of time, and mortar is the superhero that makes it all possible. Picture this: a magical mixture of cement, sand, and water that, when combined, creates a bond so strong it can withstand the elements for generations to come. It’s like a superhero team-up, with each component playing its part to create an unbreakable alliance.
But before we jump into the nitty-gritty of mortar magic, let’s start with the basics. First things first, you need to prep your bricks. They need to be squeaky clean, free from any dirt or debris that might hinder the bond. And here’s a pro tip – soak those bricks in water beforehand. This prevents them from greedily sucking up all the moisture from the mortar too quickly, which could weaken the bond. We want a long-lasting connection here.
Now that your bricks are ready for action, it’s time to grab your trusty trowel and dive into the mortar mix. Spread that mortar evenly between the bricks, ensuring there are no gaps or air pockets. It’s like spreading creamy peanut butter on bread – smooth and even, with no lumps or bumps. A solid bond starts with a solid application.
Once the mortar is in place, it’s time to bring those bricks together in perfect harmony. Press them firmly together as if they were long-lost friends reuniting after years apart. And don’t forget to scrape off any excess mortar for that flawless finish. We want our masterpiece to be picture-perfect.
Now comes the waiting game – the agonizing period of time when we have to let our creation cure and harden. Depending on factors like temperature and humidity, this could take anywhere from 24 hours to several weeks. Patience is key, my friends. And in the meantime, protect your masterpiece from excess moisture by covering it with plastic or using a curing compound. This will ensure a strong bond that can withstand the elements.
But wait, there’s more. Mortar comes in different types for different applications. Exterior brickwork? Check. High-strength bonding? Check. Fire resistance? Check. Choose the mortar that best suits your project, and you’ll be one step closer to brick bonding bliss.
And let’s not forget about those fancy joint finishes. Flush joints, raked joints, struck joints – the choice is yours. It’s like adding the final touch of elegance to a work of art. Get creative and make your bond stand out from the rest.
Remember, my friends, proper mixing and application techniques are key to achieving a strong bond between bricks. Follow the manufacturer’s guidelines and don’t hesitate to seek professional advice if you’re unsure. With the right mortar mix and a little bit of patience, you’ll be well on your way to creating something amazing with brick bonding.
The Buttering Technique
Brick bonding is a crucial skill in the construction industry, and one of the most widely used methods for creating a sturdy brick structure is the Buttering Technique. By applying a layer of mortar, known as “butter,” to the surface of each brick before placing them together, this technique ensures a strong and secure bond. In this article, we will explore the Buttering Technique in detail, including step-by-step instructions and expert tips for achieving flawless brick bonds.
Step 1: Gather the materials
Before diving into the Buttering Technique, gather all the necessary materials, including bricks, mortar mix, water, and a trusty trowel. Ensuring you have everything ready beforehand will make the process more efficient.
Step 2: Mix the mortar
Follow the instructions on your mortar mix packaging to achieve the perfect consistency. The mortar should be thick enough to hold its shape yet still easily spreadable.
Step 3: Apply butter
Using your trowel, scoop a generous amount of mortar onto its blade. This mortar will act as your “butter.” Hold the trowel at a slight angle and apply an even layer of mortar to one brick’s surface. Ensure complete coverage on the area that will come into contact with another brick.
Step 4: Press and twist
Take another brick and firmly press it onto the buttered surface of the first brick. Use slight twisting motions to evenly distribute the mortar and create a solid connection. Check for proper alignment and levelness between the bricks.
Step 5: Repeat and remove excess
Continue applying butter to one side of each brick and pressing them together until your desired structure is complete. Maintain consistent spacing between bricks and remove any excess mortar that squeezes out from between them.
Expert Tips:
- Avoid excess mortar: Applying too much mortar can lead to an uneven bond or difficulty in aligning the bricks properly. Start with a moderate amount and add more as needed.
- Work efficiently: Mortar dries quickly, so butter one brick at a time before placing it onto another. This ensures workability and optimal bonding.
- Choose the right mortar: Different projects require different mortars. Consult with a professional or refer to manufacturer guidelines to select the appropriate mortar mix for your specific project.
Finishing the Bonding Process
Brick bonding is a crucial step in creating robust and visually appealing brickwork. However, the process doesn’t end there. To guarantee a lasting and durable bond, it’s vital to complete the finishing steps with precision. In this article, we’ll walk you through the necessary steps for completing the bonding process, with a focus on using glue. So, let’s dive right in.
Step 1: Removing Excess Adhesive or Mortar
Once you’ve successfully bonded the bricks together, it’s common to find some adhesive or mortar squeezed out between them. Gently scrape away this excess material using a putty knife or trowel, ensuring no harm comes to the bricks themselves.
Step 2: Allowing Proper Curing Time
After removing the excess adhesive or mortar, you must allow the bond to cure and dry thoroughly. The curing time varies depending on the adhesive or mortar used, but for optimal results, wait at least 24 hours.
Step 3: Checking for Gaps or Voids
Inspect the bonded area for any gaps or voids between the bricks. These imperfections can weaken the bond and compromise structural integrity. Fill any gaps with additional adhesive or mortar, ensuring even application that completely fills the void.
Step 4: Smoothing Out Joints
To enhance both appearance and strength, consider using a pointing tool to smooth out and shape the adhesive or mortar joints between the bricks. This step adds finesse and stability to your bond.
Step 5: Protecting from Moisture and Weathering
Preserve your bonded bricks by applying a suitable sealant or waterproofing agent to safeguard against moisture and weathering. This final step ensures longevity and integrity for your bond.
Adhesive Bonding for Masonry Applications

Adhesive bonding is a game-changer for masonry applications. It offers a host of advantages over traditional mortar-based methods, making it the go-to choice for builders and architects looking to create strong and visually appealing structures. Let’s dive into the world of adhesive bonding and explore what makes it so special.
Advantages of adhesive bonding:
- Increased Strength: When it comes to bonding bricks together, adhesive bonding takes the cake. Epoxy adhesives, in particular, are known for their exceptional strength and durability. With adhesive bonding, you can rest assured that your brick structure will stand tall and strong for years to come.
- Faster Installation: Time is money, especially in the construction industry. Adhesive bonding offers a significant advantage in terms of installation speed compared to traditional mortar-based methods. Adhesives cure much faster than mortar, allowing you to save precious time during your masonry project. This is particularly useful when working on tight deadlines or striving for maximum efficiency.
- Improved Aesthetics: Adhesive bonding not only provides functional benefits but also enhances the overall appearance of your brickwork. Unlike traditional mortar joints, adhesive bonds are less noticeable, resulting in cleaner and more modern-looking structures. If aesthetics are a priority for your project, adhesive bonding is an excellent choice.
Considerations for successful adhesive bonding:
- Type of Adhesive: Choosing the right adhesive is critical for successful bonding in masonry applications. Epoxy adhesives, polyurethane adhesives, and acrylic adhesives are commonly used for bonding bricks together. Each type has its own characteristics and suitability for specific applications, so be sure to select the one that best fits your needs.
- Surface Preparation: Properly preparing the surfaces before applying the adhesive is crucial for achieving a strong bond between bricks. Ensure that the surfaces are clean and free from contaminants like dust or dirt. Use a wire brush or sandpaper to remove any loose material and create a pristine surface for optimal adhesion.
- Curing Time: After bonding the bricks together, allow sufficient time for the adhesive to cure and reach its full strength. The curing time will depend on the type of adhesive used and environmental conditions. Always follow the manufacturer’s instructions to ensure proper curing.
Applying Adhesives to Bricks
When it comes to bonding bricks, adhesives are the unsung heroes of the masonry world. With their incredible strength and fast installation, they can save the day whether you’re building a majestic brick structure or repairing a small section of your home. Imagine a bond as solid as Thor’s hammer and as stunning as Wonder Woman’s lasso – that’s what adhesives can achieve.
Before we dive into the process of applying adhesives to bricks, let’s explore the different types available. Epoxy adhesives are known for their high strength and durability, making them perfect for bricklaying and construction projects. For outdoor applications, polyurethane adhesives can withstand extreme temperatures and weather conditions. And for versatility, construction adhesives can bond a wide range of materials, including bricks.
Now that we have our adhesive of choice, let’s prepare the brick surfaces. Using a wire brush or compressed air, make sure they’re clean and free from dust, dirt, or debris. To improve the bond, dampen the surfaces with water before applying the adhesive. This simple step makes a big difference in bond strength.
When applying the adhesive, follow the manufacturer’s instructions carefully. Use the recommended amount and apply it evenly across the surface of the bricks. Depending on the type of adhesive used, you may need to apply pressure. Clamps or weights can hold the bricks together while the adhesive cures.
Patience is crucial – allow sufficient time for the adhesive to fully cure before subjecting it to stress or load. The curing time varies, so check the manufacturer’s instructions.
After curing, check the bond strength by applying pressure or conducting a test. In some cases, additional reinforcement may be necessary. Metal or fiberglass reinforcement bars, known as rebar, embedded in the adhesive can further strengthen the bond.
Remember that adhesives alone may not provide sufficient strength for all applications. In such cases, consider other bonding methods like mortar or mechanical fasteners. Consulting professionals or experts in bricklaying and construction is always wise.
Mechanical Fasteners for Brick Bonding
Imagine a world without mechanical fasteners – a world where bricks stand alone, vulnerable to the forces of nature. Thankfully, in the masonry realm, we have these unsung heroes to save the day. Mechanical fasteners provide the crucial connection between bricks, ensuring the stability and strength of walls and buildings.
When it comes to bonding bricks together, there are several types of mechanical fasteners that can be utilized, each serving a specific purpose:
- Wall ties: These metal wonders are designed to connect adjacent layers of bricks. Inserted into pre-drilled holes and secured with mortar or epoxy adhesive, wall ties distribute the load evenly across the brickwork, reinforcing its structure.
- Anchor bolts: When securing bricks to a concrete or masonry substrate, anchor bolts come to the rescue. By inserting them into pre-drilled holes and tightening them with nuts and washers, a formidable bond is created that can withstand the test of time.
- Metal brackets or plates: Sometimes, metal brackets or plates step in as the heroes of brick bonding. Attached to bricks using screws or bolts, these versatile devices provide a secure and durable connection.
But wait, there’s more. It’s crucial to choose mechanical fasteners compatible with the materials being bonded and specific project conditions. Additionally, size and spacing play a critical role in ensuring proper load distribution and structural stability.
Factors to Consider when Choosing a Bonding Method
When it comes to bonding bricks together, there are several crucial factors to consider in order to ensure a strong and durable bond. Whether you’re working on a small DIY project or a large-scale construction job, choosing the right bonding method is essential for the success of your project.
Strength and durability should be at the top of your list when considering bonding methods. The adhesive or mortar you choose must be able to withstand the weight and pressure applied to the bricks. This will ensure that your bond will last for years to come, without weakening or breaking under stress.
Weather resistance is another important factor to consider. Bricks are exposed to various weather conditions, including rain, extreme temperatures, and humidity. Therefore, it’s crucial to choose a bonding method that is resistant to these elements. Water-resistant adhesives or mortars are commonly used in brick bonding to prevent water penetration and damage.
Ease of application is also a key consideration. Some adhesives may require specialized tools or techniques, while others can be easily applied using a standard caulking gun or trowel. The chosen method should be user-friendly and suitable for the skills and expertise of the individuals involved in the bonding process.
Time constraints are another factor that shouldn’t be overlooked. Depending on your project’s timeline, you may need a bonding method that offers quick curing or setting times. This will ensure that the bonding process is completed efficiently and does not cause unnecessary delays.
Aesthetic appeal may also be a significant factor in certain cases. If you want your bonded bricks to have a seamless and visually appealing appearance, consider choosing a bonding method that provides this result.
Compatibility with the type of bricks being used is crucial as well. Different types of bricks may require specific adhesives or mortars for optimal bonding. It’s important to consult with professionals or manufacturers to determine the compatibility of different bonding methods with your specific type of bricks.
Lastly, cost-effectiveness should always be considered. Compare the prices of different adhesives or mortars and evaluate their performance and suitability for your project requirements. It’s essential to find a balance between quality and affordability.
kBXXDK9ooyI” >
Conclusion
When it comes to bonding brick to brick, there are a few tried-and-true methods that can ensure a strong and durable connection.
One popular approach is using mortar, a mixture of cement, sand, and water. This sticky substance acts as a glue, holding the bricks together and creating a solid structure.
Another option is using adhesive or construction glue specifically designed for masonry applications. These powerful adhesives provide an instant bond and are ideal for smaller projects or repairs.
Additionally, reinforcing the bond with metal ties or anchors can further enhance the strength and stability of the brickwork. Whether you’re building a new wall or repairing an existing one, choosing the right bonding method is crucial for long-lasting results.
So, whether you opt for traditional mortar or modern adhesives, make sure to follow proper installation techniques and take your time to achieve a secure bond between each brick.