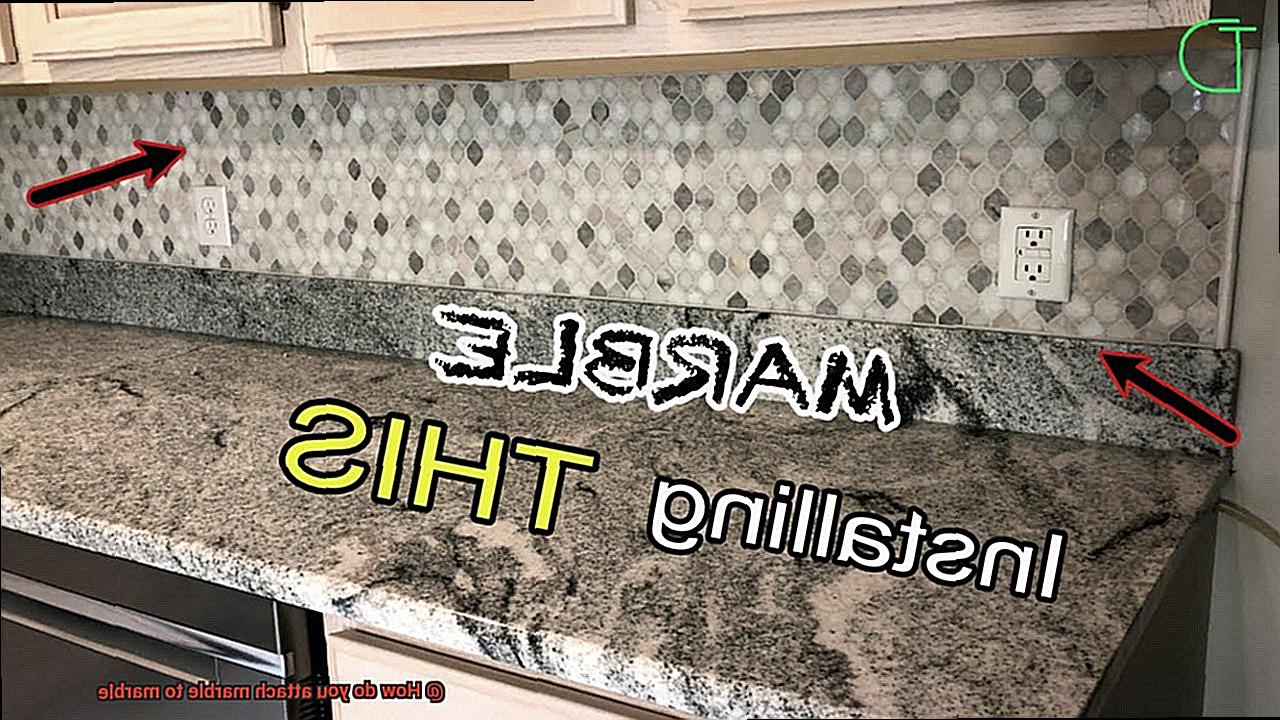
Marble, a timeless masterpiece with veins that dance like strokes of an artist’s brush, has captivated hearts for centuries. Its luxurious allure and elegance make it a coveted material for creating stunning mosaics or elevating the beauty of interior spaces. If you’ve ever wondered how professionals achieve flawless connections between marble pieces, you’re in luck. In this guide, we’ll delve into the secrets of seamlessly attaching marble to marble, revealing the precision, patience, and expertise required for this artful process.
Step 1: Prepare the Surface – Setting the Stage for Perfection
Contents
- 0.1 Step 1: Prepare the Surface – Setting the Stage for Perfection
- 0.2 Step 2: Select the Right Adhesive – The Secret Ingredient
- 0.3 Step 3: Apply the Adhesive – Weaving Magic Between Marble Pieces
- 0.4 Step 4: Align and Press – Bringing Harmony to Marble’s Symphony
- 1 What You Need to Know Before Attaching Marble to Marble
- 2 Preparing the Surfaces for Adhesive Application
- 3 Applying the Adhesive
- 4 Clamping or Holding the Marble Pieces Together
- 5 Alternative Methods of Attaching Marble to Marble
- 6 Using Mechanical Fasteners
- 7 Using a Marble Bonding Agent
- 8 Choosing the Right Adhesive or Bonding Agent
- 9 Conclusion
Before embarking on your bonding journey, it’s vital to prepare the marble surfaces meticulously. Imagine a pristine canvas awaiting its masterpiece. Begin by ensuring that both surfaces are immaculately clean, dry, and free from any dust or debris that could mar their union. A gentle cleansing with a mild detergent and water solution will banish any stains or residues. Once purified, allow them to bask in the air until they are completely dry.
Step 2: Select the Right Adhesive – The Secret Ingredient
Choosing an adhesive tailored specifically for marble is key to achieving a bond that withstands the test of time. Like a master chef selecting only the finest ingredients for their dish, opt for high-quality marble epoxy adhesive or seek out specially formulated adhesives designed explicitly for marble applications. To ensure compatibility with your specific marble type and project requirements, consulting professionals or reaching out to adhesive manufacturers is highly recommended.
Step 3: Apply the Adhesive – Weaving Magic Between Marble Pieces
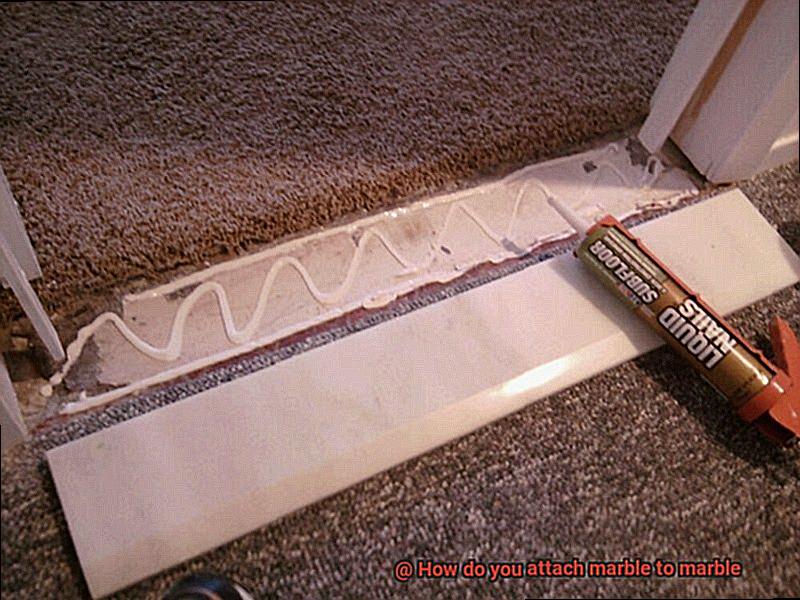
With your chosen adhesive in hand, it’s time to weave magic between your marble pieces. Using either a small-sided trowel or a notched spreader as your wand of choice, gracefully spread an even layer of adhesive onto both sides of the marble. Be mindful, however, not to overindulge in adhesive excess, as it can mar the final result with unsightly seepage or a weakened bond. The notches on the spreader ensure an even distribution, allowing for a seamless connection between the two pieces.
Step 4: Align and Press – Bringing Harmony to Marble’s Symphony
Gently align the edges or tiles of your marble pieces, seeking perfect harmony in their union. Apply a gentle pressure using a rubber mallet or a wooden block wrapped in a protective cloth, like a conductor guiding an orchestra
What You Need to Know Before Attaching Marble to Marble
Marble, a timeless material that exudes elegance and sophistication, is a stunning addition to any space. However, attaching marble to marble requires meticulous attention to detail. In this article, we will explore the essential factors to consider when bonding marble surfaces together to ensure a secure and visually pleasing result.
Choosing the Right Adhesive:
Selecting the right adhesive is crucial when attaching marble to marble. Consider these options:
- Epoxy Adhesive: Renowned for exceptional bonding capabilities and moisture resistance, epoxy adhesive is ideal for wet areas like bathrooms and kitchens.
- Polyurethane Adhesive: With excellent flexibility and durability, polyurethane adhesive is suitable for environments with temperature fluctuations or heavy foot traffic.
- Silicone-Based Adhesive: For lighter applications or when flexibility is required, silicone-based adhesives provide a reliable bond while allowing slight movement.
Surface Preparation:
Achieving a strong bond begins with proper surface preparation. Follow these steps:
- Cleanliness: Ensure both surfaces are free from dirt, dust, or debris. Use a mild detergent or stone cleaner to remove oils or residues that hinder adhesion.
- Removal of Existing Adhesives: Completely remove remnants of previous adhesives or coatings on the marble surfaces for a seamless bond.
- Surface Roughening: Enhance adhesion by gently sanding the surfaces with sandpaper or a diamond abrasive pad. This creates a slightly rough texture, improving the adhesive’s grip on the marble.
Adhesive Application:
With prepared surfaces, apply the adhesive using these techniques:
- Color Matching: Select an adhesive that matches or complements the marble’s color for a seamless and aesthetically pleasing result.
- Application Technique: Use a notched trowel or putty knife to apply a thin, even layer of adhesive on both surfaces. Consistent coverage minimizes excess adhesive.
- Alignment and Clamping: Align the marble pieces carefully, ensuring no gaps or spaces between them. Apply gentle pressure and use clamps or weights to hold the pieces together while the adhesive cures.
Curing Time and Maintenance:
Follow these guidelines for optimal strength and durability:
- Curing Time: Allow the adhesive to fully cure before subjecting the marble to stress or load. Follow the manufacturer’s instructions regarding temperature and humidity conditions for optimal curing.
- Maintenance: Regularly clean and maintain the attached marble surfaces using appropriate stone cleaners or mild detergents. Avoid acidic or abrasive cleaners that could damage the adhesive bond.
Preparing the Surfaces for Adhesive Application
Marble, with its exquisite beauty, adds a touch of elegance to any space. Whether you’re embarking on a DIY project or undertaking a professional installation, the key to a flawless bond lies in properly preparing the surfaces before applying adhesive. In this comprehensive guide, we will unveil the secrets to achieving a strong and long-lasting bond between two marble pieces.
Step 1: Purify the Surfaces
The journey to a perfect bond begins with purifying the marble surfaces. Rid them of any dirt, dust, or debris that may obstruct the adhesive’s efficacy. Employ a gentle cleaning solution, such as a mild detergent or specifically formulated stone cleaner, and gently wipe the surfaces with a soft cloth. Rinse away any residue and ensure that the marble is completely dry before proceeding.
Step 2: Banish Residual Adhesive
Scour the marble surfaces for remnants of previous adhesive or residue. With utmost care, use a scraper or putty knife to delicately remove any lingering traces, taking care not to mar the marble’s exquisite facade. Once all vestiges of past adhesives have been eradicated, repeat the cleaning process to ensure pristine conditions.
Step 3: Embrace the Sands of Strength
To fortify the adhesive’s grip, gently sand both marble surfaces using fine-grit sandpaper. Employ circular motions to create a textured terrain that encourages optimum adhesion. This crucial step acts as an insurance policy against slippage or detachment in the future.
Step 4: Smooth Out Imperfections
With an eagle eye, inspect both marble surfaces for chips, cracks, or uneven areas that may compromise the adhesive bond. Should you uncover any imperfections, reach for a specialized stone epoxy filler or repair kit designed exclusively for marble. Apply these magical potions to fill and smooth out any flaws, allowing them ample time to dry and harden before proceeding.
Step 5: The Dance of Precision
Before the adhesive can work its magic, allow the marble pieces to perform a test fit. This delicate dance ensures that the pieces align harmoniously, leaving no room for error. Embark on this ritualistic trial to make any necessary adjustments or modifications before committing to a permanent bond. Should gaps or unevenness rear their heads, call upon shims or wedges to achieve a snug and seamless fit.
Applying the Adhesive
In this comprehensive guide, we will take you through the step-by-step process of applying adhesive when attaching marble to marble. From selecting the perfect adhesive to achieving a bond that will stand the test of time, we’ve got you covered. So, let’s dive in and master the art of applying adhesive.
Choosing the Perfect Adhesive:
To start off on the right foot, it is crucial to select an adhesive that is tailor-made for your marble-to-marble project. Epoxy adhesives, polyurethane adhesives, and silicone adhesives are all popular choices. Each type has its unique advantages and considerations, so take your time to research and choose the one that best fits your needs.
Preparing the Marble Surfaces:
Before diving into the adhesive application, it’s essential to give your marble surfaces some love. Start by thoroughly cleaning them with a gentle cleanser and water, ensuring that every speck of dirt and debris is removed. Rinse and dry the surfaces completely to create a pristine canvas for bonding.
Creating Texture for Optimal Bonding:
To enhance the bond between marble surfaces, add some texture. Gently roughen the surfaces using sandpaper or a sanding block, being careful not to damage or scratch the marble. This slight roughening creates a textured surface that allows the adhesive to grip more effectively.
Applying the Adhesive with Precision:
Now comes the exciting part – applying the adhesive. Following the manufacturer’s instructions, apply a thin and even layer of adhesive to both marble surfaces using a notched trowel or putty knife. Ensure complete coverage without excessive buildup, as precision is key for achieving a flawless bond.
Pressing the Surfaces Together for Perfection:
Once the adhesive is applied, align the marble pieces with care and firmly press them together. Apply consistent pressure to eliminate any gaps or spaces between the surfaces. This step is crucial for achieving optimal bonding strength, ensuring that your marble-to-marble attachment is rock-solid.
Securing During Curing for Unyielding Strength:
To ensure a strong bond during curing, use clamps or weights to hold the marble pieces in place. This maintains constant pressure until the adhesive has fully cured. Refer to the manufacturer’s instructions for recommended curing times and conditions, allowing your bond to reach its full potential.
Protecting the Bond from Potential Threats:
During the curing process, guard your marble surfaces against any potential stressors that could compromise the bond. Shield them from excessive moisture, temperature extremes, or any other factors that might jeopardize the integrity of the adhesive. Protecting your bond ensures a lasting connection.
Clamping or Holding the Marble Pieces Together
Creating a secure and stable bond between marble pieces is vital when it comes to constructing lasting structures. The key to achieving this lies in clamping or holding the marble pieces together during the adhesive’s curing process, preventing any undesirable shifting or movement. In this comprehensive guide, we will explore an array of tools and techniques available for clamping or holding marble pieces together, guaranteeing a successful bond that will endure the test of time.
C-Clamps and Bar Clamps:
- Adjustable jaws ensure even pressure distribution across the marble surface, fostering a solid bond.
- Utilize padded jaws or protective blocks to safeguard against unsightly damage.
- Strategically position clamps along the edges of the marble pieces, granting maximum stability.
- Apply ample pressure to securely hold the pieces without distorting their shape.
Specialized Stone Clamps or Suction Cups:
- Stone clamps designed explicitly for securing heavy stone materials like marble.
- Rubberized grips or padded surfaces ensconce your marble, providing a secure hold without leaving a trace.
- Suction cups harness the power of vacuum seals, effectively joining multiple pieces together.
Mechanical Devices (Turnbuckles and Tension Rods):
- Turnbuckles: Offering adjustable tension, they expertly pull together two vertical surfaces.
- Tension rods: Perfect for horizontal joins, ensuring an impeccably tight fit.
- Precise installation and meticulous adjustment are essential for optimal results.
Important Considerations:
- Exercise caution to avoid applying excessive pressure that may lead to unsightly cracks or damage.
- Marble possesses delicate attributes; therefore, it is crucial to strike a balance between sufficient pressure for a robust bond and avoiding undue force.
Alternative Methods of Attaching Marble to Marble
In this article, we will delve into the world of alternative methods for attaching marble to marble. From traditional mechanical fixings to innovative adhesive techniques, we will uncover the art of achieving a seamless bond.
Mechanical Fixings:
One tried and tested method is the use of metal brackets, clips, or anchors. These fixings are secured in pre-drilled holes and tightened to hold the marble pieces together. This technique provides a strong and durable bond, ensuring long-lasting results.
Epoxy Resin:
Epoxy resin, designed specifically for bonding stone materials, is a popular choice. This two-part adhesive is mixed and applied between the marble pieces, forming a robust bond once cured. However, caution must be exercised during application due to its messy nature.
Silicone Adhesive:
For flexibility and waterproofing, silicone adhesive is an excellent option. It not only provides a relatively strong bond but also allows for movement or vibration in expected areas.
Polyurethane Adhesive:
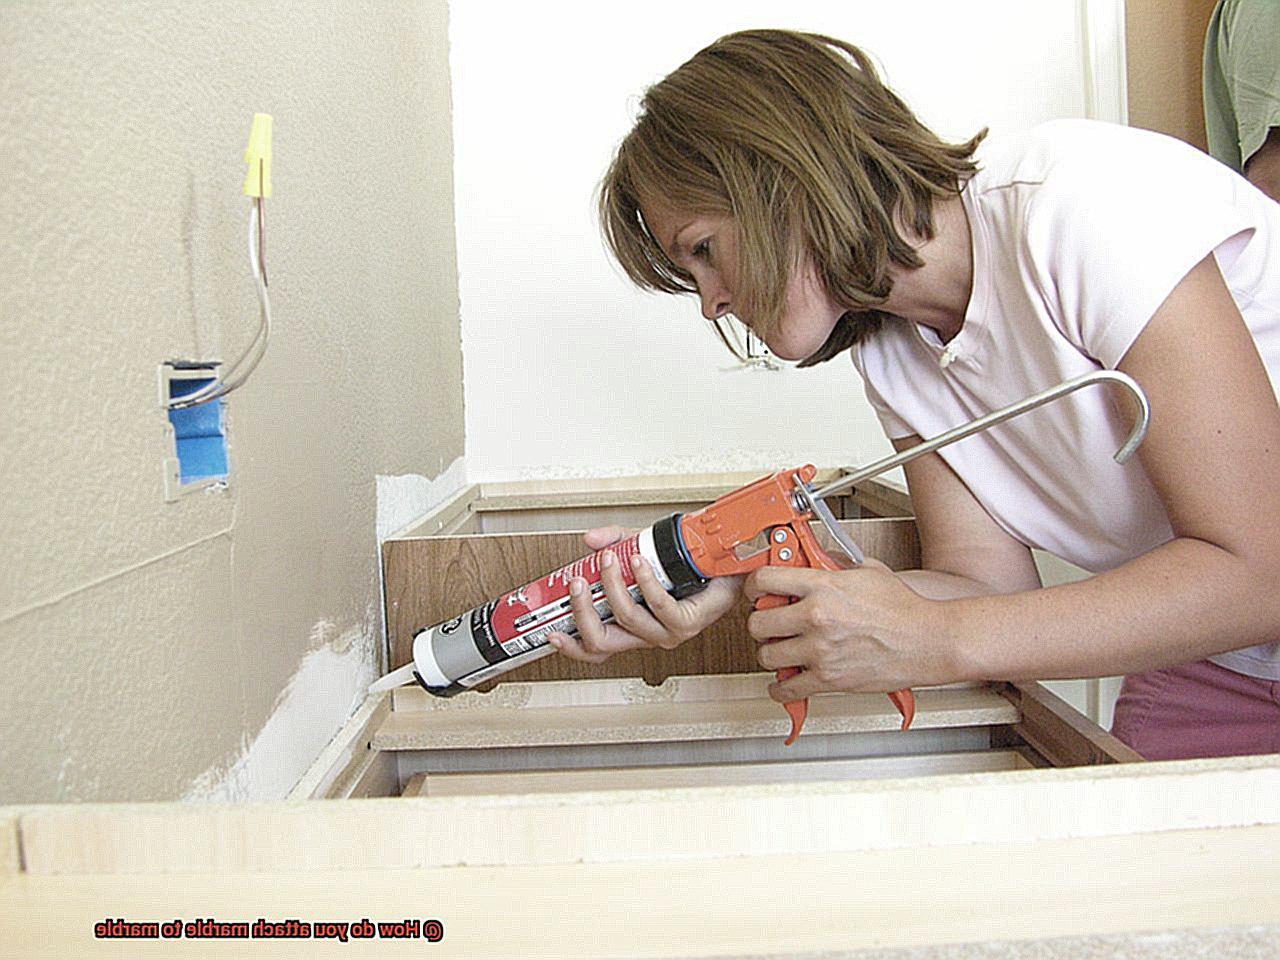
Polyurethane adhesive is ideal for projects requiring resistance to moisture, heat, and chemicals. Available in liquid or gel form, it can be applied with a caulking gun or trowel. Following the manufacturer’s instructions is crucial for optimal performance.
Mechanical Interlocking:
For a more intricate approach, mechanical interlocking offers an artistic touch. By carving grooves or channels on the edges of marble pieces, they can be fitted together like puzzle pieces. This method requires skillful craftsmanship and precise carving for a perfect fit.
Using Mechanical Fasteners
Marble, with its timeless elegance and breathtaking beauty, is a top choice for a wide range of applications, from luxurious countertops to exquisite flooring. However, when it comes to joining two marble pieces together, the question arises: should one rely on traditional mechanical fasteners or dive into the realm of adhesive techniques?
Mechanical fasteners offer a tried and tested method for securely attaching marble to marble. There are two common types of fasteners used in this process: marble anchors and marble clamps. Marble anchors, typically crafted from corrosion-resistant materials like stainless steel, are inserted into pre-drilled holes in the marble and then secured with screws or bolts. On the other hand, marble clamps utilize adjustable jaws that grip onto the edges of the marble pieces, tightly holding them together.
The advantage of utilizing mechanical fasteners lies in their unwavering reliability and exceptional strength. They provide a secure bond capable of withstanding heavy loads, making them ideal for applications where durability is paramount. Additionally, mechanical fasteners allow for easy disassembly if necessary, offering convenience when it comes to repairs or modifications.
However, it is important to consider potential downsides. One drawback of mechanical fasteners is their visibility on the surface of the marble. In certain applications where a seamless appearance is desired, this may not be preferable. Additionally, using mechanical fasteners requires drilling holes into the marble, a process that can be time-consuming and potentially weaken the stone’s structure if not executed correctly.
When deciding between mechanical fasteners and adhesive techniques for joining marble to marble, several factors must be taken into account. These include the weight of the marble pieces, the installation’s location, and aesthetic preferences. Seeking guidance from professional contractors or installers specializing in marble installations is crucial to ensure the proper selection and installation of mechanical fasteners.
Using a Marble Bonding Agent
Marble, renowned for its timeless allure and sophistication, is a popular choice for countertops, flooring, and other applications. While mechanical fasteners have traditionally been used to join marble pieces, the use of marble bonding agents offers a reliable and aesthetically pleasing alternative. This article will delve into the process of using a marble bonding agent to achieve a seamless and robust connection between marble surfaces.
To begin, it is crucial to ensure that the marble surfaces are pristine and free from contaminants. Gentle cleaning with a mild detergent and water solution is recommended, avoiding harsh chemicals or abrasive cleaners that could mar the marble’s beauty.
The most commonly used marble bonding agent is an epoxy resin adhesive. Boasting exceptional bonding strength and durability, epoxy adhesives are well-suited for marble bonding applications. Typically, these adhesives come in two parts – a resin and a hardener – which must be mixed in the correct ratio to activate their adhesive properties.
Once the adhesive is mixed, it should be evenly spread onto both marble surfaces using a putty knife or notched trowel. Care must be taken to ensure smooth application without any gaps or unevenness between the marble pieces.
After applying the adhesive, align the marble pieces meticulously and press them firmly together. Any excess adhesive that squeezes out should be promptly removed with a clean cloth or sponge before it dries.
Allow ample curing time for the epoxy adhesive to fully set and bond the marble pieces together. Curing times may vary depending on the specific product used, so consulting the manufacturer’s instructions is advisable.
Once the adhesive has cured, any remaining residue or smudges can be effortlessly cleaned using a marble-specific cleaner or a mild solution of water and vinegar. Acidic or abrasive cleaners must be avoided as they can harm the delicate marble surface.
Choosing the Right Adhesive or Bonding Agent
Marble, with its timeless elegance and sophistication, has become a popular choice for various applications such as countertops and flooring. Achieving flawless connections between marble surfaces requires selecting the right adhesive or bonding agent. In this blog post, we will explore the importance of choosing the appropriate adhesive for marble bonding and delve into the different options available.
Understanding the Factors:
To ensure optimal bonding, several factors must be considered when selecting the adhesive for marble bonding:
- Type of marble: Different types of marble have varying properties, including porosity and surface texture. The adhesive must be compatible with the specific type of marble.
- Application method: The method of applying the adhesive can vary, such as using a putty knife or notched trowel. The adhesive should be suitable for the chosen application method.
- Desired strength: Depending on the intended use, the required level of strength will vary. Consider the weight-bearing capacity and potential vibrations to select an adhesive that provides adequate strength.
Epoxy Adhesives:
Epoxy adhesives are commonly used for marble bonding due to their excellent adhesive properties and high strength. They consist of two components – a resin and a hardener – that must be mixed together before application. Epoxy adhesives offer a strong and long-lasting bond that can withstand heavy loads and vibrations.
Polyurethane Adhesives:
Polyurethane adhesives are another option for bonding marble surfaces. They provide good bonding properties and offer flexibility, making them suitable for applications where some movement or expansion is expected. These adhesives also offer good resistance to water and chemicals.
Specialized Construction Adhesives:
In some cases, specialized construction adhesives specifically designed for marble bonding may be preferred. These adhesives are formulated to meet the unique requirements of bonding marble surfaces and provide excellent adhesion strength.
Surface Preparation and Application:
Proper surface preparation is crucial for optimal bonding. Thoroughly clean the surfaces, ensuring they are free from dust, dirt, and contaminants. Slightly roughening the surface using sandpaper can improve adhesion. Follow the manufacturer’s instructions for mixing ratios, application methods, and curing times. Wear appropriate protective gear and ensure adequate ventilation when working with adhesives.
eEcaSrE2ZSA” >
Conclusion
When it comes to attaching marble to marble, there are several techniques at your disposal. One effective method involves utilizing an epoxy adhesive specially formulated for bonding marble surfaces together. This powerful adhesive not only creates an unyielding bond but also ensures long-lasting durability that will stand the test of time.
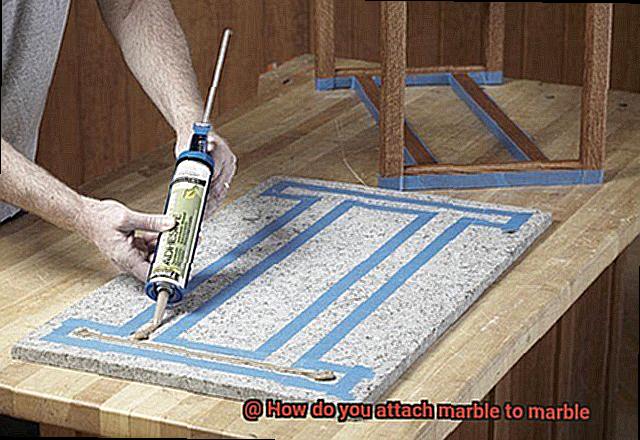
Another option worth considering is employing a marble adhesive packaged in a convenient tube akin to caulk. With its user-friendly application process and transparent drying properties, this type of adhesive guarantees a flawless finish that seamlessly blends into your marble masterpiece.
For those seeking maximum stability and support, mechanical fasteners like screws or brackets can be employed alongside adhesives. This dual approach provides an extra layer of reinforcement while maintaining aesthetic integrity.
Before embarking on any attachment endeavor, it is crucial to meticulously clean and prepare both surfaces involved in the process. Ensure that all traces of dust, dirt, and grease have been thoroughly eradicated from the marbled surfaces for optimal adhesion.
Lastly, adhere strictly to the manufacturer’s instructions for the adhesive you choose. Allow ample time for drying or curing to avoid compromising the bond between your marble pieces. Exercise caution when handling or applying pressure to the attached marble, allowing it sufficient time to solidify and reach its maximum strength.