Are you ready to take your aquarium game to the next level?
Brace yourself, because we’re about to dive into the mesmerizing world of bonding acrylic to glass. This mind-blowing technique not only amps up the strength and durability of your tank but also unleashes a wave of jaw-dropping visual appeal.
Picture this: your once ordinary glass aquarium transformed into a show-stopping masterpiece that will leave everyone in awe. The possibilities are as vast as the ocean itself.
But hold on tight, my friend, because bonding acrylic to glass requires some serious precision and attention to detail. In this blog post, we’re about to embark on an epic journey where we’ll unravel the secrets behind achieving a seamless and long-lasting bond between acrylic and glass in your aquarium.
So get ready to make waves in the world of aquarium transformation like never before.
What is Required for Bonding Acrylic to Glass Aquarium?
Contents
- 1 What is Required for Bonding Acrylic to Glass Aquarium?
- 2 Preparation of the Surfaces for Bonding
- 3 Applying the Adhesive
- 4 Aligning and Pressing the Surfaces Together
- 5 Using Clamps or Weights to Secure the Bond
- 6 Curing Time and Precautions During Curing Process
- 7 Removing Excess Adhesive After Curing
- 8 Challenges of Bonding Acrylic to Glass Aquarium
- 9 Conclusion
In this article, we will explore the secrets to successfully bonding acrylic to glass in your aquarium, ensuring a strong and durable bond.
Select the Right Adhesive:
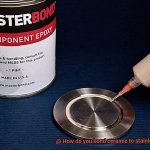
Choose an adhesive specifically formulated for bonding acrylic and glass surfaces. Popular options include two-part epoxies or specialized acrylic cements that provide a reliable bond resistant to water and other elements commonly found in aquariums.
Thorough Surface Preparation:
Thoroughly clean, dry, and remove any dirt, dust, or grease from both the acrylic and glass surfaces. Use a mild detergent or alcohol-based cleaner for optimal cleanliness.
Enhance Bond Strength through Roughening:
Lightly sand both the acrylic and glass surfaces using fine-grit sandpaper. This roughens the surfaces, increasing the contact area for the adhesive to adhere to and enhancing bond strength.
Apply Adhesive Evenly:
Ensure even application of the adhesive, covering the entire bonding area sufficiently. Follow the manufacturer’s instructions for application techniques and curing time.
Allow for Adequate Curing Time:
Securely clamp or hold together the acrylic and glass until the bond has fully cured. Be patient and follow the manufacturer’s instructions regarding curing time. Rushing this step could compromise the bond’s strength.
Handle with Care:
After bonding, handle your aquarium carefully to avoid applying excessive force or stress on the bonded areas. Regular maintenance and inspection are recommended to detect any deterioration or weakening of the bond over time.
Preparation of the Surfaces for Bonding
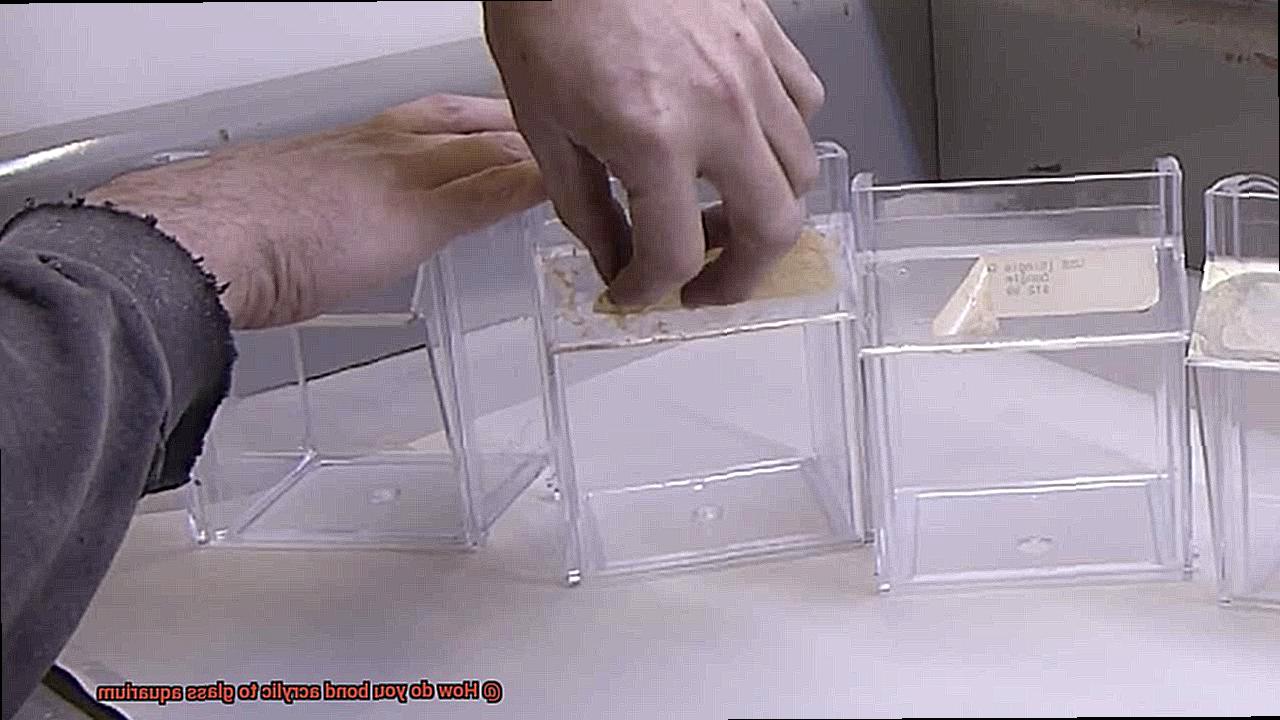
Creating a strong and unbreakable bond between acrylic and glass requires proper surface preparation. Before diving into the gluing process, it’s crucial to clean and roughen both surfaces.
Start by thoroughly cleaning the acrylic and glass surfaces to remove any dirt, dust, grease, or contaminants. A mild detergent or specialized acrylic and glass cleaner can be used, ensuring it doesn’t contain any harmful chemicals that could damage the materials.
Once the surfaces are clean, it’s time to roughen them up. This step is essential as it provides more surface area for the adhesive to grip onto. For acrylic, use sandpaper or a sanding block with a fine grit. Gently sand in a circular motion, applying even pressure. Be careful not to scratch or crack the acrylic – we want grooves, not battle scars.
Glass is more delicate, so treat it with care. Use glass-specific sandpaper or a glass etching solution to gently roughen the surface. Take caution not to damage or shatter the glass while doing this.
After roughening, clean up any debris or dust using a clean cloth or compressed air. A pristine surface is crucial for a perfect bond.
For an extra boost in bond strength, consider using a primer or adhesion promoter specifically designed for acrylic-to-glass bonding. Follow the manufacturer’s instructions and allow sufficient drying time before proceeding.
Applying the Adhesive
Today, we embark on a journey to master the art of creating an unbreakable bond between acrylic and glass in your aquarium. Like fitting together the pieces of a puzzle, applying the adhesive is a critical step in ensuring a strong and durable connection. So, let’s dive into the step-by-step process of applying the adhesive to achieve a flawless aquarium bond.
Step 1: Selecting the Ideal Adhesive
Before we begin, it’s crucial to choose the right adhesive for your project. Silicone sealants, epoxy adhesives, and cyanoacrylate (super glue) are popular options. Silicone sealants offer flexibility and water resistance, while epoxy adhesives provide a robust bond. Cyanoacrylate adhesives offer quick bonding but may not withstand wet environments as well.
Step 2: Preparing the Surfaces
Proper surface preparation is key to a successful bond. Start by meticulously cleaning both the acrylic and glass surfaces, removing any dirt, dust, or grease. A gentle solution of mild soap or alcohol works wonders. Follow the manufacturer’s instructions for drying time.
Step 3: Applying the Adhesive
Now comes the exciting part – applying the adhesive. For silicone sealants, use a caulk gun or squeeze tube to apply a thin, even bead along the joint between the acrylic and glass. Take your time to ensure no gaps or bubbles are present. Use a small putty knife or gloved finger to smooth out the silicone, eliminating any excess.
If you opt for epoxy adhesives, follow the manufacturer’s instructions for mixing the components thoroughly. Once mixed, apply the adhesive to the joint using a brush or spatula. Be swift but careful, as epoxy adhesives have limited working time before they cure.
For cyanoacrylate adhesives, a small amount is all you need. Apply it directly to one of the surfaces and align the acrylic and glass accurately. Press them together firmly, wiping away excess adhesive promptly to avoid any visible residue.
Step 4: Allowing for Curing Time
Patience is a virtue when it comes to aquarium bonding. Allow the adhesive sufficient time to cure before handling or moving your newly bonded aquarium. Curing times vary depending on the adhesive type, so consult the manufacturer’s instructions. Waiting at least 24 hours is generally recommended to ensure the bond can withstand stress and pressure.
Aligning and Pressing the Surfaces Together
Aligning and pressing the surfaces together is a critical step in bonding acrylic to glass, creating a seamless and durable connection. To achieve this, there are several key factors to consider.
First and foremost, cleanliness is paramount. Before starting the bonding process, it is essential to thoroughly clean both the acrylic and glass surfaces. Using a mild detergent or glass cleaner, along with a lint-free cloth, ensures that any dirt or residue that could hinder the bonding process is removed. Take the time to scrub the surfaces until they are squeaky clean.
Once the surfaces are pristine, it’s time to align them. This step is crucial for creating a flush and seamless joint. Carefully position the acrylic piece on top of the glass, ensuring that all edges match up perfectly. Clamps or tape can be used to temporarily hold the pieces in place while you work.
Now comes the exciting part – applying pressure. There are various methods you can use to accomplish this. One option is to use clamps or weights to firmly hold the pieces together. This guarantees even distribution of pressure across the entire surface area, promoting a strong bond.
Alternatively, adhesive tapes specifically designed for bonding acrylic and glass can be employed. These tapes have robust adhesive properties that eliminate the need for additional equipment. Simply apply the tape along the joint line, firmly pressing it onto both the acrylic and glass surfaces.
For those seeking an extra-strong bond, specialized adhesives or glues formulated for bonding acrylic to glass are available. These typically consist of two parts that need to be mixed before application. It’s crucial to carefully follow the manufacturer’s instructions regarding application and curing times.
After aligning the surfaces and applying pressure, allow sufficient time for the bond to fully cure. The curing time varies depending on the adhesive used, ranging from a few hours to several days. During this period, avoid any movement or disturbance that could compromise the bond’s integrity.
Using Clamps or Weights to Secure the Bond
Creating a strong and secure bond between acrylic and glass in an aquarium is crucial for the safety and longevity of your aquatic masterpiece. In this article, we’ll explore the world of clamps and weights, uncovering the secrets to achieving a flawless connection. Get ready to dive deep into the art of securing your aquarium bond.
Step 1: Choosing the Right Tools
Selecting the right clamps or weights is essential for a successful bond. Look for clamps specifically designed for working with acrylic and glass, ensuring they have protective padding to prevent scratches or cracks. Alternatively, if you prefer weights, opt for heavy objects like books or bricks that can provide even pressure.
Step 2: Cleaning and Prepping
Before applying any adhesive, thoroughly clean and dry both the acrylic and glass surfaces. Use a mild detergent or acrylic cleaner to remove dirt and debris. This step is crucial for achieving a solid bond.
Step 3: Applying the Adhesive
Choose an adhesive formulated specifically for bonding acrylic to glass. Apply a thin layer according to the manufacturer’s instructions on either the acrylic or glass surface. Pay attention to application and curing times.
Step 4: Aligning and Bonding
Once adhesive is applied, it’s time to bring the two materials together in perfect harmony. Carefully align the acrylic and glass, ensuring a snug fit. If needed, enlist a friend’s help – four hands are better than two.
Step 5: Clamps or Weights?
Now comes the moment of truth – clamps or weights? If you choose clamps, position them strategically along the edges of the bonded area, exerting enough pressure without causing damage. The number of clamps required depends on your aquarium’s size and adhesive strength.
If you’re feeling adventurous, go for the weight method. Distribute heavy objects evenly across the bonded area to provide consistent pressure. Just make sure your weights won’t topple over and create an aquarium disaster.
Step 6: Let It Cure
During the curing process, avoid any sudden movements or disturbances. Your aquarium needs stability for the adhesive to work its magic. Follow the manufacturer’s instructions for recommended curing times, ranging from a few hours to several days.
Step 7: The Big Reveal
Once the adhesive has fully cured, remove the clamps or weights and unveil your masterpiece. Patience is key here – don’t rush the process. Follow the manufacturer’s instructions to ensure a strong and durable bond.
Curing Time and Precautions During Curing Process
Get ready to learn all about the crucial aspects of curing time and precautions during the curing process. These insights will ensure that your aquatic masterpiece stays intact, providing a safe haven for your fishy friends.
Curing Time:
Let’s start with the magic of curing time. This is the period when your adhesive transforms from gooey to rock-solid, creating a bond that can withstand the test of time. It’s essential to follow the recommended curing time provided by the adhesive manufacturer. Remember, patience is key. Rushing this process can lead to a weak bond. Give the adhesive enough time to reach its maximum strength before subjecting it to stress or pressure.
Precautions:
Now, let’s dive into precautions during the curing process. Imagine this: you’ve diligently followed the curing time, but disaster strikes—a sudden jolt or vibration disrupts your bond. To avoid heartbreak, place your bonded aquarium in a safe and stable position where it won’t be accidentally bumped or moved. Let’s keep those fishies in their aquatic paradise.
Contaminants are the nemesis of any good bond. Dust, debris, or moisture have no place near your uncured adhesive. Protect that beauty. Cover your work area with a clean plastic sheet or use a protective barrier to keep unwanted visitors at bay. We don’t want any uninvited guests ruining our bonding party.
UV exposure can be sneaky too. Just like sunscreen protects our skin from harmful rays, we need to shield our bond from direct sunlight or harsh UV rays during the curing process. Those rays can weaken the adhesive over time, compromising its strength. Shade that aquarium or cover it up with a light-blocking material for added protection.
Last but not least, resist the urge to fill your aquarium with water or add your finned friends just yet. Let the adhesive fully cure and reach its maximum strength before subjecting it to the weight and pressure of water. We certainly don’t want any leaks or failures, do we?
Removing Excess Adhesive After Curing
Removing excess adhesive after curing is a crucial step in achieving a clean and professional finish when bonding acrylic to a glass aquarium. There are several effective methods for removing the excess adhesive, each with its own unique benefits and considerations.
Method #1: The Gentle Scraper
The first method involves using a plastic scraper or razor blade to carefully scrape off the excess adhesive. This delicate dance requires precision and mindfulness to avoid scratching the acrylic or glass. Take your time and be gentle, ensuring that you remove the residue without leaving any unsightly marks behind.
Method #2: Solvent to the Rescue
If scraping alone doesn’t do the trick, don’t despair. There are solvents and adhesive removers specifically designed for acrylics that can work wonders. These magical potions soften the adhesive, making it easier to remove. However, it is crucial to use a solvent that is safe for acrylics and to follow the manufacturer’s instructions meticulously. Safety should always be your top priority.
Method #3: Heat it Up.
In some instances, applying heat can be a game-changer. Grab your trusty heat gun or hairdryer and gently apply heat to the area with excess adhesive. The warmth will soften the adhesive, making it easier to remove. However, exercise caution not to overdo it with the heat, as melted acrylic or shattered glass is not what we’re aiming for.
Once you have successfully removed the excess adhesive, it’s time to give your aquarium a thorough cleaning. Use a mild soap and water solution along with a soft cloth or sponge to remove any remaining residue. Avoid abrasive materials or harsh chemicals that could potentially damage your beloved aquarium.
Challenges of Bonding Acrylic to Glass Aquarium
Prepare to embark on a journey through the hurdles that lie ahead. As an expert in the art of adhesion, I am here to share my knowledge and help you conquer these challenges. Let’s dive right in.
The Compatibility Conundrum:
The first challenge we encounter is the compatibility of adhesives with both acrylic and glass. Ordinary glues won’t suffice here, my friends. Specialized options like acrylic-based adhesives or epoxy resins are essential for achieving a sturdy bond.
Surface Preparation Shenanigans:
Before attempting any bonding, it is crucial to ensure that both the acrylic and glass surfaces are impeccably clean. Bid farewell to contaminants and residues by using solvents or cleaners designed specifically for acrylic and glass. Trust me, this step is paramount.
Expansion and Contraction Conundrum:
The differing expansion rates of acrylic and glass pose a significant challenge. Over time, these disparities can strain the bond line, leading to cracks or delamination. To avoid such disasters, opt for bonding methods that can accommodate these differences in thermal expansion. We want a bond that can weather any temperature changes.
Thickness Matters:

Fear not, thick acrylic sheets are no match for us. However, it is essential to take additional measures to ensure a secure bond. Consider utilizing mechanical fasteners or increasing the bonding surface area to establish an unyielding connection. Your aquarium’s thickness need not be an obstacle.
Clarity and Aesthetics Awesomeness:
We all yearn for visually stunning aquariums, don’t we? When selecting adhesives or bonding methods, ensure they leave no unsightly residue and do not compromise the transparency of your aquarium. Allow your aquatic friends to shine through crystal clear.
Durability and Maintenance Must-Haves:
Lastly, let us consider the long-term. Your bond must withstand water pressure, temperature fluctuations, and occasional bumps. Regular inspections and maintenance are imperative to keep your bond in top-notch condition. After all, we want your aquarium to be a safe and blissful abode for your aquatic companions.
Conclusion:
Kudos, glue enthusiasts. You have triumphed over the challenges of bonding acrylic to glass aquariums like seasoned professionals. Armed with an understanding of compatibility puzzles, pristine surface preparation, expansion disparities, thickness requirements, clarity and aesthetic considerations, as well as long-term durability, you possess the tools to create bonds that stand the test of time. So go forth, aquarists, and conjure underwater marvels with confidence.
hT6Ow_cBTps” >
Conclusion
In conclusion, bonding acrylic to a glass aquarium is no easy task. But fear not. With the right techniques and materials, you can create a seamless and sturdy bond that will take your aquatic masterpiece to new heights.
First things first, choosing the right adhesive is absolutely crucial. Don’t settle for just any old glue. Opt for an adhesive specifically designed for bonding acrylic and glass surfaces. Look for two-part epoxies or specialized acrylic cements that are specially formulated to withstand the water and other elements found in aquariums.
Surface preparation is key. Get rid of any dirt, dust, or grease by giving both the acrylic and glass surfaces a thorough cleaning. Use mild detergents or alcohol-based cleaners to ensure optimal cleanliness. And don’t forget to roughen up the surfaces with some fine-grit sandpaper. This will increase the contact area for the adhesive and make for a stronger bond.
When it comes time to apply the adhesive, make sure you do so evenly and cover every inch of the bonding area. Follow the manufacturer’s instructions carefully when it comes to application techniques and curing time.
Once your bond is in place, treat your aquarium with care. Avoid putting excessive force or stress on the bonded areas. Regular maintenance and inspections are also recommended to catch any signs of deterioration or weakening over time.
By following these steps and taking precautions during the curing process, you’ll achieve a flawless bond between acrylic and glass in your aquarium.