Ever wondered how to bring together the timeless beauty of wood and the modern allure of glass? Attaching wood to glass might seem like a daunting task, considering their different properties. But fear not. We’re here to reveal the secrets that will help you achieve a flawless and professional finish.
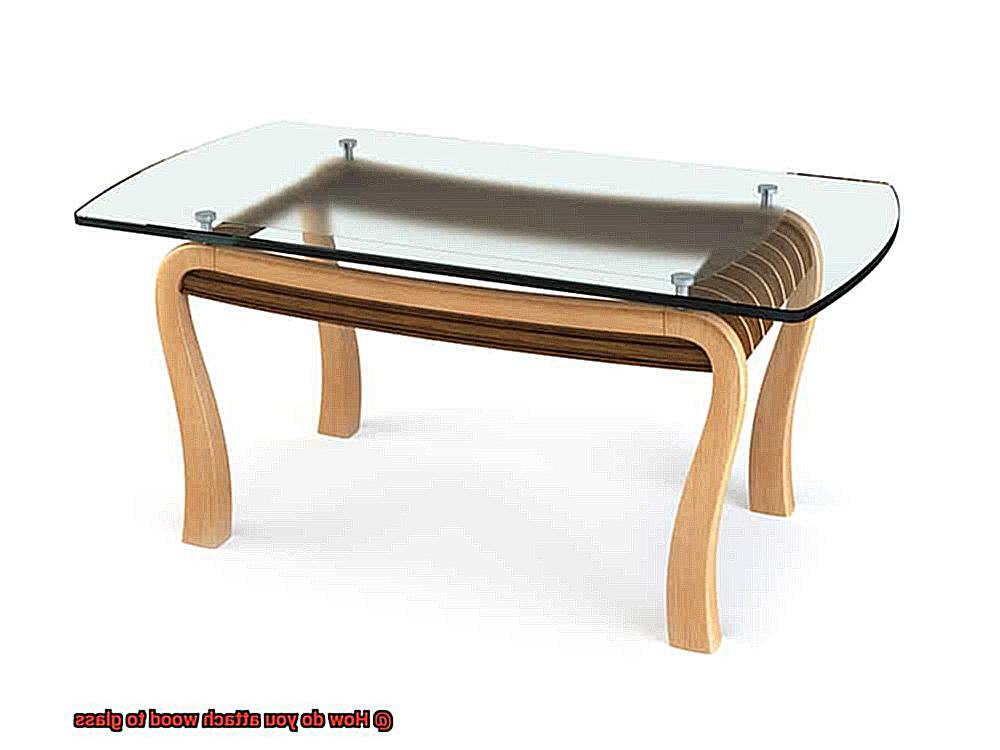
Wood and glass create a delicate yet powerful combination that can elevate the aesthetics of any project. Whether you’re dreaming of a chic coffee table, a floating shelf, or a unique room divider, knowing how to securely attach wood to glass is essential. Not only does it guarantee durability and stability but also ensures an eye-catching result.
Before we dive into the process, it’s important to note that there are various methods for attaching wood to glass, each suited for different projects and desired outcomes. In this blog post, we’ll explore some of the most common and effective techniques while sharing practical tips and advice along the way.
Adhesive Bonding:
Contents
- 1 Types of Adhesives for Attaching Wood to Glass
- 2 How to Use Epoxy Resin for Bonding Wood and Glass
- 3 Adhesive Tapes for Attaching Wood to Glass
- 4 Using Screws or Brackets for Attaching Wood to Glass
- 5 Preparing the Surfaces Before Attaching Wood to Glass
- 6 Benefits of Using Adhesives for Bonding Wood and Glass
- 7 Tips and Tricks for Achieving Optimal Results when Attaching Wood to Glass
- 7.1 “Mastering the Art of Attaching Wood to Glass: Tips and Tricks for Optimal Results”
- 7.2 Introduction:
- 7.3 When it comes to attaching wood to glass, it’s essential to have the right techniques up your sleeve. Whether you’re a seasoned DIY enthusiast or a beginner looking to tackle a new project, these tips and tricks will help you achieve optimal results. From proper surface preparation to selecting the right adhesive, let’s dive into the world of wood and glass bonding.
- 7.4 Clean Surfaces for a Strong Bond:
- 7.5 Before attaching wood to glass, make sure both surfaces are squeaky clean. Any dust, dirt, or grease can prevent the adhesive from adhering properly. Grab a damp cloth and wipe away any debris, then let the surfaces dry completely before proceeding.
- 7.6 Adhesive Tapes: Quick and Easy:
- 7.7 Adhesive tapes specifically designed for wood-to-glass bonding offer a quick and easy solution. These tapes are transparent, ensuring that they won’t be visible once applied. Cut the tape to your desired length or shape, peel off the backing, and carefully apply it to the wood surface. Press firmly against the glass to ensure a strong bond.
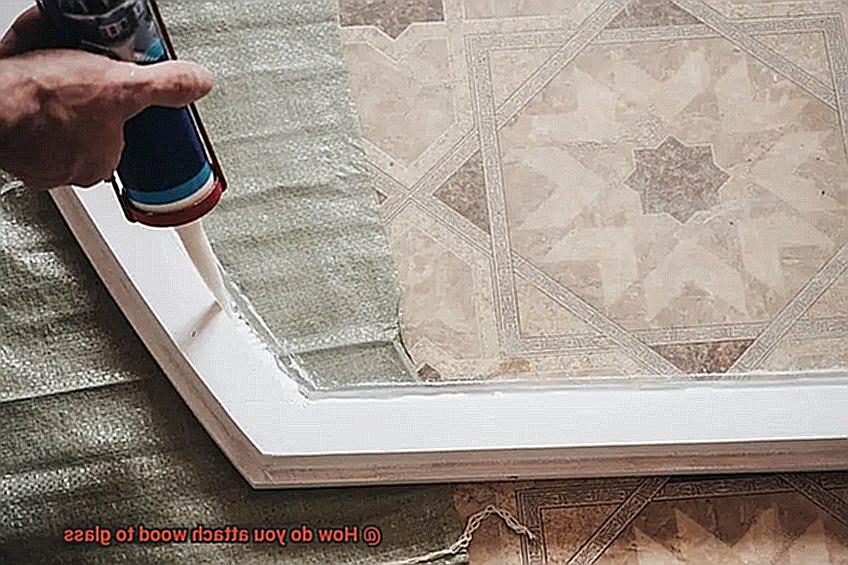
- 7.8 Silicone Adhesive: Flexibility and Strength:
- 7.9 For a more traditional approach, consider using clear silicone adhesive. This versatile adhesive is waterproof, flexible, and provides a robust bond between wood and glass. Use a high-quality silicone adhesive made specifically for this purpose. Apply it evenly on both surfaces, press them together firmly, and allow the adhesive to cure as per the manufacturer’s instructions.
- 7.10 Screws or Brackets: Stability Matters:
- 8 Common Problems When Attaching Wood to Glass
- 9 Conclusion
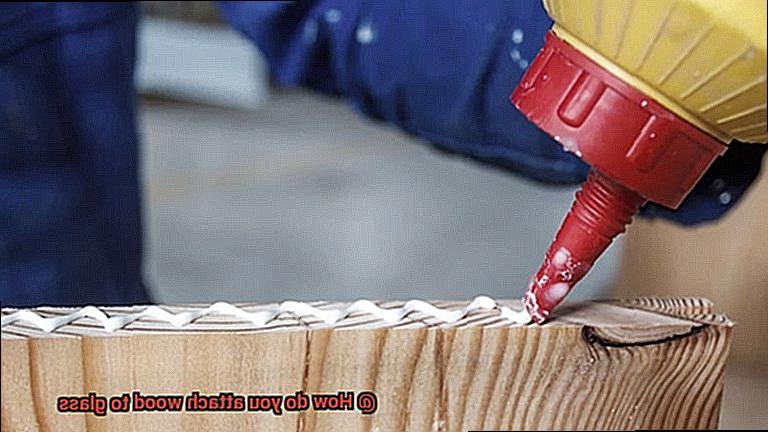
Adhesive bonding is one of the most versatile and reliable ways to attach wood to glass. By using specialized glass adhesives, you can achieve exceptional strength while maintaining transparency. Before applying the adhesive, make sure both surfaces are squeaky clean without any pesky dust or debris. Follow the manufacturer’s instructions carefully, including recommended curing times for optimal results.
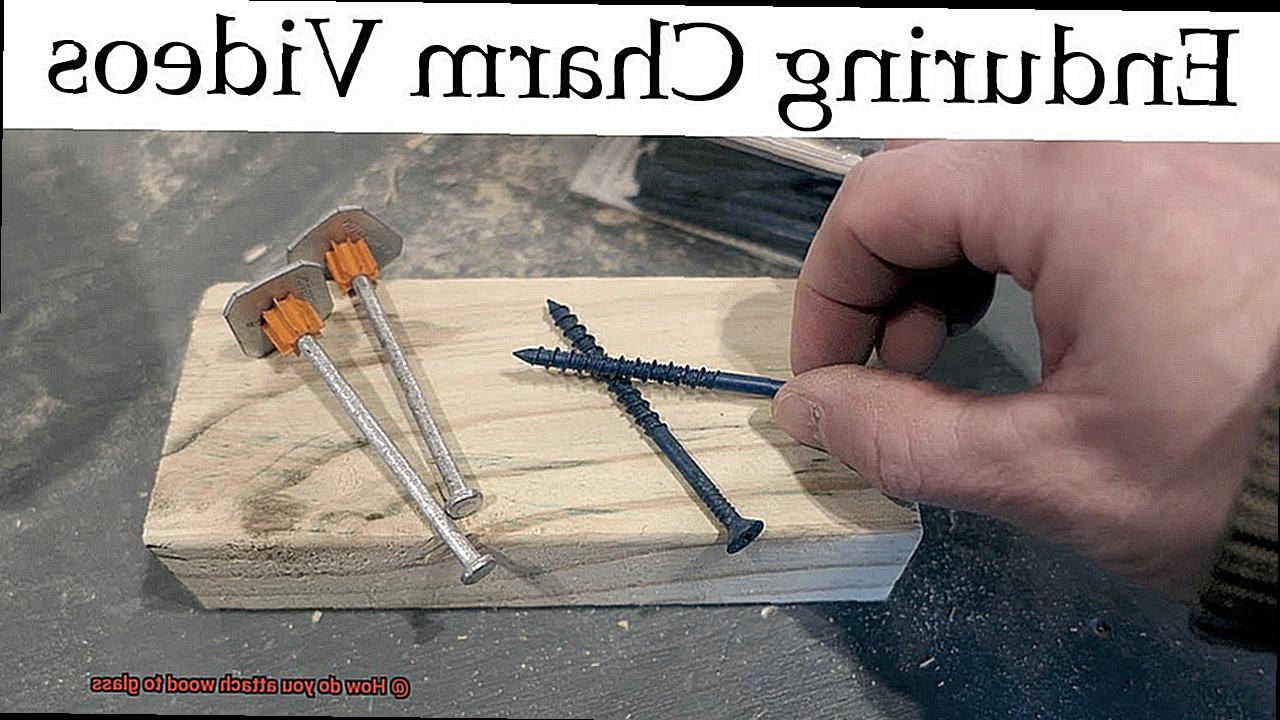
Mechanical Fasteners:
For projects requiring extra strength and stability, mechanical fasteners like screws, brackets, or metal supports can be used in conjunction with adhesive bonding. This technique not only looks great but also adds structural integrity. To avoid cracks or damage, always pre-drill the wood before securing your fasteners.
Clamps and Jigs:
When working with smaller pieces of wood or intricate designs, clamps and jigs become invaluable tools. They hold everything together securely while the adhesive cures, ensuring precision alignment throughout the attachment process. The result? A seamless and professional finish that will make you proud.
Router or Dremel:
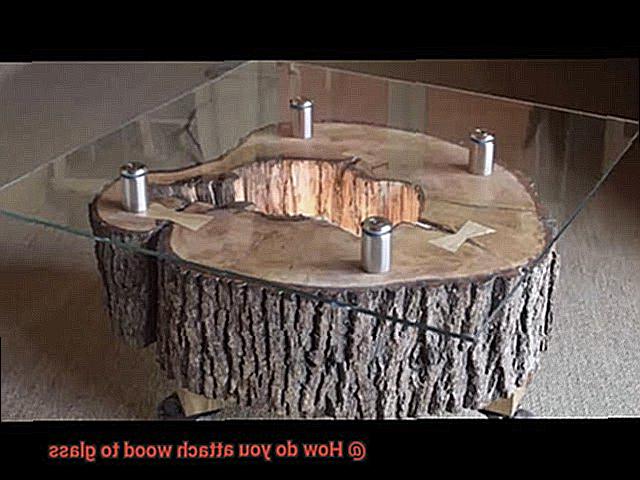
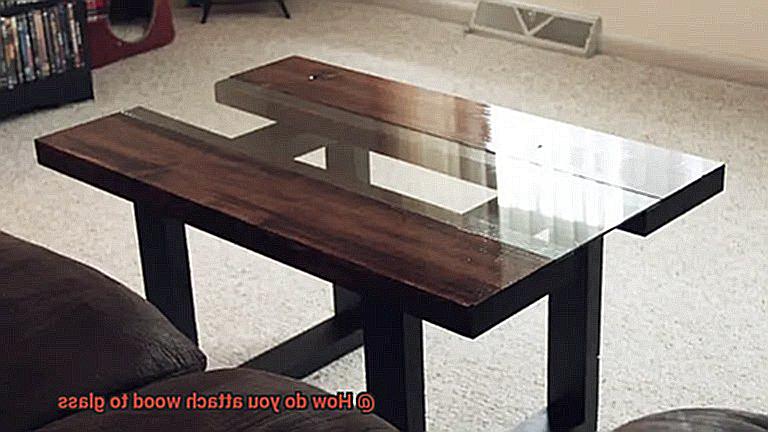
For projects that demand a joinery approach, like creating a wood frame for a glass tabletop, a router or Dremel tool comes to the rescue. These tools allow you to create cutouts or recesses in the wood to accommodate the glass, providing stability and enhancing the overall aesthetic appeal of your final masterpiece.
Tips for Success:
- Don’t forget to wear safety glasses throughout the process. Your eyes are precious.
- Take your time and measure twice before making
Types of Adhesives for Attaching Wood to Glass
Look no further. There are various types of adhesives available that can help you achieve this union. In this comprehensive guide, we will delve into the strengths and weaknesses of popular adhesive options, ensuring you make the perfect choice for your project. Let’s embark on this adhesive adventure.
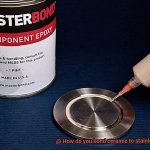
Epoxy Resin – The Unbreakable Connection:
Epoxy resin is the superhero of adhesives, forming an ironclad and long-lasting bond between wood and glass. With its remarkable resistance to moisture and temperature changes, this adhesive is ideal for both indoor and outdoor projects. However, exercise caution during application, as it can be a bit unruly, demanding precise mixing and handling like a skilled alchemist.
Silicone Adhesive – The Bendable Ally:
Silicone adhesive is akin to a loyal friend – flexible and dependable. It forges a supple and waterproof connection between wood and glass. Resistant to moisture, heat, and cold, silicone adhesive suits a wide range of applications. Nevertheless, bear in mind that it may not provide the same level of strength as epoxy, making it best suited for smaller projects or temporary attachments.
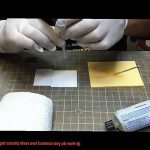
Cyanoacrylate Adhesive (Super Glue) – The Swift Solution:
Super glue is the trusty sidekick you turn to in emergencies; it bonds quickly and securely. However, its durability might not match that of epoxy or silicone. Suited for small projects or temporary attachments, super glue offers rapid solutions when time is of the essence.
Polyurethane Glue – The Expanding Marvel:
Polyurethane glue is like magic in action – expanding as it cures, creating an unyielding bond between wood and glass. Perfect for filling gaps and tolerating moisture, this adhesive is a versatile choice. Be prepared for a bit of messiness and the potential need for clamping during the curing process.
Specialty Adhesives – The Experts’ Choice:
For specific projects, specialized adhesives designed specifically for bonding wood to glass are available. These adhesives may require additional surface treatments or preparation steps, necessitating careful adherence to instructions for optimal results.
Conclusion:
When it comes to attaching wood to glass, various adhesives possess their own unique strengths and weaknesses. Consider factors such as the weight of the wood, type of glass, and intended use before making your adhesive selection. Ensure proper surface preparation, follow the manufacturer’s instructions diligently, and allow ample curing time for a bond that will withstand the test of time.
How to Use Epoxy Resin for Bonding Wood and Glass
Look no further. Epoxy resin is here to make your dreams come true. This magical adhesive has the power to bond wood and glass together with an unbreakable bond. In this guide, we will delve into the world of epoxy resin and explore the secrets of its mystical bonding abilities. Prepare to become a master of the craft.
Preparing the Surfaces:
Before embarking on your bonding adventure, ensure that both the wood and glass surfaces are pristine. Banish any trace of dirt or grease by diligently wiping them down with a clean cloth. Once cleaned, allow them to dry completely to achieve an optimal bond.
The Perfect Mix:
Epoxy resin is a two-part adhesive, consisting of a resin and a hardener. Pay close attention to the manufacturer’s instructions for the correct ratio of these components. This enchanting concoction creates a chemical reaction that transforms your project into an unbreakable masterpiece. Stir the two parts together until they harmoniously merge into one.
Applying the Elixir:
Now that your magical potion is ready, it’s time to apply it to the wood and glass surfaces. With a brush or spatula, gently spread a thin layer of epoxy resin onto both materials. Embrace every groove and contour, ensuring complete coverage. This will create an unyielding bond that will withstand the test of time.
The Sacred Union:
With your surfaces coated in the mesmerizing elixir, it’s time for them to unite. Press the wood and glass together firmly, as if they were long-lost lovers embracing after years of separation. If needed, enlist the help of clamps or weights to hold them steadfastly in place while the adhesive sets.
Erasing the Excess:
As with any love affair, a little overflow is bound to happen. Fear not. Simply take a clean cloth or paper towel and gently wipe away any excess epoxy resin that seeps from the edges. This meticulous touch will ensure a flawless finish.
The Art of Patience:
Now comes the most challenging part – waiting. Give your project the time it needs to cure and solidify its bond. Refer to the instructions on your epoxy resin bottle for the recommended curing time. Show patience, for this waiting period is essential to achieve perfection.
Adhesive Tapes for Attaching Wood to Glass
In this comprehensive guide, we will unlock the secrets of adhesive tapes and how they can effortlessly transform your project into a work of art. Get ready to embark on a bonding adventure as we explore the enchanting world of adhesive tapes for attaching wood to glass.
Double-Sided Foam Tape:
One popular choice for this task is double-sided foam tape, known for its strong adhesive properties on both sides. Here’s how to use it:
- Prepare the surfaces: Thoroughly clean the wood and glass surfaces, ensuring they are free from any dust or debris.
- Cut and peel: Trim the foam tape to your desired length and remove the backing on one side. Press the exposed adhesive onto the wood surface, applying even pressure.
- Align and secure: Peel off the backing from the other side of the tape and carefully align the wood with the glass surface. Firmly press down on the wood to securely attach it in place.
Double-Sided Acrylic Foam Tape:
For a more durable and long-lasting bond, consider using double-sided acrylic foam tape. This versatile tape is resistant to temperature changes, UV rays, and moisture, making it suitable for various applications.
- Surface preparation: Just like with foam tape, ensure that both surfaces are clean and free from any contaminants.
- Apply at room temperature: To achieve optimal bonding strength, apply the tape at room temperature.
Additional Support:
While adhesive tapes provide a strong bond, it is important to consider the weight and size of the wood piece. For heavier or larger wood pieces, additional support such as brackets or screws may be necessary in conjunction with adhesive tape.
Easy Removal:
Adhesive tapes offer a non-permanent solution, allowing for easy removal without causing damage to either surface. However, it is advisable to test a small area before applying the tape to a larger surface.
Using Screws or Brackets for Attaching Wood to Glass
The task of attaching wood to glass may seem daunting at first, but fear not. In this article, we will explore the best techniques and materials to use when connecting these two materials using either screws or brackets. Whether you’re a DIY enthusiast or a professional carpenter, these tips and tricks will help you create a strong and durable bond between wood and glass.
Preparation is Key:
To ensure a solid connection, it’s important to prepare both the wood and glass surfaces. Thoroughly clean and dry them, removing any dust or debris that could affect the bond. This step sets the foundation for a secure attachment.
Selecting the Right Materials:
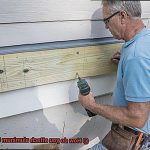
When it comes to screws or brackets, stainless steel is the go-to choice. Its corrosion resistance and strength make it ideal for this application. Opt for flat-headed screws or brackets for a flush finish that enhances the overall aesthetics.
Pilot Holes for Stability:
To prevent wood from splitting and ensure a snug fit, create pilot holes in the wood using a drill bit slightly smaller than the screw diameter. This step helps distribute pressure evenly, reducing the risk of cracking or breaking the glass.
Marking and Aligning:
Position the wood in the desired location on the glass surface and mark the spots where screws or brackets will be inserted. Multiple screws or brackets are recommended to distribute weight evenly and provide added stability.
Pre-drilling Holes:
Pre-drill holes in both the wood and glass surfaces using a drill bit that matches the diameter of your screws or brackets. This step makes it easier to insert fasteners without causing damage.
Secure Attachment:
Carefully insert screws into the pre-drilled holes, aligning them with the corresponding holes in the glass surface. Use a screwdriver or power drill with a screwdriver bit to tighten the screws until they are secure. Avoid over-tightening to prevent damage.
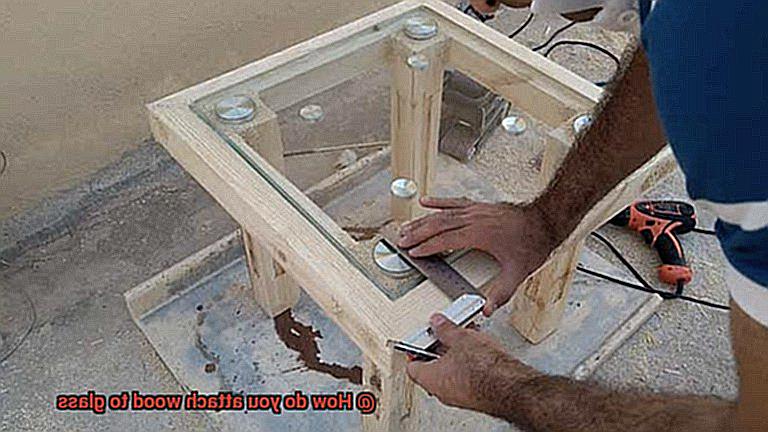
Brackets for Added Support:
For larger or heavier pieces of wood, consider using brackets for additional support. Attach the brackets to both the wood and glass surfaces using screws or bolts, ensuring proper alignment and secure fastening.
Final Inspection:
After attaching the wood to the glass, inspect the connection to ensure it is secure and stable. Apply slight pressure or movement to check for any signs of looseness. If needed, tighten screws or brackets further.
Preparing the Surfaces Before Attaching Wood to Glass
Today, we unveil the secrets of surface preparation before attaching wood to glass. Whether you’re crafting a stunning glass-top table or adding flair to your windows, these steps will guarantee a robust bond that withstands the test of time.
- Step 1: Clean, clean, clean. Start by scrubbing both the wood and glass surfaces with a mild detergent or glass cleaner. Eliminate any dirt, dust, or grease that could hinder the adhesive’s efficacy.
- Step 2: Get rough and ready. Gently sand both surfaces with fine-grit sandpaper. This step ensures an improved surface for the adhesive to grip onto, guaranteeing a stronger bond.
- Step 3: Wipe away the remnants. Employ a tack cloth or lint-free cloth dampened with rubbing alcohol to eradicate any sanding residue or dust particles from both surfaces. A pristine canvas is crucial for the adhesive’s magic.
- Step 4: Prime it up (if needed). If the wood surface is porous or uneven, applying a wood primer or sealer enhances adhesion. Seek out primers specifically designed for wood and adhere to the manufacturer’s instructions.
- Step 5: Etch for success (if needed). Smooth or non-porous glass surfaces may benefit from a glass etching solution. This creates micro-abrasions on the glass, promoting better adhesion. Exercise caution and follow instructions diligently.
- Step 6: Test it out. Before diving into your project, test the adhesive on a small, inconspicuous area. This ensures compatibility and adherence with your specific materials.
- Step 7: Choose the right adhesive. Opt for an adhesive specifically formulated for bonding wood to glass. Epoxy, polyurethane-based, or silicone-based adhesives are all suitable options. Refer to the manufacturer’s instructions for application methods and curing time.
- Step 8: Apply it like a pro. Utilize a brush, roller, or recommended applicator to evenly spread a thin layer of adhesive on either the wood or glass surface (or both, depending on the adhesive type).
- Step 9: Bring them together. Join the wood and glass surfaces, applying even pressure to foster contact and bonding. Clamps or weights may be necessary while the adhesive cures.
- Step 10: Patience is key. Allow the adhesive to fully cure as directed by the manufacturer before subjecting it to stress or load. Each adhesive has its own curing time, so be patient.
- Step 11: Inspect and reinforce if needed. Once the adhesive has fully cured, scrutinize the bond for weak spots or areas requiring additional reinforcement. Apply more adhesive or consider mechanical fasteners like screws or brackets for added security.
Benefits of Using Adhesives for Bonding Wood and Glass
Look no further. In this article, we will explore the advantages of using adhesives to bond wood and glass. Adhesives have become an essential tool in various applications, offering a strong and durable connection, design flexibility, and a seamless finish. Let’s dive in and discover why glue is the ideal choice for bonding wood and glass.
Strong and Durable Bonds:
Adhesives provide a permanent connection between wood and glass surfaces, withstanding environmental conditions like temperature changes, humidity, and moisture. Unlike mechanical fasteners that create stress points, adhesives distribute stress evenly, ensuring a long-lasting bond.
Seamless Finish:
Adhesives fill gaps and irregularities between wood and glass, resulting in a smooth and aesthetically pleasing appearance. This is particularly advantageous for visible applications like furniture or decorative pieces.
Design Flexibility:
Adhesives allow for precise control over bond thickness, making them ideal for delicate or intricate designs where mechanical fasteners may be impractical or visually undesirable. Thin layers of adhesive open up endless possibilities for creative projects.
Enhanced Insulation Properties:
Adhesive bonds reduce heat transfer and minimize condensation between wood and glass. This makes them perfect for applications where thermal efficiency is crucial, such as windows or doors.
Additional Structural Support:
Adhesives not only create a strong bond but also provide additional structural support to the assembly. By distributing loads across a larger surface area, they reinforce the joint and improve overall strength.
Wide Range of Options:
Adhesives designed for bonding wood and glass come in various formulations to suit different requirements. Whether it’s an interior or exterior application, or specific wood or glass surfaces, there is a perfect adhesive for every project.
Tips and Tricks for Achieving Optimal Results when Attaching Wood to Glass
“Mastering the Art of Attaching Wood to Glass: Tips and Tricks for Optimal Results”
Introduction:
When it comes to attaching wood to glass, it’s essential to have the right techniques up your sleeve. Whether you’re a seasoned DIY enthusiast or a beginner looking to tackle a new project, these tips and tricks will help you achieve optimal results. From proper surface preparation to selecting the right adhesive, let’s dive into the world of wood and glass bonding.
Clean Surfaces for a Strong Bond:
Before attaching wood to glass, make sure both surfaces are squeaky clean. Any dust, dirt, or grease can prevent the adhesive from adhering properly. Grab a damp cloth and wipe away any debris, then let the surfaces dry completely before proceeding.
Properly preparing both the wood and glass surfaces is crucial for achieving a strong bond. Start by cleaning the surfaces thoroughly to remove any contaminants that may compromise the adhesive’s effectiveness. Use a damp cloth or sponge to wipe away dust, dirt, and grease from both the wood and glass surfaces. Allow them to dry completely before moving on to the next step.
Adhesive Tapes: Quick and Easy:
If you’re looking for a hassle-free method, adhesive tapes designed for wood-to-glass bonding are your best friend. These transparent tapes provide a strong bond without the need for additional tools or materials. Simply cut the tape to your desired length or shape, apply it to the wood, and press firmly against the glass.
Adhesive tapes specifically designed for wood-to-glass bonding offer a quick and easy solution. These tapes are transparent, ensuring that they won’t be visible once applied. Cut the tape to your desired length or shape, peel off the backing, and carefully apply it to the wood surface. Press firmly against the glass to ensure a strong bond.
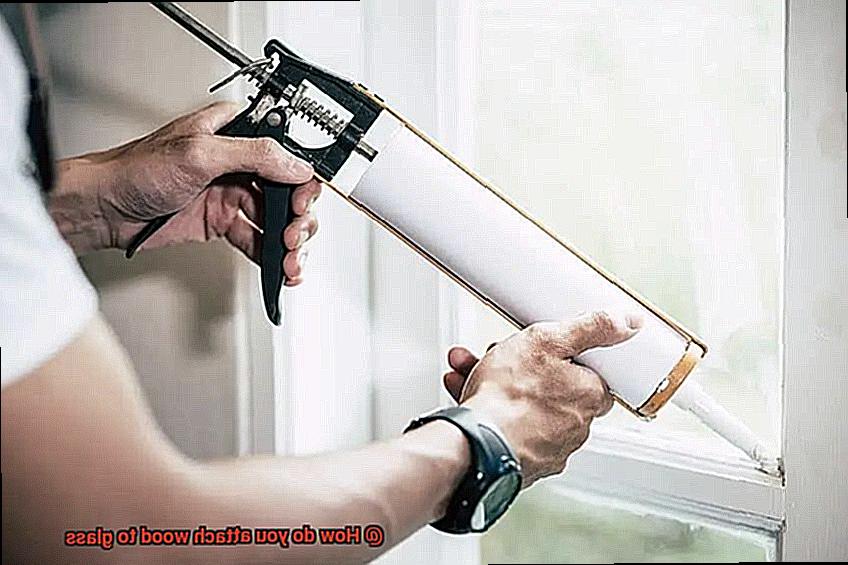
Silicone Adhesive: Flexibility and Strength:
For a more traditional approach, consider using clear silicone adhesive. This versatile adhesive is waterproof, flexible, and provides a robust bond between wood and glass. Use a high-quality silicone adhesive made specifically for this purpose. Apply it evenly on both surfaces, press them together firmly, and allow the adhesive to cure as per the manufacturer’s instructions.
Clear silicone adhesive is a popular choice for attaching wood to glass due to its flexibility and strength. Use a high-quality silicone adhesive that is specifically formulated for bonding wood and glass. Apply an even layer of adhesive to both surfaces, ensuring full coverage. Press the wood and glass together firmly, making sure they are aligned correctly. Allow the adhesive to cure according to the manufacturer’s instructions before subjecting it to any stress or load.
Screws or Brackets: Stability Matters:
When attaching larger or heavier wood pieces to glass, screws or brackets can offer added stability. Drill appropriate holes in both the wood and glass surfaces, then secure them with screws or brackets. Remember to choose hardware that complements your project and distributes weight evenly.
Common Problems When Attaching Wood to Glass
It’s a beautiful combination that can create a stunning visual impact. However, like any DIY project, there are common problems that can arise when working with these materials. But fear not. I’m here to share some expert tips and solutions to help you overcome those challenges.
Firstly, a weak adhesive bond is a common problem when attaching wood to glass. To ensure a secure and long-lasting attachment, choose a high-quality adhesive specifically designed for bonding wood to glass. Look for adhesives that offer strong bonding capabilities and are suitable for both porous and non-porous surfaces.
Secondly, surface compatibility between the wood and glass can pose problems. Wood surfaces are typically porous, while glass surfaces are smooth and non-porous. This difference in texture can make it challenging for the adhesive to create a strong bond. To overcome this, properly prepare both surfaces before attaching them together. Sand the wood surface to create a rougher texture, allowing the adhesive to adhere better. Clean the glass surface with alcohol to remove any dirt or oils that may hinder the bond. This step is crucial for achieving a strong connection between the two materials.
Thirdly, consider the weight and dimensions of the wood piece you’re attaching. If it’s too heavy or large, it may strain the adhesive bond, leading to failure. Choose an adhesive that can support the load and consider using additional support like screws or brackets for added stability when dealing with larger or heavier wood pieces.
Temperature and humidity can also affect the adhesive bond when attaching wood to glass. Extreme changes in temperature or high humidity levels can weaken the bond or cause it to fail altogether. Ensure that the attachment is done in a controlled environment and give the adhesive sufficient time to cure before subjecting it to any extreme conditions.
Lastly, pay attention to the overall aesthetics of the attachment. Use an adhesive that is transparent or color-matched to blend in seamlessly with both the wood and glass surfaces. Take care to remove any excess adhesive for a clean and professional finish.
4ElbQ18bkXU” >
Conclusion
Attaching wood to glass may seem like a daunting task, but with the right techniques and materials, it can be accomplished successfully. There are several methods you can use, depending on your specific needs and preferences.
One option is to use adhesive products specifically designed for bonding wood and glass. These adhesives are typically strong and durable, providing a secure attachment between the two materials. Make sure to choose an adhesive that is suitable for both wood and glass surfaces.
Another method is to use mechanical fasteners such as screws or nails. This approach requires drilling holes into the wood and carefully attaching it to the glass using the fasteners. It’s important to use screws or nails that are appropriate for both wood and glass to ensure a secure connection.
If you prefer a more decorative approach, you can consider using clamps or brackets to hold the wood in place against the glass. This method allows for easy removal or repositioning of the wood if needed.
Before attaching the wood to the glass, it’s crucial to properly prepare both surfaces. Clean them thoroughly and ensure they are free from any dirt, dust, or grease that could affect adhesion.
In conclusion, attaching wood to glass requires careful consideration of the desired outcome and choosing the right method accordingly. Whether you opt for adhesives, mechanical fasteners, or clamps, following proper preparation steps will help ensure a successful attachment.