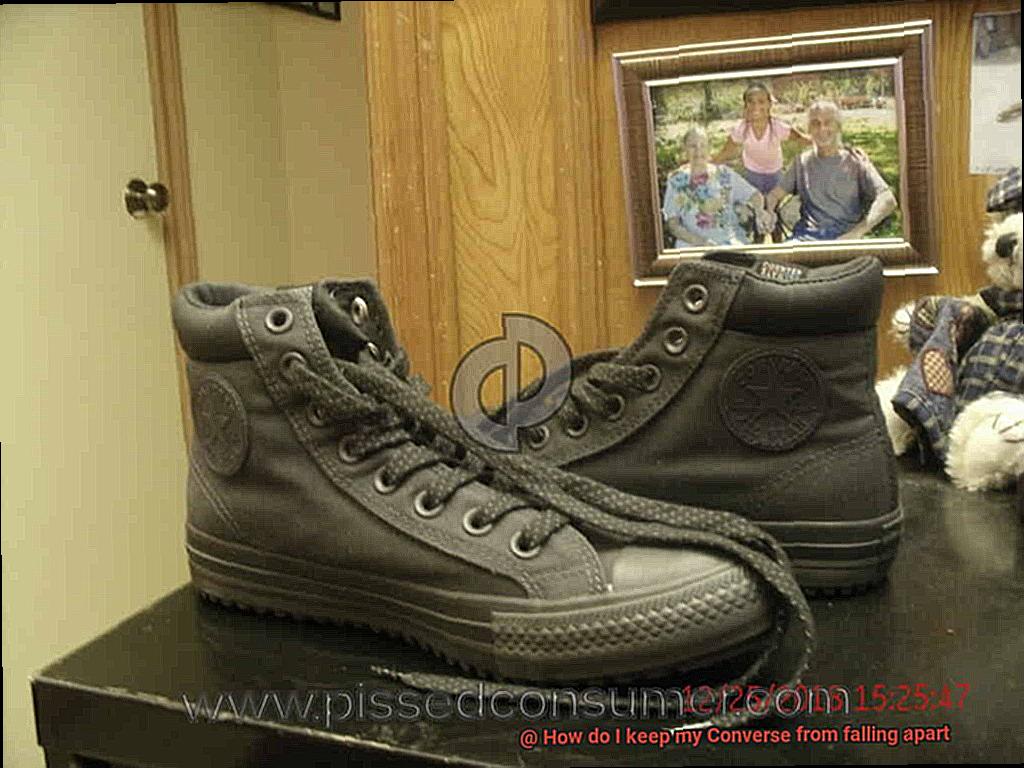
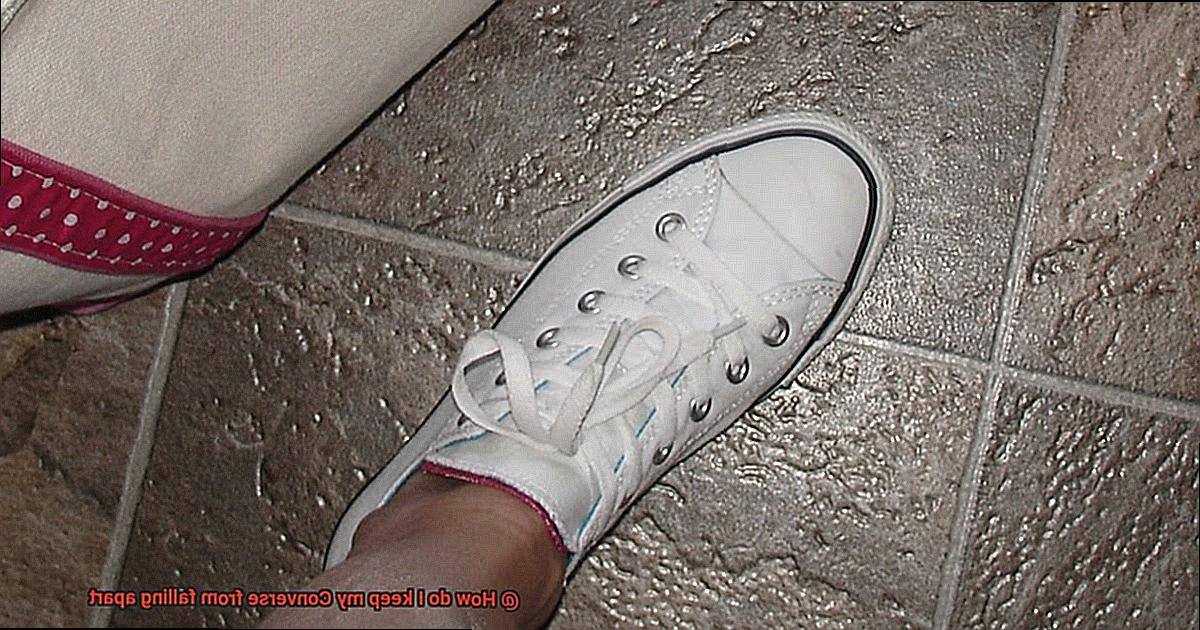
We all know how these bad boys can take any outfit from drab to fab in an instant. But let’s face it, they have a tendency to kick the bucket sooner than we’d like.
So, if you’re tired of your Converse disintegrating right before your eyes, fear not. In this blog post, we’ve got your back with some killer tips and tricks to keep those Chuck Taylors alive and kicking.
So, grab a cuppa and get ready to save your favorite kicks from an untimely demise – let’s do this.
What Causes Converse Shoes to Fall Apart?
Contents
- 1 What Causes Converse Shoes to Fall Apart?
- 2 How to Choose the Right Adhesive
- 3 Preparing the Shoe for Repair
- 4 Applying the Adhesive
- 5 Allowing Enough Time for the Glue to Cure
- 6 Other Preventative Measures to Take
- 7 Regular Maintenance Tips for Prolonging the Life of Your Converse Shoes
- 8 Conclusion
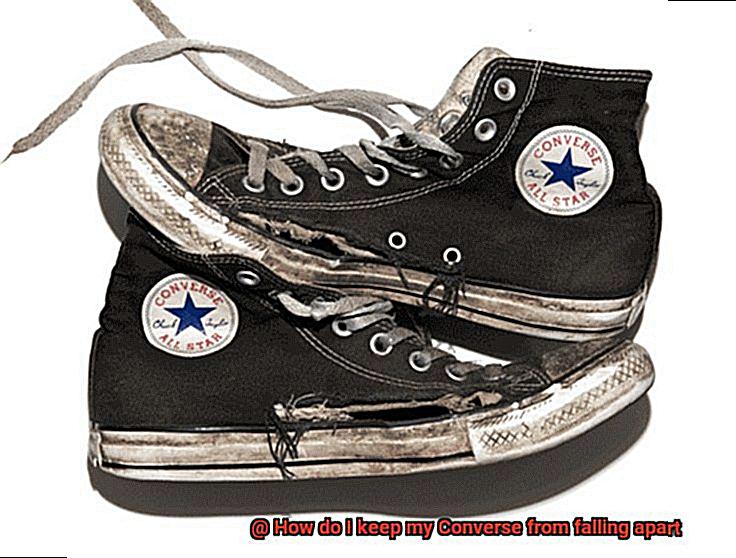
Converse shoes have become a global fashion icon, adorning the feet of millions. However, many loyal Converse enthusiasts have experienced the heart-wrenching moment when their beloved sneakers fall apart. Fear not. In this article, we will delve into the factors that cause Converse shoes to deteriorate and provide practical tips to prolong their lifespan.
Factors Contributing to Deterioration:
Material Quality:
The quality of materials used in Converse shoes is crucial for their longevity. Low-quality canvas uppers and rubber soles are more susceptible to wear and tear, resulting in faster deterioration.
Frequent Use:
The more you wear your Converse shoes, the faster they will wear out. Activities involving bending, stretching, and impact, such as sports or running, can accelerate the breakdown process.
Improper Care and Maintenance:
Many people are oblivious to proper cleaning and maintenance techniques for their shoes. Using harsh cleaning products or machine washing can weaken the glue that holds the shoes together, leading to their downfall.
Environmental Factors:
Extreme temperatures, excessive moisture, and exposure to chemicals can all contribute to the deterioration of Converse shoes. Sun exposure can cause rubber soles to degrade and crack.
Individual Factors:
Foot shape and gait play a role in how quickly Converse shoes fall apart. Heavy strides or high arches exert more pressure on specific areas of the shoes, hastening wear and tear.
Preventive Measures:
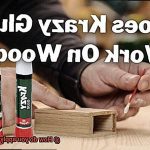
Choose High-Quality Adhesive:
Opt for shoe-specific glue designed for sneakers to reinforce weak spots and repair any damage.
Thoroughly Clean Surfaces:
Before applying glue, meticulously clean the surfaces with mild soap and warm water, then allow them to dry completely.
Apply Glue Correctly:
Use a small amount of adhesive on both surfaces, ensuring a thin, even layer. Press the surfaces together firmly, holding them in place for a few minutes to allow proper bonding.
Give Glue Time to Cure:
Follow the manufacturer’s instructions and let the glue dry for at least 24 hours before wearing the shoes again.
Take Preventive Measures:
Avoid excessive bending or twisting of the shoes, and protect them from extreme temperatures or harsh conditions whenever possible.
Regular Maintenance:
Clean your Converse shoes regularly using a soft brush or cloth and store them in a cool, dry place when not in use.
How to Choose the Right Adhesive
Don’t let them fall apart. In this blog post, we’ll guide you through the process of choosing the perfect adhesive to keep your Converse intact and ready for your next adventure. Let’s dive in and explore the factors to consider when selecting the right adhesive.
Material Matters:
Converse sneakers come in various materials, such as canvas and leather. It’s crucial to choose an adhesive that matches the material of your shoes. For canvas shoes, opt for a fabric glue or a versatile adhesive suitable for fabrics. These adhesives bond seamlessly with canvas, ensuring a strong and durable hold. If you have leather Converse, a leather glue or a powerful adhesive specifically designed for bonding leather surfaces is recommended. These adhesives provide the strength and flexibility needed to keep your leather Converse in top shape.
Strength and Durability:
When it comes to adhesive selection, strength and durability are paramount. Look for adhesives that are marketed as strong and durable, guaranteeing a long-lasting bond that can withstand even the most active lifestyles. These adhesives prevent your Converse from falling apart, ensuring that they stay intact during all your adventures.
Quick-Drying Formula:
Impatient like us? Don’t worry. Choose an adhesive with a fast-drying formula, allowing you to get back to rocking your Converse in no time. With quick-drying adhesives, you won’t have to wait for hours or overnight for the bond to set. You can lace up your sneakers and step out confidently.
Easy Application:
Consider the application method of the adhesive. Opt for adhesives that come in tubes with applicator tips, enabling easy direct application onto the desired areas of your shoes. These adhesives provide convenience and precision, ensuring a mess-free application. On the other hand, some adhesives may require a brush or a separate applicator tool for more accurate application. Choose an adhesive that suits your preference and provides ease of use.
Specific Requirements:
Think about any specific requirements or features you may need from an adhesive. If you want flexibility in certain areas of your shoes, look for an adhesive that offers flexibility after drying. These adhesives allow your Converse to move naturally without compromising the bond. Additionally, if you anticipate exposure to moisture or extreme conditions, consider using a waterproof or weatherproof adhesive. These specialized adhesives provide extra protection and ensure that your Converse stays intact in any environment.
Preparing the Shoe for Repair
If you’re eager to breathe new life into your beloved Converse shoes, proper preparation is key. Investing a little extra time in readying your shoes for repair will ensure that the fixes last longer and keep your kicks looking fresh. So, let’s delve into the essential steps for preparing your Converse shoes for repair.
Step 1: Get Those Shoes Clean:
Before embarking on any repairs, arm yourself with a soft brush or cloth and give your shoes a thorough cleaning. Pay meticulous attention to hard-to-reach areas like seams and soles. Stubborn stains? No worries. Mix mild soap or detergent with water and gently scrub those pesky spots. Remember, shun harsh chemicals or abrasive cleaners – they spell disaster for your shoe material.
Step 2: Let Them Air Dry:
Completing your cleaning mission, grant your shoes ample time to air dry. Moisture interferes with the bonding of glue or other repair materials, so banish any lurking dampness from your kicks.
Step 3: Inspect for Wear and Tear:
Give your shoes an eagle-eyed inspection to spot signs of wear and tear. Cast an observant eye on loose stitching, separated soles, or any other issues in need of fixing. Jot down all the areas requiring repair – this efficient note-taking will aid your repair strategy.
Step 4: Trim Loose Threads or Frayed Edges:
Spy any unruly loose threads or frayed edges? Exercise caution as you wield your scissors to trim them. This preventive measure halts further damage and keeps your shoes looking trim and tidy.
Step 5: Roughen Up the Surfaces:
Before applying any glue or adhesive, it’s time to roughen up the surfaces in need of bonding. Equip yourself with fine-grit sandpaper to gently sand these areas. This ensures a superior grip for the adhesive, enhancing its potency.
Step 6: Remove Excess Dust and Debris:
Having roughened up the shoe surface, take a moment to obliterate any excess dust or debris. This meticulous step ensures a pristine surface, primed for optimal bonding during the repair process.
Step 7: Gather Your Materials and Tools:
Before embarking on your repair journey, gather all the necessary materials and tools. Equip yourself with glue, adhesive tape, replacement parts (if required), and any other supplies tailored to your repair needs. Preparedness paves the way for smooth sailing.
Applying the Adhesive
Today, we embark on a journey into the captivating world of adhesive and its vital role in repairing your beloved Converse shoes. Prepare to be captivated by this essential knowledge that will safeguard your favorite kicks for years to come.
Why is applying adhesive correctly so crucial, you may ask? Well, my fellow shoe aficionados, the right adhesive is akin to a knight in shining armor, defending your Converse shoes against the perils of wear and tear. It is the secret weapon that fortifies the bond between different parts of the shoe, ensuring they remain resolute through every adventure you undertake.
Let’s delve into the nitty-gritty details. The first step on this adhesive journey is selecting the appropriate type for your Converse shoes. Fear not, my friends, for you have options aplenty. Fabric glue is perfect for repairing any fabric components, while specialized shoe glue is tailor-made for footwear repairs. And in a pinch, trusty super glue can save the day (although it may lack the durability of dedicated shoe adhesives).
Once you’ve chosen your adhesive ally, it’s time to prepare the surfaces. Cleanliness is key, my friends. Arm yourself with mild detergent or soap and scrub away any dirt or debris from the areas in need of bonding. Afterward, ensure thorough drying before advancing to the next step.
Now comes the exhilarating part – applying the adhesive. Follow the manufacturer’s instructions diligently like a seasoned pro. Some adhesives require a thin layer on both surfaces being bonded, while others demand one surface coated and firmly pressed onto the other. And speaking of pressing, exert gentle pressure for a few seconds to forge a bond as unyielding as steel.
But hold on. We’re not quite done yet. Patience is a virtue when it comes to adhesive drying time. Rush not through this step, my friends. Give the adhesive ample time to weave its magic and cure properly. Hasty handling or premature donning of your shoes may jeopardize the bond, and we wouldn’t want that, would we?
Ah, and here’s an extra gem of wisdom – proactive reinforcement. Daub a thin layer of adhesive along the edges of the sole or in areas susceptible to fraying. Bestow your shoes with a touch of additional armor, shielding them from future wear and tear. Pure genius, wouldn’t you agree?
And there you have it, my fellow shoe-loving comrades. Applying adhesive correctly is the secret sauce to preserving your Converse shoes and keeping them primed for any adventure that beckons. With the right adhesive, meticulous surface preparation, adherence to instructions, and a sprinkle of patience, you shall proudly sport those Converse kicks for years to come.
Allowing Enough Time for the Glue to Cure
If you’re tired of your beloved Chucks falling apart and want to ensure they endure the test of time, then you’ve stumbled upon the ultimate guide. Today, we’re delving into the significance of allowing sufficient time for glue curing when fixing your Converse shoes. Brace yourself, because this little-known secret will revolutionize how you preserve your favorite sneakers.
The Science Behind Curing:
We all know glue is the superhero that holds our shoes together, but did you know it needs time to cure properly? This crucial process allows the adhesive to reach its pinnacle strength and firmly bond the different parts of your Converse. Remember, patience is paramount here.
Factors Influencing Curing Time:
Numerous factors can influence how long your glue takes to cure. Different adhesives come with their own recommended curing times, so adhere to the manufacturer’s instructions diligently. Moreover, environmental factors such as temperature and humidity can impact the process. So, find a well-ventilated area with moderate conditions for optimal curing.
The Waiting Game:
Now comes the toughest part – waiting. Most glues require a minimum of 24 hours to fully cure. I understand the temptation to slip on your freshly repaired Converse as soon as possible, but trust me, giving it ample time is pivotal. Rushing this step could compromise the bond and result in a shortened lifespan for your shoes.
Tips and Tricks:
To ensure proper curing, place your shoes in an ideal environment with moderate temperature and humidity levels. Steer clear of extreme conditions that could interfere with the adhesive’s integrity. Additionally, apply consistent pressure by using weights or clamps on the glued area to foster a stronger bond.
Maintenance After Curing:
Congratulations. Your glue has successfully cured. However, don’t let that make you complacent. Even though the bond is robust, it’s still advisable to handle your Converse with care. Avoid excessive stress or forceful movements that could strain the repaired areas and potentially weaken the bond.
Investing in Specialized Adhesives:
If you frequently find yourself repairing your Converse, it might be worth considering specialized adhesives designed explicitly for shoe repairs. These products offer enhanced durability and flexibility, ensuring your shoes remain intact for extended periods.
Other Preventative Measures to Take
In the realm of sneaker fashion, Converse shoes hold a special place in our hearts. To keep them looking fresh and lasting as long as possible, we’ve already explored the importance of glue curing and specialized adhesives. However, there are other preventative measures you can take to extend the lifespan of your beloved Chucks. Let’s dive in and discover these secrets.
First and foremost, cleanliness is key. Regularly clean your Converse shoes to prevent the build-up of dirt and grime. Gently scrub them with a mild detergent and water, ensuring that both the canvas and rubber parts get some love. Steer clear of harsh chemicals that can wreak havoc on these precious materials.
Next, shield your Chucks from extreme conditions. Avoid subjecting them to scorching heat or prolonged exposure to sunlight. High temperatures can cause rubber soles to deteriorate, while direct sunlight can fade the vibrant colors of the canvas. When not in use, store them in a cool, dry place.
Consider spritzing on some protection. Protective sprays or coatings designed specifically for sneakers create a barrier that repels water, stains, and dirt. These magical potions keep your Converse shoes looking cleaner for longer. Just follow the instructions provided to achieve optimum results.
Be mindful of wearing your Chucks in inclement weather conditions. Excessive rain, snow, or mud can inflict damage on the materials and weaken their construction. If you brave the elements in your Converse shoes, remember to clean and dry them promptly afterward.
Give your Converse shoes a well-deserved rest by rotating them with other pairs. Wearing the same pair every day accelerates wear and tear. Allowing each pair time to recuperate prolongs their lifespan.
To reinforce high-stress areas like the toe cap and heel, consider applying extra stitching or adhesive. These vulnerable spots tend to wear out quickly but reinforcing them fortifies their resilience.
For optimal comfort and support, consider using insoles or inserts designed specifically for sneakers. These provide additional cushioning and help distribute pressure evenly, easing strain on the shoe’s construction.
Lastly, treat your Converse shoes with care. Avoid engaging in rough or demanding activities that they may not be designed for. Also, refrain from dragging your feet or excessively scuffing the soles, as this hastens wear and tear.
Regular Maintenance Tips for Prolonging the Life of Your Converse Shoes
Converse shoes are beloved for their classic style and comfort, but they can sometimes fall apart due to issues with the glue. In this article, we will explore five essential maintenance tips that will help you keep your Converse shoes glued together and looking fresh for longer.
Choose the right adhesive:
To repair any weak spots or damage in your Converse shoes, it’s crucial to use a high-quality adhesive specifically designed for sneakers. Look for a shoe-specific glue that bonds different materials commonly found in sneakers, such as fabric, rubber, and leather. This will ensure a strong and long-lasting bond that keeps your shoes intact.
Clean before gluing:
Before applying any adhesive, make sure to thoroughly clean the surfaces that need repairing. Use a mild soap and warm water to remove dirt and grime, then allow the shoes to dry completely before proceeding. Cleaning the surfaces ensures better adhesion and improves the longevity of the repair, making your shoes last longer.
Apply the glue correctly:
When applying the adhesive, remember that a little goes a long way. Apply a small amount of glue to both surfaces that need bonding, ensuring an even layer. Avoid using excessive amounts of glue as it can create a messy repair and weaken the bond. By applying the glue correctly, you can ensure a strong and durable repair that keeps your shoes intact.
Allow proper drying time:
After gluing the surfaces together, apply enough pressure and hold them in place for a few minutes. This will help the adhesive bond effectively. It’s important to give the glue enough time to cure properly before wearing the shoes again. Follow the manufacturer’s instructions regarding drying time, but generally, let it dry for at least 24 hours. By allowing proper drying time, you ensure that the bond is strong and long-lasting.
Take preventive measures:
In addition to using adhesive, taking preventive measures can prolong the life of your Converse shoes. Avoid excessive bending or twisting of the shoes, as this can weaken the glue bond over time. Also, protect your shoes from extreme temperatures and harsh conditions that could accelerate wear and tear. By taking these preventive measures, you can maintain the integrity of your shoes and keep them looking fresh for longer.
cLJvSdENPNA” >
Conclusion
To ensure the longevity of your beloved Converse sneakers, there are a few key strategies you can employ. First and foremost, it’s essential to give them regular TLC. This means cleaning them gently but thoroughly after each wear, removing any dirt or stains that may have accumulated. Additionally, storing them in a cool and dry place will help prevent any moisture-related damage.
Another crucial aspect is proper maintenance. Take the time to inspect your Converse regularly for any signs of wear and tear. If you notice any loose threads or fraying edges, address them promptly by reinforcing the stitching or seeking professional repair if needed.
Furthermore, consider investing in protective measures such as shoe inserts or insoles to provide extra cushioning and support. This will not only enhance comfort but also minimize strain on the shoe’s structure, reducing the risk of premature deterioration.
Lastly, be mindful of how you wear your Converse. While they are undoubtedly stylish and versatile, subjecting them to excessive strain or harsh conditions can accelerate their decline. Avoid wearing them in extreme weather conditions or engaging in activities that put undue stress on the shoes.
By implementing these practices into your routine, you can extend the lifespan of your Converse sneakers and continue rocking their iconic style for years to come.