Imagine this: you stumble upon a stunning leather piece, whether it’s a luxurious handbag or a sleek dashboard cover, and instantly fall head over heels. But there’s a catch—the leather needs to be attached to plastic. So how on earth do you make this unexpected union happen?
Welcome, fellow leather enthusiasts, to our guide on how to attach leather to plastic. We’re here to demystify the process, equip you with the tools of the trade, and spill the hidden secrets that professionals have been keeping under wraps.
But before we dive in, let’s address the elephant in the room. Why would you even want to combine these two contrasting materials? Well, besides the visually striking results, blending leather and plastic can boost durability, enhance functionality, and create one-of-a-kind designs that demand attention.
In this exciting blog post, we’ll explore tried-and-true methods used by experts for attaching leather to plastic. From classic stitching techniques to cutting-edge adhesive applications, we’ll uncover the pros and cons of each method, empowering you to make an informed choice.
Prepare yourself for a deep dive into the world of adhesives as we examine specialized glue options designed specifically for seamlessly bonding leather and plastic. And that’s not all—we’ll also delve into critical preparation steps like surface cleaning, roughening, and priming that are crucial for ensuring a successful attachment.
But wait. There’s more. We’re not stopping at just techniques and products. We’ll also spill insider tips and tricks from seasoned professionals—those little nuggets of wisdom that will prove invaluable during your daring journey into attaching leather to plastic.
So gear up, my fellow leather aficionados. Get ready for an adventure filled with skillful craftsmanship, boundless creativity, and innovative thinking. By the end of this comprehensive guide, you’ll have mastered the art of attaching leather to plastic, ready to bring your imaginative ideas to life. It’s time to unleash the artisan within you.
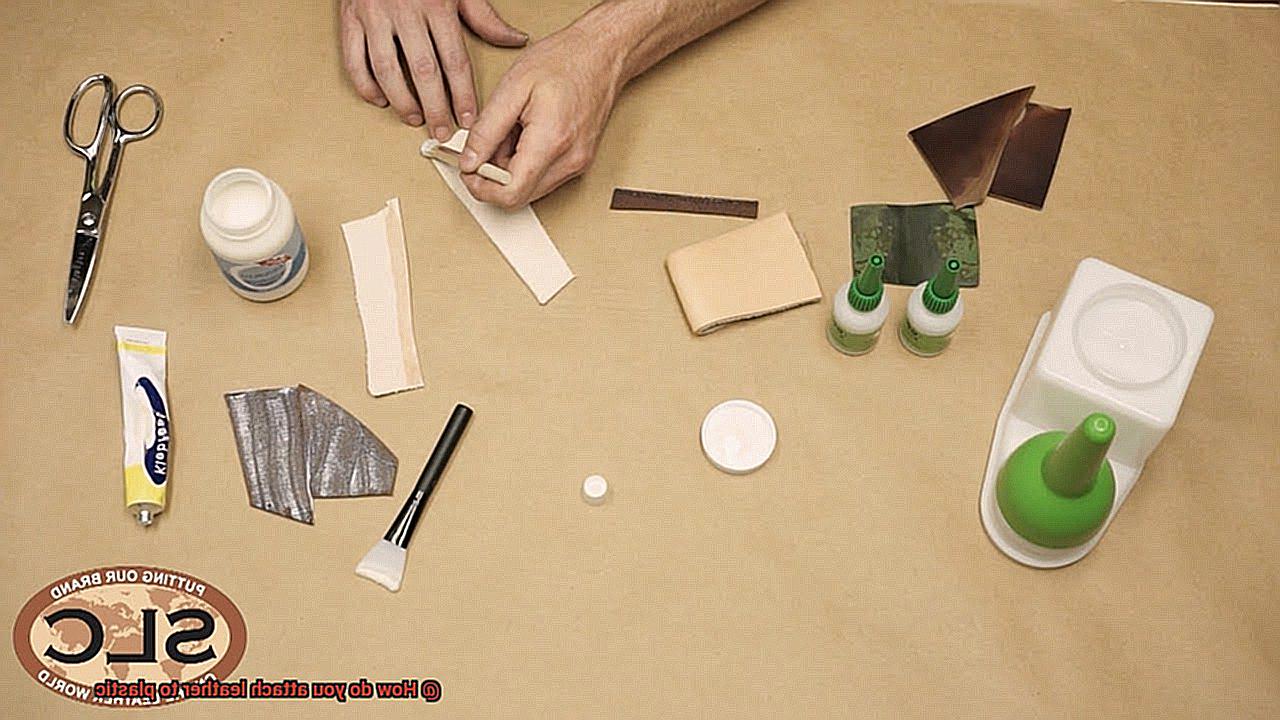
Types of Adhesives for Attaching Leather to Plastic
Contents
- 1 Types of Adhesives for Attaching Leather to Plastic
- 1.1 Contact Cement: Unbreakable Bonds in an Instant
- 1.2 Epoxy Resin: The Indestructible Connection
- 1.3 Polyurethane Adhesive: Flexibility without Compromise
- 1.4 Solvent-Based Adhesives: The Strong Hold with an Odor
- 1.5 Double-Sided Tape: The Convenient and Removable Solution
- 1.6 Epoxy
- 1.7 The Mighty Epoxy:
- 1.8 Conquering Difficult Surfaces:
- 1.9 The Art of Surface Preparation:
- 1.10 Masterful Application Techniques:
- 1.11 Harmonious Mixing:
- 1.12 The Dance of Application:
- 1.13 Contact Cement
- 1.14 The Marvels of Contact Cement
- 1.15 Prepare the Surfaces:
- 1.16 Apply with Precision:
- 1.17 Waiting for Tackiness:
- 1.18 Bonding with Perfection:
- 1.19 Adding Pressure:
- 1.20 The Patience Game:
- 2 Hardware Options for Attaching Leather to Plastic
- 3 Stitching as an Option for Attaching Leather to Plastic
- 4 Choosing the Right Adhesive or Method for Attaching Leather to Plastic
- 5 Preparing the Surfaces Before Applying Adhesive or Hardware
- 6 How to Properly Apply Adhesive and Hardware When Attaching Leather to Plastic
- 7 Tips on Ensuring a Secure Bond When Attaching Leather to Plastic
- 8 Troubleshooting Common Problems When Attaching Leather to Plastic
- 8.1 Problem #1: Poor Adhesion
- 8.2 Solution: Proper Surface Preparation
- 8.3 Problem #2: Wrong Type of Adhesive
- 8.4 Solution: Choose the Right Adhesive
- 8.5 Problem #3: Temperature and Humidity Issues
- 8.6 Solution: Follow Manufacturer’s Guidelines
- 8.7 Problem #4: Poor Material Quality
- 8.8 Solution: Inspect Materials Thoroughly
- 9 Conclusion
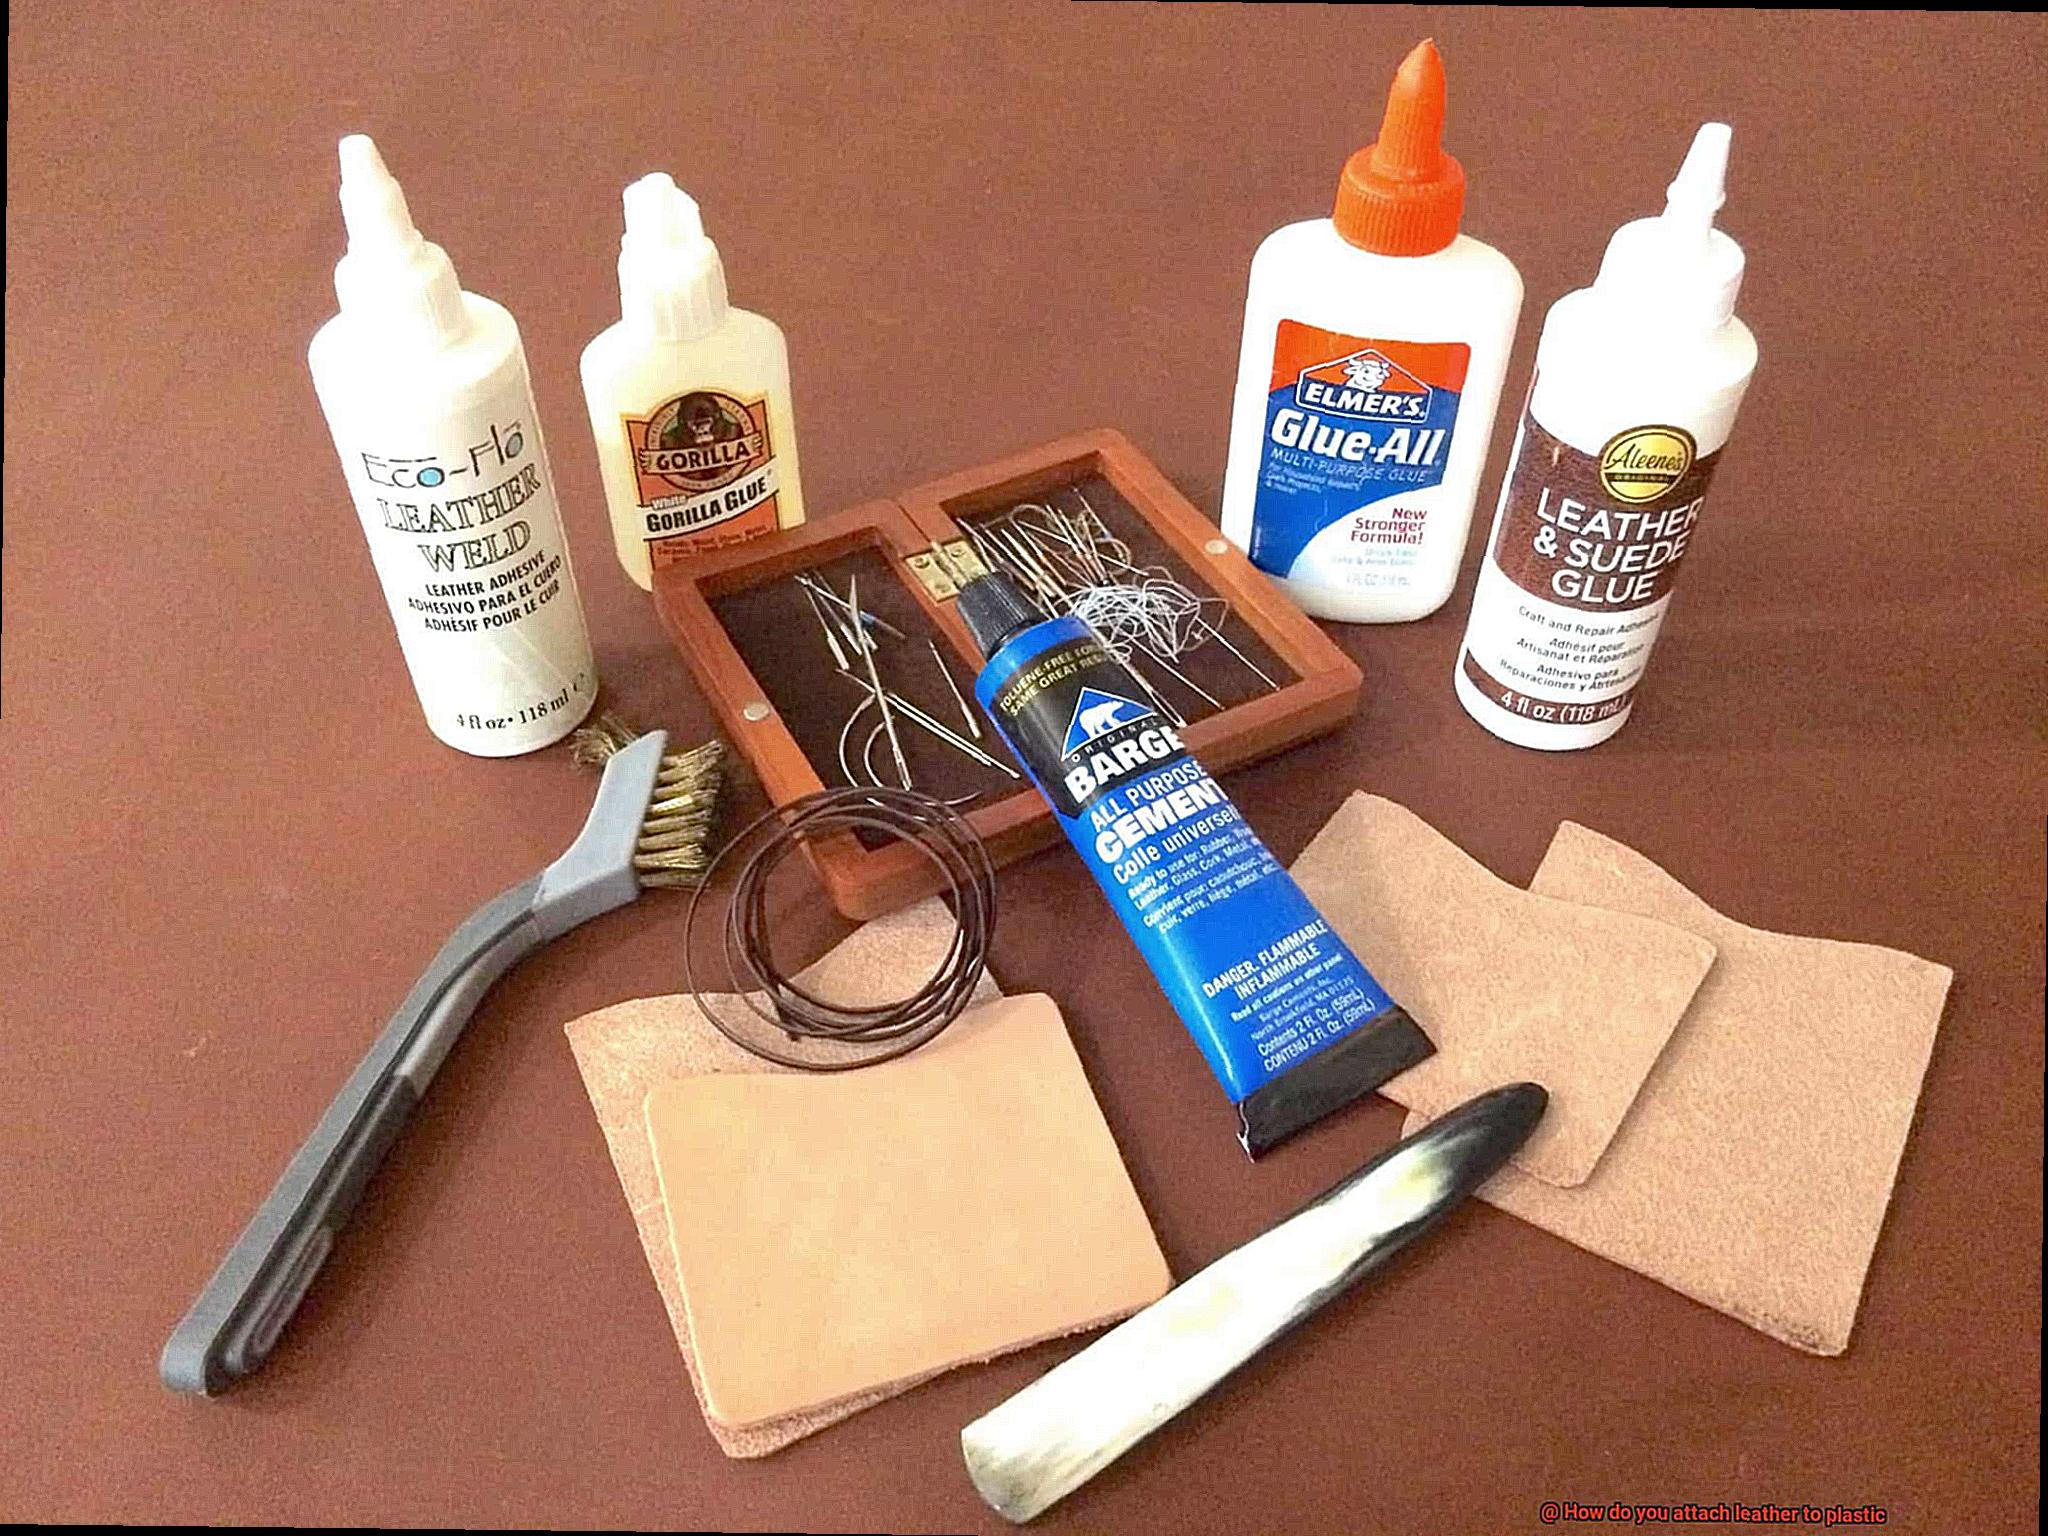
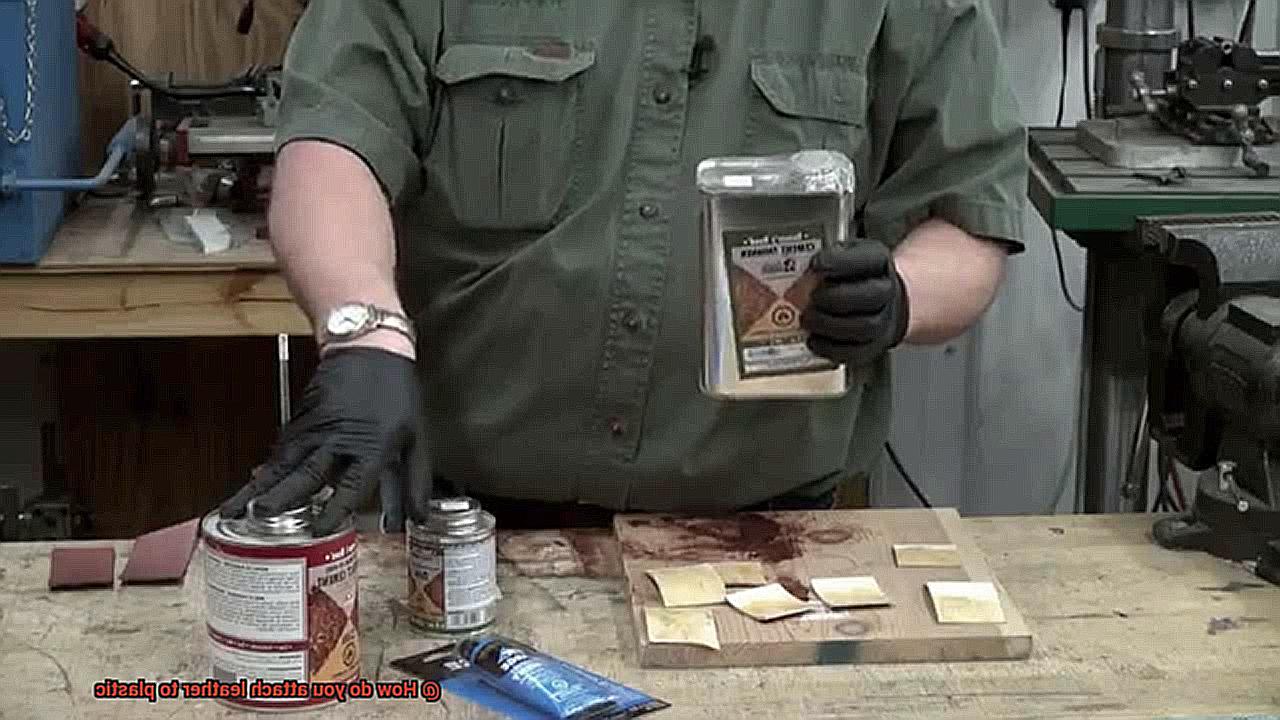
When it comes to attaching leather to plastic, choosing the right adhesive is crucial for a strong and durable bond. In this comprehensive guide, we will explore five different types of adhesives that are commonly used for this purpose.
From the instant bond of contact cement to the flexibility of polyurethane adhesive, we will cover all the options you need to know to make an informed decision for your project.
Contact Cement: Unbreakable Bonds in an Instant
Contact cement is a popular choice for attaching leather to plastic due to its high bond strength and fast-drying properties. This adhesive forms an instant and unbreakable bond when applied to both surfaces, making it ideal for applications where a strong hold is required.
Once the contact cement becomes tacky, simply press the leather and plastic together firmly, and they will be securely bonded. However, keep in mind that contact cement bonds instantly upon contact, so you need to be careful during application.
Epoxy Resin: The Indestructible Connection
For projects that demand exceptional bonding strength and resistance to heat and chemicals, epoxy resin is the go-to adhesive. Composed of a resin and a hardener, this two-part adhesive is mixed just before application.
Once applied to the leather and plastic surfaces, it creates a powerful and long-lasting bond. Epoxy resin requires some curing time to achieve its full strength, but once cured, it provides an indestructible connection between leather and plastic.
Polyurethane Adhesive: Flexibility without Compromise
When flexibility is crucial in your project, polyurethane adhesive is your best bet. This adhesive is known for its ability to withstand movement and stretching without compromising its bond strength. While polyurethane adhesives require longer curing times compared to other types of adhesives, they offer excellent resistance to water, heat, and chemicals. So, if you’re attaching leather to flexible or curved plastic surfaces that may expand or contract, polyurethane adhesive is the way to go.
Solvent-Based Adhesives: The Strong Hold with an Odor
Solvent-based adhesives are another option for attaching leather to plastic. These adhesives contain solvents that evaporate during the curing process, leaving behind a strong bond. They offer good initial tack and bond strength, making them suitable for various applications. However, it’s worth noting that solvent-based adhesives may have some odor during application.
Double-Sided Tape: The Convenient and Removable Solution
If you’re looking for a temporary bond or need the flexibility to reposition your leather on plastic surfaces, double-sided tape is a convenient option. This adhesive is easy to use and provides a quick solution without the need for drying or curing time. Simply stick the tape to both surfaces, and you’re good to go.
Epoxy
Today, we embark on a journey that will revolutionize the way you attach leather to plastic. Prepare to be amazed by the unrivaled strength and versatility of epoxy resin. With this secret ingredient, your creations will defy time and fashion trends. So, gather your tools and let’s dive into the captivating world of epoxy.
The Mighty Epoxy:
When it comes to bonding leather to plastic, epoxy is the undisputed champion. This remarkable adhesive, comprising a resin and a hardener, unleashes a chemical reaction that forges an unbreakable connection. But what sets epoxy apart from the rest?
Conquering Difficult Surfaces:
Plastic’s smooth and non-porous nature poses a formidable challenge for adhesion. Yet, fear not. Epoxy rises above this obstacle by penetrating the plastic’s surface with its resinous power, ensuring a bond that refuses to peel or separate. Say goodbye to limitations and hello to boundless creativity.
The Art of Surface Preparation:
Before embarking on your epoxy adventure, meticulous surface preparation is key. Like a skilled painter priming their canvas, cleanse both the leather and plastic surfaces with a gentle detergent or rubbing alcohol. To enhance the adhesive’s grip on plastic, caress its smoothness with the gentle abrasion of sandpaper. These small acts will yield triumphant results in your quest for durability.
Masterful Application Techniques:
Now that your surfaces are primed and ready for transformation, it’s time to wield the mighty epoxy and bring your vision to life. Follow these steps to achieve a seamless bonding experience:
Harmonious Mixing:
In perfect harmony, blend equal parts of epoxy resin and hardener according to the manufacturer’s precise instructions. Like a chemist measuring potions, accuracy is paramount. Once united, time becomes your ally, so prepare for action.
The Dance of Application:
With a delicate brush or a humble cotton swab as your partner, grace the leather and plastic surfaces with a thin and uniform layer of the epoxy mixture. Remember, subtlety is key. Excessive application risks an unsightly overflow between the materials, marring your masterpiece.
Contact Cement
Prepare to be amazed as we delve into the captivating world of contact cement – a magical adhesive that will revolutionize the way you attach leather to plastic. Join us as we explore the secrets of this versatile glue and unleash your creativity. So grab your tools and let’s embark on this enchanting journey together.
The Marvels of Contact Cement
Step into a world where strength, speed, and permanence converge. Contact cement, the adhesive of choice for attaching leather to plastic, will leave you in awe. Its fast-drying nature creates an instant bond that stands the test of time. No wonder it reigns supreme in industries like automotive, upholstery, and crafts.
Prepare the Surfaces:
Before diving into the bonding process, cleanliness is key. Rid your surfaces of dirt and debris, ensuring a smooth foundation for that flawless connection. Don’t forget to give rough areas on the plastic a little TLC with some gentle sanding.
Apply with Precision:
Like an artist wielding a brush, delicately coat both the leather and plastic surfaces with a thin layer of contact cement. Evenness is vital here – no room for excess adhesive throwing off your masterpiece.
Waiting for Tackiness:
Patience is an art in itself. Allow contact cement to dry for just a few minutes until it reaches that perfect tackiness. This tactile indicator tells you it’s time to bring your materials together in a bond that will withstand any challenge.
Bonding with Perfection:
Align your leather and plastic with utmost care, ensuring every detail is harmoniously in place. Once contact cement is applied, there’s no going back – precision is paramount for success.
Adding Pressure:
For that extra touch of strength, embrace the power of pressure. Clamping or weighting down your pieces will enhance the bond’s integrity during the curing process. A solid connection is just a little extra weight away.
The Patience Game:
Crafting perfection requires time. Leave your project undisturbed for at least 24 hours to allow contact cement to fully cure. The result? A bond so strong, it’ll make your creation truly stand the test of time.
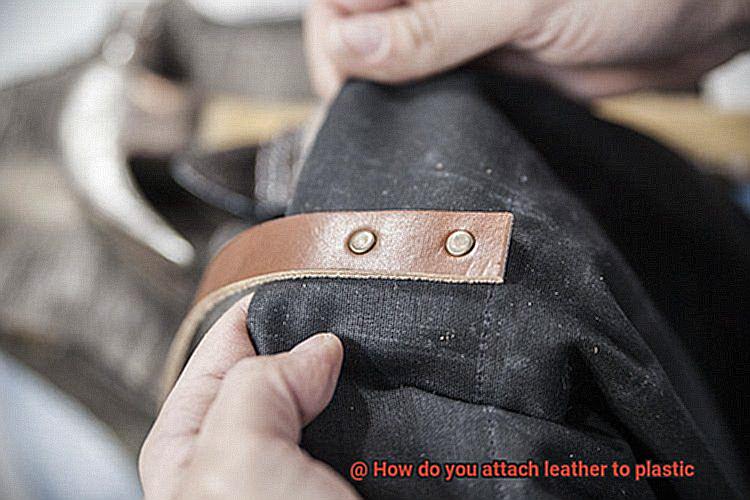
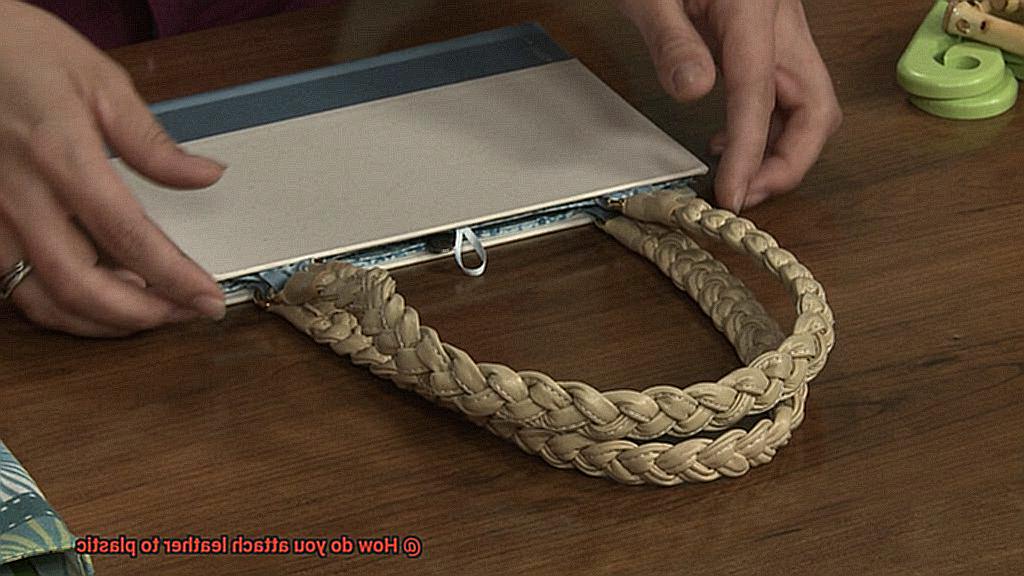
Hardware Options for Attaching Leather to Plastic
When it comes to joining leather and plastic, you need a connection that not only withstands the test of time but also adds a touch of elegance to your project. In this article, we will delve into the exciting world of hardware options that make attaching leather to plastic a breeze. From the mighty rivets to the versatile snap fasteners, we will explore each option’s benefits and provide a glimpse into their applications. So grab your tools and let’s embark on a journey of craftsmanship.
Chicago Screws – The Handy Helpers:
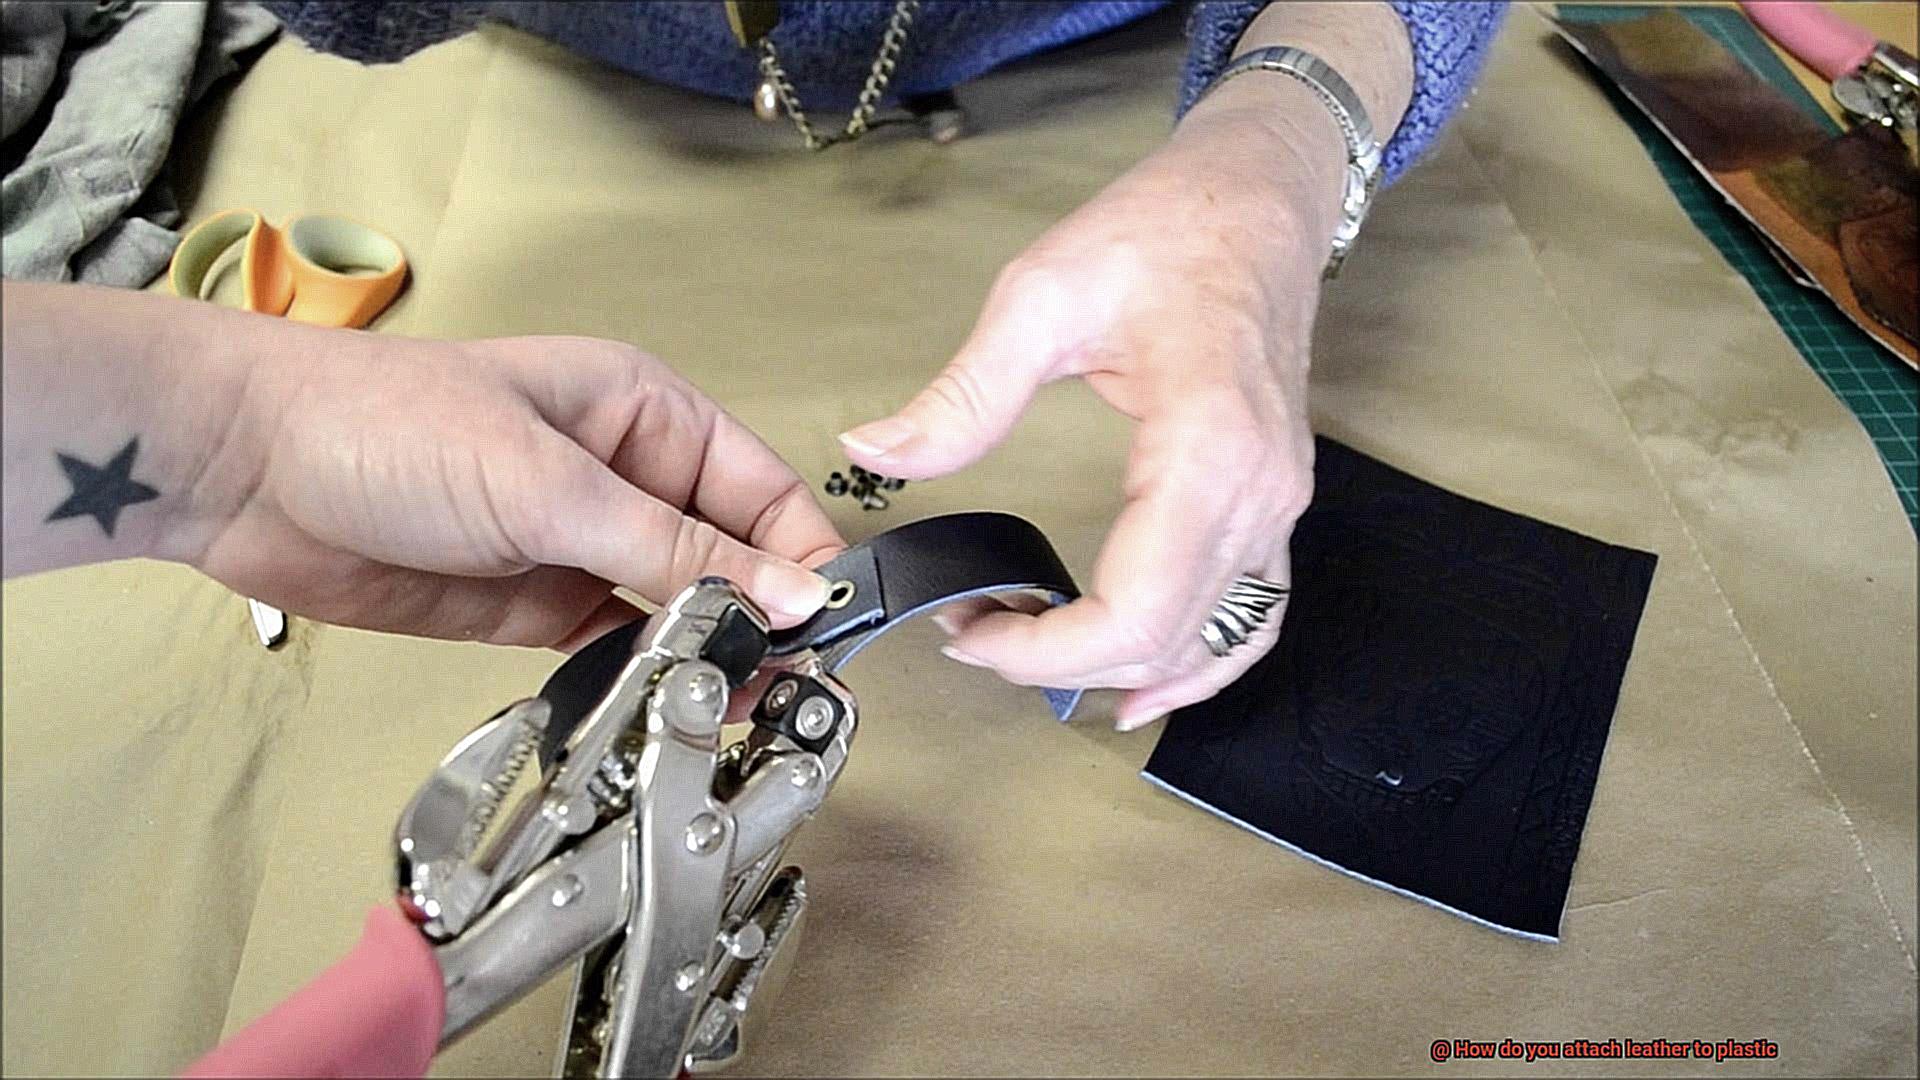
For those seeking versatility and ease of adjustment, Chicago screws are the ideal hardware option. Known as binding posts, these screws consist of a threaded post and a mating screw head. To attach leather to plastic using Chicago screws, drill holes through both materials at the desired attachment points. Insert the post through the holes and tighten the screw head onto it, creating a secure connection. What sets Chicago screws apart is their ability to be easily disassembled and reassembled, making them perfect for projects requiring frequent adjustments or replacements.
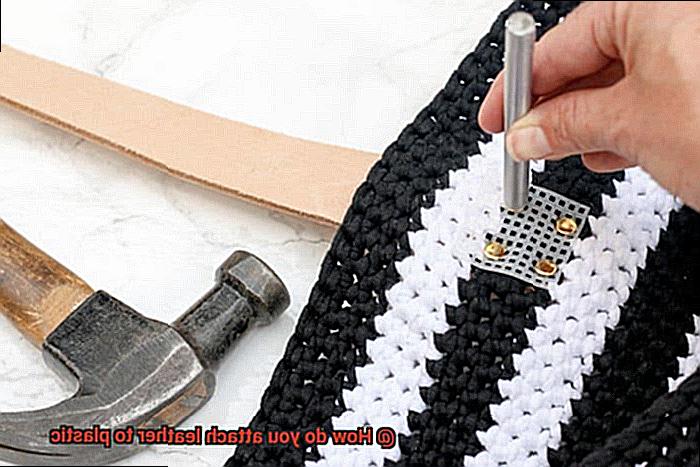
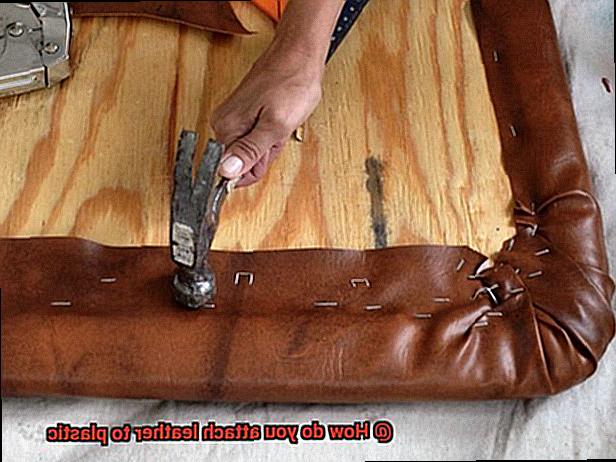
Rivets
These small metal fasteners are the unsung heroes when it comes to attaching leather to plastic. They create a strong and durable connection that ensures your materials stay securely bonded.
To embark on this riveting adventure, let’s gather our tools and materials. You’ll need a drill or punch tool, the perfect size of rivets, and, of course, your trusty leather and plastic pieces. Choosing the right size of rivet and corresponding drill bit or punch is essential for a snug fit.
Now, let’s mark the spots where our rivets will work their magic. Take a moment to envision the design and functionality of your project, then carefully mark those spots on both the leather and plastic surfaces. Planning ahead will yield flawless results.
With our marked spots in place, it’s time to create holes that will bring everything together seamlessly. Utilize your drill or punch tool to make holes at the marked spots on both materials. Remember to align the holes perfectly so that they match up when you join the leather and plastic. This step ensures a connection that is as smooth as silk.
Now comes the thrilling part – it’s time for some riveting action. Insert the rivet through the hole from one side, ensuring that the smooth or rounded head of the rivet is visible. On the other side, place a washer or spacer over the shank of the rivet. This not only adds stability but also protects your precious materials from any harm.
Securing the rivet in place requires finesse and precision. Take out your trusty rivet setter or an appropriate tool and apply pressure or give it a gentle strike with a hammer. The end of the rivet will flatten or expand, creating a tight connection between the leather and plastic. Witness the birth of an unbreakable bond.
It’s worth noting that using rivets may leave visible marks on both surfaces. But fear not, my crafty comrades. To minimize any concerns, strategically plan and position the rivets in inconspicuous areas or where the marks won’t be a bother.
Now let’s highlight why rivets reign supreme when it comes to attaching leather to plastic. They provide a secure and permanent connection that can withstand even the strongest pulling and tearing forces. Rivets are the sturdy glue that holds together your leather belts, bags, and other accessories where a robust bond is an absolute must.
Snaps
Snaps are the perfect solution for securely attaching leather to plastic while adding a stylish touch to your creations. Let’s dive in and explore the captivating process together.
Let’s start by getting acquainted with the essential components of snaps. The male part, also known as the stud or button, is made of strong metal with a protruding post. Its counterpart, the female part, goes by the names socket or cap and is typically crafted from durable plastic with a snug receptacle for the post.
Now that we’re familiar with our fastener heroes, it’s time to gear up with the necessary tools. Grab a snap setter or an installation kit, which comes equipped with a versatile metal tool featuring a concave end for setting the male part and a convex end for setting the female part. And don’t forget your trusty mallet or hammer – they’ll help you apply just the right amount of pressure.
Let’s get down to business. The first step is punching holes in both the leather and plastic at your desired snap placement points. Remember, precise spacing and proper alignment are crucial for achieving that polished and professional look. You can rely on an awl or a specially designed hole punch tool for snaps to create those perfectly aligned holes.
With your holes prepared, it’s time for the main event. Thread the male part through the front side hole in your leather project. Then, slide the female part over the protruding post from the back side of your plastic piece. Take a moment to ensure everything is aligned flawlessly – we want those snaps to be spot on.
Now comes the thrilling part – setting those snaps in place. Position the concave end of your snap setter tool over the male part on top of the leather. Firmly hold it in place and give it a few well-placed strikes with your mallet or hammer. The goal is to apply just enough pressure for a secure attachment – we’re not going for a Hulk-like smash here.
Flip your project over and repeat the process on the plastic side. This time, use the convex end of your snap setter tool on the female part. Remember, gentle strikes are key to prevent any damage to the snaps or surrounding materials. We want our snaps to bring things together, not tear them apart.
It’s worth noting that different types and brands of snaps may have their own unique instructions, so always refer to the manufacturer’s guidelines for optimal results.
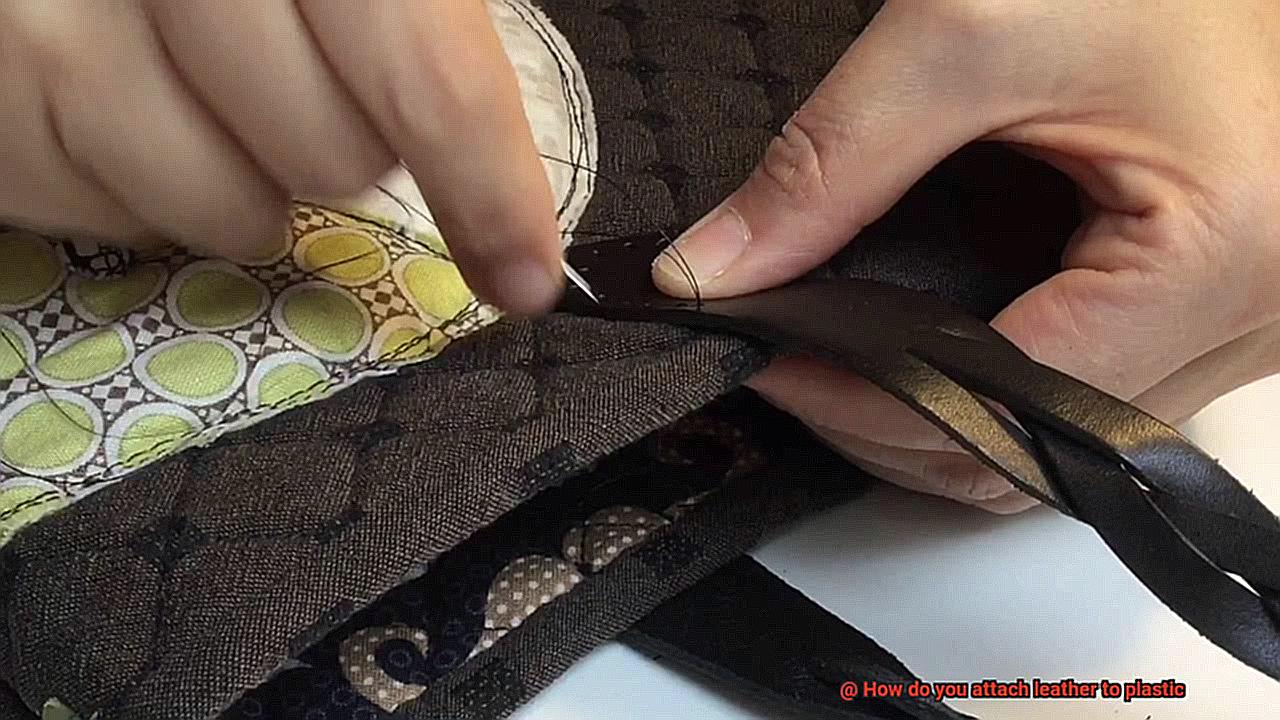
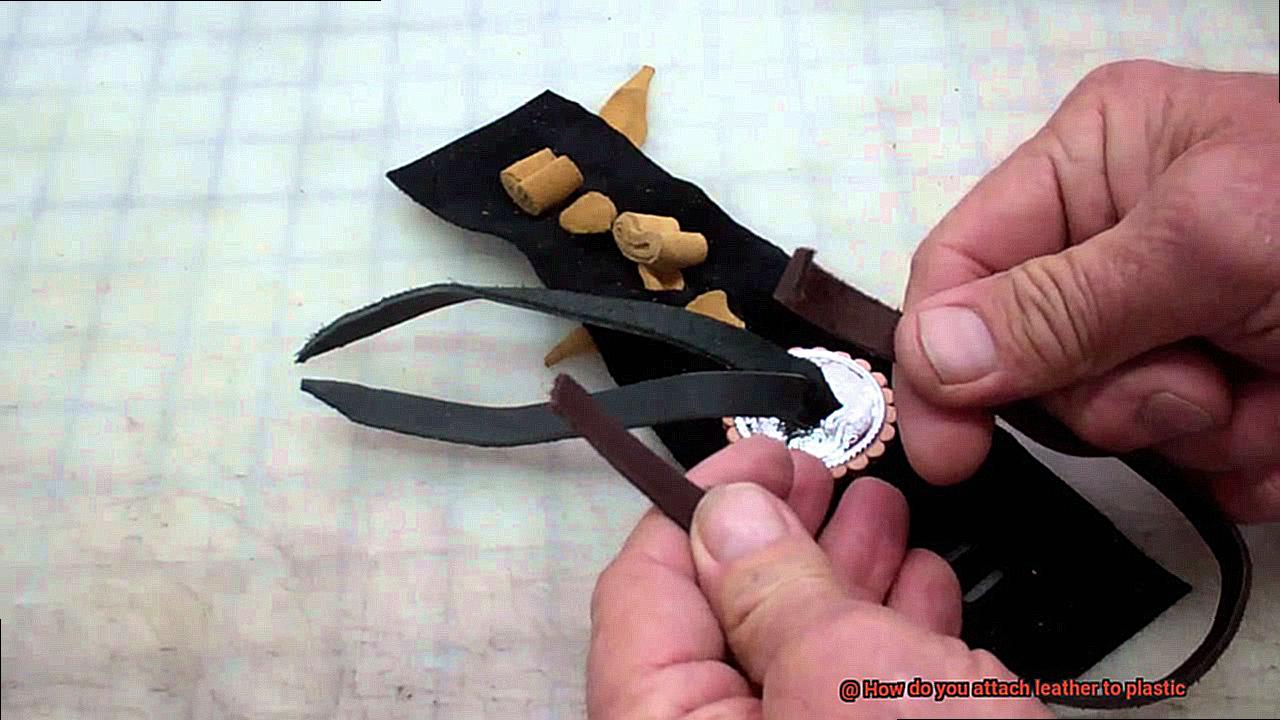
Stitching as an Option for Attaching Leather to Plastic
Are you ready to elevate your leathercraft skills? If you’re seeking a secure and long-lasting method to attach leather to plastic, stitching is the ultimate solution. This guide will take you on a journey through the techniques and materials needed to forge a bond that defies time. So grab your needle, thread, and let’s embark on this stitching adventure.
Choosing the Right Thread:
Not all threads are created equal when it comes to stitching leather to plastic. For a robust and resilient connection, nylon or polyester threads are your trusted allies. Not only are they strong, but they also resist wear and tear. Plus, these threads come in a plethora of colors, allowing you to infuse your project with a touch of personalization.
Preparing the Materials:
Before diving into the stitching process, proper preparation is key. Ensure that both the leather and plastic surfaces are free from dirt and debris that might compromise the bond. To enhance adhesion, consider gently roughening the plastic surface using sandpaper or a file. This extra step will guarantee a firm and secure connection.
The Perfect Needle:
A sharp needle is your faithful companion when joining leather and plastic through stitching. Opt for needles specifically designed for leatherwork, as they boast thickness and durability beyond those of regular sewing needles. The needle’s eye should be large enough to comfortably accommodate your chosen thread.
Let’s Get Stitching:
- Thread your needle with an ample length of thread and secure one end with a knot.
- Align the leather and plastic pieces precisely as desired.
- Insert the needle through both materials from one side, leaving a small tail of thread.
- Push the needle back into both materials slightly further along the seam, creating an initial stitch.
- Repeat this process, alternating sides, until you reach the end of the seam.
To fortify the stitches and prevent unraveling, tie a knot at the seam’s end and neatly trim any excess thread.
Practice Makes Perfect:
Stitching leather to plastic may require practice and patience, particularly if you’re new to this technique. Take your time and ensure each stitch is tight and secure. Loose or sloppy stitches will result in a weak bond that won’t endure. So dedicate yourself to practice, practice, and more practice.
Choosing the Right Adhesive or Method for Attaching Leather to Plastic
Embark on a new chapter of our leathercraft expedition as we explore the art of choosing the perfect adhesive or method for attaching leather to plastic. In this exciting journey, we will uncover the secrets of creating a bond that defies time and showcases your craftsmanship. So, fasten your seatbelt and prepare to dive headfirst into the captivating world of adhesives and techniques.
Contact Adhesive: The Mighty Bond:
Step into the realm of contact adhesive, a superhero among glues when it comes to attaching leather to plastic. This remarkable adhesive requires application and drying time on both surfaces before bringing them together. Its unparalleled strength is particularly well-suited for larger surfaces or irregular shapes. But remember, precision is key, so don’t forget to follow the manufacturer’s instructions for optimal results.
Epoxy Resin: Versatility Meets Durability:

Introducing epoxy resin, the epitome of versatility and durability in adhesives. This extraordinary adhesive can bind leather and plastic seamlessly. However, achieving perfection requires careful mixing and application. Keep in mind that epoxy resin usually comes in two parts that must be mixed in the correct ratio before application. Patience becomes your ally as you wait for the longer curing time, knowing that the end result will be worth every second.
Specialized Adhesives: Small Projects, Big Impact:
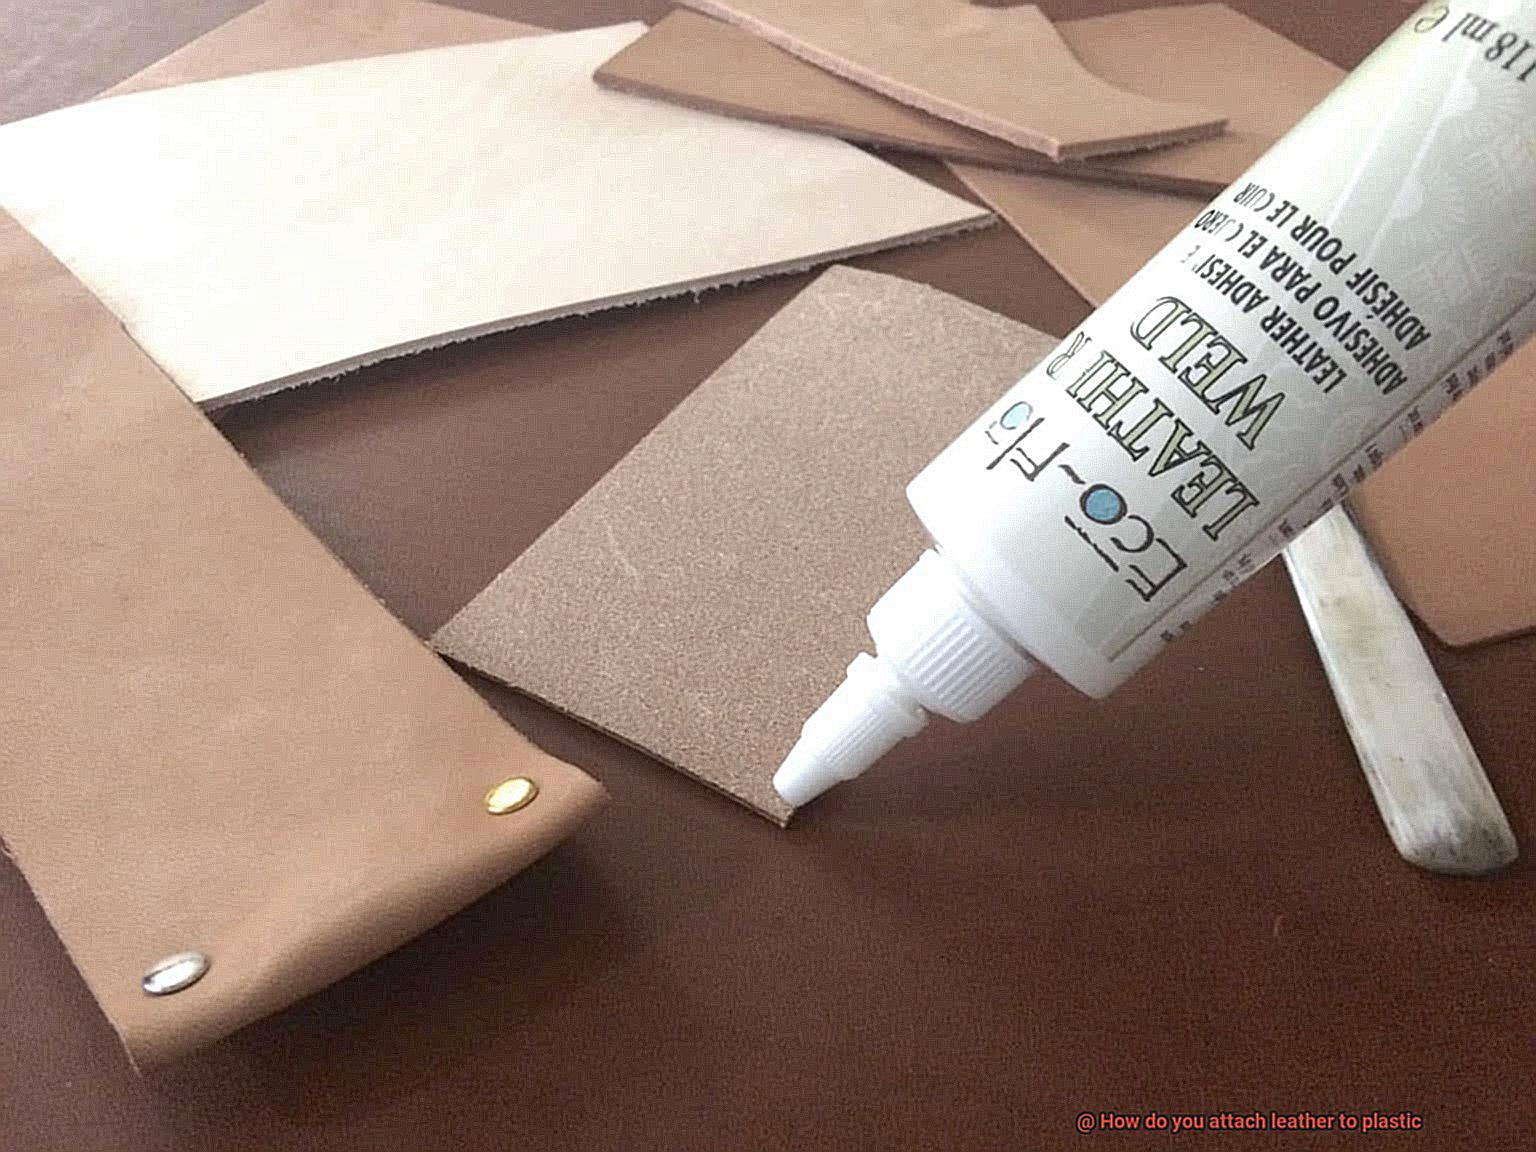
For delicate projects where precision reigns supreme, specialized adhesives offer a solution fit for royalty. Enter fabric glue and leather glue, designed explicitly for bonding fabric or leather to various materials, including plastic. These water-based wonders provide flexibility without compromising strength, ensuring your attachments stand the test of time.
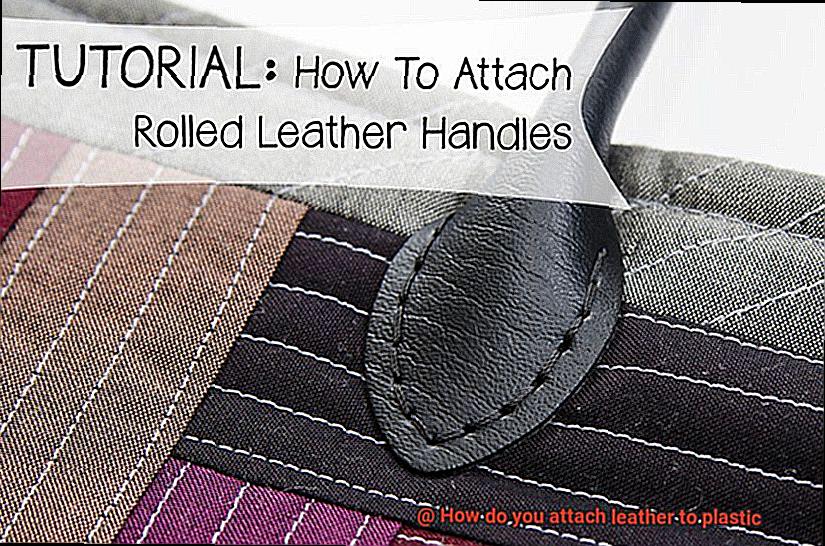
The Mechanical Marvel: Stitching:
Embrace tradition and let stitching weave its magic into your creations. This timeless method not only guarantees unyielding strength but also adds an enchanting touch to your masterpiece. By puncturing or drilling holes into both leather and plastic, then skillfully sewing them together using a dedicated needle and thread, you can create a bond that not only endures but also captivates the eye. Remember, though, this method may not be suitable for all projects or materials.
Preparing the Surfaces Before Applying Adhesive or Hardware
Today, we embark on a thrilling journey to uncover the secrets of surface preparation before applying adhesive or hardware to attach leather to plastic. Get ready to unlock the ultimate guide to achieving a bond that defies time. Let’s dive in and become masters of preparation.
Cleanliness is Paramount:
Step one: cleanliness. Prepare for success by ensuring both the leather and plastic surfaces are spotless, devoid of any dirt, dust, or grease. Gently clean the leather with a mild detergent or leather cleaner, while plastic surfaces can be wiped down with a suitable plastic cleaner or a mild soap and water solution. Remember, cleanliness is the foundation of a steadfast bond.
Dry it Out:
No room for moisture. After cleaning, thoroughly dry both surfaces. Moisture is the enemy of adhesion, so make sure not a single droplet remains. A clean and dry surface sets the stage for an unbreakable connection.
Sanding – Embrace the Roughness:
Texture matters. Give both leather and plastic surfaces a light sanding to create a rougher texture that promotes superior adhesion. Employ fine-grit sandpaper or a sanding block, gently moving in circular motions. This step ensures your adhesive has something substantial to grip onto.
Wipe Away Residue:
Banish sanding remnants. After sanding, eliminate any lingering residue using a clean cloth or tack cloth. Don’t let those pesky particles sabotage your bond; make sure your surfaces are squeaky clean.
Supercharge the Bond with Adhesive Promoter or Primer:
Ready for an extra punch of adhesion power? Consider employing an adhesive promoter or primer. These transformative elixirs come in spray or liquid form and forge a chemical bond between leather and plastic. Follow the manufacturer’s instructions for application and drying time to maximize their effectiveness.
Choose Wisely: Adhesive or Hardware?
Now that our surfaces are primed and ready, it’s time to select the ideal adhesive or hardware for your project. Take into account factors such as flexibility, strength, and compatibility when making your choice. Let your decision be guided by the specific requirements of your magnificent creation.
How to Properly Apply Adhesive and Hardware When Attaching Leather to Plastic
Securing leather to plastic may seem daunting at first, but with the right approach and materials, you can achieve a bond that is both sturdy and long-lasting. In this comprehensive guide, we will delve into the intricacies of applying adhesive and hardware when attaching leather to plastic. Whether you’re a DIY enthusiast or a seasoned professional, these expert techniques will ensure that your leather attachments are seamless and professional-looking.
Selecting the Perfect Adhesive:
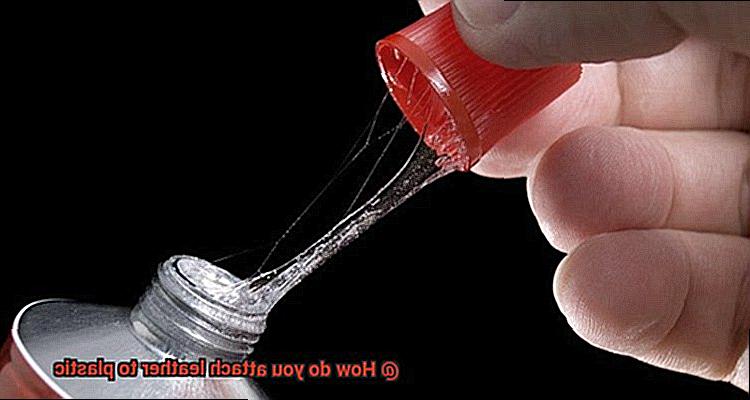
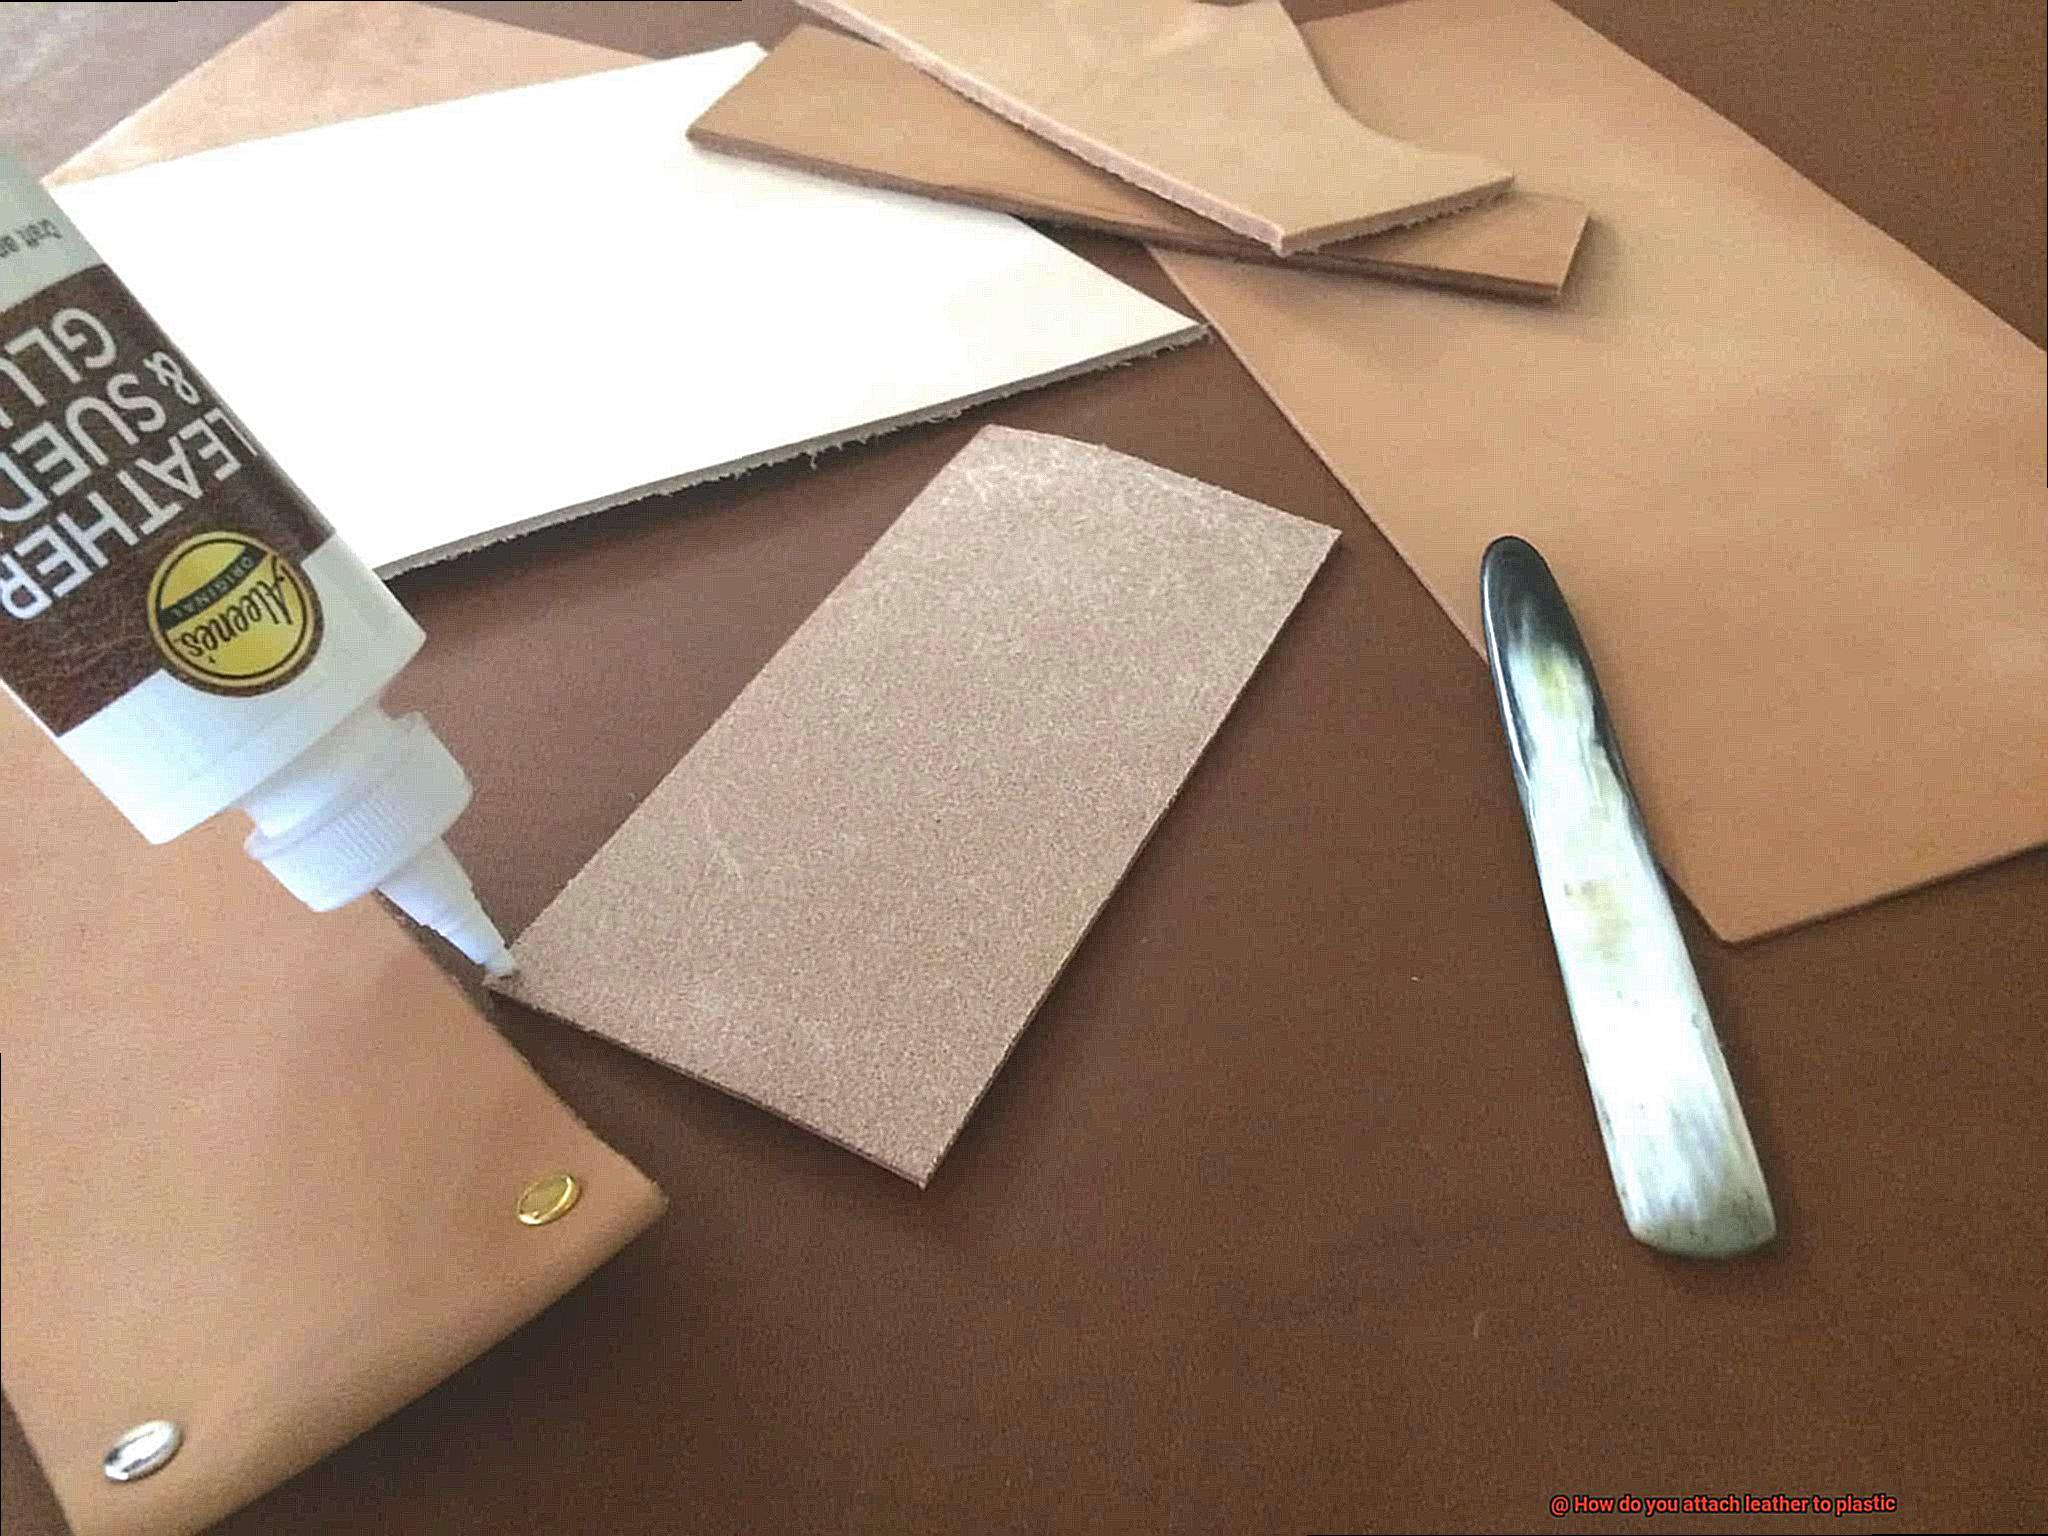
When it comes to bonding leather and plastic, not all adhesives are created equal. It is crucial to choose an adhesive specifically formulated for these materials. Epoxy, contact cement, and cyanoacrylate (super glue) are among the top contenders. These adhesives boast exceptional strength and durability, making them ideal for this application.
Pristine Surface Preparation:
Before applying the adhesive, meticulously clean both the leather and plastic surfaces. Use a gentle soap and water solution to eliminate any trace of dirt or debris. Once cleaned, ensure that both surfaces are completely dry before proceeding. A thorough cleaning guarantees optimal adhesion and prevents unsightly peeling or detachment.
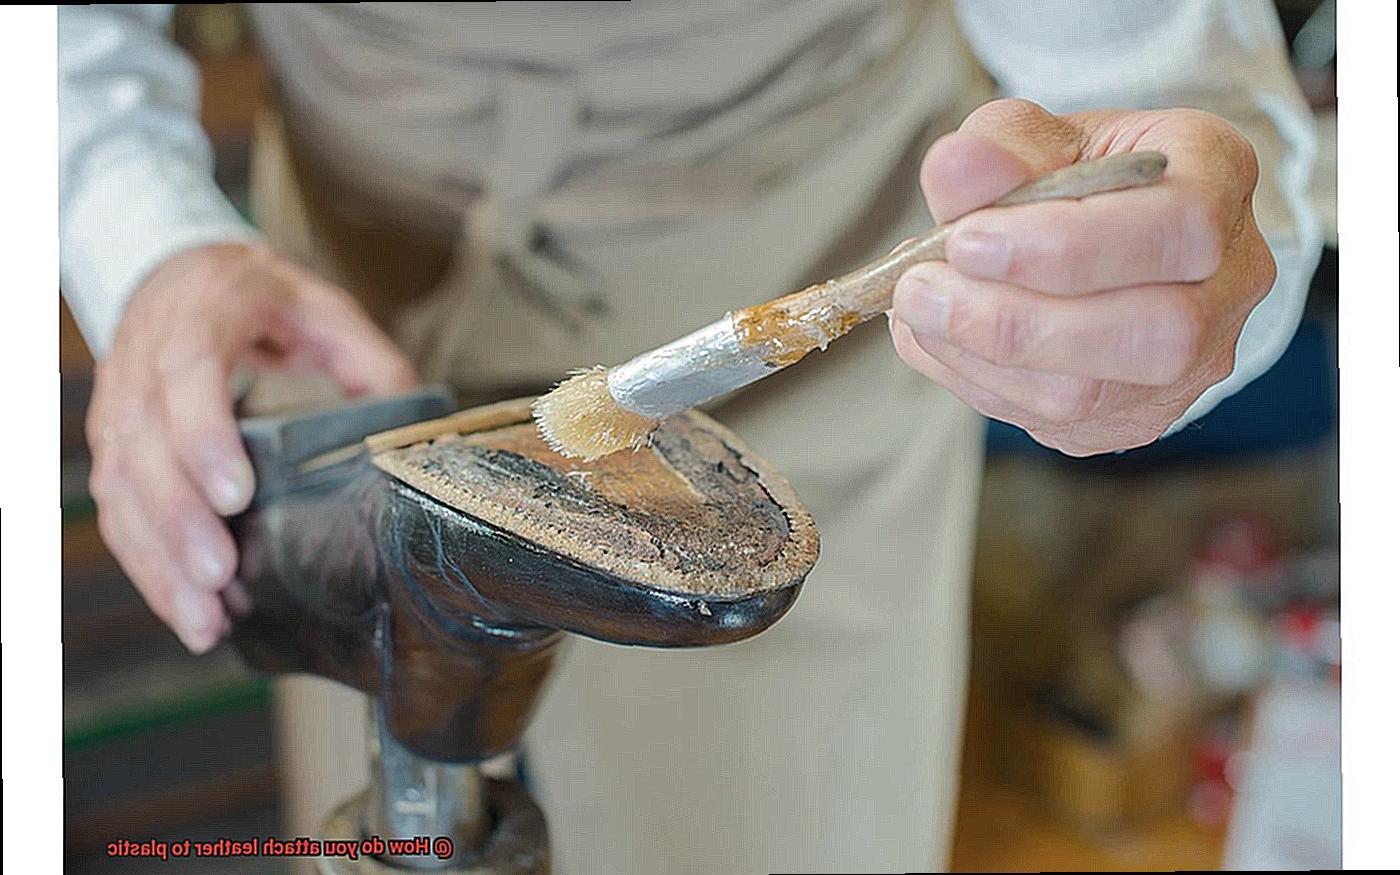
Mastering Adhesive Application:
With clean surfaces at hand, it’s time to apply the adhesive strategically. Use a brush or an applicator to spread a thin and even layer of adhesive on both the leather and plastic surfaces. Be cautious not to overapply, as excess adhesive can lead to an uneven bond. Remember, a modest layer is all it takes to forge a robust connection between the two materials.
Precision Alignment and Firm Pressure:
After applying the adhesive, allow it to reach a tacky consistency before aligning the leather and plastic surfaces. This typically takes a few minutes but consult the manufacturer’s instructions for precise guidance. When aligning the pieces, ensure they fit together snugly, and exert firm pressure to bond them securely. By uniformly distributing pressure across the entire surface, you’ll create an unyielding connection.
Reinforcing with Hardware:
In certain instances, incorporating hardware like rivets, snaps, or screws can fortify the bond between leather and plastic. These fasteners are inserted through pre-drilled holes in both materials, effectively enhancing their union. This step is especially crucial for areas subjected to considerable stress or movement.
Tips on Ensuring a Secure Bond When Attaching Leather to Plastic
Whether you’re crafting a trendy accessory or a functional item, ensuring a strong bond is crucial for the longevity of your creation. With these expert tips, you’ll learn how to achieve a secure and durable connection between leather and plastic that will withstand the test of time.
Immaculate Surfaces: The Foundation of Success
Before delving into the bonding process, take the time to meticulously clean both the leather and plastic surfaces. Eliminate any traces of dirt, dust, or oils that could hinder the adhesive’s effectiveness. A gentle soap and warm water solution will do wonders. Remember to dry the surfaces completely before proceeding with the bonding process.
Texture Matters: Roughening for Enhanced Adhesion
To enhance adhesion, it’s essential to create a textured surface on both the leather and plastic. Arm yourself with sandpaper or a sanding block and gently sand both materials using a back-and-forth motion. This technique creates a slightly roughened surface that allows the adhesive to grip with unwavering tenacity.
The Perfect Adhesive: A Critical Choice
Not all adhesives are created equal when it comes to bonding leather to plastic. Dedicate time to select an adhesive specifically designed for these two materials. Seek out adhesives that offer not only a strong bond but also flexibility and resistance to heat and moisture. Remember, adherence to the manufacturer’s instructions is paramount to achieve optimal results.
Application Prowess: Evenness is Key
Once you’ve discovered the adhesive that meets your needs, apply it evenly on both the leather and plastic surfaces. Utilize a brush, sponge, or applicator recommended by the manufacturer for seamless application. Make certain to adhere closely to the instructions regarding drying times and application techniques to maximize the adhesive’s effectiveness.
Firm Pressure and Patient Curing: The Road to a Secure Bond
After applying the adhesive, exert firm pressure on the leather as you bond it to the plastic surface. Maintain this consistent pressure for several minutes to ensure optimal contact between the two materials. Subsequently, allow the bond to cure according to the adhesive manufacturer’s instructions. During this crucial curing period, avoid subjecting the bond to any stress or strain.
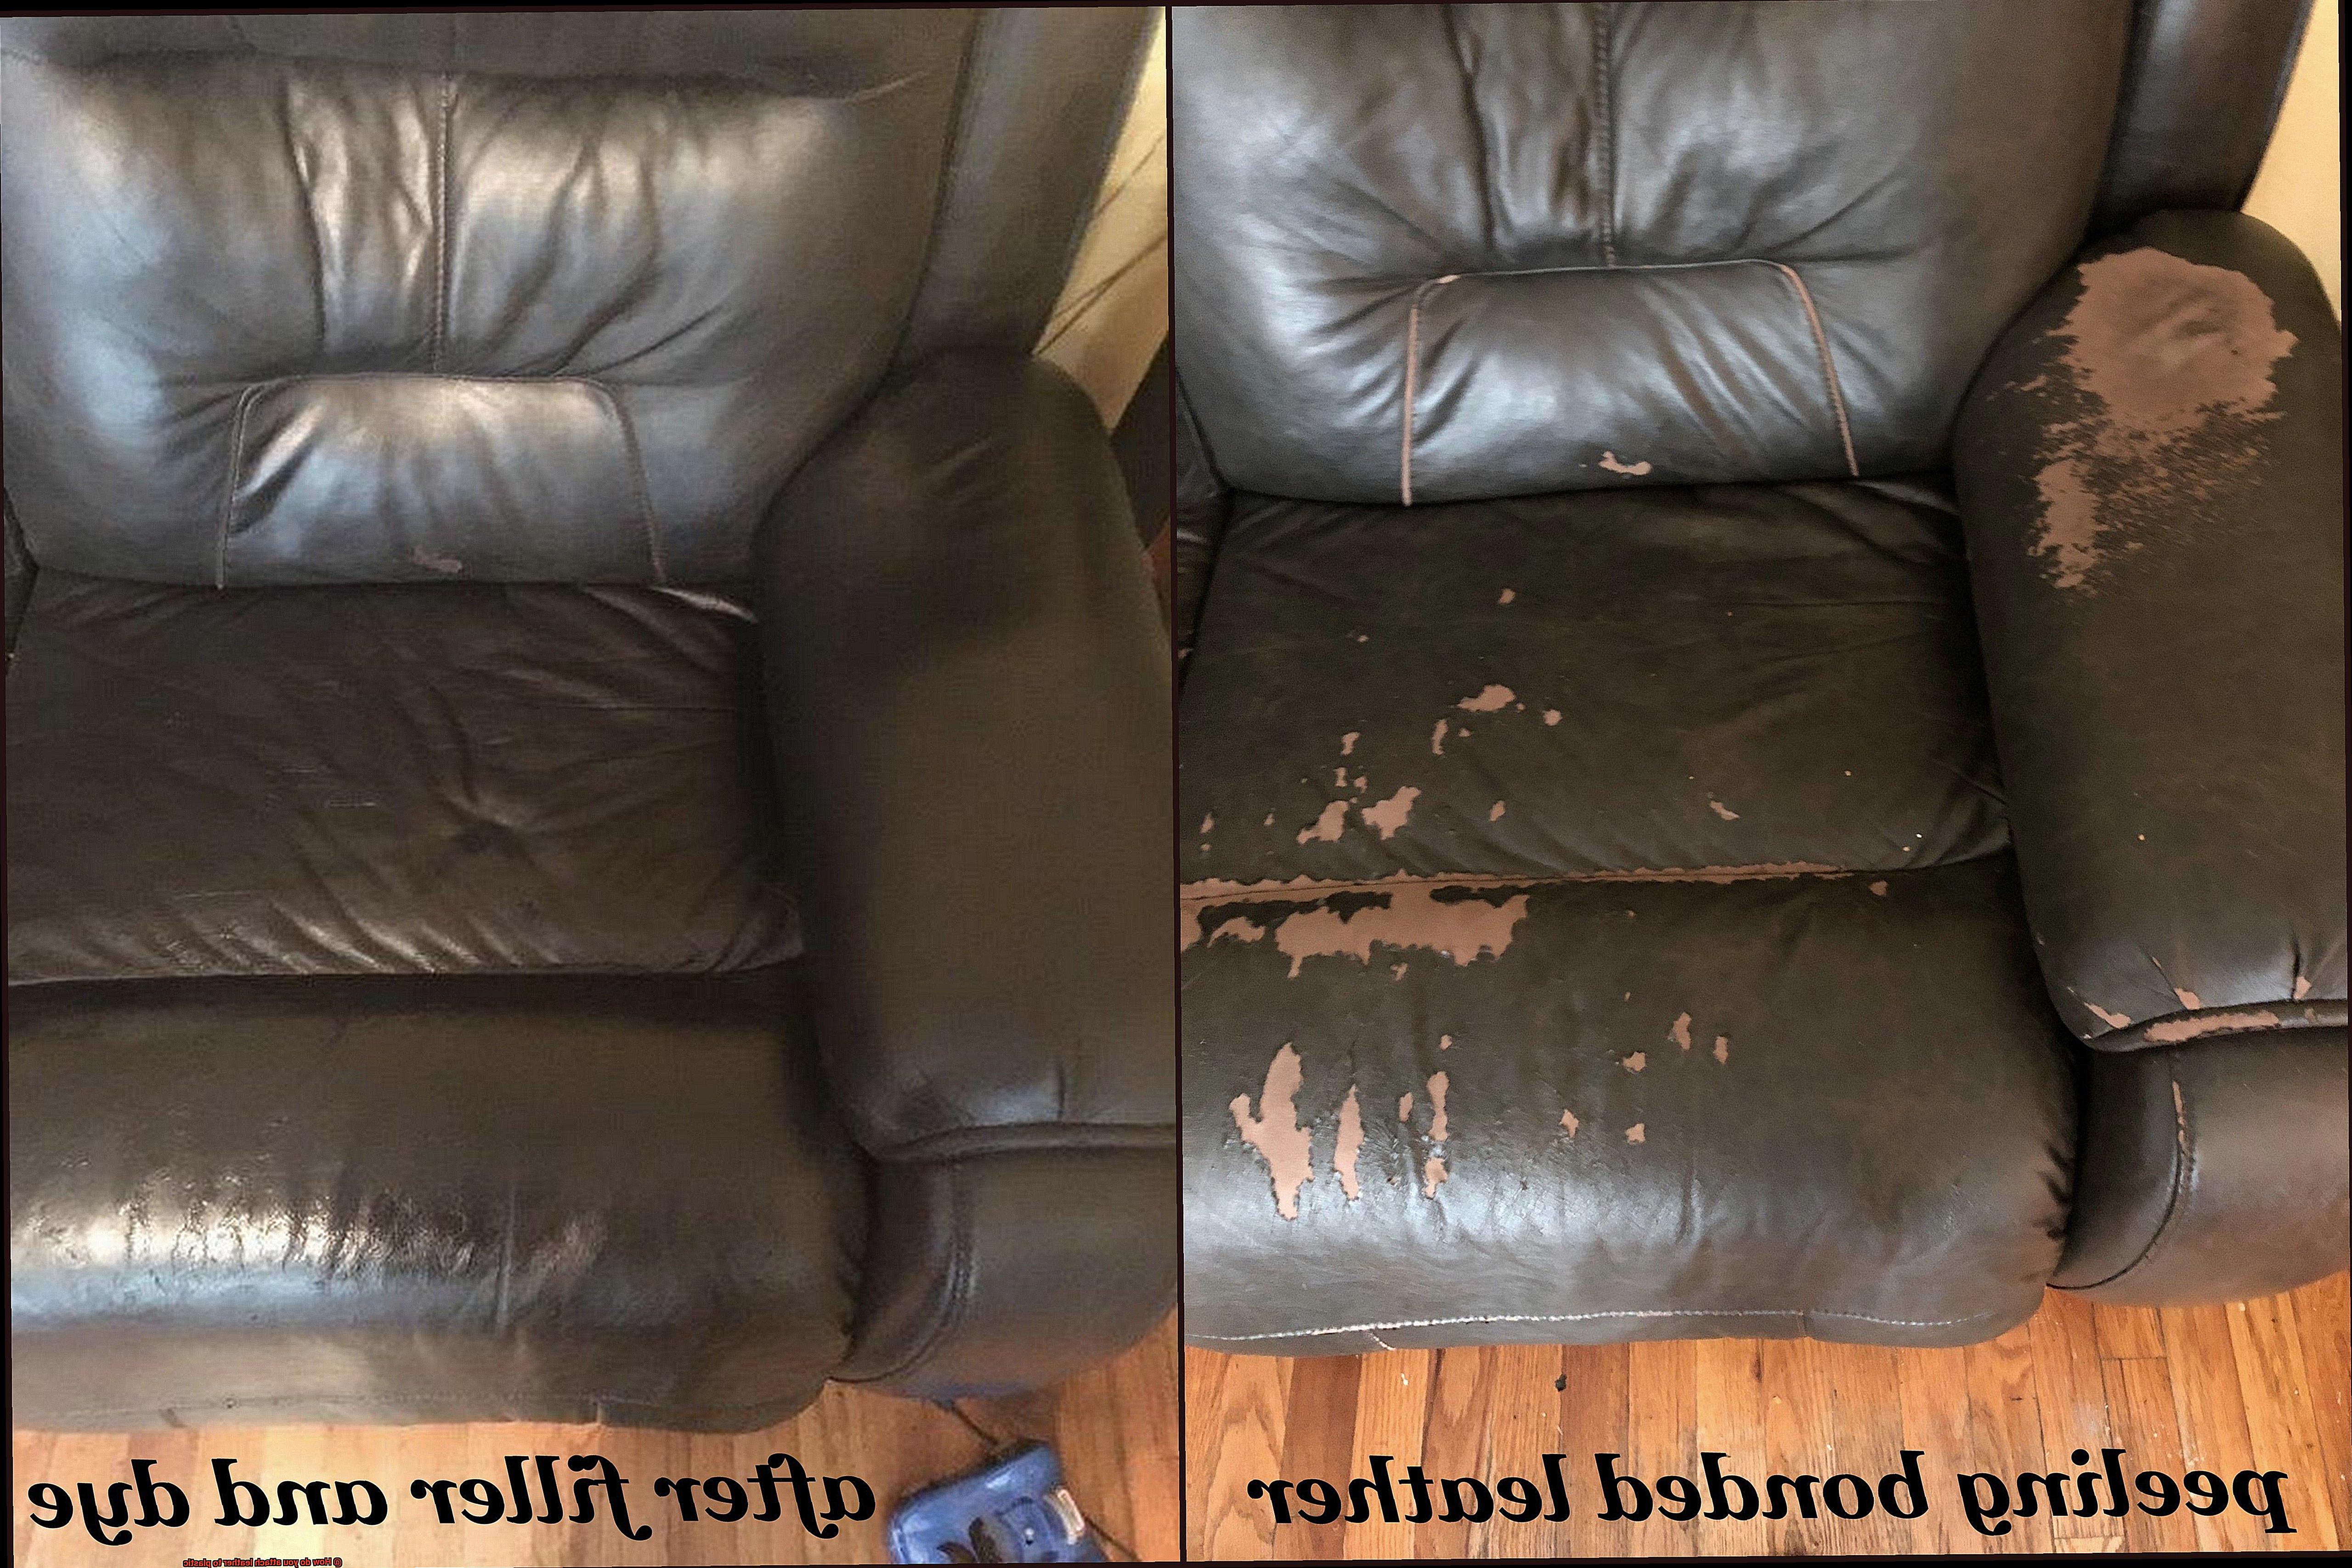
Troubleshooting Common Problems When Attaching Leather to Plastic
Unlocking the secrets to a strong and durable connection between leather and plastic is crucial for crafting projects that stand the test of time. However, common problems can arise when attaching these two materials together. In this article, we will explore some of the most frequent issues and provide practical solutions to troubleshoot them. So, let’s dive in.
Problem #1: Poor Adhesion
The first problem that often arises when attaching leather to plastic is poor adhesion. This occurs when the bond between the two materials is weak, resulting in the leather coming loose or peeling away.
Solution: Proper Surface Preparation
To achieve a strong bond, it’s essential to prepare both the leather and plastic surfaces properly. Thoroughly clean both surfaces, removing dirt, oils, or contaminants that may interfere with adhesion. Ensure a clean surface for the adhesive to grip onto, promoting better bonding.
Problem #2: Wrong Type of Adhesive
Using an unsuitable adhesive can be a recipe for disaster. Not all adhesives are designed to bond leather to plastic effectively, leading to weakened connections.
Solution: Choose the Right Adhesive
When selecting an adhesive for attaching leather to plastic, opt for a specialized one specifically designed for bonding these materials. These adhesives offer superior strength and flexibility, ensuring a long-lasting connection that can withstand stress and movement.
Problem #3: Temperature and Humidity Issues
Temperature and humidity can impact adhesive performance when attaching leather to plastic. Extreme conditions can cause certain adhesives to become less effective, compromising the strength of the bond.
Solution: Follow Manufacturer’s Guidelines
Always refer to the manufacturer’s instructions for your chosen adhesive. Check if there are any recommended temperature and humidity guidelines during application. Adhering to these guidelines ensures optimal bonding results.
Problem #4: Poor Material Quality
Sometimes, the problem doesn’t lie with the adhesive or surface preparation but rather with the quality of the materials themselves. Poor quality leather or plastic can hinder proper bonding and lead to adhesion failure.
Solution: Inspect Materials Thoroughly
Before attaching leather to plastic, carefully inspect both materials for defects or signs of poor quality. Ensure they are in good condition, free from imperfections that could compromise the bond. Investing in high-quality materials significantly improves the chances of a successful attachment.
XdTqJ26HSNY” >
Conclusion
Attaching leather to plastic may seem like a daunting task, but with the right techniques and materials, it can be accomplished with ease.
There are several methods you can use to achieve a strong and secure bond between these two materials. One option is to use an adhesive specifically designed for bonding leather and plastic.
This type of adhesive is typically flexible and durable, ensuring a long-lasting attachment. Another method is to sew the leather directly onto the plastic using a heavy-duty needle and thread.
This technique not only provides a strong bond but also adds a decorative touch to your project. Additionally, you can consider using rivets or snaps to attach the leather to the plastic, providing both strength and style.
Whichever method you choose, make sure to clean and prepare both surfaces properly before attempting any attachment.