No need to break the bank on a replacement just yet. Let me introduce you to the magic of leather glue.
You heard it right. Leather glue is like a superhero adhesive made specifically for fixing and bonding leather materials. Whether your leather jacket has a tear, your favorite handbag’s handle is loose, or your beloved leather shoes are worn out, this glue can work miracles in giving them a fresh lease on life.
But how do you apply leather glue the right way? Well, my friends, that’s exactly what we’re diving into today. In this guide, we’ll walk through the step-by-step process of applying leather glue flawlessly so your repairs last.
First things first – prepping the leather surface is crucial. Proper preparation sets the stage for a successful bond. Then, we’ll get into the nitty-gritty of applying the glue – how much to use and how to spread it evenly like a pro.
But wait, there’s more. We’ve got some invaluable tips and tricks up our sleeves to help you tackle any challenges that come your way. From choosing the perfect glue for your specific needs to knowing when it’s dry enough to move on, we’ve got all bases covered.
So if you’re ready to revive those tired leather items and impress everyone with your repair skills, buckle up for this exciting journey into leather glue application. Get ready to unleash your inner DIY enthusiast and make your precious pieces look brand spanking new. Stay tuned for our next installment where we’ll dive deep into the thrilling world of leather glue application techniques.
Preparing the Leather Surface
Contents
- 1 Preparing the Leather Surface
- 2 Choosing the Right Leather Glue
- 3 Applying the Glue to the Leather
- 4 Pressing the Surfaces Together
- 5 Curing Time for Maximum Strength
- 6 Cleaning Up Excess Glue Immediately
- 7 Different Types of Leather Require Different Techniques
- 8 Testing the Glue on a Small Area First
- 9 Conclusion
In the world of leather crafting and repairs, the secret to a strong and durable bond lies in the meticulous preparation of the leather surface before applying glue.
Whether you’re breathing new life into a beloved handbag or creating a stunning leather accessory, understanding the step-by-step process of preparing leather surfaces is essential.
In this article, we will delve into the intricate world of leather preparation, ensuring that your glue adheres flawlessly while safeguarding the integrity of the material.
Step 1: Cleanse and Purify
The journey begins with a gentle cleansing ritual for your leather surface. Armed with a soft brush or cloth, whisk away any dirt, dust, or oily residue that may hinder the adhesive properties of your glue.
For extra cleaning power, opt for a specialized leather cleaner designed to leave no trace behind. Remember, a pristine canvas is vital for a seamless bond. Patience is key here – allow the surface to air dry completely before proceeding to the next step.
Step 2: Polish and Perfect
Like an artist smoothing out rough edges on a masterpiece, it’s time to tackle any imperfections on your leather surface. Armed with fine-grit sandpaper or a trusty sanding block, gently stroke away those rough spots until they melt into silky smoothness.
Caution is key, as an overly aggressive approach can mar the leather’s delicate beauty. Embrace precision and finesse as you transform imperfections into perfection.
Step 3: Strip Away the Old
Unleash your leather’s true potential by bidding farewell to any lingering coatings that may hinder your adhesive journey. Wax, varnish, or paint – whatever stands in your way must be vanquished. With a specialized leather deglazer or acetone-soaked cloth in hand, embark on a mission to eradicate these barriers. Remember, moderation is key – work in small sections, gently rubbing away the old to reveal the new.
Step 4: Embrace the Roughness
In the pursuit of unwavering bond strength, embrace a touch of roughness. Employ fine-grit sandpaper or an abrasive pad to gently caress the leather surface, creating a delicate abrasion that will transform your project from ordinary to extraordinary. As your hand dances in circular motions, envision the glue penetrating and gripping onto the leather fibers with newfound tenacity.
Choosing the Right Leather Glue
Picture this: your hands skillfully working, creating a bond so strong it defies time itself. But how do you unlock this power? Fear not, for today we embark on a journey into the realm of adhesive mastery. We unveil the secrets that will guide you in choosing the perfect glue for your leather masterpiece. Prepare to unleash your artistry as we unveil the factors to consider when selecting the right leather glue.
Embrace the Unique Character:
Just as every hero possesses their own powers, each type of leather boasts its distinctive characteristics. From delicate and supple to thick and formidable, different leathers demand specific glues. Take a moment to identify the type of leather you’re working with, considering its thickness, flexibility, and finish. Let these factors guide you towards the glue that will form an unbreakable bond.
The Art of Form:
Behold, the various forms of leather glue – liquid, gel, or spray – each with its own allure. Liquid glue is a versatile ally for general leather bonding, while gel glue empowers you with precision for intricate work. Need a swift connection? The mighty spray glue swoops in to save the day. Identify your project’s demands and select the form that best complements your craftsmanship.
Strength That Endures:
Are you seeking a love that lasts or a fleeting encounter? Some glues forge permanent bonds that defy separation (imagine relationship goals.). Others offer temporary connections that allow for repositioning or effortless removal. Determine whether your project demands eternal unity or temporary harmony based on your desired outcome.
Patience is Key:
We all know greatness requires patience. When it comes to leather glue, drying time can make or break your project’s timeline. Some glues dry at lightning speed, allowing you to continue your work without delay. Others require a more leisurely approach, demanding patience as they reach full strength. Consider your need for speed and select a glue that aligns with your project’s schedule.
Applying the Glue to the Leather
Prepare yourself for a journey filled with careful preparation, precise application, and the promise of a strong and durable bond. So gather your tools and let us embark on this adhesive adventure.
First and foremost, we must prepare the leather surface before we begin our adhesive masterpiece. Just as a painter primes their canvas, we must cleanse the leather using a mild soap and water solution or a specialized leather cleaner. This meticulous cleaning removes any dirt, oils, or residues that could hinder our bond, ensuring a flawless connection.
Once our leather is immaculate, we must allow it to dry completely. Excess moisture can be the nemesis of a successful bond, so patience is key here. Whether we let the leather air dry naturally or aid the process with a clean, dry cloth, we must ensure it is bone dry before proceeding.
Now, let us delve into the realm of glue selection. Just as each leather type has its own unique qualities, different glues cater to different needs. Whether we choose contact cement, leather adhesive, or epoxy glue, we must consider the specific characteristics of our leather and the intended use of our creation. Finding the perfect glue is like discovering our soulmate in the adhesive realm – a connection that will withstand the test of time.
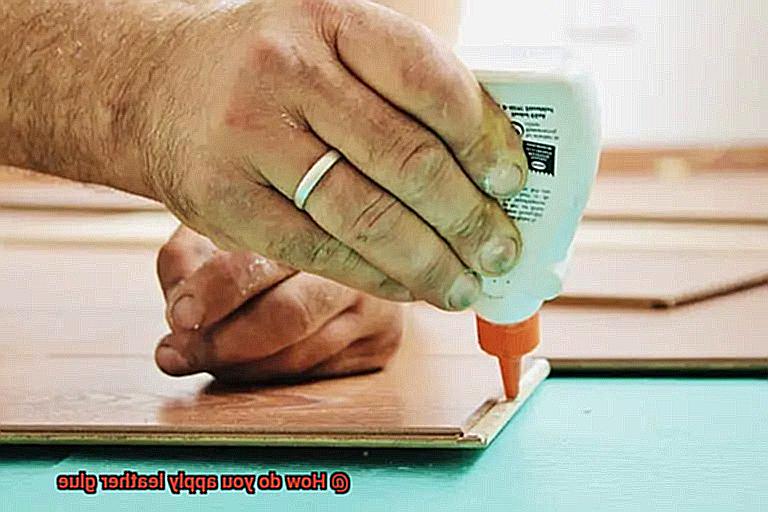
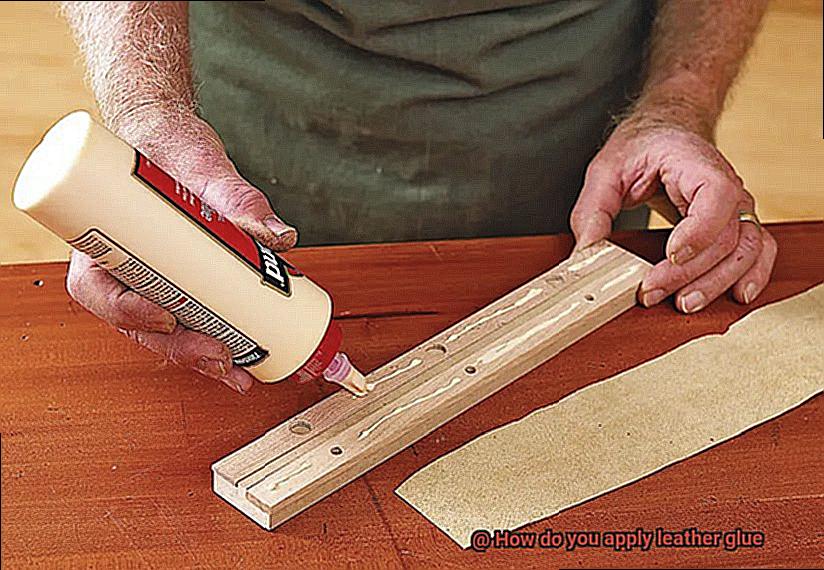
Armed with our chosen glue, it is time to apply it to our precious leather surfaces. However, we must exercise caution and remember that less is more in this adhesive universe.
A thin and even layer of glue is what we seek – not an overwhelming deluge that could mar or harm our beloved material. To achieve this, we can employ a small brush, sponge applicator, or even our own finger (yes, you heard right.) to evenly spread the glue across both surfaces.
Embrace your inner artist and ensure every nook and cranny receives its adhesive embrace.
We must exercise patience as we allow the glue to become tacky and ready for bonding. Each glue has its own unique drying time, so we must consult the manufacturer’s instructions to avoid any adhesive mishaps. Remember, patience is a virtue in this adhesive artistry.
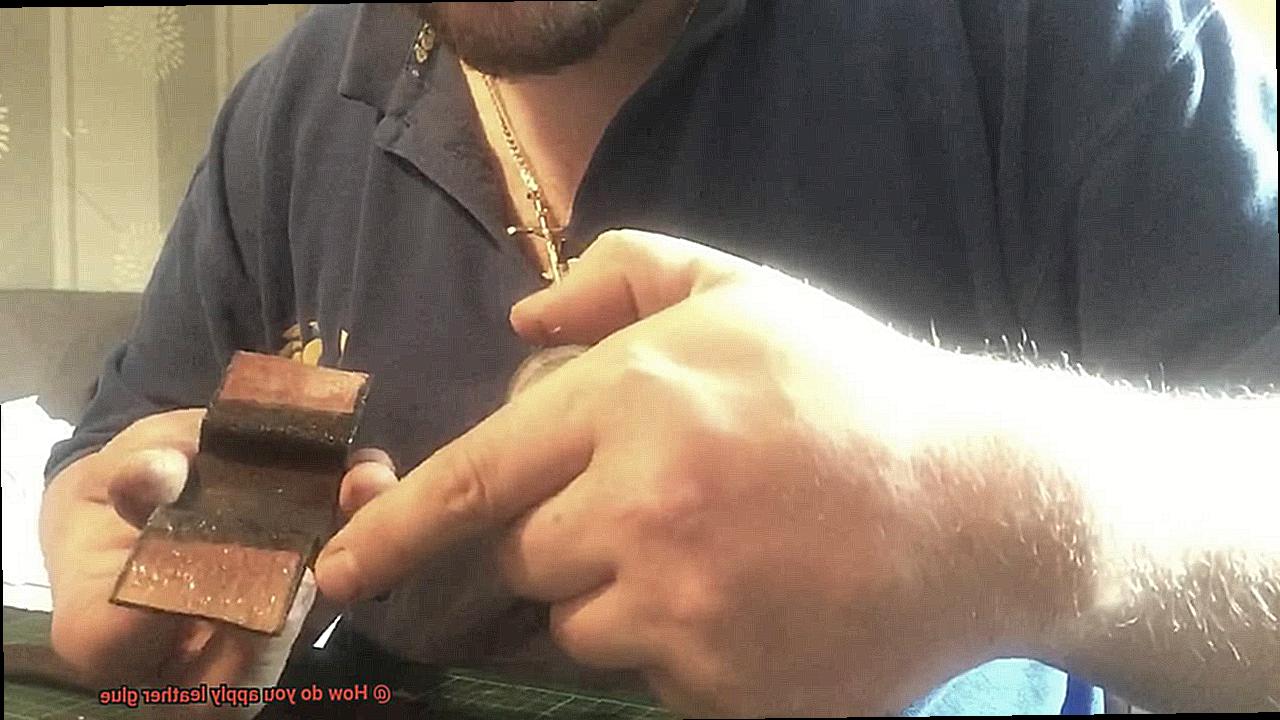
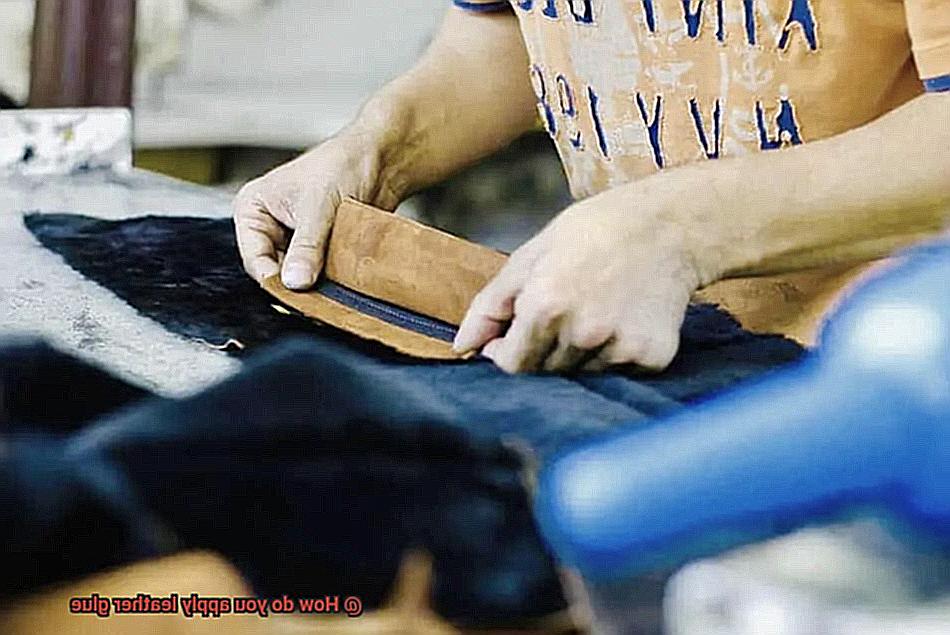
Pressing the Surfaces Together
Prepare to embark on an adhesive adventure where pressing those surfaces together takes center stage. Get ready to witness the transformative power of pressure as we delve into the world of leather glue bonding. Grab your clamps and weights, because we’re about to unveil the secrets behind this game-changing technique.
Even Distribution and Bubble Banisher:
Pressing those surfaces together isn’t just a step – it’s a magical transformation. It ensures an even distribution of our chosen leather glue, banishing any lumps that may threaten our seamless bond. No more worries about unsightly air bubbles or pesky gaps sabotaging our masterpiece. With every press, we guarantee a connection that boasts unwavering strength and durability.
Strength and Durability:
When it comes to leather bonding, pressing is the key that unlocks a connection built to withstand the test of time. The pressure exerted during this step creates a bond that defies weakness, embodying unparalleled strength and durability. Say goodbye to flimsy connections and hello to a rock-solid union that commands attention.
Clamps or Weights? The Choice is Yours.
Now, let’s tackle the age-old question – clamps or weights? Both options yield successful results, but let’s break it down for you. Clamps provide consistent pressure across the entire surface area, eliminating any chance of sneaky movements or shifts while your masterpiece dries. However, a word of caution – don’t unleash your inner Hulk. Excessive pressure can squeeze out excess glue, compromising the integrity of your bond. Keep it steady and controlled.
On the other hand, if you opt for weights, ensure they’re evenly distributed and cover every inch of the surface area. This guarantees uniform pressure, leaving no spot untouched by the power of connection. Balance is the secret ingredient to success, both in leather crafting and life itself.
Curing Time for Maximum Strength
Our previous expedition taught us the significance of pressure and balance in creating flawless connections. Today, we delve into a pivotal ingredient in the recipe for success: curing time. Join me as we unravel the mystery behind this often underestimated factor and unleash the full potential of your leather glue bonds.
The Science Behind Curing Time:
Picture an enchanting waltz between your leather surfaces and the glue that binds them. As the curing process commences, solvents or water content within the glue gracefully evaporate, metamorphosing it from a liquid state into a formidable adhesive fortress. This transformation is what endows your bond with its unparalleled strength.
Understanding Variations in Curing Time:
Just as every leather project possesses its unique essence, different types of glue demand varying durations to cure optimally. Some may perform their alchemy in as little as 30 minutes, while others yearn for several hours or even an indulgent overnight slumber to reach their zenith. Remember, my dear companions, always consult the manufacturer’s instructions to ensure you grant your glue the time it craves to manifest its brilliance.
Factors That Influence Curing Time:
Ah, behold the influence of Mother Nature. Temperature and humidity gracefully sway the pace at which your leather glue cures. Higher temperatures bestow acceleration upon this process, while lower temperatures gently coax it to slow down. Meanwhile, humidity levels possess the power to either elongate or expedite curing. For impeccable outcomes, seek refuge in a well-ventilated sanctuary adorned with moderate temperature and humidity levels – a haven where your glue can weave its enchantment.
Handle with Care:
During the delicate dance of curing, prudence reigns supreme. Disturbing or exerting excessive stress upon your glued surfaces prematurely can imperil or even sever the bond. To maintain stability, contemplate the embrace of clamps or the weight of burdensome companions, distributing an even pressure as your bond matures. Thus, your leather pieces remain steadfastly united, prepared to embark on any adventure that beckons.
Cleaning Up Excess Glue Immediately
In our journey through the secrets of leather glue bonding, we have delved into the magical world of curing time. But what happens when excess glue threatens to mar your impeccable craftsmanship? Fear not. Today, we will explore the art of cleaning up excess glue immediately, ensuring your leather creations remain flawless. So grab a cup of tea, and let’s dive in.
Step 1: Act Swiftly to Prevent Drying and Hardening
When it comes to excess glue on leather, time is not on your side. The longer you wait, the harder it becomes to remove. So act swiftly to preserve the pristine condition of your leather surface.
Step 2: The Gentle Touch of a Damp Cloth or Sponge
In your battle against excess glue, a trusty ally is a damp cloth or sponge. Moisten it with warm water and gently wipe away the unwanted adhesive. Remember, a little moisture goes a long way; avoid using excessive water that could harm your precious leather.
Step 3: Gentle Scraping for Dried Glue
If you find yourself facing dried glue, fear not. Arm yourself with a blunt object like a plastic scraper or the edge of a credit card. With finesse and care, gently scrape off the stubborn adhesive from the leather surface. Be cautious not to leave any scratches or damage in your quest for cleanliness.
Step 4: Commercial Glue Remover – A Helping Hand
When your own efforts fall short, turn to commercial glue removers tailor-made for leather surfaces. These gems can be found in craft stores or online, offering salvation for your sticky predicament. Follow the instructions diligently to effectively remove the excess glue. However, before going all-in, perform a patch test on an inconspicuous area to ensure no discoloration or damage occurs.
Step 5: Seeking Professional Assistance
In the face of a seemingly unbeatable glue monster, it’s time to call in reinforcements. Reach out to a leather repair specialist who possesses the knowledge and experience to handle even the stickiest of situations. They will come to your rescue and restore your leather creation to its former glory.
Different Types of Leather Require Different Techniques
Leather is a versatile and exquisite material that demands specific care and techniques when it comes to applying glue. Each type of leather, whether it be full-grain, top-grain, suede, or bonded leather, possesses its own distinct characteristics and necessitates particular approaches to ensure a robust and enduring bond. In this blog post, we will delve into the different techniques required for applying leather glue to various types of leather, equipping you with the knowledge to confidently tackle your leather projects.
Full-Grain Leather: The Ruler of Leather
Full-grain leather reigns supreme in terms of durability and natural grain pattern. To effectively apply glue to full-grain leather, it is crucial to select a high-quality adhesive that can seamlessly bond with the surface. Begin by applying a thin layer of glue to both surfaces, ensuring an even distribution. Then, with careful precision, press the surfaces together, aligning them flawlessly. Utilize your hands or a roller to exert firm pressure, guaranteeing complete contact between the glue and the leather. Remember to adhere to the manufacturer’s instructions regarding drying time for optimal results.
Top-Grain Leather: Smooth and Sophisticated
Top-grain leather undergoes sanding or buffing to eliminate imperfections, resulting in a sleeker surface. When gluing top-grain leather, exercise extra caution to preserve its pristine appearance during application. Apply a thin layer of glue evenly on both surfaces and gently but firmly press them together. Avoid excessive pressure that may cause indentations or marks on the leather. Grant ample drying time before handling or using the bonded item.
Suede Leather: Soft and Sensational
Suede leather enthralls with its soft and velvety texture, presenting challenges when it comes to applying glue effectively. To establish a strong bond on suede leather, it is advisable to employ a specialized suede adhesive or adopt specific techniques. One method involves lightly brushing the suede surface with a suede brush to create a rougher texture, facilitating better adhesion of the glue. Apply a small amount of glue and gingerly press the surfaces together. Exercise patience during the drying process to ensure proper setting of the adhesive.
Bonded Leather: Handle with Tender Care
Bonded leather, fashioned from leftover scraps and fibers bonded together with adhesive, represents a lower quality type of leather. Due to its composition, bonded leather may necessitate a different type of glue compared to other types of leather. Opt for an adhesive specifically formulated for bonded leather and meticulously follow the manufacturer’s instructions. Apply the glue evenly and exert firm pressure when pressing the surfaces together, guaranteeing a solid bond. Allow ample drying time before using or handling the bonded leather item.
Testing the Glue on a Small Area First
Today, we’re delving into a vital step that will ensure your leather projects are bound with strength and finesse. We’ll be exploring the importance of testing the glue on a small area before applying it to the entire surface. Trust me, this little test can save you a ton of frustration and disappointment down the road. So, let’s dive in and learn how to apply leather glue like a pro.
Why Test the Glue on a Small Area First?
Imagine pouring your heart and soul into a stunning leather creation, only to discover that the glue you used ruined its appearance or failed to hold it together. Heartbreaking, right? That’s why it’s crucial to take this extra step and test the glue beforehand. Let’s break it down into three key reasons:
Different Types of Leather, Different Reactions:
Leather comes in various types, each with its own unique quirks. Smooth, suede, bonded, top-grain – they all have their distinct characteristics. Testing the glue on a small, inconspicuous area allows you to observe how your specific type of leather interacts with the adhesive. No unexpected surprises when applying it to the entire surface.
Avoid Unwanted Discoloration or Damage:
Picture this: you apply glue to your treasured leather item only to discover that it changed color or damaged the texture. Nightmare material. By testing on a small area first, you can identify any potential discoloration or texture changes before committing to the entire project. This ensures that your masterpiece remains flawless and unblemished.
Secure and Long-Lasting Bond:
Naturally, you want your leather projects to withstand the test of time. By testing the glue’s bond on a small area, you can verify its holding power and durability. A secure bond should show no signs of peeling or detachment when gently rubbed with your finger or a soft cloth. With this assurance, you can proceed confidently, knowing your project will stand strong.
How to Test the Glue on a Small Area:
Now that we understand why this step is crucial, let’s walk through the process of testing the glue on a small area:
RtGI1Bj3xxw” >
Conclusion
When it comes to applying leather glue, there are a few key steps you should follow for optimal results. First and foremost, make sure the surface of the leather is clean and free from any dust or debris. This will ensure proper adhesion and prevent any imperfections in the final result.
Next, apply a thin layer of glue onto both surfaces that you want to bond together. Use a small brush or applicator to evenly spread the glue, making sure to cover the entire area that will be bonded. Be careful not to apply too much glue as it can lead to messy results.
Once the glue has been applied, carefully press the two surfaces together, ensuring they are aligned correctly. Apply firm pressure for a few seconds to secure the bond. It’s important to note that some leather glues require longer drying times, so be sure to read the instructions on your specific product.
After allowing sufficient drying time, check if the bond is strong and secure. If needed, you can reinforce the bond by applying additional layers of glue and repeating the pressing process.
In conclusion, applying leather glue requires attention to detail and proper technique. By following these steps and using high-quality leather glue, you can achieve strong and durable bonds that will last for years to come.