Ready to embark on a creative adventure and turn ordinary wood into extraordinary art? Look no further. In the world of DIY crafting, Mod Podge reigns supreme as the versatile superstar. Whether you’re a newbie or a seasoned pro, Mod Podge offers endless possibilities for enhancing and protecting your wood projects. But how do you achieve flawless results? Fear not.
In this comprehensive guide, we’ll take you step-by-step through the process while sharing insider tips and tricks to ensure your creations shine like masterpieces.
So grab your brush and let’s dive in.
Step-by-Step Instructions:
- Prep that Wood: Start by giving your wooden surface some TLC—clean it thoroughly, sand lightly for better adhesion, and make sure it’s free from any dust or debris.
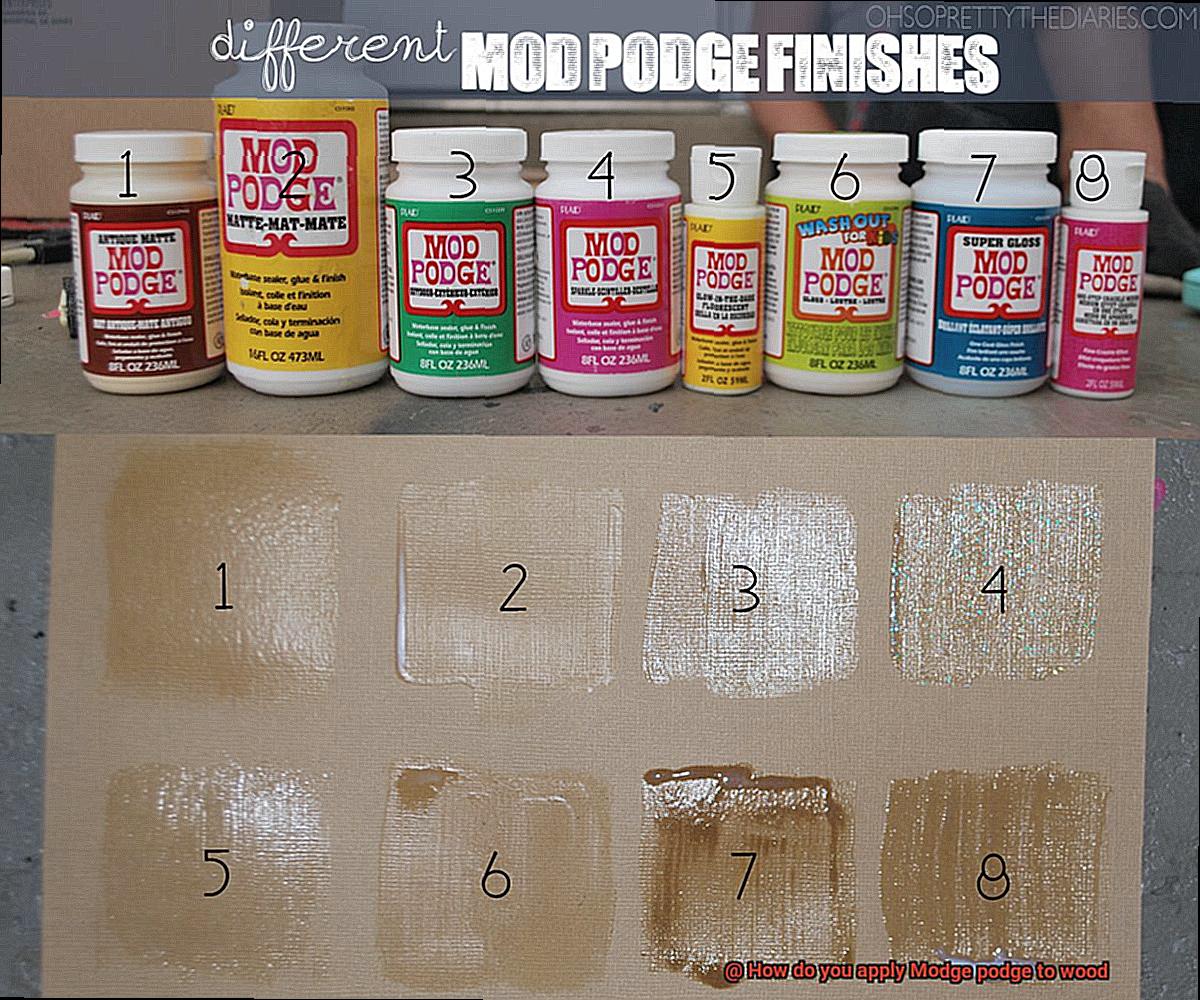
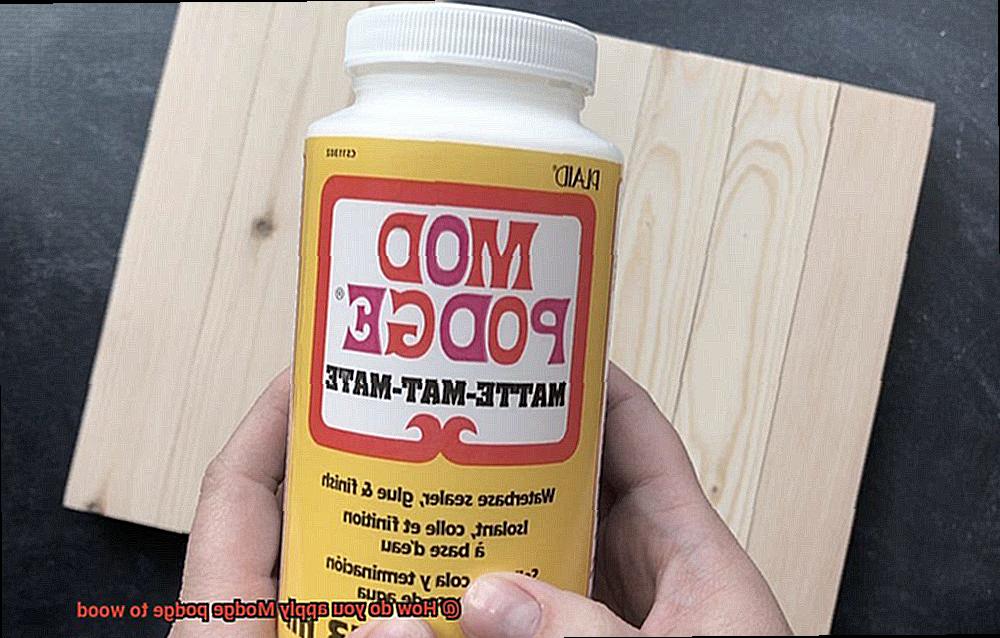
- Choose Your Magic Potion: Mod Podge comes in different formulas (Matte, Gloss, Satin), each offering its own unique finish. Pick the one that matches your artistic vision.
- Gather Your Arsenal: Besides Mod Podge, arm yourself with a foam brush or bristle brush (depending on project size), plus a clean cloth for potential spills or excess.
- Coat Numero Uno: Dip your brush into the Mod Podge and apply an even layer onto the wood surface. Work in small sections to prevent premature drying.
- Smooth Operator: If pesky air bubbles or wrinkles pop up, gently smooth them out using either your brush or nimble fingers.
- Patience is Key: Let that first coat dry completely according to the recommended time on the bottle—typically around 15-20 minutes.
- Layer Up: For added durability and pizzazz, repeat steps 4-6 with additional coats of Mod Podge—ensuring each layer dries fully before adding the next. Two to three coats usually do the trick.
- Lock It In: Once your final coat is dry, consider sealing your masterpiece with a clear acrylic sealer for extra protection against moisture and mishaps.
Tips and Tricks:
By following these steps and unleashing your creativity, you’ll soon become a Mod Podge maestro, transforming humble wood into stunning works
What You Need to Apply Modge Podge to Wood
Contents
If you’re a creative soul looking to add charm and personality to your wooden projects, Mod Podge is the go-to glue. This popular decoupage adhesive can transform ordinary pieces of wood into stunning works of art. In this comprehensive guide, we’ll walk you through the essential supplies needed and the step-by-step process to achieve flawless results.
Supplies You’ll Need:
- Mod Podge (matte, gloss, or satin finish)
- Clean, dry piece of wood
- Foam brush or paintbrush
- Sandpaper (optional)
- Drop cloth or newspaper
- Damp cloth or sponge
Step-by-Step Instructions:
Prepare Your Workspace:
Protect your working area from spills and drips by laying down a drop cloth or newspaper.
Prep the Wood Surface:
Ensure your wooden surface is clean and free from dust or debris. Wipe it down with a damp cloth to remove any hindering particles.
Choose Your Mod Podge Finish:
Select the desired Mod Podge finish (matte, gloss, or satin) based on the look you want to achieve for your project.
Sand if Necessary (Optional):
Smooth out rough edges or imperfections on the wood by lightly sanding the surface with sandpaper. This step ensures smooth adhesion.
Apply the Mod Podge:
Using a foam brush or paintbrush, evenly spread Mod Podge onto the wooden surface. Work in small sections to ensure complete coverage without missing any spots.
Work Quickly:
Mod Podge dries relatively fast, so work swiftly to avoid premature drying before finishing spreading it. If any areas do dry, simply add another coat once the first layer has dried.
Add Paper or Fabric (Optional):
For projects using paper or fabric, apply it directly onto the wet Mod Podge. Smooth out wrinkles or bubbles using your fingers or a squeegee, working from the center outwards. Seal it with another layer of Mod Podge on top.
Layer and Dry:
Continue applying layers of Mod Podge until you achieve your desired look and level of protection. Allow each layer to dry completely before adding another coat to prevent streaks or smudges.
Let It Cure:
Once satisfied with the number of coats, let the Mod Podge cure fully for a few hours or overnight before handling or displaying your finished project.
Preparing the Wooden Surface
Properly preparing the wooden surface is essential for achieving a smooth and flawless finish when applying Modge Podge. Here are five key steps to follow:
- Cleanliness is Key: Before cracking open that bottle of Modge Podge, take a moment to thoroughly clean the wooden surface. Wipe away dirt, dust, and grease with a damp cloth or mild detergent. This simple step will make a world of difference in the final result.
- Smooth Operator: Achieving a smooth surface is crucial for optimal Modge Podge application. Use medium-grit sandpaper to tackle rough patches and previous finishes. Then, switch to fine-grit sandpaper for that desired baby-smooth finish. Remember to sand in the direction of the wood grain.
- Dust Busters Unite: Banish lingering dust particles after sanding by using a tack cloth or soft brush to gently wipe down the wooden surface. This ensures flawless adhesion and leaves you with a clean and professional-looking finish.
- Priming Perfection (Optional): Take your Modge Podge game to the next level by applying a primer before gluing. Priming seals the wood and provides an even smoother base for your masterpiece. Be sure to choose a primer suitable for your wood type and follow the manufacturer’s instructions.
- Test, Test, Test: Before diving headfirst into your project, conduct a small test on a hidden area of the wood to ensure compatibility between Modge Podge and your wooden surface. This allows you to experiment with different finishes and techniques, ensuring a successful outcome.
By following these five steps, you’ll create stunning Modge Podge projects that leave everyone in awe. Properly preparing the wooden surface ensures better adhesion, smoother finishes, and longer-lasting masterpieces. So grab your Modge Podge and let your creativity run wild.
Choosing the Right Modge Podge Finish
In the world of Modge Podge, there is a plethora of finishes to choose from. Each finish possesses its own distinct characteristics and purposes, making it crucial to select the perfect one for your wood project. Let’s dive into the various finishes in detail to help you make an informed decision.
Matte Finish:
The Matte finish is a favorite amongst those who prefer a more natural look. It offers a subtle, non-shiny appearance that allows the texture and beauty of the wood to shine through. This finish is ideal for decoupage projects or when you want to preserve the original aesthetics of the wood.
Gloss Finish:
If you’re seeking to add a glossy, polished look to your wood project, the Gloss finish is your go-to. It enhances the beauty of the wood and adds an elegant touch. The Gloss finish works wonders for photo transfers or creating a shiny topcoat on painted wood surfaces.
Sparkle Finish:
For those craving some sparkle and shimmer, the Sparkle finish is an excellent option. It contains glitter particles that create a dazzling effect when applied to the wood surface. Use this finish to add glamour to jewelry boxes, picture frames, or any project where you want to make a statement.
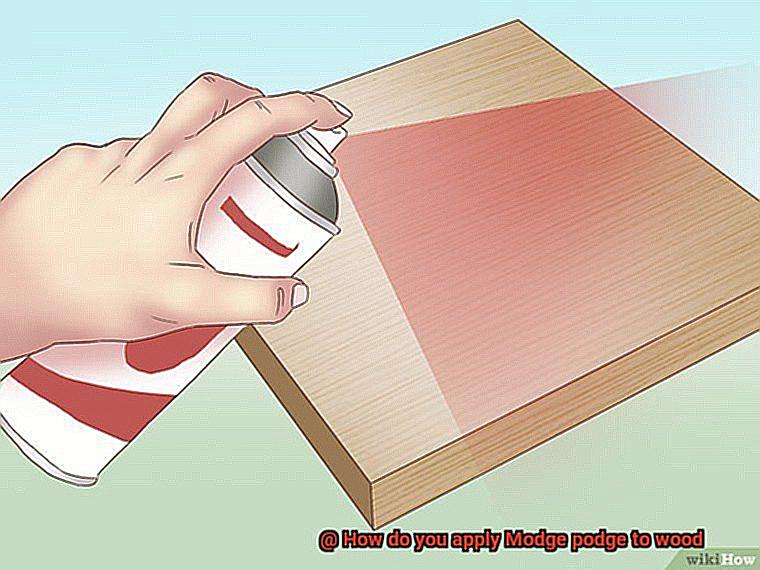
Outdoor Finish:
If your wood project will brave the elements, consider using the Outdoor finish. This specially formulated finish provides waterproof and UV-resistant protection, ensuring that your project remains intact and shielded even in harsh weather conditions.
Specialty Finishes:
In addition to the aforementioned finishes, there are also specialty Modge Podge formulas available for specific purposes. The Antique Matte finish imparts an aged or vintage look on wood surfaces by adding a subtle brown tint. The Hard Coat finish boasts extra durability and protection, making it ideal for high-traffic areas or frequently handled items.
When selecting the right Modge Podge finish for your wood project, consider the desired look, level of shine, and the intended use of the finished piece. It’s also crucial to read the instructions and recommendations on the Modge Podge label to ensure proper application and drying times.
Before applying Modge Podge to wood, ensure that the surface is clean and free from dust or debris. Use a soft cloth or brush to remove any dirt or loose particles. Apply a thin and even layer of Modge Podge using a foam brush or paintbrush, working in one direction. Allow each coat to dry completely before applying additional coats if needed. For a smooth and flawless finish, lightly sand between coats using fine-grit sandpaper.
Applying the Modge Podge
This versatile adhesive and sealant is a game-changer when it comes to adding a smooth and glossy finish to your wood creations. Get ready to unleash your creativity as we guide you through the exhilarating process of applying Modge Podge to wood.
To begin, prepare your wood surface with precision. Cleanliness is key, so make sure to remove any dust or debris that may mar your masterpiece. Smooth out imperfections with sandpaper, transforming your wood into a flawless canvas that’s ready for the magic of Modge Podge.
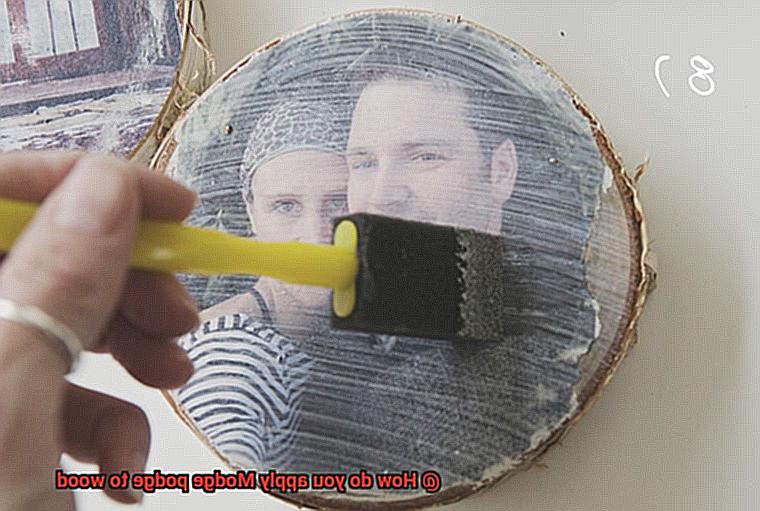
Now, it’s time to dive into the enchanting application process. Equip yourself with a trusty brush or foam applicator, your ticket to creating a stunning finish. Immerse the brush in Modge Podge and embark on the journey of a lifetime. Begin by applying a thin and even layer onto the wood surface, working in small sections to ensure a mesmerizingly even spread.
As you apply Modge Podge, you have two captivating techniques at your fingertips: brushing and dabbing. Brushing offers an elegant dance of long, even strokes in one direction, crafting a seamless and polished finish. In contrast, dabbing unveils a mystical stippled effect as you gently press the brush onto the wood surface, creating a textured masterpiece that will captivate any beholder.
Once the first layer of Modge Podge graces your creation, let it dry completely before embracing the next chapter. Patience is key here, as this step ensures that no bubbles or wrinkles dare interrupt your artistic vision. Feel free to add multiple layers of Modge Podge for enhanced durability and an ethereal gloss, allowing each layer to dry before progressing.
Should you encounter air bubbles or imperfections in this enchanting process, fear not. Utilize the power of a foam brush or a magical credit card to gently smooth them out. Beware of pressing too hard, for this may unleash streaks and unevenness that could mar the final result.
Once you have applied all the layers and behold a finish that fills your heart with joy, allow your creation to bask in the glory of drying. The time required may vary, depending on the thickness of the layers. It is wise to grant your masterpiece a few hours or even an overnight slumber for optimal results.
To elevate your Modge Podge finish to celestial heights, consider embarking on a final journey of sanding. A gentle caress with fine-grit sandpaper will unveil a surface so smooth, so sublime, that rough edges and imperfections will vanish into oblivion. This final touch bestows upon your project a professional aura that will leave viewers spellbound.
Adding Additional Materials
Adding additional materials to a Modge Podge project on wood can take your creativity to new heights. There are several options for incorporating different materials into your masterpiece, allowing you to personalize it and make it truly unique.
- Decorative Paper/Fabric: A timeless choice that never fails to impress. Cut your preferred paper or fabric into various shapes and sizes. Apply Modge Podge directly onto the wood surface and carefully place the material onto the wet Modge Podge. Smooth out any air bubbles and let it dry. For added protection, seal the deal with another layer of Modge Podge.
- Embellishments: Beads, sequins, buttons – the possibilities are endless. Use Modge Podge as an adhesive to securely attach these little beauties onto the wood surface. Make sure they are evenly spaced for a professional finish.
- Texture Paste/Modeling Clay: If you crave texture, texture paste or modeling clay is the answer. Mold these materials onto the wood surface and let them dry before applying Modge Podge over them. This will give your project a stunning three-dimensional look that will make it stand out.
- Glitter/Metallic Paint: Want some sparkle and shine? Mix your desired amount of glitter or metallic paint into the Modge Podge and apply it to the wood. This will give your project a dazzling finish that is sure to catch everyone’s attention.
By incorporating these additional materials, you can elevate your Modge Podge project from ordinary to extraordinary. Let your creativity soar and experiment with different combinations. Remember to take your time and let each layer dry thoroughly before moving on. Smooth out any imperfections using a foam brush or even a trusty old credit card.
Working Quickly and Avoiding Streaks
Creating beautiful crafts with Modge Podge requires attention to detail, especially when it comes to working quickly and avoiding streaks. In this comprehensive guide, we will explore essential tips and techniques that will help you achieve a smooth and streak-free finish on your wood projects. So, let’s dive in.
Preparation:
Before you start applying Modge Podge, it’s crucial to prepare your work area. Clear away any dust, debris, or loose particles from the wood surface, ensuring a clean canvas for your masterpiece. This simple step will prevent unwanted particles from getting trapped in the Modge Podge, leading to streaks or imperfections.
Application:
To achieve a flawless finish, remember to apply thin layers of Modge Podge rather than a thick layer all at once. Working with thin layers not only ensures an even application but also helps in preventing streaking. Use a foam brush or a soft-bristled brush to apply the Modge Podge in smooth and even strokes, allowing for better control and precision.
Working in sections is particularly important for larger surfaces. Dividing the area into smaller sections allows you to focus on one area at a time and complete each section before the Modge Podge starts drying. This technique enables you to maintain control over the application process and avoid streaks.
When applying Modge Podge, use long, continuous strokes instead of going back and forth repeatedly over an area. This will help you achieve a seamless finish without visible brush strokes or unevenness. Start at one end of the wood surface and gently glide the brush in one direction until you reach the other end.
Blending while wet is another crucial technique to avoid streaking. Modge Podge dries relatively quickly, so make sure to overlap each layer slightly with the previous one while it’s still wet. This blending technique creates a seamless and streak-free finish, adding depth and dimension to your project.
Minimize brush marks by using a foam brush or a soft-bristled brush specifically designed for Modge Podge application. These brushes are designed to minimize visible brush strokes and create a smoother finish. Additionally, avoid pressing too hard on the brush while applying the Modge Podge as this can also lead to streaking.
Clean-up:
As you work, regularly clean your brush to prevent dried Modge Podge from accumulating on the bristles. Accumulated dried Modge Podge can harden and create streaks when reapplied. Rinse your brush with warm water and mild soap between applications to keep it clean and ready for flawless application.
Finishing Touches
In this guide, we’ll explore the art of adding those finishing touches that will transform your projects from ordinary to extraordinary. So grab your brushes, prepare to unleash your creativity, and let’s dive into the world of Modge Podge magic.
Let’s start with the brush. Choosing the right brush is crucial for achieving a flawless finish. Opt for a foam brush or a soft-bristled brush to ensure a smooth application. These brushes are designed to prevent streaks or brush marks on the surface of the wood. Before you begin, make sure your brush is clean and dry, free from any residue or debris that could mar your masterpiece.
Now, let’s talk about preparation. Before you dive into the Modge Podge magic, take a moment to properly prepare the wood surface. Lightly sand it with fine-grit sandpaper to create an even and smooth base for the Modge Podge to adhere to. This not only ensures better adhesion but also helps remove any roughness or imperfections that could detract from the final result. Once you’re done sanding, wipe away any dust using a clean cloth or tack cloth, leaving behind a canvas ready for your artistic touch.
It’s time to apply the Modge Podge and bring your creation to life. Pour a small amount onto a disposable plate or palette, ready to work your magic. Dip your chosen brush into the Modge Podge and apply an even layer onto the wood surface. Smooth it out delicately, following the natural grain of the wood. Take care not to overload your brush with Modge Podge, as too much can lead to dripping, clumping, or uneven drying.
Now comes the hard part – waiting for it to dry. Patience is key in achieving that professional finish. Allow each coat of Modge Podge to dry completely before applying additional coats. The drying time varies depending on the type of Modge Podge and environmental conditions, so consult the product’s instructions for guidance. Remember, multiple thin coats are better than one thick coat, as they ensure better adhesion and a more durable finish.
Once your masterpiece has dried, it’s time to address any imperfections. Gently sand the dried Modge Podge with fine-grit sandpaper, smoothing out any unevenness that may have occurred. Don’t forget to wipe away any dust before moving on to the next layer, leaving behind a flawless canvas ready for your artistic expression.
But why stop there? If you’re craving that extra shine, consider using a gloss Modge Podge or applying a clear sealer on top of the final coat. This will give your project a lustrous finish and protect the wood surface from moisture or potential damage. Apply the gloss Modge Podge or sealer using the same technique as before, ensuring an even and smooth application that will make your creation truly stand out.
Allowing Time for Curing
When it comes to using Modge Podge on wood, allowing sufficient time for curing is a crucial step that should never be overlooked. Curing refers to the process of the Modge Podge drying and forming a strong bond with the wood surface, ensuring a durable and long-lasting finish. But why is this step so important?
Let’s break it down. When you apply Modge Podge to wood, a chemical reaction occurs between the glue and the wood surface. This reaction is what creates that strong bond that will hold your project together for years to come. However, this reaction takes time. That’s why it’s essential to follow the instructions on the glue label and allow for proper curing time.
Each type of Modge Podge may have different recommended drying times, so it’s crucial to read those instructions carefully. As a general rule of thumb, it’s best to give it at least 24 hours to fully cure. I know waiting can be tough when you’re excited about your project, but trust me, it’s worth it.
Rushing the curing process can lead to an uneven or damaged finish that won’t be as durable as it should be. And let’s face it – no one wants all their hard work to go to waste. So during this curing period, be patient and avoid touching or disturbing the Modge Podge-coated wood surface. Even a slight movement can disrupt the drying process and ruin your finish.
Adequate ventilation is also important during curing, as it helps speed up drying by allowing moisture to evaporate from the Modge Podge layers. Once your Modge Podge has fully cured, you’ll be rewarded with a beautiful, clear, and glossy finish that’s ready for any further embellishments or protective coatings you desire.
81j70QRy7Ow” >
Conclusion
Enhancing wooden projects with Modge Podge is both effortless and imaginative. Gather your supplies: Modge Podge, a foam brush or sponge, and the chosen piece of wood awaiting its transformation.
Begin by ensuring cleanliness—no dust or debris should mar its surface. With steady strokes from brush or sponge, apply an even layer of Modge Podge onto the wood—a thin veil suffices for perfection’s sake. Watch for air bubbles or excess adhesive; deftly smooth them away with gentle caresses from brush or sponge.
Patience is key—let the first coat dry completely before adding more; smudges and streaks are foes to be vanquished. For an unyielding defense against wear and tear, consider multiple layers of Modge Podge, each drying thoroughly in between.
Behold the final coat’s dry brilliance—a glossy armor that safeguards wood from harm’s way.