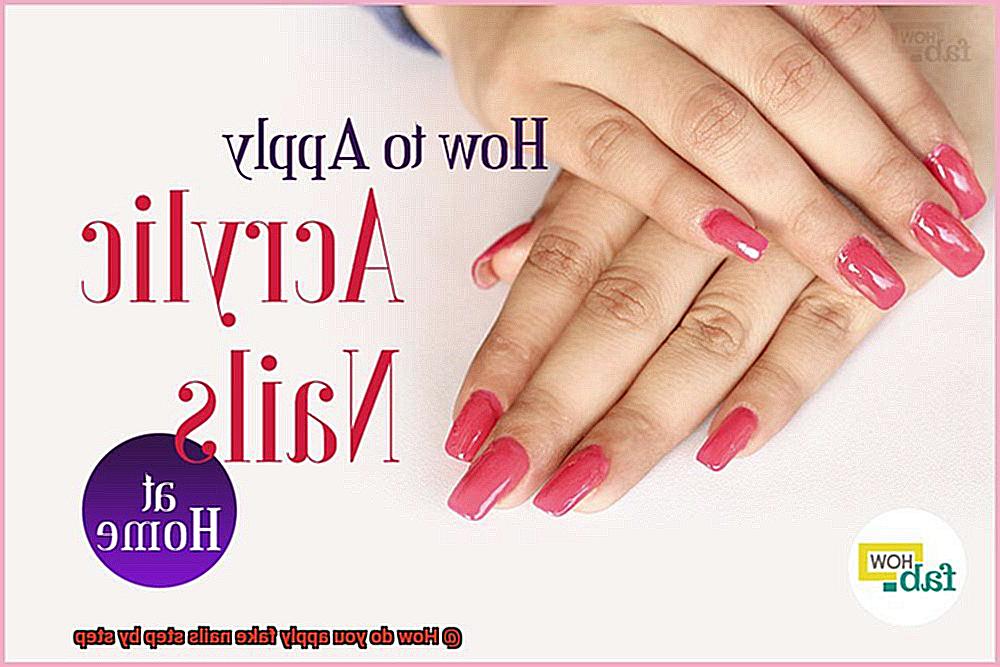
Longing for nails that scream “I’m fabulous.” wherever you go? Well, guess what? You’re in for a treat. This guide is your ticket to applying fake nails like a total boss.
Picture this: flawless nails that are perfectly shaped and painted, without the agony of waiting for them to grow or the constant fear of breaking them. With fake nails, you can make that dream a reality in just a few simple steps.
First things first, let’s talk prep. We’ll walk you through all the essential pre-application rituals, from getting your natural nails ready to finding the ideal size for your fake ones. Then comes the fun part – applying those bad boys. We’ll spill all the secrets on how to use nail glue like a pro and ensure those fakes stay put. Oh, and we’ve got some sneaky tips up our sleeves too – think natural-looking finish and longer-lasting wear.
Once you’ve nailed (pun intended) the application process, it’s time to unleash your inner artist. We’ll show you how to navigate the wild world of nail art – from picking out killer polish colors to creating jaw-dropping designs and adding fancy extras. Get ready to turn heads and leave everyone wondering where you got your fabulous mani.
Whether you’re a newbie dipping your toes into the world of fake nails or a seasoned pro looking for fresh techniques, this guide has got your back. Prepare yourself for a journey filled with step-by-step instructions and insider tips that will transform your nails into stunning masterpieces. Ready? Let’s dive in and discover all the juicy secrets of applying fake nails like an absolute queen.
Preparing Your Natural Nails
Contents
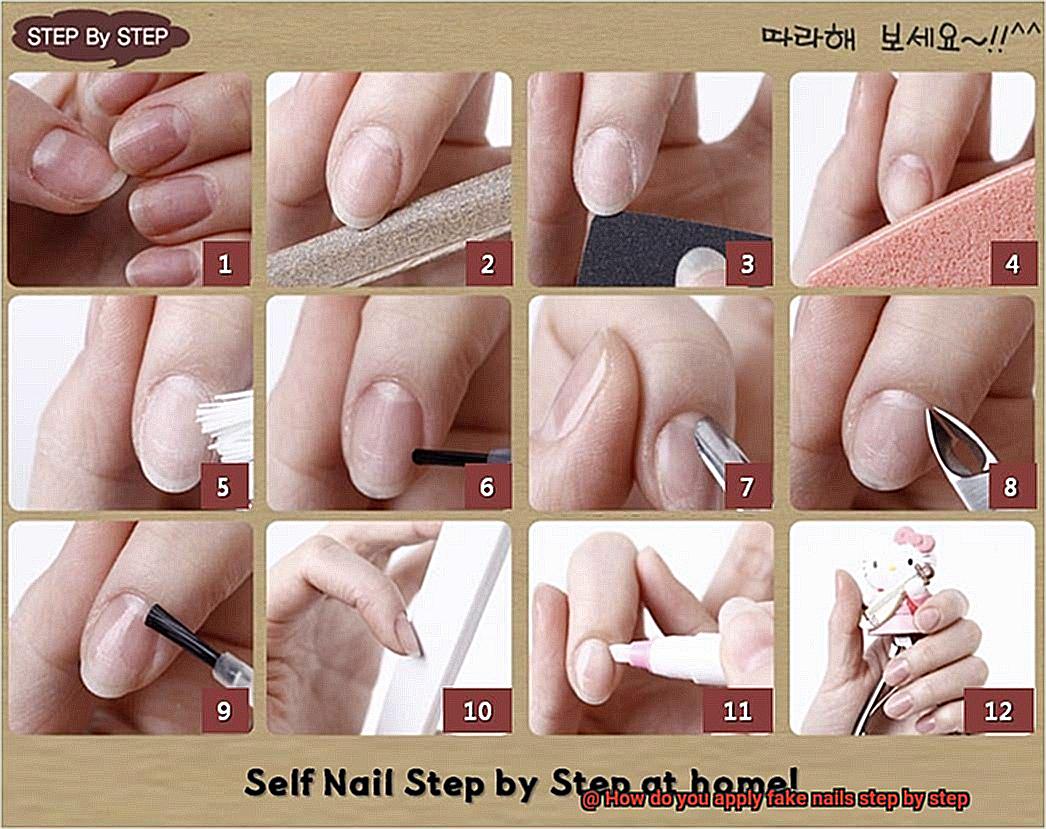
Preparing your natural nails is the secret to achieving beautiful and long-lasting fake nails. With proper preparation, you can ensure that the fake nails adhere well and provide a flawless finish. In this article, we will delve into the importance of preparing your natural nails before applying fake nails, offering step-by-step instructions to guide you along the way.
Step 1: Unveiling a Clean Canvas
To start off, it’s essential to remove any remnants of nail polish from your natural nails. Opt for a non-acetone nail polish remover and gently swipe away any traces of color. We want to avoid harsh acetone-based removers that can strip away the natural oils in your nails. Give each nail a clean slate, ready for the next steps.
Step 2: Trim and Shape with Precision
Now it’s time to trim and shape your natural nails. Grab a trusty nail clipper and cut them to your desired length, bearing in mind that the fake nails will add some extra length. Keep it even and avoid cutting them too short, as this affects how well the fake nails adhere later on. After trimming, grab a nail file and shape your nails with finesse, choosing between square, round, oval, or almond shapes. File gently in one direction to avoid damage or splitting.
Step 3: Buffing for Perfection
To create a smooth surface for the fake nails to adhere to, give your natural nails a light buff. Utilize a nail buffer or a soft nail file to delicately remove any ridges or imperfections. This step ensures that your canvas is flawless, ready for the transformation ahead. Remember not to over-buff, as this can compromise the strength of your natural nails.
Step 4: Washing Away the Dust
After all that meticulous preparation, it’s time to wash your hands thoroughly with soap and water. This step ensures that any dust or debris accumulated during the process is washed away, leaving you with pristine nails ready for the next step.
Step 5: Nourishing Your Nails
To keep your natural nails healthy and nourished, it’s crucial to apply a cuticle oil or cream. Massage this into your cuticles and the surrounding skin, allowing it to absorb for a few minutes. This essential step moisturizes your nails, giving them the strength they need for the next phase.
Choosing the Appropriate Size Fake Nails
Just like finding the perfect pair of jeans, selecting the right size can make all the difference in comfort and style. Let’s dive into the world of fake nails and explore the essential factors to consider when finding your perfect fit.
The Importance of a Perfect Fit
Imagine wearing shoes that are too tight or too loose – not a pleasant experience, right? Well, the same goes for fake nails. Ill-fitting nails can be uncomfortable, cause pain, and even lead to shorter wear time. It’s crucial to find the perfect fit that complements your natural nail bed and ensures a comfortable, long-lasting wear.
Accurate Measurements: Your Must-Do
To find your ideal fake nail size, accurate measurements are key. Most nail kits come with a handy measuring guide, making this process a breeze. However, if you don’t have one, don’t fret. You can simply compare the sizes to your natural nails to determine the best fit.
How to Measure for a Perfect Match
Hold up each fake nail to your own and select the one that closely matches the width and length of your nail bed. It should cover the entire nail without extending beyond the edges or cuticles. This ensures a seamless and natural appearance.
Smaller is Better: When in Doubt
If you’re unsure about sizes, always opt for a slightly smaller size rather than a larger one. Why? Well, you can always file down the edges of a smaller nail to fit your nail shape perfectly. Unfortunately, making a larger nail smaller is not as easy and may result in discomfort and instability.
Enhancing Your Natural Look: Consider Proportions
Fake nails should enhance your natural look, not overpower it. Take into account the proportions of your hands and fingers when selecting the size. If you have small hands or short fingers, opt for shorter and narrower nail sizes that will flatter your features. Conversely, if you have larger hands or longer fingers, longer and wider nail sizes can complement your natural beauty.
Cleaning Your Natural Nails
But first, let’s not forget the essential step that sets the stage for a flawless manicure – cleaning your natural nails. Think of it as the secret ingredient for a head-turning, envy-inducing nail look. So, gather your nail tools and prepare to unveil the magic of perfectly prepped nails.
Step 1: Bid Adieu to Nail Polish
Before we dive into the wonders of fake nails, let’s bid farewell to any lingering traces of nail polish. But wait. Hold off on that harsh acetone-based remover. Instead, opt for a gentler, non-acetone alternative. We’re all about nurturing those nails and keeping them hydrated.
Step 2: Trim and File with Finesse
It’s time to sculpt those nails to perfection. Reach for your trusty nail clipper and trim them to your desired length. Remember, don’t go overboard and cut them too short – we want pain-free beauty. Once trimmed, grab a nail file and smoothen any rough edges. This step ensures a pristine canvas for your fake nails.
Step 3: Immerse in Tranquility
Ah, it’s time to indulge in some well-deserved relaxation. Fill a bowl with warm water and add a few drops of gentle liquid soap or mild shampoo. Allow your nails to luxuriate in this blissful concoction for approximately 5-10 minutes. This mini spa session works its magic by softening up those stubborn cuticles and loosening any trapped dirt.
Step 4: Cuticle Care, Oh-so-Gentle
After the tranquil soak, let’s lavish some attention on those cuticles. Grab a cuticle pusher or an orangewood stick and gently nudge them back into place. Remember, we’re not here to perform a cuticle massacre – our goal is to create a clean canvas for the fake nails to shine.
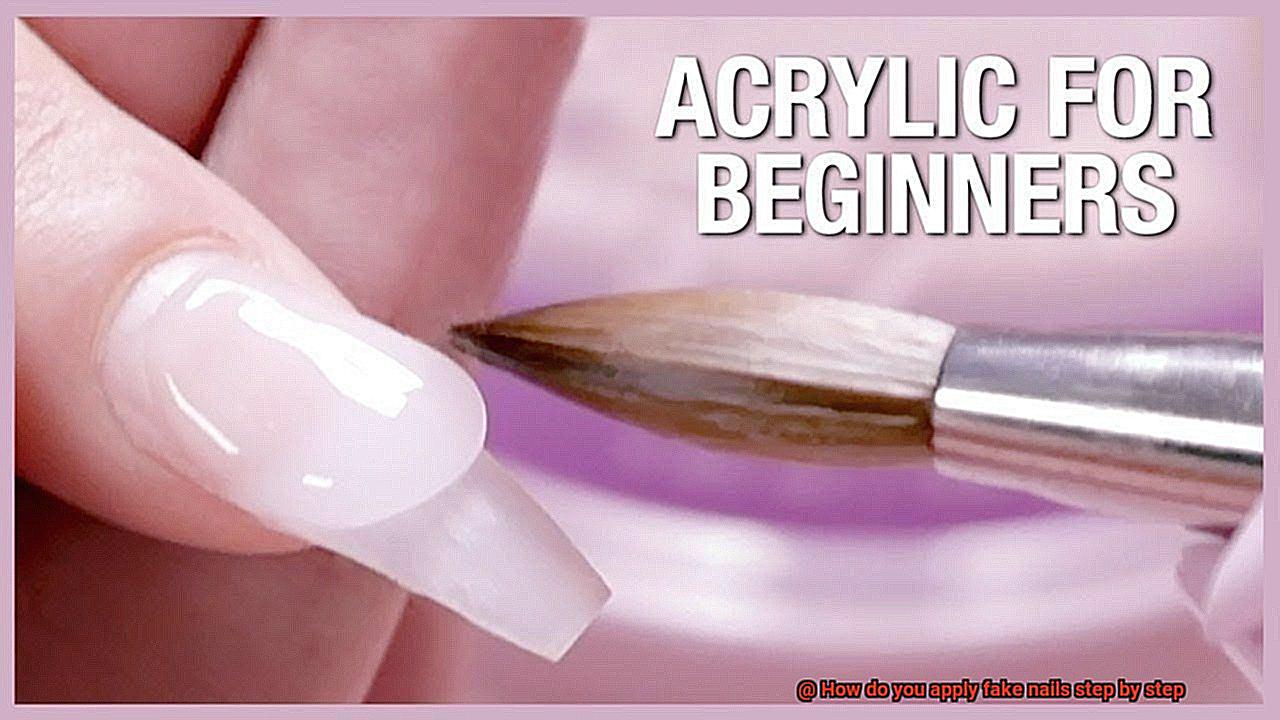
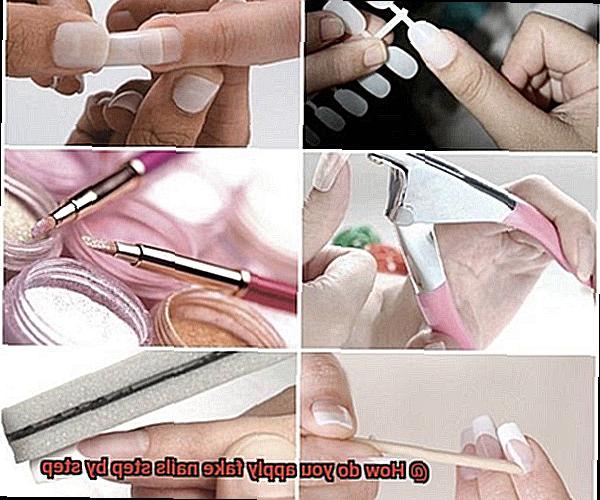
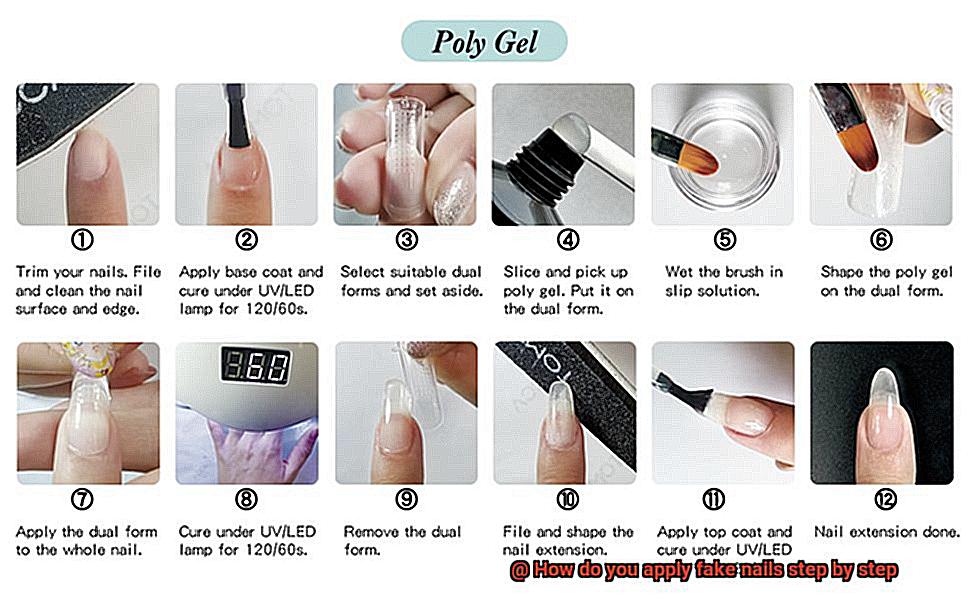
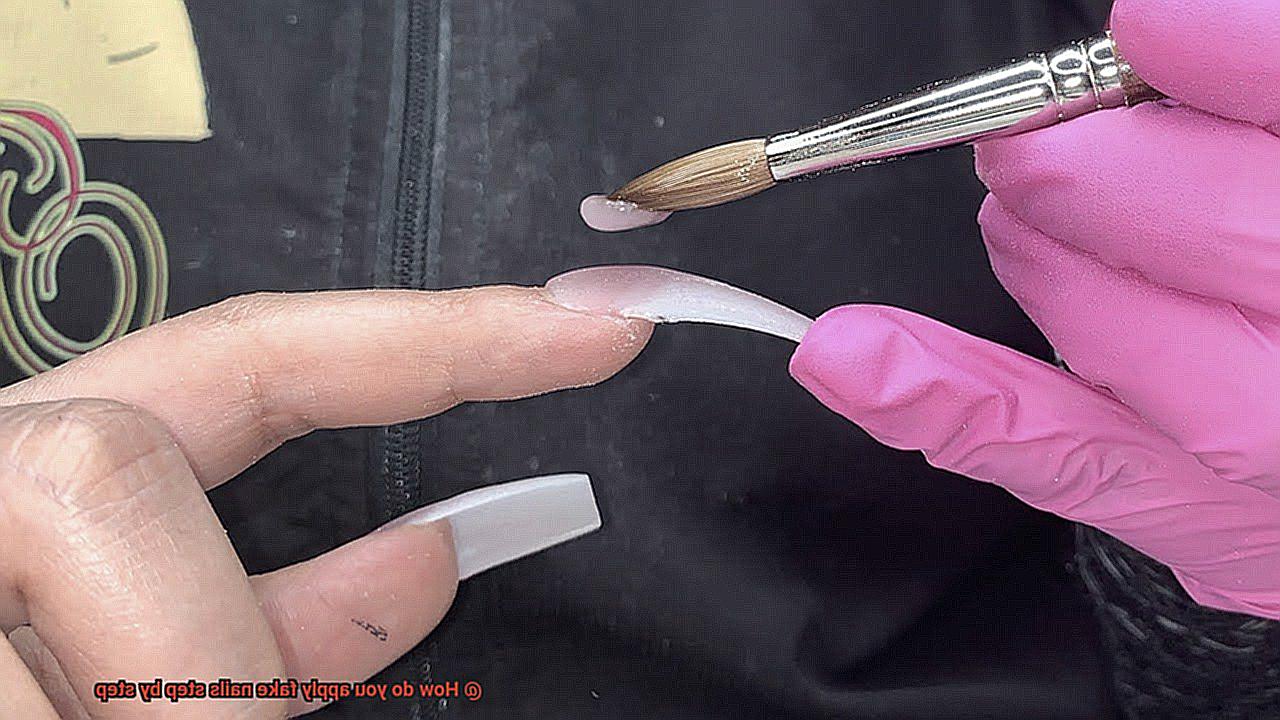
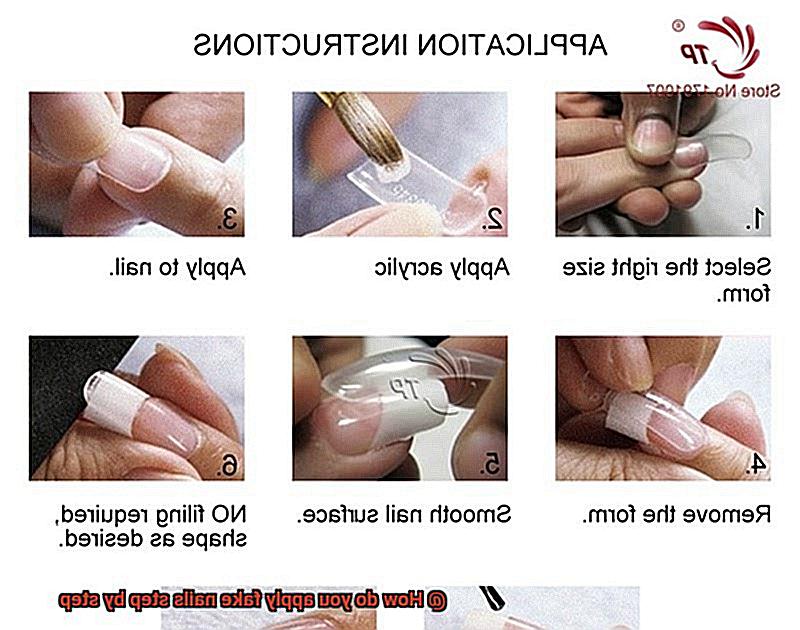
Applying the Adhesive
In our previous section, we discussed the importance of prepping your natural nails to achieve the ultimate manicure experience. Now, get ready to dive into the exciting world of applying adhesive to fake nails. It’s time to take your nail game to the next level.
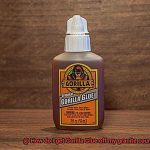
Let’s start by talking about the star of the show – the adhesive. This special glue is specifically designed for nail application and plays a vital role in keeping your fake nails securely in place. To ensure long-lasting results, it’s crucial to choose a high-quality adhesive that is strong and reliable.
But before we jump into the application process, we can’t forget about proper nail preparation. Cleanliness is key, my friends. Begin by thoroughly cleaning your natural nails and removing any remaining nail polish or oils. This clean canvas is essential for a flawless application.
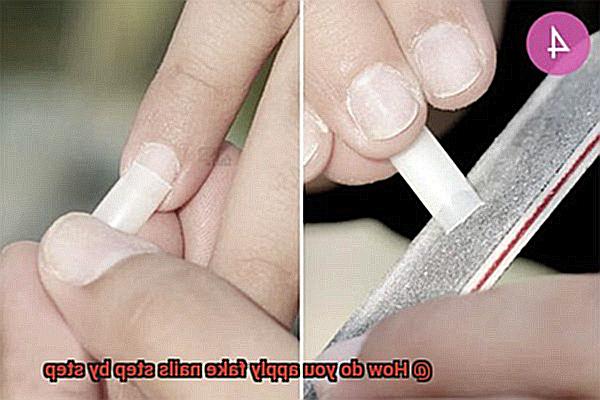
Once your nails are perfectly clean, it’s time to create a rough surface texture that will help the adhesive bond better. Grab a trusty nail file and gently buff the surface of your natural nails. This small step may seem inconsequential, but it makes a world of difference in the longevity of your fake nails.
Now, onto the exciting part – selecting the perfect size of fake nails for each finger. Remember, it’s better to choose slightly smaller sizes rather than larger ones. Trust me, it’s much easier to trim down a slightly smaller fake nail than trying to reshape a larger one without causing damage. Take your time and find the perfect fit for each finger.
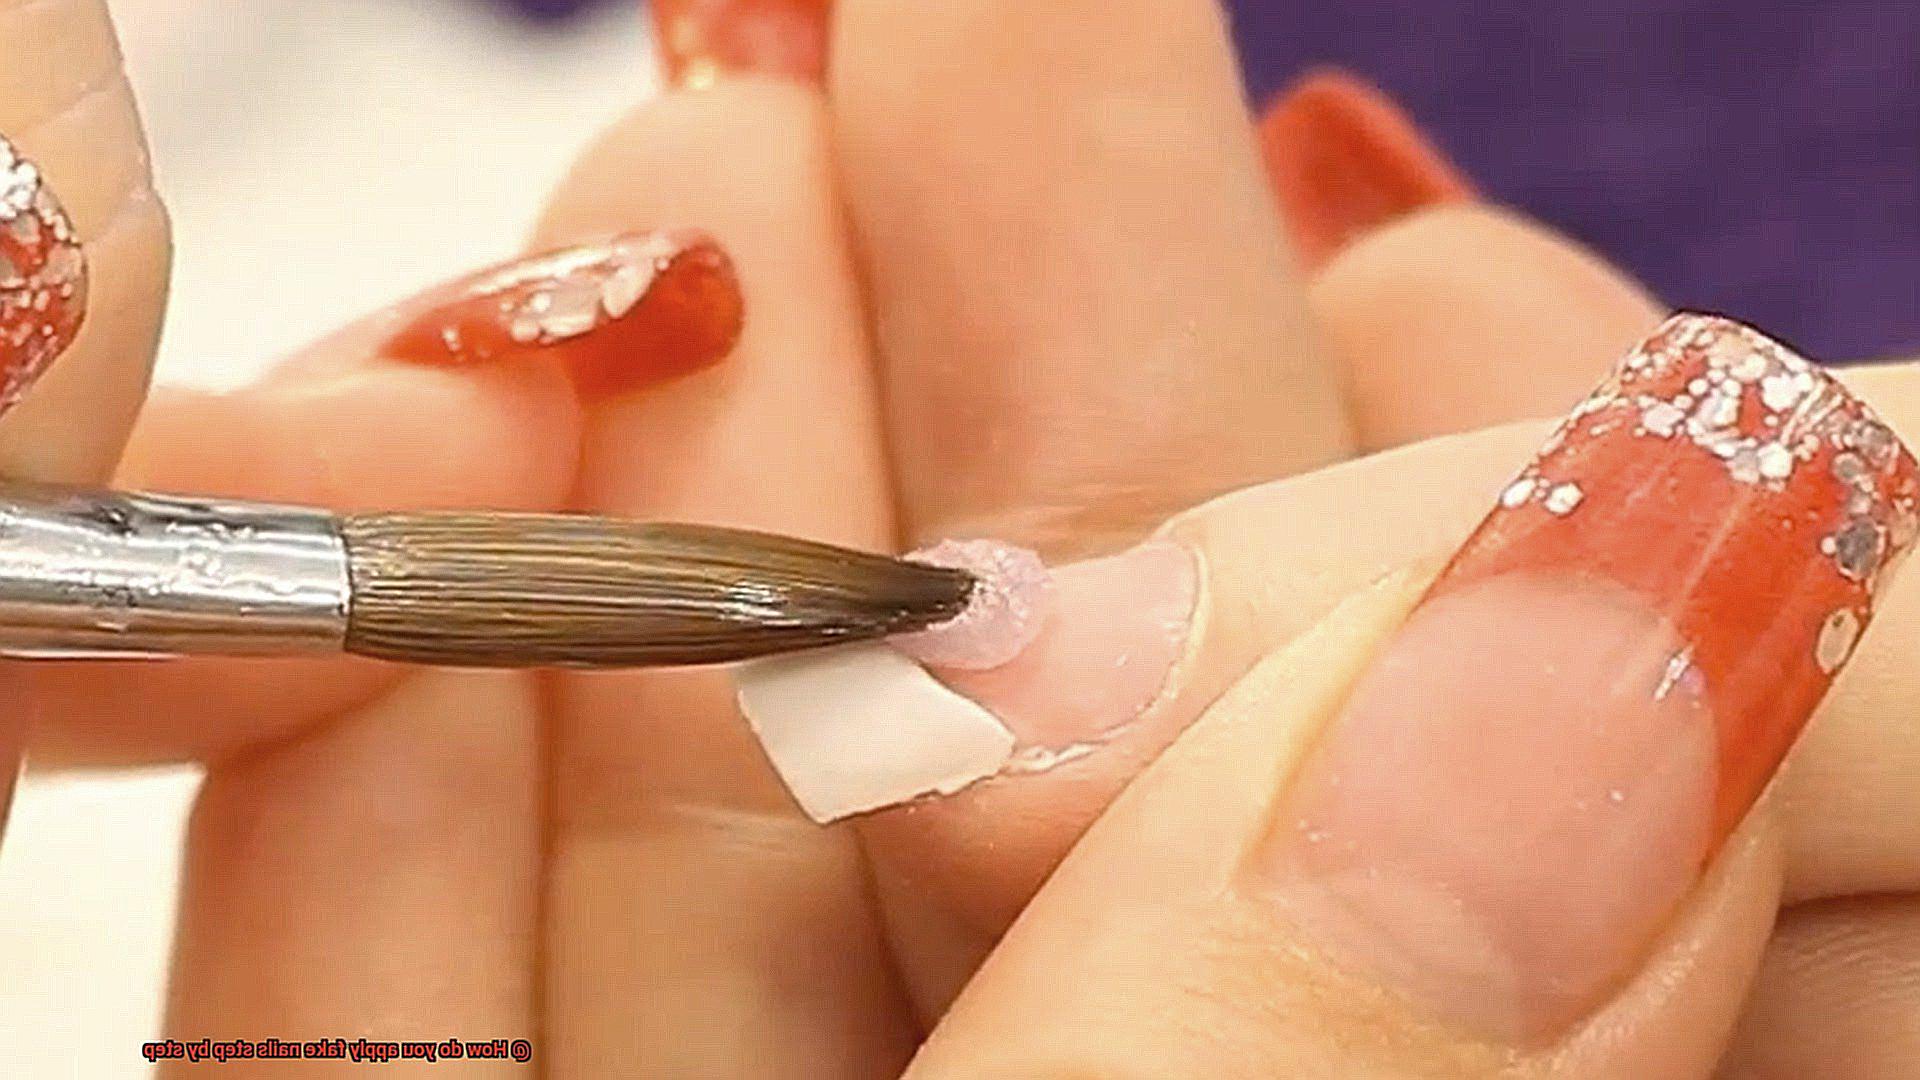
Once you’ve found your match made in nail heaven, it’s time to apply the adhesive. Take a deep breath because this is where the magic happens. Apply a thin layer of glue to the backside of the fake nail, ensuring that you cover the entire length and those pesky edges as well. However, be cautious not to go overboard with the adhesive as it can lead to messy application and excess glue seeping out from the sides.
Now, it’s time to press that fake nail onto your natural nail with precision and confidence. Align it perfectly with your cuticle and firmly press for a few seconds to ensure a strong bond. If any excess adhesive decides to make an appearance, gently wipe it away with a cotton swab or an orangewood stick dipped in nail polish remover. After all, we want clean and polished nails.
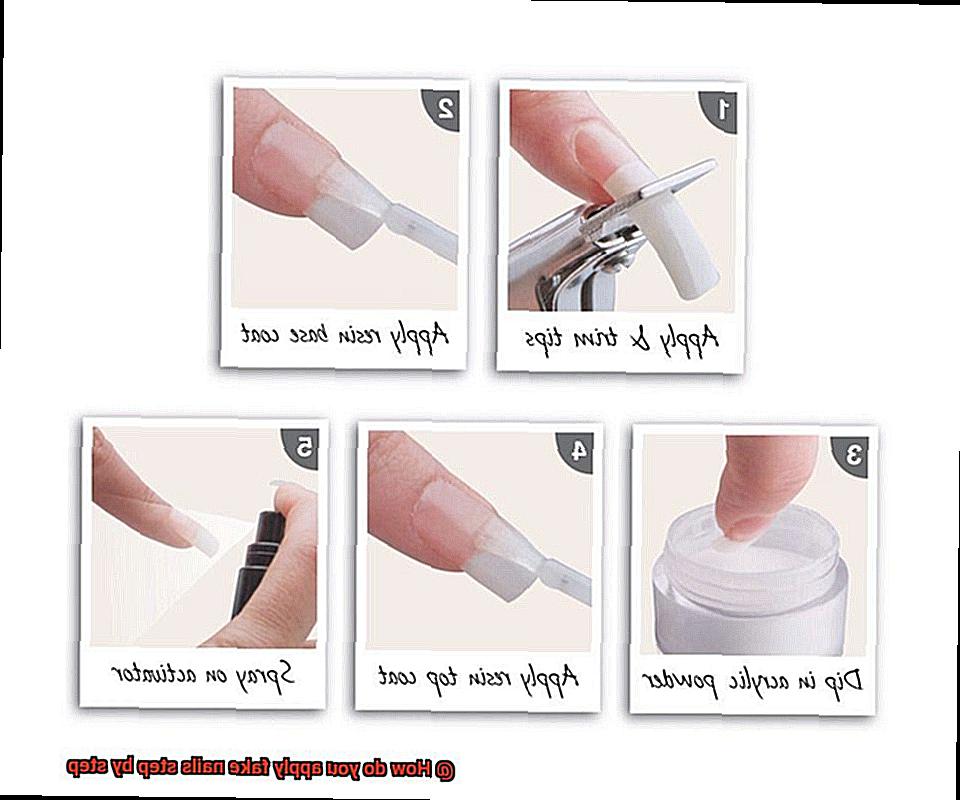
Securing the Fake Nails in Place
Today, we’re diving into the exciting world of securing fake nails in place. Just like finding the perfect pair of shoes, ensuring that your fake nails stay put is crucial for a flawless and long-lasting manicure. So, grab your favorite nail glue or adhesive tabs and let’s explore the different methods to achieve a secure bond.
Method 1: Nail Glue – The Classic Choice
Nail glue, the tried and true option, is a favorite among many nail lovers. This specially designed adhesive offers a strong bond that keeps your fake nails securely in place. Begin by giving your natural nails a thorough cleaning to eliminate any oils or dirt. Then, apply a small amount of glue to the back of the fake nail, spreading it evenly for optimal coverage.
Gently press the fake nail onto your natural nail, starting from the cuticle area and moving towards the tip. Hold it in place for a few seconds, allowing the glue to dry and set. Witness the magic as your fake nails become one with your natural nails.
Method 2: Adhesive Tabs – Easy and Damage-Free
If you prefer a more temporary solution or enjoy switching up your nail look frequently, adhesive tabs are about to become your new best friend. These pre-cut pieces of double-sided tape offer a secure hold without causing any damage to your natural nails.
Begin by peeling off one side of the tape and sticking it onto your clean natural nail, ensuring that it covers the entire nail bed.
Then, peel off the other side of the tape and firmly press the fake nail onto it, securing it in place with confidence. Enjoy hassle-free application and removal without compromising on style.
Method 3: Nail Adhesive Stickers – Quick and Stylish
For those who crave convenience without sacrificing style, nail adhesive stickers are here to save the day. Available in a wide range of designs and sizes, these stickers offer a quick and easy way to attach fake nails.
Start by peeling off the protective backing from the sticker, revealing its adhesive surface. Align the sticker with your natural nail and press it firmly onto the nail bed. The adhesive on the sticker will hold your fake nails securely in place until you’re ready for a change. Embrace effortless elegance with these trendy and time-saving stickers.
Allowing Time for Adhesive to Dry and Set
Attention, nail aficionados. Are you ready to elevate your manicure game to a whole new level? Prepare yourself for the secret ingredient that will take your fake nails from ordinary to extraordinary: allowing ample time for the adhesive to dry and set. Get ready to unleash your inner nail guru and achieve flawless, long-lasting nails that will make heads turn.
Now, let’s delve into the reasons why drying and setting time is absolutely crucial. Imagine this: you’ve painstakingly chosen the perfect set of fake nails, meticulously applied them with precision, only to have them come loose mere moments later. Talk about a major nail catastrophe. *cue suspenseful music* Giving the adhesive enough time to dry and set ensures a bond so strong between your natural nails and the fake ones that your manicure will withstand any challenge life throws your way.
Here are a few key things to keep in mind when it comes to drying and setting time:
- Recommended Drying Time: Every adhesive product has its own set of instructions, and it’s vital to follow them diligently. Typically, drying times can vary from a few seconds to several minutes. Remember, my fellow nail enthusiasts, patience is the name of the game here. The longer you allow it to dry, the stronger the adhesion will be.
- Steer Clear of Water and Oils: During the drying process, avoid any contact with water or oils as if your entire manicure depended on it (well, it kind of does). We’re talking about activities like washing dishes, applying lotions or creams, or even using hand sanitizers. These sneaky culprits can interfere with the adhesive’s effectiveness, and we definitely don’t want that.
- A Gentle Tap Test: Once you’ve patiently waited for the recommended drying time (you’ve got this, my nail-savvy friends.), it’s time for the moment of truth. Gently tap or press on each nail to ensure they are securely in place. This quick inspection will give you the green light or signal if any nails need a little extra drying time or some tender love and re-application.
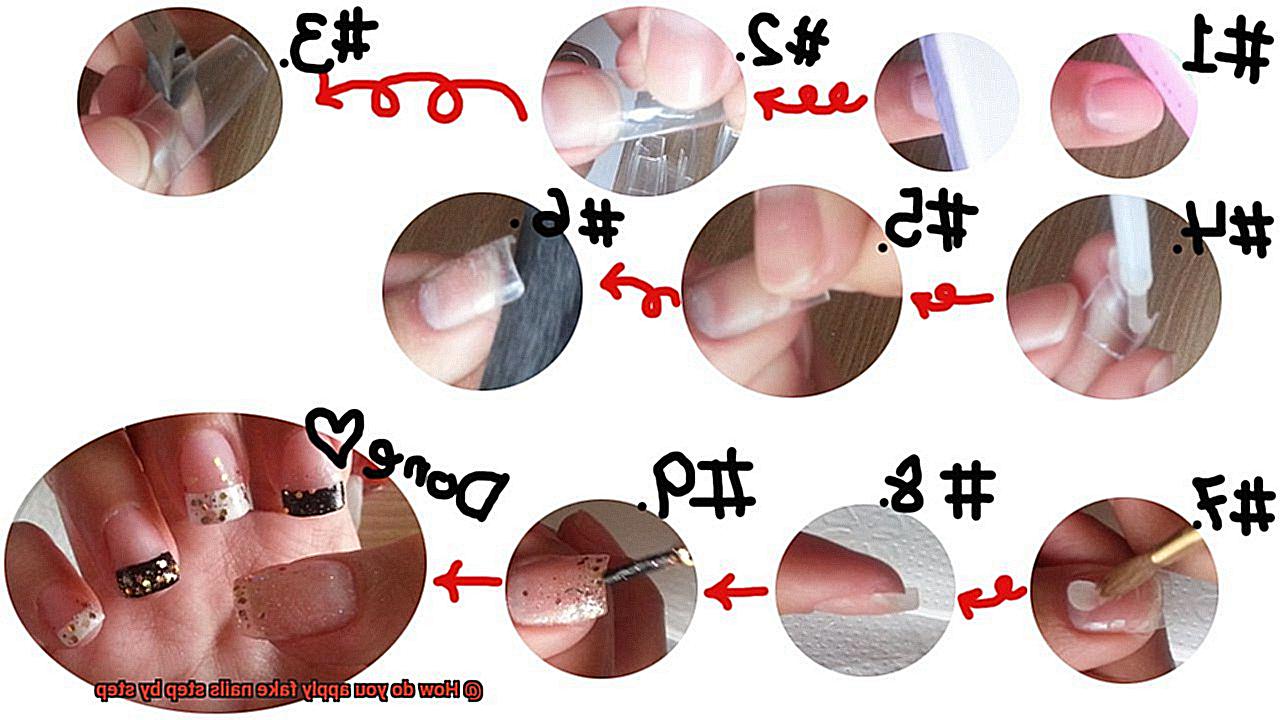
Applying a Clear Top Coat
Today, we’re going to delve into the secrets of applying a clear top coat that will transform your fake nails from ordinary to extraordinary. Get ready to elevate your manicure game.
Let’s start with the basics – preparation is key. Before you even think about applying that top coat, ensure that your fake nails are completely dry and free from any dust or debris. Give them a thorough cleanse with a lint-free wipe or cotton pad soaked in nail polish remover to remove any oils or residue. We want a pristine canvas for our masterpiece.
Now, let’s talk about the different types of top coats available. It’s like being a kid in a candy store. You have regular top coats that give you a mesmerizing shine, quick-dry top coats that work their magic in record time, and gel-like top coats that offer long-lasting effects akin to gel nails. Take your pick based on your preferences and needs.
Alright, let’s get down to business. Grab that bottle of clear top coat and give it a gentle shake to awaken its magical formula. Open it up and be sure to wipe off any excess polish from the brush on the rim of the bottle. We’re aiming for precision here, not a gloopy mess. Now, apply a thin layer of the top coat onto each nail, starting from the base and gliding towards the tip. Remember, less is more – don’t flood those cuticles or apply too much pressure.
Here’s an insider tip: pay extra attention to sealing the edges of your fake nails with the clear top coat. This little trick will prevent any water from seeping underneath and causing lifting or peeling. Glide that brush along the edge of each nail, creating a seamless and flawless seal.
Now, my friends, patience is key during the drying time. Each top coat has its own unique drying time, so consult the instructions on the product packaging. Resist the urge to touch or apply pressure on your nails during this period unless you want smudges or dents to mar your fabulous manicure. We surely don’t want that, do we?
Feeling a little daring? Go ahead and add multiple layers of that clear top coat for added durability and an extra touch of glamour. Just make sure to let each layer dry completely before applying the next one. We’re aiming for perfection here, not a clumpy disaster.
Removing the Fake Nails
Whether you’re a DIY nail aficionado or just looking to switch up your style, it’s important to know how to safely remove fake nails. In this comprehensive guide, we’ll walk you through the step-by-step process, ensuring that your natural nails remain healthy and strong. So grab your tools and get ready to unveil the beauty beneath those fabulous fakes.
Step 1: Assemble Your Arsenal
Before embarking on this nail journey, let’s make sure you have everything you need. Get your hands on a trusty nail file, acetone, cotton balls or pads, aluminum foil, and a cuticle pusher. These tools will be your allies in the quest for flawlessly bare nails.
Step 2: File Down the Obstacles
To begin, delicately file down the top layer of your fake nails. This act of precision will break the seal and facilitate the removal process. Say goodbye to any barriers standing between you and your natural nails.
Step 3: Soak and Secure
Create a sanctuary for your nails by soaking a cotton ball or pad in acetone. Place it atop each nail and wrap them securely with aluminum foil. This cozy cocoon will keep the magic potion in place, allowing it to work its wonders.
Step 4: Patience is Virtue
Now it’s time for some zen-like patience. Let your nails luxuriate in the acetone bath for approximately 10-15 minutes. This generous soak will loosen the adhesive, making it easier to bid farewell to those stubborn fake nails.
Step 5: Gentle Liberation
With grace and finesse, remove the aluminum foil and cotton balls. Employ your trusted cuticle pusher to gently nudge off the softened fake nails. Remember, force is not your friend here – we want to preserve the integrity of your natural nails.
Step 6: Persistence Prevails
In case any remnants of the fake nails refuse to let go, don’t panic. Repeat the soaking process for a few more minutes and give it another try. Persistence will ultimately pay off, revealing the true beauty beneath.
8DHP5XZPSjc” >
Conclusion
Applying fake nails is a simple process that can give your hands an instant glam makeover. By following these step-by-step instructions, you’ll be able to achieve professional-looking results in no time.
First, start by preparing your natural nails. Remove any old polish and gently file the edges to create a smooth surface. It’s important to ensure that your nails are clean and dry before proceeding.
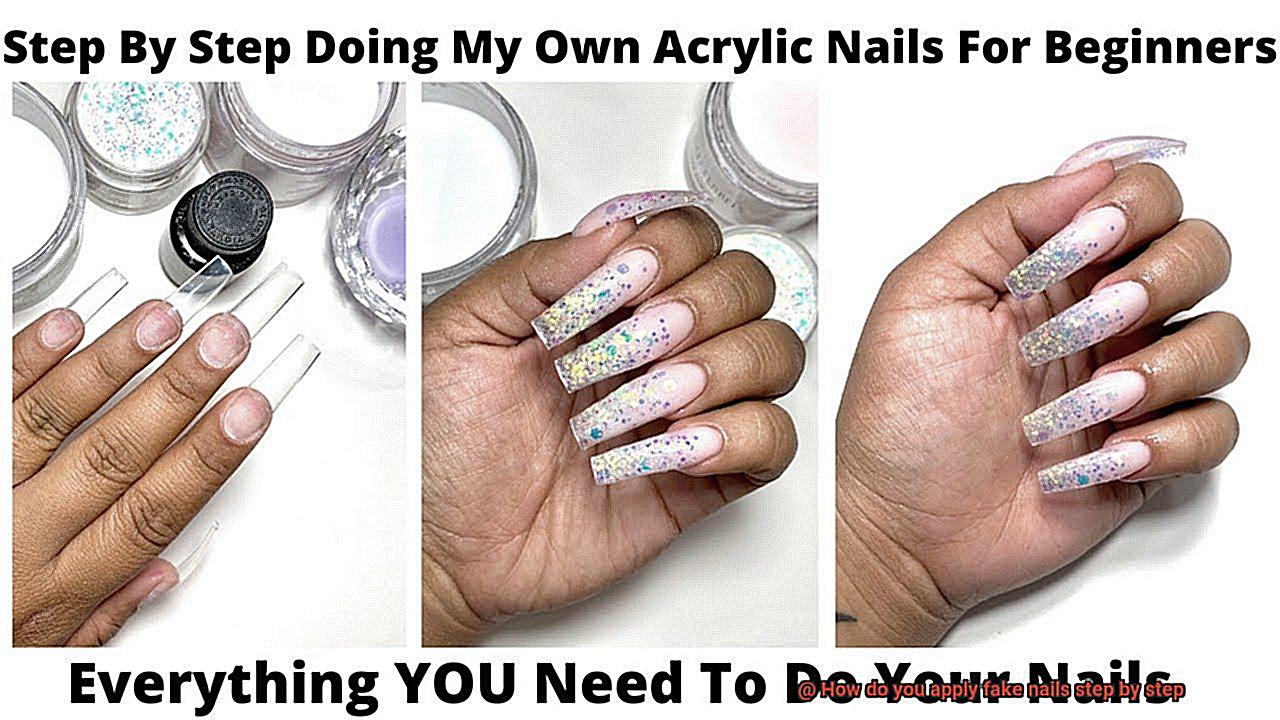
Next, select the fake nails that best fit your natural nail size and shape. You can choose from a variety of styles and lengths to suit your personal preference. Remember to lay out all the nails in the correct order for easy application.
Before applying the fake nails, it’s recommended to apply a thin layer of nail glue onto each nail bed. This will help the fake nails adhere securely and prevent them from lifting or falling off prematurely.
Now comes the exciting part – carefully place each fake nail onto your natural nail bed, starting from the cuticle area and pressing down firmly. Make sure to align the fake nail with your natural nail’s edge for a seamless look.
Once all the fake nails are applied, use a nail file or buffer to shape and smooth out any rough edges or unevenness. This will give your nails a polished finish and ensure they blend seamlessly with your natural nails.
To complete the process, apply a top coat of clear polish over the entire set of fake nails. This will not only add shine but also provide extra protection against chipping and peeling.
Voila. You now have beautiful, salon-worthy fake nails that are ready to show off. With proper care and maintenance, they can last for up to two weeks before needing replacement or touch-ups.
Remember, practice makes perfect when it comes to applying fake nails. Don’t get discouraged if it takes a few tries to get it right – soon enough, you’ll become a pro at achieving flawless manicures in the comfort of your own home.
So go ahead, indulge in some self-care and pamper yourself with a set of fabulous fake nails.