Are you about to embark on a DIY stone project and find yourself pondering over the ideal adhesive to seamlessly unite those stones? Well, fret no more because we’ve got your back. In this blog post, we’ll take a deep dive into the captivating realm of adhesives to uncover the crème de la crème when it comes to bonding stone to stone.
When faced with the task of joining these ancient yet delicate beauties, numerous glue options present themselves. Each type boasts its own unique set of advantages and disadvantages, but ultimately, your choice will depend on the specific requirements of your project and your personal preferences.
From the ever-reliable epoxy to the versatile acrylic-based adhesives, we’ll explore the most trusted solutions that guarantee your stone masterpiece will withstand the test of time. So buckle up for some adhesive revelations as we unravel the secrets behind creating bonds that harmoniously unite stones in perfect unison.
Factors to Consider When Bonding Stone to Stone
Contents
- 1 Factors to Consider When Bonding Stone to Stone
- 2 Epoxy Adhesives for Bonding Stone to Stone
- 3 Polyurethane Adhesives for Bonding Stone to Stone
- 4 Cement-Based Adhesives for Bonding Porous Stones
- 5 Silicone-Based Adhesives for Bonding Smooth Stones
- 6 Preparing the Surface Before Applying the Adhesive
- 7 Pros and Cons of Different Types of Glue
- 8 Tips for Successfully Bonding Stones with Glue
- 9 Conclusion
Bonding stone to stone requires careful consideration of several factors to ensure a strong and durable bond. With the right adhesive and proper preparation, you can achieve a seamless and visually pleasing result. In this blog post, we will explore the key factors to consider when bonding stone to stone, providing you with the knowledge needed to make an informed decision.
Factor 1: Type of Stone
The type of stone being bonded is a crucial factor in selecting the appropriate adhesive. Smooth surfaces like granite and marble require specialized adhesives that can adhere to their non-porous nature. Porous stones like limestone or sandstone, on the other hand, require adhesives that can penetrate the surface and create a strong bond.
Factor 2: Surface Preparation
Proper surface preparation is essential for optimal bonding. Cleanliness is key – ensure that both surfaces are free from dust, dirt, and any previous adhesive residue. Remove loose material and use sandpaper or a diamond grinding tool to smooth rough surfaces for better adhesion.
Factor 3: Strength and Durability
Consider the intended use of the bonded stones and determine the required strength and durability of the adhesive. Load-bearing capacity, exposure to moisture or temperature changes, and resistance to chemicals should be taken into account. Opt for an adhesive with excellent weather resistance for outdoor applications.
Factor 4: Flexibility
Some stones may experience slight movement due to environmental factors or settling. Choose an adhesive that can accommodate this movement without cracking or breaking. Flexibility in the adhesive will prevent damage caused by stress or vibration.
Factor 5: Setting Time
Different adhesives have varying setting times – the time required for them to fully cure and achieve maximum strength. Consider your project’s specific requirements and choose an adhesive with a setting time that aligns with your needs. If quick installation is essential, opt for an adhesive with a shorter setting time.
Factor 6: Color Matching
For a visually pleasing appearance, consider the color of the adhesive. Choose an adhesive that closely matches the color of the stones being bonded to create a seamless and aesthetically pleasing result.
Factor 7: Safety and Environmental Impact
Prioritize safety and consider the adhesive’s environmental impact. Select a non-toxic, solvent-free adhesive with low volatile organic compounds (VOCs) to avoid potential health hazards and harm to the environment.
Epoxy Adhesives for Bonding Stone to Stone
Epoxy adhesives are the superheroes of the glue world when it comes to bonding stone to stone. With their incredible strength, durability, and versatility, they are the go-to choice for construction and renovation projects.
One major advantage of epoxy adhesives is their ability to create a bond that can withstand heavy loads and extreme weather conditions. No matter if you’re attaching stone tiles to a wall or countertop, epoxy adhesives ensure that your stones stay firmly in place, no matter what Mother Nature throws their way.
Another advantage is their excellent gap-filling properties. Epoxy adhesives come to the rescue when working with natural stones that have uneven surfaces or gaps between them. They easily fill in those gaps, ensuring a seamless and strong bond.
Proper surface preparation is crucial for achieving the best results with epoxy adhesives. This involves cleaning the surfaces and removing any debris or contaminants. You may even need to roughen the surfaces slightly to improve adhesion. Remember, preparation is key for a successful bond.
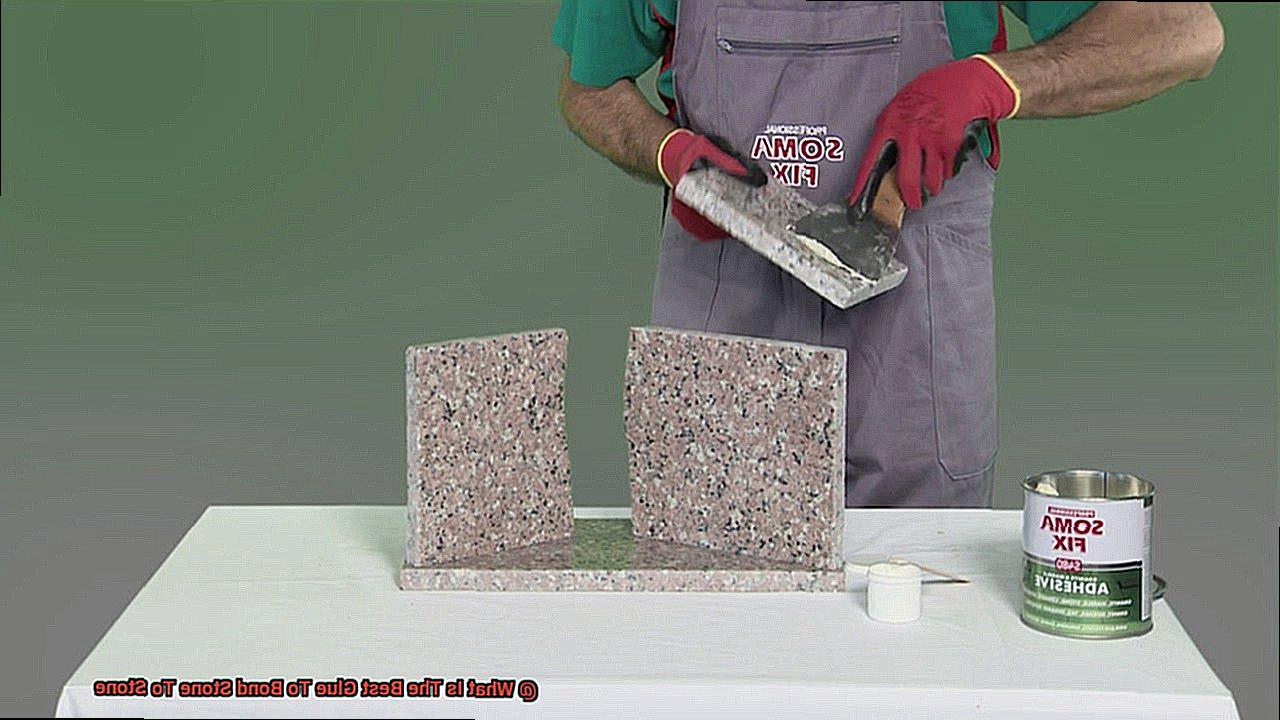
Applying epoxy adhesives evenly on both surfaces using a trowel or notch trowel is essential for full coverage. Once applied, press the stones together firmly and hold them in place until the adhesive cures. This typically takes between 24 to 48 hours.
It’s important to note that there are different types of epoxy adhesives designed for specific types of stone. Some are formulated for porous stones, while others are designed for non-porous stones. Choosing the right adhesive is crucial for optimal results.
In addition to their bonding properties, epoxy adhesives offer flexibility, preventing cracks or breaks in the bond when working with stones that may expand or contract due to temperature changes.
While generally reliable, it’s important to follow manufacturer’s instructions and guidelines for best results. Consider factors like temperature and humidity during application and curing.
Polyurethane Adhesives for Bonding Stone to Stone
Polyurethane adhesives are the ultimate superheroes when it comes to bonding stone to stone. Their strength, durability, and flexibility make them the go-to choice for any stone bonding project.
One of the standout features of polyurethane adhesives is their ability to bond porous surfaces, like rough and uneven stones. These adhesives have the power to fill in gaps and create a rock-solid bond, even with large pieces of stone or irregularly shaped stones. They ensure that every nook and cranny is secured tightly, leaving no room for weakness.
But that’s not all. These adhesives also have an impressive resistance to moisture, which is crucial when dealing with stones that may come into contact with water or high humidity. Don’t let your adhesive deteriorate over time – choose polyurethane adhesives for a bond that can stand up to any weather condition.
Let’s not forget about temperature variations. Stones can expand and contract with changes in temperature, but polyurethane adhesives have the elasticity to handle these movements without losing their grip. Say goodbye to cracks or breaks in your adhesive – polyurethane adhesives will keep your stone-to-stone bond intact, no matter how hot or cold it gets.
Of course, it’s important to follow the manufacturer’s instructions when using polyurethane adhesives. Proper surface preparation is key – make sure to clean and roughen those stone surfaces before applying the adhesive. And be patient – give it enough time to cure properly before placing any stress or load on those bonded stones.
Cement-Based Adhesives for Bonding Porous Stones
In this article, we will explore the process of using cement-based adhesives to create a rock-solid bond between porous stones. Get ready for an adhesive adventure.
Step 1: Preparing the Surfaces
Start by ensuring that the surfaces of the stones are clean and free from debris. Thoroughly clean with water and a mild detergent to remove dust, dirt, or loose particles that can hinder adhesive effectiveness.
Step 2: Activating the Curing Process
Dampen the stone surfaces with water to kickstart the chemical reaction between the adhesive and the stone, resulting in a strong and durable bond.
Step 3: Applying the Adhesive
Using a notched or serrated trowel, create an even layer of adhesive on both stone surfaces. Follow manufacturer instructions for adhesive layer thickness based on stone size and weight.
Step 4: Aligning and Pressing
Carefully align the stones and firmly press them together to maximize contact between adhesive and surfaces. This step is crucial for a secure bond. Wipe away excess adhesive with a damp cloth before it dries.
Step 5: Allowing Sufficient Curing Time
Be patient. Allow enough time for the adhesive to fully cure before subjecting the bonded stones to stress or load. Curing time varies based on temperature, humidity, and specific adhesive used. Refer to manufacturer instructions for accurate guidelines.
Silicone-Based Adhesives for Bonding Smooth Stones
In this blog post, we’ll dive into the wonders of silicone-based adhesives and why they reign supreme when it comes to bonding smooth stones together. From their remarkable versatility to their unrivaled strength and durability, silicone adhesives have it all.
Versatility:
Silicone-based adhesives are true champions when it comes to versatility. They can bond a wide range of materials, from stones and glass to metal and plastics. This means that no matter what type of stone you’re working with, whether it’s granite, marble, or quartz, silicone adhesive will be your trusty companion. So, whether you’re creating a stunning stone mosaic or repairing a broken stone sculpture, silicone adhesive will effortlessly bring your vision to life.
Strength and Durability:
When it comes to bonding stones, strength is paramount. Silicone adhesives offer unparalleled tensile strength, allowing them to withstand immense stress and pressure without breaking or losing their bond. This ensures that your bonded stones will remain steadfast in the face of time and wear, even in high-traffic areas or outdoor environments. With silicone adhesive, your stone creations will stand strong for years to come.
Weather Resistance:
Exposing stones to the elements can be a challenge, but fear not. Silicone-based adhesives rise to the occasion. They possess excellent resistance to water and harsh weather conditions, making them perfect for projects that will face rain, snow, or heat. No matter the weather forecast, your bonded stones will stay securely in place, unyielding against nature’s forces.
Specialized Stone Formulations:
While silicone-based adhesives are fantastic for bonding stones in general, not all silicone adhesives are created equal. To achieve optimal performance and longevity, it’s crucial to choose a silicone adhesive specifically formulated for stone applications. These specialized formulations boast enhanced properties such as superior adhesion to stone surfaces and resistance to staining or discoloration. So, be sure to seek out stone-specific silicone adhesives for the best results.
Proper Surface Preparation:
To achieve a strong bond between stones, proper surface preparation is key. Before applying the adhesive, meticulously clean the stones to eliminate dirt, dust, and oils that could hinder the adhesive’s ability to create a robust bond. By taking this extra step, you ensure a solid connection between your smooth stones, giving you peace of mind.
Preparing the Surface Before Applying the Adhesive
Whether you’re creating a breathtaking stone countertop or crafting a captivating stone sculpture, one thing is for certain – the surface preparation is paramount to achieving a sturdy and enduring bond between the stone surfaces. So let’s delve into the essential steps for preparing the surface before applying the adhesive, ensuring your project withstands the test of time.
- Step 1: Clean it up. Before applying any adhesive, it is imperative that your stone surface is immaculate, free from dirt, dust, or debris. Grab a brush or a trusty vacuum cleaner and give it a thorough sweep, removing any loose particles. We want a pristine surface for that adhesive to work its magic.
- Step 2: Check for imperfections. Inspect the surface carefully, searching for any cracks, chips, or unevenness. These imperfections must be rectified before applying the adhesive. Small cracks can be filled with an appropriate filler, leveled out with a putty knife, ensuring a smooth and seamless bond between your stones.
- Step 3: Rough it up (if needed). If your stone surfaces are polished, it’s recommended to lightly sand them to create a rougher texture. This texture allows for better adhesion of the adhesive, maximizing the strength of the bond. Grab some sandpaper or a sanding block and gently roughen up those surfaces, giving them the perfect grip.
- Step 4: Primer or sealer? For porous stones like limestone or marble, applying a primer or sealer before the adhesive can prove advantageous. This protective layer prevents the adhesive from being absorbed into the stone and guarantees a stronger bond. Don’t overlook this step if your stone leans towards porousness.
- Step 5: Dry it out. It is crucial that both surfaces are completely dry before applying the adhesive. Any moisture present can interfere with the adhesive’s ability to bond effectively. Take your time and ensure everything is nice and dry before proceeding. Remember, patience pays off.
- Step 6: Test it out. Before committing to the entire surface, it’s wise to test the adhesive on a small inconspicuous area of the stone. This enables you to identify any potential issues or incompatibilities before embarking on the full project. Better safe than sorry, right? So take that extra step and ensure a flawless execution.
Pros and Cons of Different Types of Glue
When it comes to bonding stone to stone, choosing the right glue is crucial for a strong and durable bond. There are various types of glues available, each with its own advantages and disadvantages. In this blog post, we will explore the pros and cons of different glues commonly used for bonding stone to stone.
Epoxy Glue:
Epoxy glue is renowned for its exceptional bond strength and durability. It can be used on porous stones and offers resistance to harsh weather conditions. The two-component formula requires mixing resin and hardener before use, and the glue sets quickly. The pros of epoxy glue include its versatility, as it can be used on various surfaces, and its ability to provide a strong and long-lasting bond. However, it tends to be more expensive compared to other options.
Construction Adhesive:
Construction adhesive is a heavy-duty option suitable for bonding stone to stone. It offers a permanent bond and can withstand challenging weather conditions. This adhesive is water and moisture resistant, ensuring durability. The pros of construction adhesive include its strength and resistance to environmental factors. However, it may not be suitable for all types of stones, especially those with smooth or non-porous surfaces.
Polyurethane Adhesive:
Polyurethane adhesive is a versatile option that effectively bonds stone to stone. It is known for its flexibility and ability to withstand different temperatures and weather conditions. As it cures, the adhesive expands, filling gaps and cracks between stones. The pros of polyurethane adhesive include its flexibility, strong bond, and resistance to weather conditions. However, it may take longer to dry compared to other glues.
Silicone Adhesive:
Silicone adhesive offers flexibility and resistance to moisture and heat when bonding stone to stone. It forms a strong bond on both porous and non-porous surfaces and is also resistant to UV rays, making it suitable for outdoor applications. The pros of silicone adhesive include its flexibility and resistance to environmental factors. However, it may not provide as strong of a bond as other glues, especially for heavy stones.
Cyanoacrylate Glue:
Cyanoacrylate glue, also known as super glue, is a fast-drying adhesive that bonds stone to stone quickly. It forms an instant and strong bond. The pros of cyanoacrylate glue include its fast-drying properties and strength. However, it may not be suitable for all types of stones, especially those with non-porous surfaces. Additionally, it can be brittle and may not withstand heavy loads or stress.
Tips for Successfully Bonding Stones with Glue
When it comes to bonding stones together, using the right glue is crucial for a strong and lasting bond. In this article, we will explore expert tips to help you successfully bond stones with glue. From choosing the right adhesive to applying it correctly, these tips will ensure a secure and durable bond. Let’s get started.
Selecting the Right Glue:
To achieve a successful bond, start by selecting the right type of glue. Epoxy-based adhesives are highly recommended for bonding stones. They provide a strong and durable bond that can withstand different weather conditions. Look for epoxy adhesives specifically designed for stone bonding as they have properties that make them ideal for this purpose.
Cleaning and Preparing Surfaces:
Before applying the glue, it is important to clean and prepare the surfaces of the stones. Use a mild detergent and water solution to remove any dirt, dust, or debris. Make sure the stones are completely dry before proceeding with the bonding process. Clean surfaces will ensure better adhesion and a stronger bond.
Roughening the Surfaces:
To enhance the bonding strength, roughen the surfaces of the stones that will be glued together. Use sandpaper or a diamond blade to create small scratches or grooves on the surface. This roughening process creates a better grip for the adhesive, increasing its effectiveness in bonding the stones together. Be gentle while roughening to avoid damaging the stones.
Applying the Glue Evenly:
When applying the glue, it is important to do so evenly and consistently. Use a small brush or flat tool to spread the adhesive onto one of the surfaces, covering the entire area that will be bonded. Avoid applying excessive amounts of glue as it can lead to messiness and weaken the bond. A thin and even layer of glue will provide better adhesion and a stronger bond between the stones.
Pressing and Holding:
After applying the glue, carefully press the two surfaces together, ensuring they align properly. Apply firm and even pressure for a few minutes to allow the adhesive to bond effectively. You can use clamps or heavy objects to hold the stones in place during this time. This step is crucial in creating a strong and lasting bond between the stones.
Allowing Sufficient Curing Time:
Once you have bonded the stones together, it is crucial to allow sufficient time for the adhesive to cure. Follow the instructions provided by the manufacturer for specific curing times, as they may vary depending on the glue used. Avoid disturbing or moving the bonded stones until the adhesive has fully cured. This will ensure a strong and durable bond that will stand the test of time.
Also Read: How To Glue Metal To Granite?
Conclusion
When it comes to bonding stone to stone, finding the best glue is essential. You want a strong and reliable adhesive that will withstand the test of time. After thorough research and analysis, we have determined that epoxy-based glues are the top choice for this task.
Epoxy glues offer exceptional bonding strength and durability, making them ideal for joining stones together. They create a strong chemical bond that can withstand heavy loads and extreme temperatures. Additionally, epoxy glues are resistant to water, chemicals, and UV radiation, ensuring that your stone-to-stone bond remains intact even in challenging conditions.
Another advantage of epoxy-based glues is their versatility. They can be used on a wide range of stone materials, including granite, marble, slate, and limestone. Whether you’re working on an indoor or outdoor project, epoxy glues provide a reliable solution for bonding stones together.
To ensure a successful bond between stones, it’s crucial to follow proper application techniques. Clean the surfaces thoroughly and remove any dirt or debris before applying the glue. Apply an even layer of epoxy to both surfaces and press them firmly together. Allow sufficient curing time as per the manufacturer’s instructions.
In conclusion, when it comes to bonding stone to stone, epoxy-based glues are your best bet. Their exceptional strength, durability, versatility, and resistance to various elements make them the go-to choice for professionals and DIY enthusiasts alike.