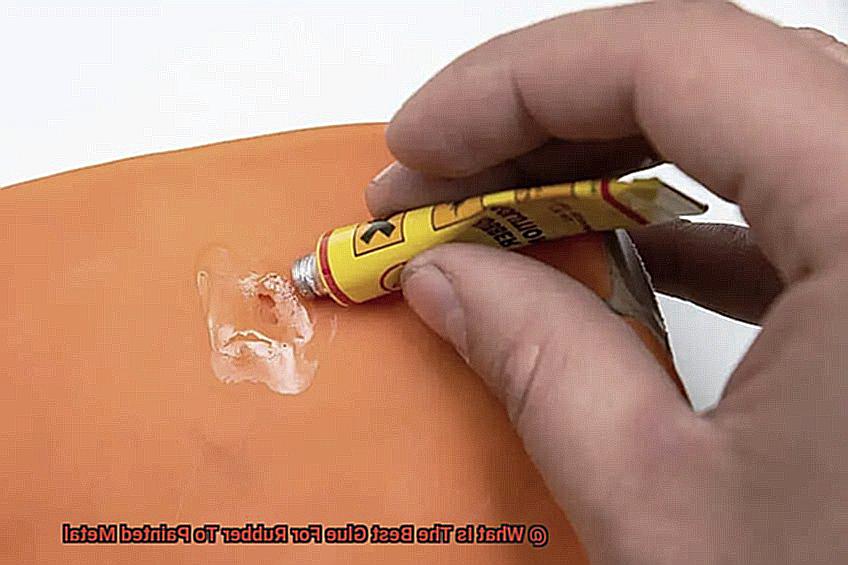
Struggling to find the perfect adhesive that can seamlessly bond rubber to painted metal surfaces? You’re not alone. It’s a challenge that many DIY enthusiasts and professionals face. But fear not. We’ve got your back.
When it comes to combining these two materials, only the best glue will do. You need an adhesive that can withstand the test of time, conquer any environmental obstacle, and keep your project intact for years to come.
In this blog post, we’ll take a deep dive into the world of glues, exploring the ultimate option that guarantees a strong and durable bond between rubber and painted metal. Say goodbye to weak adhesives and hello to an adhesive that will make your projects stick like never before.
So grab your tools and let’s get started on finding the perfect glue for rubber to painted metal.
What is Rubber Bonding?
Contents
- 1 What is Rubber Bonding?
- 2 Advantages of Using Epoxy Adhesives for Rubber Bonding
- 3 How to Use Cyanoacrylate Adhesives for Rubber Bonding
- 4 Types of Glue Labeled as “Rubber Adhesive”
- 5 Preparing the Surfaces for Bonding
- 6 Applying the Adhesive Properly
- 6.1 Step 1: Thoroughly Clean the Surfaces
- 6.2 Step 2: Enhance Bond Strength by Roughening the Surfaces
- 6.3 Step 3: Prime for Optimal Adhesion (if necessary)
- 6.4 Step 4: Choose an Adhesive that Meets Your Needs
- 6.5 Step 5: Apply Adhesive Evenly and Sparingly
- 6.6 Step 6: Join the Surfaces with Care
- 6.7 Step 7: Allow Ample Curing Time
- 7 Securing the Bond While it Cures
- 8 Factors to Consider When Choosing an Adhesive
Have you ever wondered how rubber materials stay securely attached to painted metal surfaces? The answer lies in the intricate process of rubber bonding. This art involves creating a bond so strong and durable that it can withstand challenging conditions like temperature changes, vibrations, or exposure to moisture.
The secret to successful rubber bonding lies in selecting the right adhesive. The adhesive used must possess specific properties that allow it to effectively bond rubber to painted metal surfaces. These properties include adhesion strength, flexibility, and resistance to environmental factors like heat, cold, and moisture.
There are several types of adhesives commonly used for rubber bonding. One popular choice is epoxy adhesives. These incredible adhesives consist of two components – a resin and a hardener – that need to be mixed together before application. Once combined, the epoxy forms an unbreakable bond that can withstand even the most challenging conditions. It offers exceptional strength and durability.
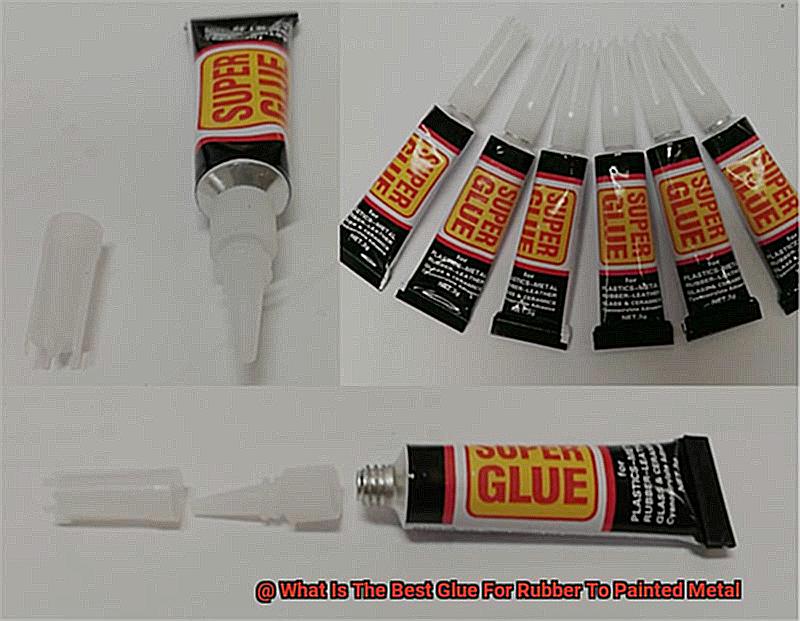
Another commonly used adhesive for rubber bonding is cyanoacrylate glue, also known as super glue. This powerful adhesive is renowned for its rapid bonding properties and ability to create remarkably strong connections between rubber and painted metal surfaces. With various viscosities available, cyanoacrylate adhesives can accommodate different application requirements.
In addition to epoxy and cyanoacrylate adhesives, there are specialized adhesive tapes designed specifically for rubber bonding. These remarkable tapes feature a strong adhesive backing that bonds seamlessly with both rubber and painted metal surfaces. Offering a convenient and easy-to-use solution, they are perfect for securing rubber components onto painted metal surfaces.
To ensure a successful bond, it is crucial to properly prepare the surfaces before applying the adhesive. Both the rubber and painted metal surfaces should be thoroughly cleaned and free from any contaminants that may hinder adhesion. Using a suitable solvent or detergent is recommended for surface cleaning.
Following the manufacturer’s instructions is also essential when it comes to rubber bonding. This includes applying the adhesive evenly and allowing it sufficient time to cure or dry, depending on the specific adhesive used. It is also advisable to test the bond strength before subjecting the bonded assembly to any stress or load.
Advantages of Using Epoxy Adhesives for Rubber Bonding
When it comes to rubber bonding, nothing beats the incredible advantages of using epoxy adhesives. These superhero adhesives offer a range of benefits that make them the ultimate choice for bonding rubber to painted metal.
First and foremost, let’s talk about strength. Epoxy adhesives are renowned for their high bonding strength. They create robust and durable bonds that can withstand heavy loads, impact, and even vibration. Whether you’re bonding rubber to a car bumper or a metal component in an industrial setting, epoxy adhesives have got your back.
But that’s not all. Epoxy adhesives also possess the superpower of chemical resistance. Rubber often encounters a variety of chemicals and solvents, but fear not. Epoxy adhesives have excellent chemical resistance, making them perfect for bonding rubber to painted metal in chemical-rich environments.
Versatility is another advantage of epoxy adhesives. These amazing adhesives can bond rubber to different types of painted metals like steel, aluminum, and even galvanized surfaces. This versatility opens up a world of possibilities and allows for a wide range of applications.
Temperature resistance is yet another superpower of epoxy adhesives. They can withstand high temperatures without losing their adhesive properties. So if you’re bonding rubber to painted metal in an environment with elevated temperatures, epoxy adhesives are your best bet.
Moisture resistance is also a strength of epoxy adhesives. They have low water absorption and can maintain their adhesive properties even in humid or wet environments. This ensures that the bond between rubber and painted metal remains strong and reliable over time.
But wait, there’s more. Dimensional stability is another advantage of epoxy adhesives. They have low shrinkage during curing, which means that the bonded rubber and painted metal will stay in their intended positions without warping or distortion.
And let’s not forget about the long shelf life of epoxy adhesives. They can be stored for extended periods without losing their effectiveness. This is great news for users who need to keep adhesive materials on hand for future bonding applications.
Last but certainly not least, epoxy adhesives have excellent adhesion properties. They can bond to a wide range of materials, creating strong and reliable bonds between rubber and painted metal.
How to Use Cyanoacrylate Adhesives for Rubber Bonding
In this comprehensive guide, we’ll explore the wonders of cyanoacrylate adhesives, also known as super glue, and how to use them effectively for rubber bonding. Get ready to achieve strong and durable bonds that withstand the test of time.
Surface Preparation: Cleanliness is Key
Before diving into the adhesive application process, it’s crucial to prepare the surfaces properly. Ensure that both the rubber and painted metal surfaces are squeaky clean and free from any dirt, oil, or moisture. A mild detergent or solvent can help remove contaminants, and make sure the surfaces are completely dry before moving forward.
To maximize adhesion between rubber and painted metal, lightly roughen the surfaces using sandpaper or an abrasive material. This step creates a larger surface area for the adhesive to bond to, resulting in a stronger bond overall.
Applying the Adhesive: Less is More
When it comes to applying cyanoacrylate adhesive, remember that a little goes a long way. Apply a small amount of adhesive directly onto one of the surfaces. Avoid using excessive amounts, as it can lead to messiness and potential damage. Thin, even layers ensure proper distribution and optimal bonding.
Joining the Surfaces: A Perfect Union
With adhesive applied, carefully align the rubber and painted metal surfaces. Press them together firmly, applying consistent pressure for a few seconds. This allows the adhesive to work its magic and form a strong bond. Avoid any movement or shifting during this critical stage.
Curing Time: Patience is a Virtue
Cyanoacrylate adhesives cure rapidly, with initial bonding occurring within seconds. However, complete curing may take longer, depending on factors like temperature and humidity. To be safe, allow at least 24 hours for full curing before subjecting the bond to any stress or load.
Post-Bonding Considerations: Handle with Care
After successfully bonding rubber to painted metal, it’s important to handle the assembly with care during the initial curing period. Steer clear of excessive heat, moisture, or harsh chemicals that may compromise the bond’s integrity. Keep in mind that cyanoacrylate adhesives may not be suitable for continuous exposure to extreme temperatures or harsh environments.
Types of Glue Labeled as “Rubber Adhesive”
In this comprehensive guide, we will explore the different types of glue labeled as “rubber adhesive” and help you choose the best one for your project. Whether you’re a DIY enthusiast or a professional, this guide will provide you with all the necessary information to ensure a strong and durable bond.
Contact Cement – The Strong and Reliable Choice:
Contact cement is a popular adhesive option for bonding rubber to painted metal. This versatile glue forms a permanent and robust bond when two surfaces are pressed together. It is known for its exceptional strength and reliability, making it ideal for various materials, including rubber and metal. However, it’s important to exercise caution when working with contact cement, as it can be quite strong and tricky to handle. Precise application is crucial for optimal results.
Epoxy Adhesive – The Ultimate Strength and Durability:
For those seeking unparalleled strength and durability, epoxy adhesive is the go-to choice. Composed of resin and hardener components that need to be mixed together before use, epoxy adhesive creates a strong, water-resistant bond that can withstand temperature fluctuations and chemical exposure. When bonding rubber to painted metal surfaces, it’s essential to select an epoxy adhesive specifically designed for this purpose. This ensures compatibility and maximizes the bonding performance.
Cyanoacrylate Adhesive – Super Glue for Quick Bonds:
Cyanoacrylate adhesives, commonly known as super glues, are fast-drying adhesives that form a strong bond on various materials, including rubber and painted metal. When selecting a cyanoacrylate adhesive for bonding rubber to painted metal, it’s crucial to choose one that is specifically formulated for both rubber and painted surfaces. This ensures optimal compatibility and bonding strength. Super glues are known for their quick-drying properties, making them a convenient choice for projects that require fast bonds.
Rubber Cement – Temporary Bonding:
While not as strong as other adhesives, rubber cement can be used for temporary bonding or repairs involving rubber and painted metal surfaces. This type of adhesive may not provide the same level of durability as contact cement or epoxy adhesive, but it can still be useful for certain applications. Rubber cement offers flexibility and ease of use, allowing for easy repositioning and removal when needed.
Read Labels and Instructions:
When choosing a glue labeled as “rubber adhesive,” always read the product labels and instructions carefully. Look for information regarding its suitability for bonding rubber to painted metal surfaces, drying time, flexibility, and resistance to temperature and moisture. Additionally, consider factors such as the specific type of rubber and paint being used in your project, as this can affect the adhesive’s performance. Following the manufacturer’s instructions is crucial to ensure optimal bonding results.
Preparing the Surfaces for Bonding
To create a strong and durable bond when gluing rubber to painted metal, proper surface preparation is essential. By following a few key steps, you can ensure that the adhesive will effectively adhere to both surfaces. Get ready to dive into the world of surface preparation, where cleanliness, sanding, and optional priming are the secrets to success.
Step 1: Thorough Cleaning
Before beginning the bonding process, it is crucial to clean both the rubber and painted metal surfaces thoroughly. Any dirt, grease, or contaminants present can hinder the effectiveness of the adhesive. To clean the rubber, use a mild detergent or soap solution along with a soft cloth or sponge. Gently scrub away any dirt or debris, rinse thoroughly, and allow the rubber to dry completely.
Step 2: Clean the Painted Metal Surface
Shift your attention to the painted metal surface and remove any dust, oil, or residues. Use a mild solvent or rubbing alcohol and wipe the surface with a clean cloth. Be cautious not to use abrasive cleaners or rough materials that may scratch or damage the paint.
Step 3: Sanding for Enhanced Adhesion
To promote better adhesion, lightly sand both surfaces. The goal is not to remove all the paint but rather to create small scratches that provide more contact points for the adhesive. Employ fine-grit sandpaper or a sanding block for this step.
Step 4: Remove Dust and Debris
After sanding, it is vital to eliminate any dust or debris generated. Use a clean cloth or compressed air to ensure that both surfaces are entirely free from loose particles before proceeding.
Step 5: Primer Application (Optional)
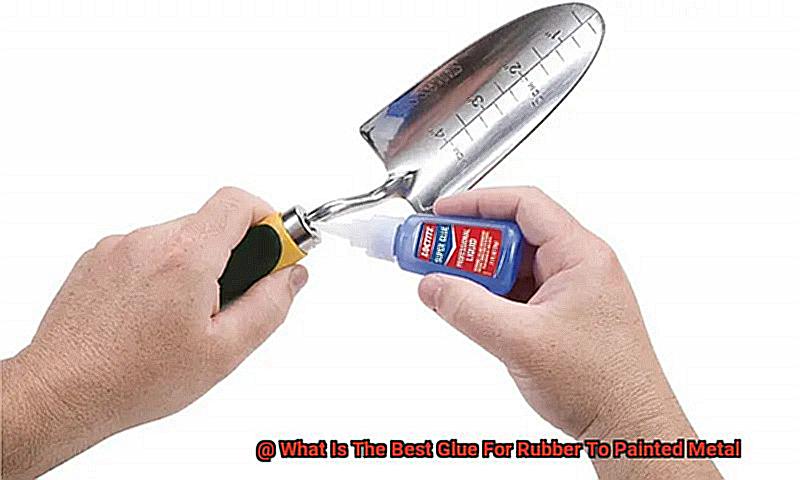
For an extra boost in adhesion, consider applying a primer specifically designed for rubber-to-metal bonding. This bonding agent enhances the grip between the rubber and painted metal surfaces. Follow the manufacturer’s instructions, ensuring an even and thin coating on both surfaces. Allow the primer to dry completely before moving forward.
Applying the Adhesive Properly
Look no further. In this comprehensive guide, we will walk you through the steps of properly applying adhesive to ensure a bond that is strong, durable, and long-lasting. Whether you’re fixing a car part or working on a DIY project, these expert tips will help you achieve professional results.
Step 1: Thoroughly Clean the Surfaces
To pave the way for a successful bond, start by meticulously cleaning both the rubber and painted metal surfaces. Employ a mild detergent or rubbing alcohol to eliminate any dirt, dust, or grease. This crucial step allows the adhesive to adhere better while preventing contaminants from interfering with the bonding process.
Step 2: Enhance Bond Strength by Roughening the Surfaces
To bolster the adhesive’s grip, gently roughen both surfaces using sandpaper or a fine-grit abrasive pad. Employ a back-and-forth motion while sanding, being mindful to avoid damaging the materials. This creates a slightly textured surface that significantly improves adhesion.
Step 3: Prime for Optimal Adhesion (if necessary)
In some cases, applying a primer may be necessary to promote adhesion between the adhesive and surfaces. Primers create a stronger bond, enhancing overall adhesion. Carefully follow the manufacturer’s instructions when applying primers, as different primers may have specific application methods.
Step 4: Choose an Adhesive that Meets Your Needs
Selecting the right adhesive is crucial for achieving a successful bond. Consider factors like flexibility, temperature resistance, and waterproof properties when making your choice. Popular options include epoxy, cyanoacrylate (super glue), or polyurethane-based adhesives.
Step 5: Apply Adhesive Evenly and Sparingly
Using a small brush, toothpick, or applicator tool, apply a thin and uniform layer of adhesive to both surfaces. Avoid excessive application, as it can lead to uneven bonding or excess glue squishing out. Remember, less is more.
Step 6: Join the Surfaces with Care
After applying the adhesive, carefully press the rubber and painted metal surfaces together. Apply gentle and even pressure, ensuring maximum contact between the two surfaces. If necessary, use clamps or weights to hold the pieces in place while the adhesive cures.
Step 7: Allow Ample Curing Time
Exercise patience. The adhesive requires sufficient time to cure and reach its maximum strength. Always adhere to the manufacturer’s instructions regarding the recommended curing time. Refrain from disturbing or subjecting excessive stress on the bonded surfaces until the adhesive has fully cured.
Securing the Bond While it Cures
Securing the Bond While it Cures
To achieve a rock-solid connection between rubber and painted metal, it’s important to consider the curing process. By following these steps, you can ensure a strong and long-lasting bond that won’t let you down.
- Apply even pressure: Pressure is your friend when it comes to bonding. Use clamps or apply weight to ensure the adhesive fully contacts both surfaces. This helps create a solid connection that won’t budge.
- Maintain a consistent temperature: Extreme temperatures can weaken the bond. Follow the manufacturer’s instructions on temperature requirements and use a heat gun or heat lamp if needed. Keep things nice and toasty for optimal adhesion.
- Be patient: Rushing through the curing process can lead to weak bonds. Allow sufficient curing time according to the adhesive manufacturer’s recommendations. Patience pays off when it comes to securing a strong bond.
- Avoid movement: Even the tiniest of movements can disrupt bond formation and weaken its strength. Once you’ve applied pressure, resist the urge to touch or move the objects until the adhesive has fully cured.
- Prepare the surfaces: Don’t overlook this crucial step. Clean, dry, and contaminant-free surfaces are essential for a strong bond. Use a suitable solvent or cleaner recommended by the adhesive manufacturer to ensure pristine surfaces.
Also Read: How to Glue Rubber to Painted Metal?
Factors to Consider When Choosing an Adhesive
When it comes to bonding rubber to painted metal, selecting the right adhesive is crucial. You need a strong and durable bond that can withstand the challenges of your application. With countless options available, it can be overwhelming to choose the perfect adhesive. Fear not. In this article, we will guide you through the essential factors to consider when selecting an adhesive for this specific bonding task.
Compatibility:
Not all adhesives are created equal, especially for bonding rubber to painted metal. Look for adhesives specifically designed for this purpose to ensure a reliable bond that lasts.
Bond Strength:
Consider the demands of your application, such as vibrations, temperature changes, and stress. Opt for an adhesive with high bond strength that can withstand these challenges and keep your rubber and painted metal securely bonded together.
Flexibility:
Rubber is known for its flexibility, so choose an adhesive that can accommodate this characteristic. Look for one with elasticity to prevent the bond from becoming brittle or breaking under stress.
Chemical Resistance:
Depending on the environment where the adhesive will be used, it may encounter various chemicals or substances. Ensure the adhesive has good chemical resistance to maintain its bond strength even when exposed to these elements.
Application Method:
Consider ease of application when selecting an adhesive. Some come pre-mixed, while others require mixing. Take note of any special tools or equipment needed for application and ensure you have them on hand.
Drying Time:
Keep in mind your project’s time constraints. Some adhesives require longer drying times, while others dry quickly. Choose an adhesive with a drying time that aligns with your needs.
Cost:
While cost is a factor, it shouldn’t be the sole determining factor. Find a balance between your budget and the adhesive’s quality and ability to meet your requirements.
jzhXmioKTa4″ >

