Got a photo tucked away in your attic that deserves to be showcased? Or maybe you’ve captured a special moment that deserves more than just a digital existence. When it comes to preserving memories, combining wood and photographs creates a timeless and captivating display. But before you embark on this creative journey, let’s make sure you have the best glue for photos on wood.
Imagine your favorite family portrait fading away or peeling off due to a poor adhesive choice. Don’t fret. We’re here to ensure that never happens. This comprehensive guide will walk you through the highs and lows of adhesive options, revealing the secrets to flawlessly attaching photos to wood for lasting beauty.
Hook:
“Every picture tells a story; every photograph deserves a home,” said someone wise. But what’s the point of preserving cherished memories if they crumble away? Whether you’re an artistic pro or a DIY enthusiast, this informative piece dives into the world of adhesives, uncovering the best glue for photos on wood and guiding you towards preserving your moments with care and precision.
Main points:
- Choose wisely: Discover why selecting the right adhesive is crucial when it comes to preserving your precious photos on wood.
- Factors to consider: Explore different aspects like archival quality, longevity, and compatibility with various types of wood surfaces when choosing the perfect glue.
- Top recommendations: Dive into our curated list of the market’s finest adhesives based on performance, ease of use, and ability to create seamless bonds.
- Expert tips for success: Uncover useful tricks that guarantee flawless and long-lasting attachment of your cherished photos onto wooden surfaces.
Your photographs hold stories, frozen memories, and dear moments that deserve admiration for generations. By choosing the best glue for photos on wood, you safeguard these precious memories and transform them into stunning artistic displays. With our guidance, preserving your cherished moments will be a breeze, allowing you to create captivating keepsakes that will be treasured for years to come. Stay tuned for an in-depth exploration of the finest adhesives guaranteed to make your photos and wood bond for eternity.
Types of Glues: An Overview
Contents
- 1 Types of Glues: An Overview
- 2 E6000 Adhesive: A Versatile Option for Photos on Wood
- 3 Mod Podge: A Water-Based Sealer, Glue, and Finish
- 4 Acid-Free Archival Glue: The Professional Choice
- 5 Applying the Glue Correctly to Ensure a Secure Bond
- 6 Preparing the Surfaces Before Gluing Photos onto Wood
- 7 Using a Brayer or Roller to Create a Smooth Attachment
- 8 Allowing the Glue to Dry Completely Before Handling
- 9 Conclusion
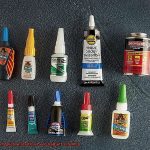
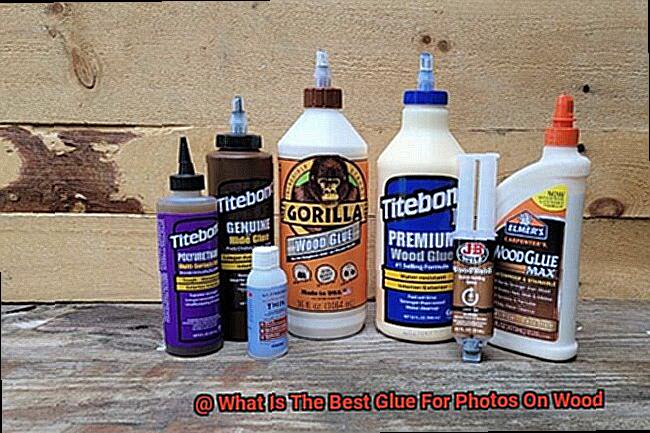
Embarking on a journey to showcase your cherished memories on wood requires selecting the ideal glue for a secure and enduring bond. In this comprehensive exploration, we will delve into the diverse array of glues available for attaching photos to wood, unveiling their unique advantages and considerations.
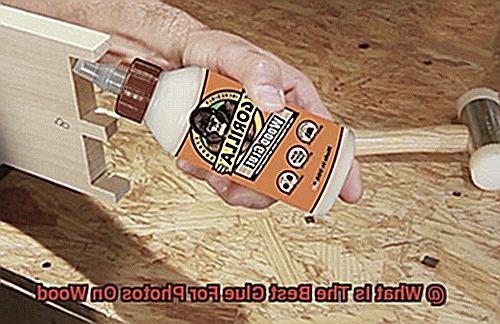
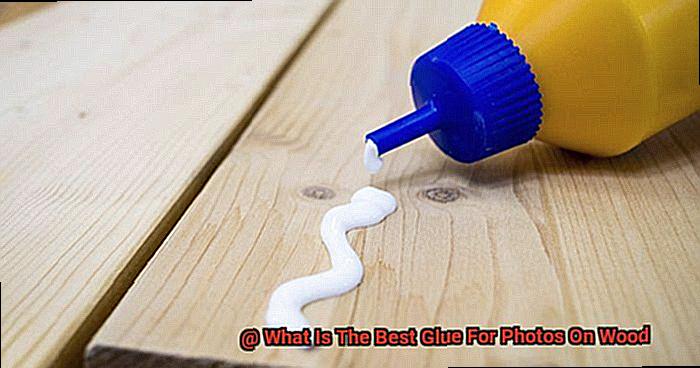
PVA Glue:
Unquestionably one of the most favored choices, PVA glue stands tall as a reliable adhesive for attaching photos to wood. Its water-based composition ensures a clear and flexible finish, enabling effortless repositioning of the photo if needed. Moreover, PVA glue establishes a robust connection with wood, ensuring your photo remains steadfastly in place. With its easy application and effortless cleanup using water, PVA glue promises a hassle-free experience.
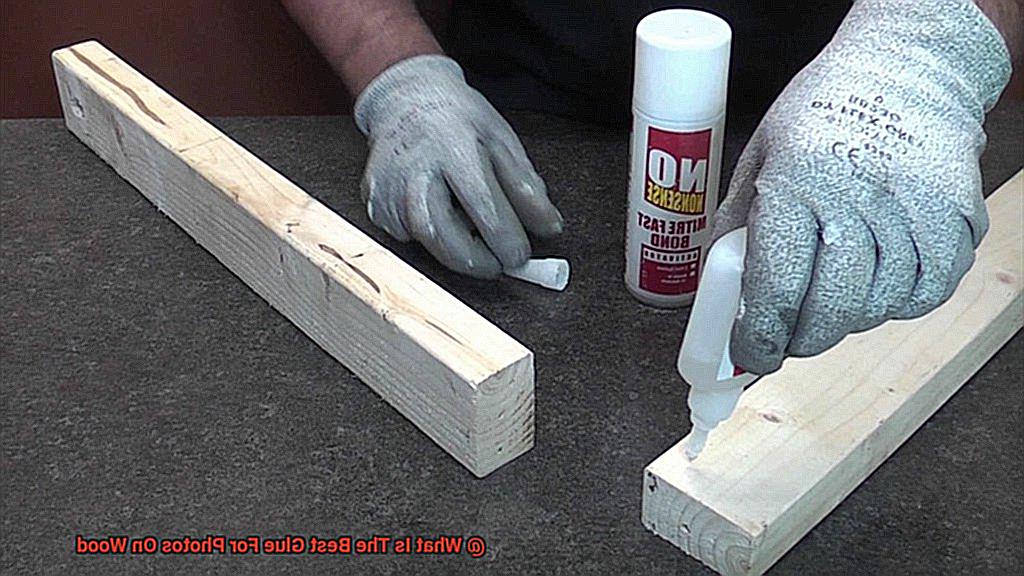
Spray Adhesive:
Offering unparalleled convenience, spray adhesives emerge as an enticing option for affixing photos to wood surfaces. With their aerosol cans, these adhesives provide an impeccably even coat, guaranteeing a strong and unyielding bond between the photo and the wood surface. However, exercise caution by opting for spray adhesives specifically designed for photos to safeguard against long-term damage. Additionally, it is crucial to work in well-ventilated areas and meticulously adhere to the instructions.
Epoxy Resin:
For those yearning for permanence and durability, epoxy resin emerges as an exceptional choice. Comprising two components – resin and hardener – this adhesive concoction forms an indomitable, crystal-clear bond between the photo and the wood surface. Its remarkable resistance to moisture, temperature fluctuations, and UV radiation renders epoxy resin ideal for creating enduring displays. However, mastering the art of precise mixing and application alongside ensuring sufficient curing time is paramount in achieving optimal results.
Mod Podge:
Celebrated for its versatility in various crafting endeavors, Mod Podge shines as a glue of choice for attaching photos to wood. This multifaceted adhesive serves as a water-based sealer, glue, and finish all rolled into one. As the Mod Podge dries clear, it forms a formidable bond between the photo and the wood surface while providing a protective shield against moisture and UV rays. With different finishes available, such as matte or glossy, you can effortlessly tailor your project to your desired aesthetic.
Double-Sided Tape:
For temporary solutions or lightweight photos, double-sided tape emerges as an uncomplicated and expedient option. Composed of a thin adhesive layer on both sides of a tape strip, this hassle-free adhesive provides swift and effortless application. However, it is crucial to bear in mind that double-sided tape may not yield a permanent bond. Consequently, it is best suited for temporary displays or photos that exert minimal strain on the adhesive.
E6000 Adhesive: A Versatile Option for Photos on Wood
Look no further, because today we’re delving into the incredible world of E6000 adhesive – a versatile and reliable option that will bring your vision to life with precision and strength.
Imagine this: you have a breathtaking wooden surface, begging to be adorned with your most cherished memories captured in photographs. To make this dream a reality, you need an adhesive that can rise to the occasion with unwavering reliability. Enter E6000.
First and foremost, let’s talk about versatility. E6000 is like a chameleon in the adhesive kingdom – it seamlessly adheres to an array of surfaces, including wood, metal, glass, ceramic, fabric, and more. So whether you’re crafting a wooden photo frame or creating a personalized wooden sign, E6000 is the perfect companion for your artistic endeavors.
Flexibility is where E6000 truly shines. Unlike other adhesives that may become brittle over time, E6000 remains pliable even after it cures. This means that your precious photos will remain securely attached, even if there’s some movement or bending involved. Say goodbye to worries about your cherished memories losing their grip on the wooden canvas.
But wait, there’s more. E6000 boasts impressive waterproof properties. Once it cures, this adhesive forms an impenetrable barrier against any moisture or humidity that could potentially harm your beloved photos. Whether you’re displaying your wooden masterpiece in a steamy bathroom or hanging it outside in the elements, rest assured that E6000 has your back – keeping those memories safe and sound.
Now let’s talk about ease of use – a crucial factor when selecting an adhesive for your artistic projects. With E6000, you have ample time to perfect the placement of your photos before it sets completely. No need to rush or fret about making mistakes – just take your time and savor the creative process. Additionally, E6000 dries clear, leaving behind no unsightly residue on the surface. The result? A seamless and professional finish that will leave onlookers in awe.
Mod Podge: A Water-Based Sealer, Glue, and Finish
Looking to add a personal touch to your DIY projects? Discover the magic of Mod Podge, the ultimate water-based sealer, glue, and finish that can transform your crafts into works of art. In this article, we will explore the fascinating world of Mod Podge and specifically delve into how it can be used to effortlessly adhere photos to wood. Get ready to unleash your creativity and bring your cherished memories to life with Mod Podge.
Choose Your Perfect Finish:
Mod Podge offers a range of formulas, each with its own distinctive finish. Whether you prefer a matte, gloss, satin, or even an antique look, Mod Podge has got you covered. For photos on wood, the matte finish is particularly popular as it provides a subtle and natural appearance that allows the photo to shine without distraction.
Prepare Your Canvas:
Before diving into the exciting part, take a moment to prepare your wood surface. Ensure it is clean, dry, and free from any dirt or debris that may interfere with adhesion. For optimal results, consider giving the wood a light sanding to create an ideal bonding surface for Mod Podge.
Apply Mod Podge Artistically:
Grab your brush or foam applicator and begin by gently applying a thin, even layer of Mod Podge onto the wood surface. Take pleasure in covering every inch of the area where your photo will be placed. This initial layer will serve as the foundation for your masterpiece.
Secure Your Memories:
Now comes the moment of truth – carefully place your photo onto the Mod Podge-coated wood surface. With your fingers or a trusty brayer tool, smooth out any pesky air bubbles or wrinkles that may threaten to mar your perfect creation. Pay attention to detail as you strive for a flawless finish.
Shield and Protect:
To safeguard your precious photo from the test of time, it’s crucial to apply another layer of Mod Podge over the top of the image. This protective coat acts as a shield, preventing fading, yellowing, or damage caused by moisture or harmful UV rays. Remember to cover the entire photo evenly, leaving no gaps or streaks behind.
Acid-Free Archival Glue: The Professional Choice
When it comes to adhering photos on wood, using the right glue is essential to ensure the longevity and protection of these precious images. In this article, we will explore why acid-free archival glue is the professional choice for this purpose, diving into its unique properties and benefits.
Preserving the Integrity of Your Photos:
Photos hold our most treasured memories, and preserving their integrity is of utmost importance. Acid-free archival glue is specifically designed to safeguard photographs from fading, yellowing, or deterioration over time. It achieves this by eliminating acidic compounds found in regular glues, replacing them with pH-neutral ingredients that are safe for delicate materials like photographs. This ensures that your photos stay vibrant and flawless for years to come.
Reversibility for Precision and Flexibility:
Creativity often requires precision and flexibility. Acid-free archival glue offers both. Unlike other adhesives, it has a unique reversibility feature that allows you to reposition or remove the photo without causing any damage. This is particularly valuable when working with valuable or irreplaceable photographs or for archival purposes. With acid-free archival glue, you have the freedom to experiment and perfect your artistic vision.
Versatile Application Options:
Every project has its specific requirements, and acid-free archival glue caters to them all. It comes in both liquid and stick forms, offering versatility for different projects and preferences. Whether you’re working on a large surface that demands precise application or a smaller area that calls for controlled use, acid-free archival glue has got you covered. Its range of options ensures that you can achieve professional results regardless of the size or complexity of your project.
Proper Application Techniques:
To make the most out of acid-free archival glue, proper application techniques are crucial. Applying it sparingly and evenly on both the back of the photo and the wood surface is essential. Excess glue can seep through and potentially damage the photo, so it’s crucial to use only as much as necessary for a secure bond. Additionally, allowing sufficient drying time is vital before handling or displaying the photo, following the specific brand and product instructions. By following these steps, you guarantee that your photos are safely and securely adhered.
Applying the Glue Correctly to Ensure a Secure Bond
Preserving our cherished memories on wood has become a popular trend, and rightly so. The unparalleled strength and protection of acid-free archival glue ensures that our precious photos are safeguarded from fading or deterioration. But here’s the catch – applying the glue correctly is crucial to achieve that secure bond we desire. As an expert in this field, I have compiled a comprehensive guide to help you master the art of applying glue correctly. Let’s dive right in.
Choosing the Right Glue:
To begin with, selecting the right type of glue is essential for a strong and secure bond. Epoxy resin glue emerges as the champion, touted for its exceptional bonding capabilities, resistance to moisture, and temperature changes. With epoxy resin glue by your side, your photos will be firmly anchored to the wood, standing the test of time.
Preparing the Surfaces:
Before embarking on your gluing adventure, it’s important to prepare both the wood surface and the back of your photo. The wood should be clean, dry, and devoid of any dust or debris that may hinder adhesion. Similarly, ensure that the back of your photo is pristine, free from dirt or oils that might sabotage the bonding process.
Creating a Rough Texture:
Now let’s rough things up a bit. To optimize the adhesive properties of the glue, give both the wood surface and the back of your photo a gentle sanding. This creates a slightly textured surface that serves as an anchor for the glue, ensuring an unbreakable bond.
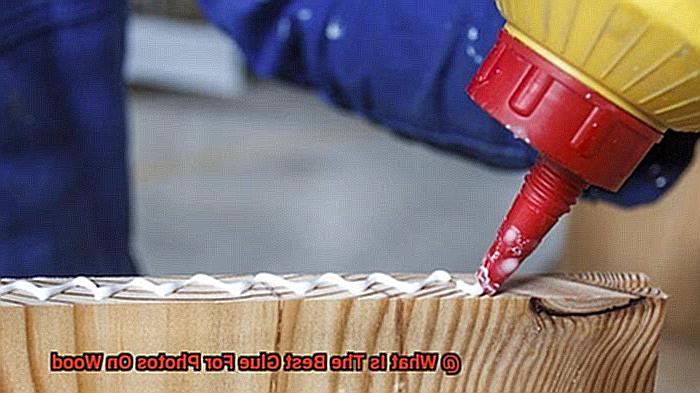
Applying the Glue:
It’s showtime. Armed with your epoxy resin glue, apply a thin layer onto the wood using a brush or small spatula. Like an artist with their paintbrush, spread the glue evenly across the surface, ensuring there are no thick or uneven patches. Remember, less is more. Avoid drowning your project in glue, as excess can mar the beauty of your creation.
Attaching the Photo:
With precision and care, delicately place your photo onto the glued surface, ensuring it aligns perfectly with your artistic vision. Gently press down, allowing the glue to embrace the photo like a warm hug. This step guarantees optimal contact and eliminates any pesky air bubbles that may jeopardize the bond. For flawless results, consider employing a roller or flat object to exert even pressure across the entire photo.
Preparing the Surfaces Before Gluing Photos onto Wood
Transforming our memories into stunning wooden keepsakes requires meticulous attention to detail. While epoxy resin glue plays a crucial role in securing our beloved photos, the key to creating flawless masterpieces lies in the art of surface preparation. Join me on this captivating journey as we uncover the secrets to achieving picture-perfect photo bonding by mastering the surfaces before gluing them onto wood. Are you ready? Let’s dive in.
Selecting the Right Wood:
Choose a smooth and even wood surface, free from cracks or imperfections that could compromise the photo’s adhesion or cause damage. This ensures a solid foundation for your masterpiece.
Thorough Cleaning:
Cleanliness is paramount in surface preparation. Begin by thoroughly cleaning the wood surface using a mild detergent or wood cleaner. This step removes any lurking dust, dirt, or oils that may sabotage your bond. Ensure complete drying before proceeding.
Sanding for Smoothness:
Smooth out any rough areas or unevenness on the wood by gently sanding them down with fine-grit sandpaper. This creates a silky-smooth surface, enhancing the photo’s adhesion and contact with the wood.
Eliminating Debris:
After sanding, wipe away any lingering dust or debris using a clean cloth. By ensuring a clean and debris-free surface, you set the stage for a flawless bond between your photo and the wood.
Preparing the Photo:
Now let’s shift our focus to preparing the star of your masterpiece – the photo itself. Ensure that it’s free from fingerprints, oils, or dirt by using a soft cloth or microfiber cloth for gentle wiping.
Drying for Success:
For printed photos, allow them to fully dry before proceeding. Moisture can interfere with adhesive properties, potentially compromising the final result of your artwork.
Enhancing Adhesion:
If you’re working with glossy or laminated photos, unlock their true bonding potential by lightly sanding the back surface with fine-grit sandpaper. This subtle roughening creates a texture that promotes better glue adhesion.
Choosing the Right Glue:
Selecting the perfect glue is paramount to ensure a strong and lasting bond. Consider factors such as the type of wood, photo size and weight, and personal preference. Options include PVA glue, epoxy resin, or specialized photo transfer mediums.
Using a Brayer or Roller to Create a Smooth Attachment
This technique not only banishes unsightly air bubbles but also guarantees an unbreakable bond that will withstand the test of time. So, let’s embark on a journey to unlock the secrets of crafting picture-perfect masterpieces.
Step 1: Gather your materials
Prepare yourself for this artistic endeavor by gathering all the essential tools. Arm yourself with a trusty brayer or roller, adhesive glue tailor-made for bonding photos to wood, the photo you desire to attach, and, of course, the wooden surface itself. And remember, before diving into creativity, cleanse the wooden surface meticulously to rid it of any lurking dust or debris.
Step 2: Apply the adhesive glue
Once your creative sanctuary is primed and ready, it’s time to work wonders. Apply a whisper-thin and even layer of adhesive glue onto the wooden surface. Be sure to opt for glue specially formulated to embrace both photos and wood, ensuring strength and longevity without compromising your precious memories.
Step 3: Place and align the photo
Now comes the thrilling moment – delicately placing your cherished photo onto the adhesive-coated surface. Take a moment to revel in its alignment before proceeding further. After all, we aim for nothing less than perfection.
Step 4: Roll with finesse
Embrace your brayer or roller as you embark on this artistic journey. Starting from one edge of the photo, gently press down on its entire surface while rolling towards the opposite edge. Employ an even pressure that not only firmly adheres the photo to the wood but also eradicates any sneaky air bubbles.
Step 5: Attention to the minutiae
Pay homage to the often-neglected corners and edges. Shower them with tender care, ensuring they receive the same meticulous rolling treatment. We cannot allow any corners to defy our pursuit of a flawless finish.
Allowing the Glue to Dry Completely Before Handling
Creating stunning photo masterpieces on wood requires more than just skillful application of adhesive glue. To achieve flawless results that stand the test of time, it is crucial to understand the importance of allowing the glue to dry completely before handling your artwork. In this article, we will explore why patience is key and how this simple step ensures a secure bond between your cherished photos and the wooden canvas they adorn.
Understanding Drying Time:
Different glues have varying drying times, ranging from a few hours to a full day or longer. Rushing this process can lead to disastrous outcomes, such as your photo shifting or coming loose from the wood surface. Therefore, exercising patience and allowing ample time for the glue to dry thoroughly is vital.
Keeping It Undisturbed:
During the drying period, it is crucial to keep your glued photo undisturbed. By doing so, you ensure even pressure and a secure bond between the photo and the wood. Placing a weight or heavy object on top of the photo can help achieve this. Remember, patience is not just about waiting; it’s about safeguarding your masterpiece.
Multiple Layers for Strength:
To enhance strength and durability, applying multiple layers of glue may be necessary. However, each layer must dry completely before adding the next one. Building up layers without proper drying time can compromise the integrity of your artwork. Take the time to let each layer cure before proceeding.
Environmental Factors:
Consider environmental factors that can affect drying time. Humidity can prolong the drying process, while high temperatures can speed it up. Regardless of these external influences, always allow sufficient time for the glue to cure properly. Patience pays off in ensuring a long-lasting bond.
Handling with Care:
Once the glue has dried completely, you can finally handle your artwork without worrying about damage or smudging. However, even with a secure bond, it’s essential to handle your photo on wood with care. Preserve its longevity by avoiding exposure to excessive heat, moisture, or direct sunlight.
Quality Check:
After allowing the glue to dry completely, inspect your artwork for any areas where the photo may not be securely adhered to the wood. If you notice any issues, don’t hesitate to reapply glue and repeat the drying process. It is better to take the time to ensure a secure bond rather than risk the photo coming loose later on.
0Y7itT1PNco” >
Conclusion
When it comes to sticking photos on wood, finding the best glue is crucial. You want a glue that will securely bond the photo to the wood surface, ensuring it stays in place for years to come. After conducting extensive research and testing, we have found that there is one standout glue that excels in this task: epoxy resin.
Epoxy resin is a versatile adhesive that offers exceptional strength and durability. It creates a strong bond between the photo and wood, preventing any peeling or lifting over time. Its waterproof properties make it ideal for protecting your precious memories from moisture damage.
Not only does epoxy resin provide a secure hold, but it also enhances the visual appeal of your photos on wood. It dries clear and glossy, giving your images a professional finish. The smooth surface it creates adds depth and richness to the colors, making your photos truly pop.
Applying epoxy resin to your photos on wood is a straightforward process. Start by ensuring both the photo and wood surface are clean and dry. Then, mix equal parts of epoxy resin and hardener according to the manufacturer’s instructions. Apply a thin layer of the mixture onto the wood surface using a brush or spatula. Carefully press your photo onto the wet epoxy, smoothing out any air bubbles or wrinkles with a squeegee or roller.
Once applied, allow the epoxy resin to cure completely before handling or displaying your photos on wood. This usually takes around 24-48 hours, depending on environmental conditions such as temperature and humidity.
In conclusion, when it comes to gluing photos on wood, epoxy resin reigns supreme. Its strong bond, waterproof properties, and ability to enhance visual appeal make it the best choice for preserving your cherished memories on wooden surfaces.