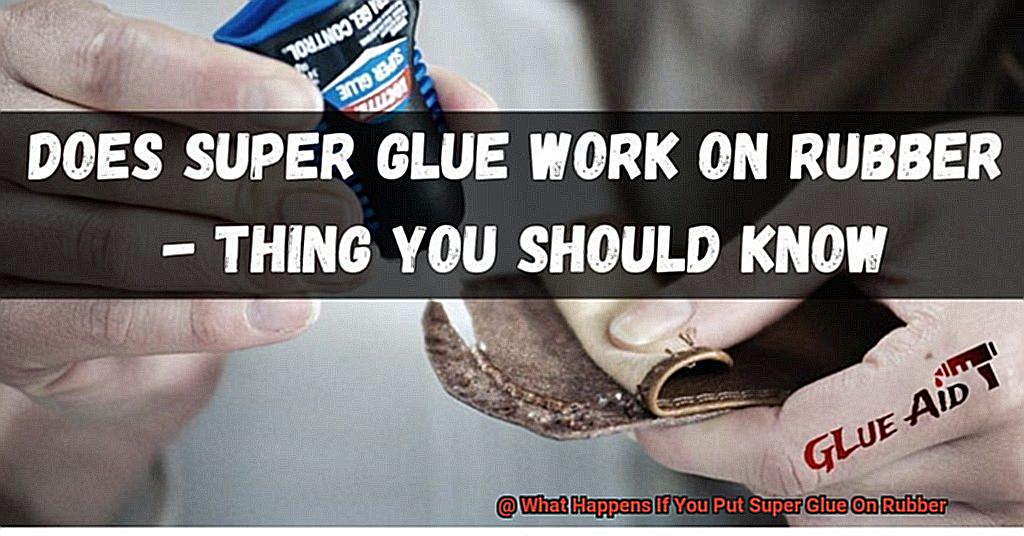
Ever found yourself in a sticky situation where you needed to fix something made of rubber, armed only with a tube of super glue? We’ve all been there, wondering if this powerful adhesive would do the trick or just make matters worse. Whether it’s a busted sneaker sole or a broken household item, knowing what happens when super glue meets rubber is essential.
In this captivating blog post, we’ll dive deep into the world of adhesion and explore the consequences of introducing super glue to rubber surfaces. Get ready for an intriguing journey as we unravel the science behind this sticky conundrum. We’ll discuss its applications in professional settings and even uncover unexpected uses that could prove handy in your everyday life.
So buckle up and join us on this rubbery adventure. Prepare to be glued to your screen as we unveil what really happens when super glue takes on rubber.
The Chemical Reaction between Super Glue and Rubber
Contents
- 1 The Chemical Reaction between Super Glue and Rubber
- 2 Factors that Affect the Bond Strength of Super Glue on Rubber
- 3 Testing for Compatibility Before Applying Super Glue to Rubber
- 4 Removing Excess Super Glue from Rubber Surfaces
- 5 Using Solvents to Remove Super Glue from Rubber
- 6 Mechanical Removal of Bonded Super Glue from Rubber
- 7 Tips for Proper Application and Removal of Super Glue on Rubber
- 7.1 Clean and Dry: The Rubber’s the Key.
- 7.2 Less is More: Tiny Drops for Mighty Bonds.
- 7.3 Precision Matters: Bond Before It Sets.
- 7.4 Glove Up or Use an Applicator: Keep Your Hands Glue-Free.
- 7.5 Tricky Spots? No Problem.
- 7.6 Patience is Key: Removal Done Right.
- 7.7 Acetone is Your Friend: Gentle Rubbing for a Clean Surface.
- 7.8 Be Gentle, Be Cool: Freezing the Glue Away.
- 8 Common Misconceptions about Using Super Glue on Rubber
- 8.1 Misconception #1: Super glue instantly bonds with rubber.
- 8.2 Misconception #2: Applying more super glue improves the bond.
- 8.3 Misconception #3: All types of super glue work on rubber.
- 8.4 Misconception #4: Removing super glue from rubber is easy.
- 8.5 Misconception #5: Super glue creates a permanent bond with rubber.
- 8.6 Misconception #6: Super glue works on all types of rubber.
- 9 Conclusion
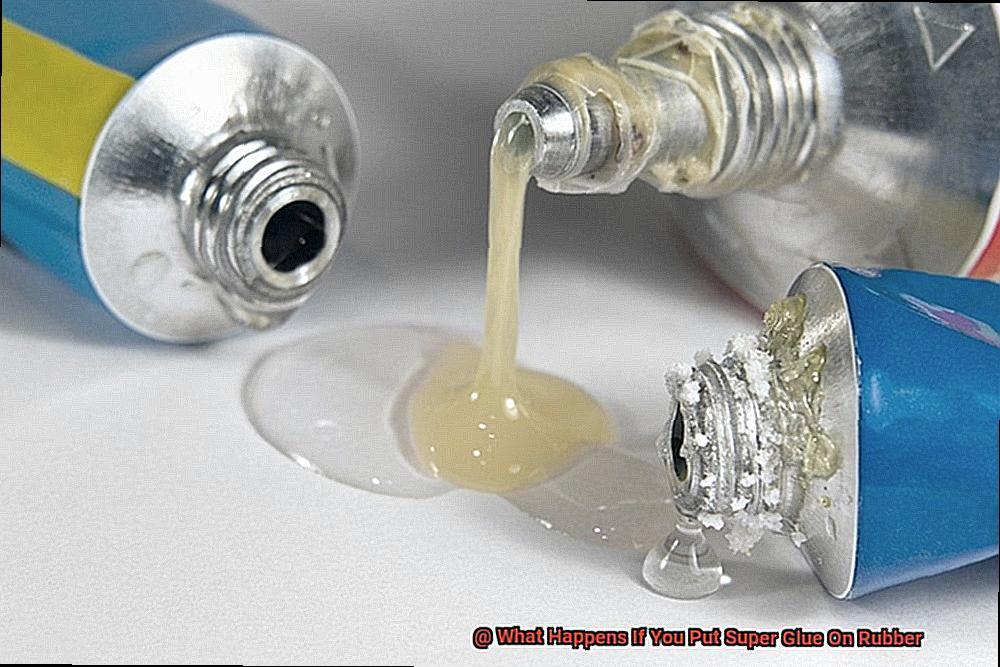
Super glue, also known as cyanoacrylate adhesive, possesses a remarkable ability to bond materials together, including rubber. When these two substances come into contact, a chemical reaction ensues, resulting in the hardening of the adhesive and the formation of an unyielding bond with the rubber surface.
At the heart of super glue lies cyanoacrylate, a powerful monomer that undergoes polymerization when exposed to moisture. Rubber surfaces typically contain moisture, acting as an activator for the glue and initiating the polymerization process of cyanoacrylate. This fascinating reaction involves the creation of long chains of molecules, yielding a robust and enduring union between the super glue and the rubber.
As polymerization occurs, heat is released as a byproduct. This heat can be problematic for certain rubber materials that lack heat resistance, causing them to melt or deform under the intense conditions. Thus, it becomes crucial to consider the heat resistance of the rubber before employing super glue in bonding applications.
Interestingly, the specific nature of the reaction between super glue and rubber varies depending on the type of rubber and the composition of the adhesive. Silicone rubber, for instance, possesses a low surface energy that makes it notoriously challenging to bond with any adhesive, including super glue. However, innovative advancements have led to specialized super glues tailored explicitly for bonding with silicone rubber.
It is important to note that while super glue can forge a formidable bond with rubber, it may not always be suitable for every rubber application. For scenarios that demand flexibility or elasticity, alternative adhesives formulated specifically for rubber are more appropriate.
Factors that Affect the Bond Strength of Super Glue on Rubber
Super glue and rubber have a unique relationship, but not all bonds are created equal. Various factors come into play when it comes to the strength of the adhesive bond between these two materials. In this blog post, we will delve into the fascinating world of glue and rubber, exploring the key factors that can influence their bond strength.
The Type of Rubber:
- Natural rubber and neoprene have high surface energy, making them more receptive to bonding with super glue.
- Silicone rubber, on the other hand, has low surface energy, making it more challenging to achieve a strong bond.
Surface Preparation:
- Thoroughly clean the rubber surface to remove dirt, oils, or contaminants that could hinder the adhesive bond.
- Abrade the surface with sandpaper or a rough cloth to create more surface area for the glue to adhere to.
Temperature and Humidity:
- Super glue cures faster in warmer temperatures.
- Cooler temperatures can slow down the curing process.
- High humidity levels can prolong curing time and potentially weaken the bond strength.
Application Technique:
- Apply a thin and even layer of glue to ensure optimal bonding.
- Excessive amounts of glue can create gaps and reduce contact between the adhesive and the rubber.
- Applying pressure or using clamps during the curing process can improve bond strength.
Age and Quality of Glue:
- Use fresh, high-quality super glue for stronger bonds.
- Over time, super glue may degrade or lose its adhesive properties, resulting in weaker bonds.
Chemical Compatibility:
- Certain chemicals present in rubbers or additives used during their manufacturing process may interfere with the adhesive properties of super glue.
- Test the adhesive on a small, inconspicuous area of the rubber before applying it to the entire surface.
Testing for Compatibility Before Applying Super Glue to Rubber
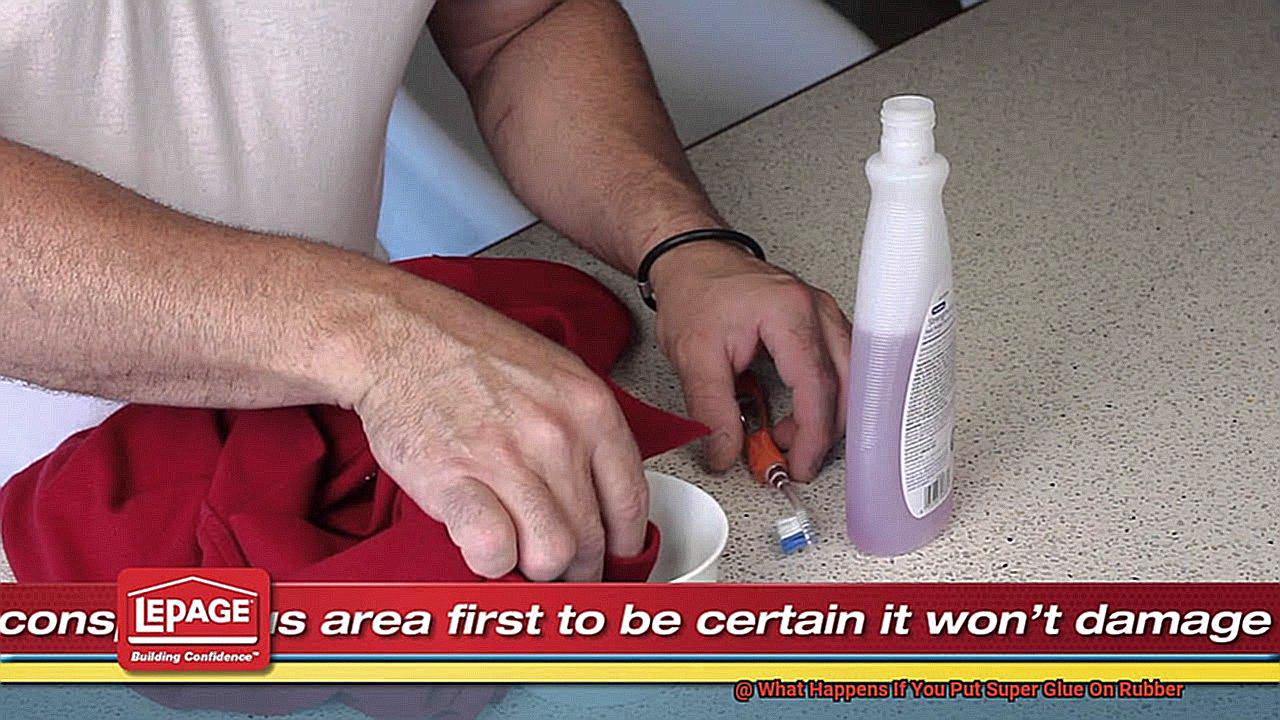
Imagine this scenario: you’re in the midst of a project that requires you to bond rubber materials together. You grab your trusty super glue, ready to tackle the task at hand. But hold on a minute. Before you start applying that adhesive, it’s absolutely crucial to test for compatibility first. Why, you ask? Well, testing for compatibility ensures a strong bond and prevents any potential damage to the rubber surface. Lucky for you, we’ve got all the inside information on how to conduct a thorough compatibility test before using super glue on rubber.
First things first, find a hidden spot on the rubber surface where you can perform your compatibility test. This way, if anything goes wrong, it won’t be noticeable. Once you’ve found the perfect spot, give it a good cleaning to remove any dirt, dust, or oils that might interfere with the bonding process. You want a clean slate for your glue to work its magic.
Now comes the fun part – applying the super glue. Follow the instructions on the packaging for proper application techniques and apply a small amount of glue to the test area. Make sure to let it dry completely. Once the glue has dried, it’s time for inspection. Carefully examine the test area for any signs of damage or discoloration. If you notice anything out of the ordinary, it’s a clear indication that the super glue isn’t compatible with that type of rubber.
But we’re not done yet. To further test the strength of the bond, give it a gentle tug. If it holds securely without tearing or stretching excessively, it’s a fantastic sign that the super glue is indeed compatible with the rubber.
However, don’t lose hope if your initial compatibility test reveals issues. Different types of rubber may require different adhesive products for optimal bonding. For instance, natural rubber, synthetic rubber, and silicone rubber each have their own unique needs. So if your first attempt doesn’t work out, don’t fret. Explore alternative adhesive options specifically designed for bonding rubber materials.
Removing Excess Super Glue from Rubber Surfaces
Don’t fret. We’ve got the solution to your problem. Removing excess super glue from rubber can be a challenging task, but fear not, with the right techniques and a dash of patience, you can restore your rubber surfaces to their former glory.
One popular method for removing super glue from rubber is using acetone. Acetone is a potent solvent that can break down the bond formed by super glue. However, it’s crucial to note that acetone may damage certain types of rubber, so it’s wise to test it on a small, inconspicuous area first. To use acetone effectively, soak a cotton ball or swab in the solvent and gently dab it onto the affected area. Allow the acetone a few minutes to penetrate the glue. Then, using a soft cloth or sponge, gently rub the area in circular motions to loosen the adhesive. Remember not to scrub too vigorously, as this may harm the rubber.
If acetone isn’t readily available or if you have concerns about its effect on the rubber, fret not. There are alternative solutions at your disposal. Rubbing alcohol is one such option. Apply a small amount of rubbing alcohol onto a cloth or sponge and gently rub the affected area until the glue begins to loosen its grip.
Heat can also be an ally in your battle against super glue on rubber surfaces. By using a hairdryer on low heat or a heat gun at a safe distance, you can soften the glue and make it easier to remove. Direct the heat towards the glued area and slowly move it around until you notice the adhesive becoming more pliable. Once sufficiently softened, use a plastic scraper or protected fingers to gently peel off the glue.
For more delicate rubber surfaces like rubber bands or phone cases, dish soap and warm water can work wonders. Create a mixture of warm water and a few drops of dish soap. Soak the affected area in the soapy water for a few minutes to help loosen the glue. Afterward, use a soft cloth or sponge to gently rub away the softened glue. Rinse the area with clean water and pat it dry.
If all else fails, fear not. Commercial adhesive removers specifically designed for removing super glue exist. These products can be found at hardware stores or online. Simply follow the provided instructions and ensure you test a small area before applying it to the entire surface.
Remember, prevention is always better than cure. To avoid super glue mishaps on rubber surfaces, take precautions such as wearing gloves when working with super glue, using protective barriers like tape or plastic wrap on nearby rubber surfaces, or working in a well-ventilated area to minimize accidental spills.
Using Solvents to Remove Super Glue from Rubber
Fear not, my friend, for I have the solution you seek. Super glue’s tenacious bond may seem impossible to break, but armed with the right solvents and techniques, you can bid farewell to that stubborn adhesive.
When it comes to removing super glue from rubber, acetone reigns supreme. This mighty solvent, commonly found in nail polish removers, has the power to dissolve the bond between the glue and rubber. Just a small amount of acetone applied to a clean cloth or cotton swab, and a gentle rub on the affected area will do the trick. But hold your horses. Before diving in headfirst, be sure to test the acetone on a small, inconspicuous area of the rubber to avoid any potential damage or discoloration.
Not a fan of acetone or concerned about its impact on your precious rubber surface? Fear not, my friend; there are other solvents at your disposal. Isopropyl alcohol, also known as rubbing alcohol, is a milder option that still gets the job done. Apply a small amount to a cloth or cotton swab and gently rub the glue until it starts to dissolve. Remember, testing on a small area first is always wise.
Nail polish remover is another contender for conquering super glue on rubber. Most nail polish removers contain acetone as their active ingredient, making them effective at dissolving super glue bonds. However, some removers may harbor additional additives that could harm or discolor the rubber. So, be sure to scrutinize the label and opt for one that is acetone-based and free from harsh chemicals.
Now that you’re acquainted with the solvents of choice, let’s delve into how to apply them. First and foremost, ensure you’re working in a well-ventilated area to avoid inhaling potent odors and fumes. It’s also wise to protect your skin by donning gloves.
Once the solvent has been applied and gently rubbed onto the affected area, you’ll witness the super glue relinquishing its hold. Now comes the fun part – delicately remove the dissolved glue using a scraping tool like a plastic scraper or even your trusty fingernail. Exercise caution to avoid scratching or damaging the rubber surface in the process.
If the super glue has dried and hardened on the rubber, you may need to repeat the solvent application and rubbing process several times until it softens enough to be removed. Remember, patience is your greatest ally when battling stubborn super glue stains.
Once you’ve successfully bid adieu to the super glue, give yourself a well-deserved pat on the back. But wait, there’s more – it’s crucial to clean up any residual solvent. Simply rinse the area with mild soap and water, then pat it dry.
Mechanical Removal of Bonded Super Glue from Rubber
Super glue accidents happen to the best of us, and when it bonds with rubber surfaces, it can feel like an unbreakable bond. But fear not. With a little elbow grease and the right tools, you can mechanically remove bonded super glue from rubber surfaces. In this guide, we’ll walk you through a step-by-step process to safely and effectively restore your rubber surfaces to their former glory.
Step 1: Gather Your Tools
Before diving into the removal process, gather the necessary tools. You’ll need a plastic or wooden scraper, sandpaper or an abrasive pad (varied grits), mild soap, water, and a dry cloth. Additionally, consider using solvents like acetone or nail polish remover if the glue proves stubborn.
Step 2: Test in an Inconspicuous Area
To avoid any potential damage, test your chosen removal method in a small, inconspicuous area of the rubber surface. This allows you to gauge its effectiveness without compromising the entire surface.
Step 3: Scrape Away the Glue
With your plastic or wooden scraper in hand, apply gentle pressure to the bonded super glue. Begin with minimal pressure and gradually increase it if necessary. Take your time – slow and steady wins the race. The goal is to remove the glue without damaging the rubber surface. Avoid metal scrapers as they can scratch or gouge the rubber.
Step 4: Sand Away Residual Adhesive
If scraping alone doesn’t fully remove the glue, don’t fret. Reach for some sandpaper or an abrasive pad. Start with a coarse grit and work your way towards finer grits until the super glue has been successfully removed. Remember to exercise caution – we don’t want to over-sand and damage the rubber surface.
Step 5: Utilize Solvents (If Needed)
For those stubborn spots of bonded super glue, solvents can be your secret weapon. Acetone or nail polish remover can help loosen the adhesive. Take a clean cloth, apply the solvent, and gently rub the affected area. But remember, safety first. Test the solvent on a small, hidden area and follow the manufacturer’s instructions. Some types of rubber may be sensitive to solvents.
Step 6: Clean and Dry
You’ve successfully removed the bonded super glue – congratulations. But we’re not done yet. Give the rubber surface a good clean with mild soap and water to remove any residue or lingering traces of glue. Rinse with clean water and pat dry with a cloth. Ensure the rubber is completely dry before using or storing it.
Tips for Proper Application and Removal of Super Glue on Rubber
Before embarking on your adhesive adventure, it’s crucial to learn the art of proper application and removal of super glue on rubber surfaces. By following these tips, you’ll be able to avoid messy mishaps and ensure a robust and lasting bond. Let’s dive in.
Clean and Dry: The Rubber’s the Key.
To create an unbreakable bond, ensure that your rubber surface is pristine and dry. Wipe it down with a mild soap solution, banishing any dirt or grease. Then, dry it thoroughly to eliminate any pesky moisture that might interfere with the glue’s magical properties.
Less is More: Tiny Drops for Mighty Bonds.
Super glue possesses unparalleled power, so remember to exercise restraint when applying it to your rubber surface. Using an excessive amount can result in a chaotic, uneven bond. Be precise and meticulous during this step.
Precision Matters: Bond Before It Sets.
Super glue works at lightning speed, so align your rubber surfaces precisely before pressing them together. Employ clamps or tape to hold them in place until the glue sets. It’s akin to solving a rubbery puzzle.
Glove Up or Use an Applicator: Keep Your Hands Glue-Free.
Avoid touching the glue with your bare hands at all costs, as it bonds to skin instantaneously. Ouch. Don gloves or wield toothpicks and cotton swabs for precise application instead.
Tricky Spots? No Problem.
Are hard-to-reach areas leaving you feeling stuck? Fear not. Utilize toothpicks or cotton swabs to delicately apply the super glue. Just remember not to exert excessive pressure that could potentially damage the rubber.
Patience is Key: Removal Done Right.
Uh-oh, accidentally applied super glue where it wasn’t intended? Don’t panic. Instead of resorting to pulling or prying, exercise patience. Employ solvents specifically designed for super glue removal, such as acetone or nail polish remover containing acetone.
Acetone is Your Friend: Gentle Rubbing for a Clean Surface.
Dab a small amount of acetone onto a cotton ball or cloth, then gently rub it onto the glued area. The bond will gradually weaken, making removal a breeze. However, remember to test the acetone on a small spot first to avoid any unexpected surprises.
Be Gentle, Be Cool: Freezing the Glue Away.
If the glue stubbornly clings on, give it a chill. Apply an ice pack or bag of ice to the glued area, making the glue brittle. Then, softly scrape off the frozen glue using a plastic tool or your fingers. Easy peasy.
Common Misconceptions about Using Super Glue on Rubber
Super glue is a commonly used adhesive found in households worldwide. However, when it comes to using super glue on rubber surfaces, there are several misconceptions that need to be addressed. In this article, we will debunk these myths and provide valuable insights to ensure successful bonding with rubber.
Misconception #1: Super glue instantly bonds with rubber.
Contrary to popular belief, super glue may not bond well with smooth or low surface energy rubber. It works best on porous or rough surfaces where it can penetrate and create a stronger bond. Therefore, it is important to choose the appropriate type of rubber for the super glue to adhere effectively.
Misconception #2: Applying more super glue improves the bond.
Applying excessive amounts of super glue does not improve the bonding strength; rather, it can weaken the bond. It is crucial to use the right amount of glue to avoid curing issues and ensure proper adhesion. Less is more in this case.
Misconception #3: All types of super glue work on rubber.
Not all super glues are suitable for bonding rubber effectively. Different formulations exist for various materials, so it is essential to check the label or product specifications to ensure compatibility between the selected super glue and the rubber surface.
Misconception #4: Removing super glue from rubber is easy.
Removing super glue from rubber surfaces can be challenging and time-consuming. Specialized solvents or adhesive removers may be required, and there is a risk of damaging the rubber in the process. Taking caution during application is crucial to avoid this issue altogether.
Misconception #5: Super glue creates a permanent bond with rubber.
The strength and durability of the bond between super glue and rubber can vary. Factors such as surface preparation, type of rubber, and specific brand or variant of super glue used can impact the longevity of the bond. It is important to consider these factors when choosing super glue for a specific rubber bonding project.
Misconception #6: Super glue works on all types of rubber.
Certain rubbers, such as silicone rubber, are highly resistant to adhesion with super glue. Specialized adhesives or silicone-based sealants are necessary for effective bonding with silicone rubber. It is crucial to research and select the appropriate adhesive for each type of rubber to achieve optimal results.
5ecE-EiZruY” >
Also Read: How to Fix a Hole in an Air Mattress With Super Glue
Conclusion
When super glue comes into contact with rubber, an interesting chemical reaction occurs.
The adhesive properties of the glue cause it to bond tightly with the rubber surface, creating a strong and durable connection. This can be advantageous in certain situations where you need to join rubber materials together permanently.
However, it’s important to note that not all types of rubber are compatible with super glue. Some rubber compounds contain oils or additives that can interfere with the bonding process, resulting in a weaker bond or no bond at all.
Additionally, exposure to extreme temperatures or moisture can also affect the strength of the bond over time.